Introduction
This tutorial shows you how to update and process data on multiple existing employees or jobs and then process the updated data in Workforce using Mass Update forms. The sections build on each other and should be completed sequentially.
Background
You can quickly update and process data on multiple existing employees or jobs and then process the updated data in Workforce using Mass Update forms.
- You can change existing properties or add a new record and then apply configured default assignments.
- You can change existing properties or add a new record and then override default assignments and rates.
- After modifying salary, you can re-apply configured default assignments for benefits, additional earnings and taxes.
- You can override default assignments and then apply the configured defaults.
Designed for optimal processing efficiency, each form is associated with a Groovy rule that processes only the changed data.
Which form you use depends on the kind of data you’re updating.
| Your Objective | Use This Form | Associated Groovy Rule |
|---|---|---|
If you need to:
|
Process Data and Synchronize Defaults
When you make updates on this form:
|
Incremental Process Data with Synchronize Defaults |
If you need to:
|
Process Updated Data When you make updates on this form:
|
Incremental Process Data with Synchronize Definition |
If you need to:
|
Synchronize Defaults When you update salary details for the selected year and month in the POV on this form:
|
Incremental Synchronize Defaults |
If you need to:
|
Synchronize Definitions When you change the assignments of earnings, benefits or, taxes and corresponding options and tiers:
|
Incremental Synchronize Definition |
In this tutorial, you update and process data on multiple existing employees or jobs and then process the updated data in Workforce using Mass Update forms.
Prerequisites
An EPM Cloud Service instance allows you to deploy and use one of the supported business processes. To deploy another business process, you must request another EPM Enterprise Cloud Service instance or remove the current business process.
- Have Service Administrator access to an EPM Enterprise Cloud Service instance. The instance should not have a business process created.
- If you haven't already, register for a free Oracle Cloud Customer Connect account so you can access the required files.
- Download the latest EPBCS Sample Application LCM snapshot from this idea page.
- Upload and import the latest EPBCS Sample Application LCM snapshot into your Planning instance.
Note:
If you run into migration errors importing the snapshot, re-run the migration excluding the HSS-Shared Services component, as well as the Security and User Preferences artifacts in the Core component. For more information on uploading and importing snapshots, refer to the Administering Migration for Oracle Enterprise Performance Management Cloud documentation.Setting up the Foundation
Assigning Values to User Variables
User Variables were added when the business process was created. User variables act as filters in forms, enabling planners to focus only on certain members. In this section, you set values for user variables.
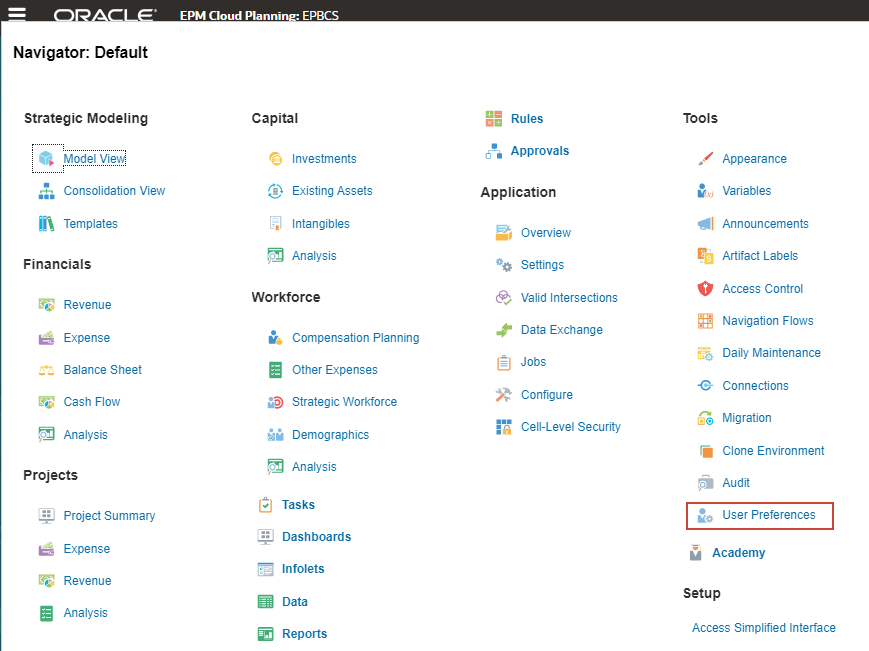
- On the home page, click
 (Navigator), and under Tools, click User Preferences.
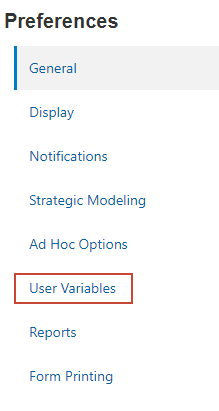
- Under Preferences, click User Variables.
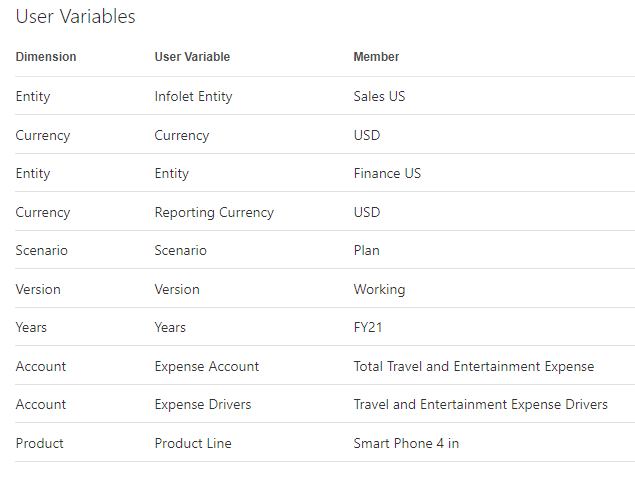
- For each variable, click its
 (Member Selector) to select a member as the variable's value:
User Variable Member Infolet Entity Sales US Currency USD Entity Finance US Reporting Currency USD Scenario Plan Version Working Years FY25 Expense Account Total Travel and Entertainment Expense Expense Drivers Travel and Entertainment Expense Drivers Product Line Smart Phone 4 in (S_001) - Verify your selections and click Save.
- At the information message, click OK.
Processing Data and Synchronizing Defaults
You can use the Process Data and Synchronize Defaults form to change existing employee properties, add a new record, modify a previously missing existing employee's data, and then apply configured default assignments rather than uploading data using text files.
- In Planning, click (Navigator), and under Workforce, click Compensation Planning.
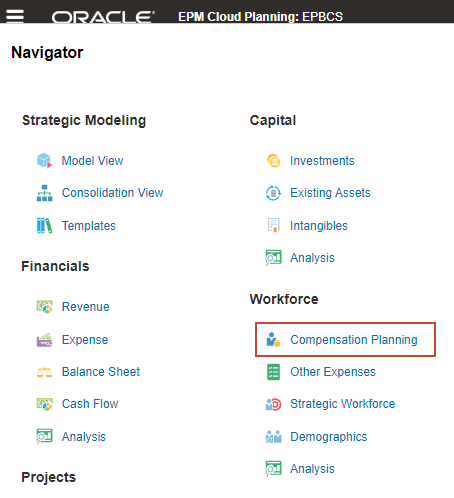
- From the vertical tabs on the left, click
 (Mass Update).
 - Make sure that you are on the Process Data and Synchronize Defaults bottom tab.
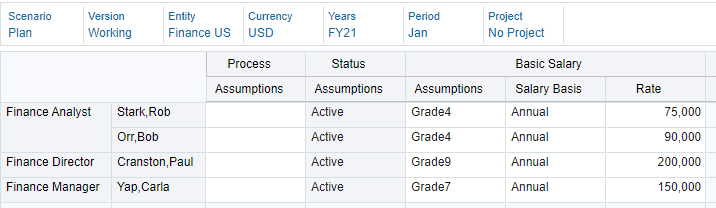
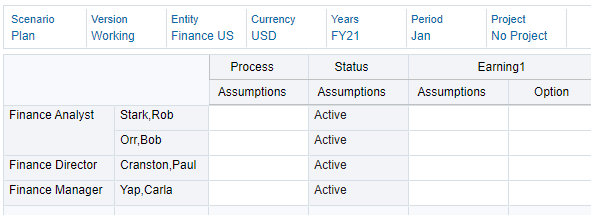
- Verify or set the POV to the following values:
Dimension Member Scenario Plan Version Working Entity Finance US Currency USD Years FY25 Period Jan Employee Parent Total Employees Project No Project Data is displayed on the form.

- Move your cursor over the cell that displays Orr,Bob to activate the dropdown list.
- Click the dropdown list to open the Select Member dialog.
- In Select Member, click Stone,Bob.
Note:
At least one Employee/Job intersection must exist on the POV before you can add another Employee/Job row to the forms using the Select Member list. - In the data row for Bob Stone, change the Skill Set - Assumptions value to Account Management.
- Click Save.
- At the information message, click OK.
A data row for Bob Stone is saved into Workforce.

- For Bob Stone, set the following employee properties:
Property Value Start Date 1/15/21 FTE Assumption 1 Headcount Assumption 1 Employee Type Regular Pay Type Exempt Applicable Union Code Default No Union Code Recommended Merit % 3% Basic Salary - Assumptions Grade4 Basic Salary - Salary Basis Annual Basic Salary - Rate 75K Note:
Start Date is used to provide more precise day-level calculations. - Verify your selections and click Save.
- At the information message, click OK.
Employee properties and salary information were saved.

- From the vertical tabs on the left, click
 (Employee Details).
 - Set the POV/Page selections to the following:
Dimension Member Job Finance Analyst Employee Stone,Bob Project No Project

-
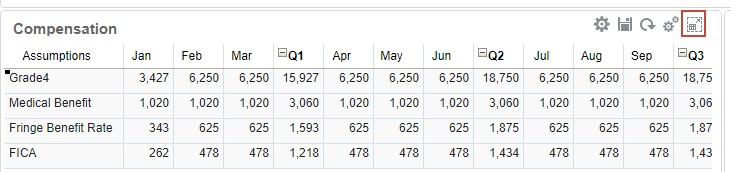
Review the employee details for Bob Stone.
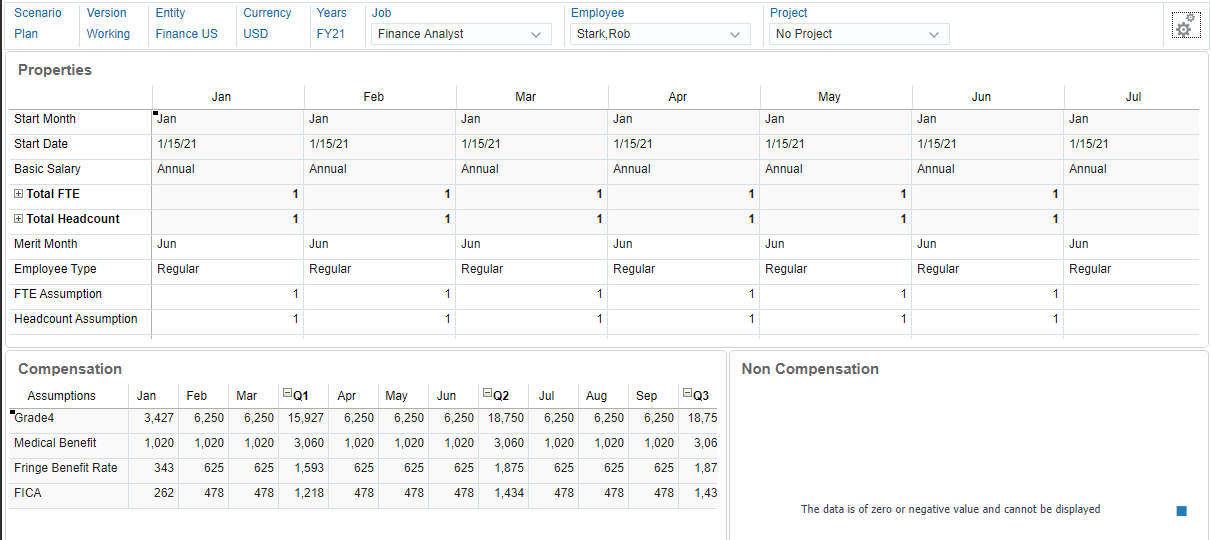
Salary, benefits, and taxes are now calculated for Bob Stone, without having to use a data load template.
- On the Compensation form, move our cursor over the whitespace above the grid to display menu icons, and then click
 (Maximize).
Maximize hides the other objects on the workspace, and fills the workspace with the selected form.
- When finished reviewing, click Restore.

Processing Updated Data
You use the Process Updated Data form to change existing properties, add a new record, or override default assignments and rates.
Note:
At least one Employee/Job intersection must exist on the POV before you can add another Employee/Job row to the forms using the Select Member list.In this section, you'll override the default Medical Benefit rate and add a car allowance for Bob Stone, where his job normally doesn’t qualify for a car allowance.
- From the vertical tabs on the left, click (Mass Update).
- Click the Process Updated Data bottom tab.
- Verify or set the POV to the following values:
Dimension Member Scenario Plan Version Working Entity Finance US Currency USD Years FY25 Period Jan Employee Parent Total Employees Project No Project Data is displayed on the form.

- In the grid, scroll to the right until you see Benefit1 for Bob Stone.
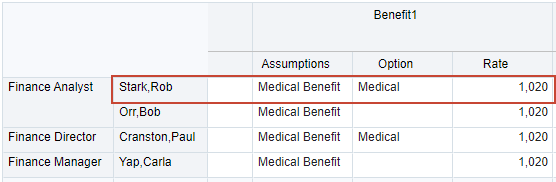
Benefit1 corresponds to Medical Benefit. You will override the current default rate.
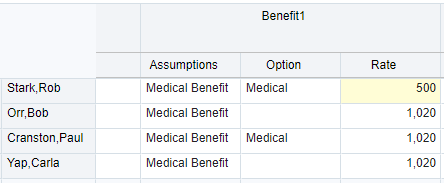
- Change Bob Stone's Benefit1 Rate to 500.
- Scroll to the right and locate Benefit3 for Bob Stone.
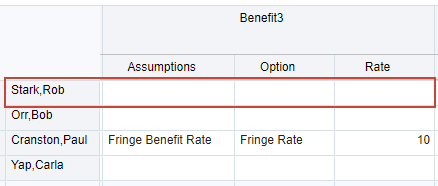
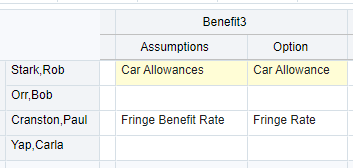
- For Bob Stone's Benefit3, click in the cell and select the following:
- Assumptions: Car Allowances
- Option: Car Allowance
- Click Save.
- At the information message, click OK.
Benefit1 and Benefit3 are saved. Benefit3 automatically populates a default rate of $250.

- From the vertical tabs on the left, click (Employee Details).
- Set the POV/Page selections to the following:
Dimension Member Job Finance Analyst Employee Stone,Bob Project No Project - On the Compensation form, review Bob Stone's additional benefits.
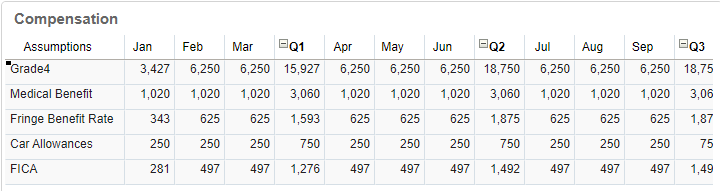
Medical Benefit shows a monthly rate of $500, and Car Allowances shows a $250 monthly allowance.
Synchronizing Defaults
In this section, you'll remove the overrides and revert Bob Stone back to the configured default assignments.
- From the vertical tabs on the left, click (Mass Update).
- Click the Synchronize Defaults bottom tab.
- Verify or set the POV to the following values:
Dimension Member Scenario Plan Version Working Entity Finance US Currency USD Years FY25 Period Jan Employee Parent Total Employees Project No Project Data is displayed on the form.
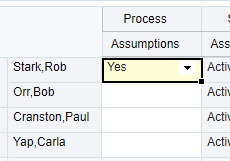
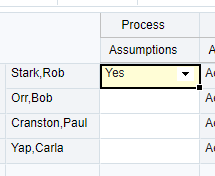
- For Bob Stone's Process - Assumptions, click in the cell and select Yes.
- Click Save.
- At the information message, click OK.
- From the vertical tabs on the left, click (Employee Details).
- Set the POV/Page selections to the following:
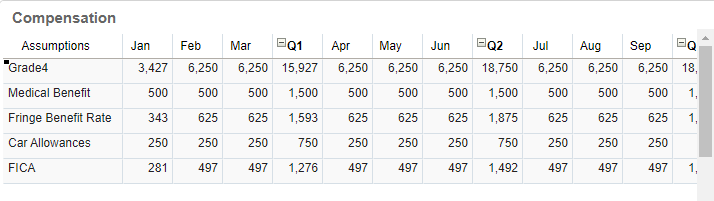
Dimension Member Job Finance Analyst Employee Stone,Bob Project No Project - On the Compensation form, review Bob Stone's benefits. Notice that the Medical Benefit rate is back to $1,020 per month and the Car Allowance benefit was removed.
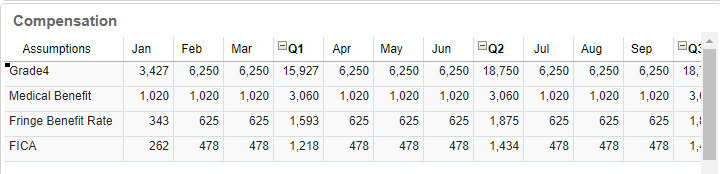
Compare the results from the previous section's results where the Medical Benefit was overridden as $500 per month and a Car Allowance was set at $250 per month:
Synchronizing Definitions
In this section, you use the Synchronize Definitions form to override default assignments. This form allows you to change the additional earnings, benefits, or taxes for an employee, as well as the Option or Tier to be used instead of the configured default assignments for the entity.
- From the vertical tabs on the left, click (Mass Update).
- Click the Synchronize Definitions bottom tab.
- Verify or set the POV to the following values:
Dimension Member Scenario Plan Version Working Entity Finance US Currency USD Years FY25 Period Jan Employee Parent Total Employees Project No Project Data is displayed on the form.
- For Bob Stone's Process - Assumptions, click in the cell and select Yes.
- Scroll to the right and locate Benefit3 for Bob Stone.
- For Bob Stone's Benefit3, click in the cell and select the following:
- Assumptions: Car Allowances
- Option: Car Allowance
- Click Save.
- At the information message, click OK.
- From the vertical tabs on the left, click (Employee Details).
- Set the POV/Page selections to the following:
Dimension Member Job Finance Analyst Employee Stone,Bob Project No Project - On the Compensation form, review Bob Stone's benefits. Notice that the Car Allowance is back to $250 per month.
More Learning Resources
Explore other labs on docs.oracle.com/learn or access more free learning content on the Oracle Learning YouTube channel. Additionally, visit Oracle University to view training resources available.
For product documentation, visit Oracle Help Center.
Performing Employee and Job Mass Updates
F45074-03
September 2025