6Working with Payments
Payment Flow Overview
This topic provides a high-level overview of fees and the payment flow. Applicants can make payments online, and agency staff can assist applicants with payments.
After completing an application for a permit, the fees are calculated and applied to the applicant’s account. The applicant manually adds fees to the payment cart, and selects which fees to pay in one transaction. Agency staff can initiate payment from the Permits list page or from the fees and payments page in the permit details. System processing for payments triggers workflow and generates accounting and invoices.
For information about setting up fees and payments, see the documentation for Implementing Oracle Public Sector Permits.
Understanding Fees
Some basics about fees include the following:
Fees for a permit are determined by decision modeling and associated with fee schedules.
Fees may be applied during the application process or later for additional fees or adjustments.
Fees appear on the My Permits page for applicants, on the Permits list page for agency staff, and on the Fees and Payments page in the permit details for both agency staff and applicants.
If a condition is applied to the permit, such as a hold or lock on the permit, the applicant may not be able to pay until the condition is resolved.
Agency staff can add or adjust fees on the Fees and Payment page in the permit details.
Fee Payments Process for Applicants
Applicants can make a payment by following this process:
On the My Permits page, add fees items to the payment cart.
Select fees for payment in the payment cart.
Fees not selected for payment remain in the cart.
Click the Continue to Checkout button.
Review the Checkout page, which lists the different secured payment methods available.
Only agency staff can process cash and check payments.
Select one of the payment methods for payment processing.
Depending on the payment service being used, the payment steps differ.
After successful payment, the applicant is returned to the My Permits page.
Fee Payments Process for Agency Staff
Agency staff can use the following process to assist an applicant with a payment:
Click the Pay button for a permit listed on the Permits page or on the Fees and Payments page in the permit details.
Agency staff skip the payment cart and go directly to the Checkout page.
Review the Checkout page, which lists the different payment methods available, such as cash or check.
Select one of the payment methods for payment processing.
Depending on the payment service being used, the payment steps differ.
After successful payment, the agency user is returned to the Permits list page.
Payment Cart Overview
Permit applicants can pay fees over the Internet using a payment cart and checkout process. The Cart page is used to accumulate fees and review them before making a payment.
The payment cart shows fees associated with a permit belonging to one customer profile at a time. When the permit applicant changes their profile, the payment cart is updated to show the fees for the selected profile.
Viewing Fees in the Payment Cart
The payment cart icon appears in the global header when a registered user logs into Oracle Public Sector Permits. The number of permits in the payment cart, if any, appears on the icon:

Permit applicants can access a fee summary in the Payment Cart summary page by the payment cart icon:
This example illustrates the Payment Cart summary page, which is a dialog box with list of fees for each permit in the cart. The registered user can access the cart from this page.
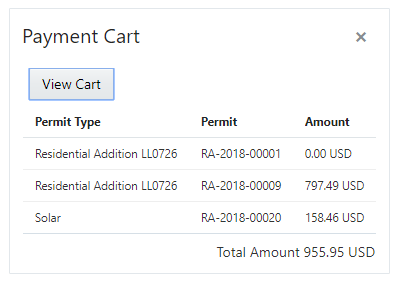
If the cart is empty, the summary of fees is not available. The user can open the Cart page by clicking the View Cart button on the Payment Cart summary page and also by clicking the cart icon in the global header.
Paying Fees in the Payment Cart
The permit system applies fees to the user's account when they submit a permit application. The applicant can then move fees into the payment cart, where they remain until the applicant selects the fees for payment. Adjusted fees are updated automatically in the cart before checkout processing.
This example illustrates the Cart page containing the field values described in the following table.

The Cart page includes these elements:
| Page Elements |
Usage |
|---|---|
 |
Click to group the fees by Address or Record Type. |
 |
Click to sort the fees by Date Added, Record Type, or Permit. |
| Total Amount |
Review the number of items to pay now and the total amount selected for payment. |
| Permit type link |
Click the permit type link—for example, FRecord0402A—to open the permit Overview page and permit details. |
| Fee amount |
View the fee amount for the record, for example: $215.17. Click the fee amount link to open the Fee Detail page, which shows a breakdown of the fees and the total fees due for the permit. |
 |
The Fee Amount Changed alert indicates the fee has been adjusted. Adjusted fees are updated automatically in the cart before checkout processing. |
| Aging information |
View the aging information for the fee, for example: Added 5 days ago. |
| Permit |
View the permit number associated with the fee. |
| Property address |
View the location of the property to which the fee applies. |
Conditions that have been applied to the record or permit appear as icons next to the permit ID. For more information about conditions, see Applying Conditions to Permit and Implementing Oracle Public Sector Permits, “Setting Up Conditions.”
After reviewing fees, the permit applicant can choose from several actions:
| Page Element |
Usage |
|---|---|
| Continue to Checkout |
Click the button to continue to checkout with the fees selected to pay now. |
| Pay Now |
Select the fees for payment by turning on the Pay Now switch. |
| Remove from Cart |
Click to remove a fee from the cart. Removing fees from the cart does not affect the permit application. The user can make changes to the permit if needed and add the fees to the cart later. |
| Return to Permit List |
Click the link to return to the user’s My Permits page. |
The system validates the permits in the payment cart and identifies permits with a conditional status. The permit applicant must correct any conditions associated with a permit before proceeding to checkout.
Users cannot make any changes to the permits and associated fees submitted for payment during processing. After the payment processing is complete, the items are removed from the cart, and the system directs the user back to the Cart page to pay remaining fees. If the cart is empty after a successful payment, the user is directed their My Permits page. If the payment fails, the fees remain in the cart and can be updated or resubmitted for payment.
Working with Cashier Sessions
Cashier sessions are instances of a cashier using a specific cash drawer to receive payments from customers. Cashiers add and modify cashier sessions on the Cashier Session page.
Opening a Cashier Session
Select .
On the Cashier Session page, click Add.
On the Cashier Session Details page, enter values for the following fields:
Page Element
Description
Cashier Drawer ID
Select the cash drawer that you want to use for this session.
Session ID
Displays the unique, system-generated ID for the cashier session.
Start Time
Displays the date and time the session was created.
Status
All new cashier sessions have a status of Open.
Cashier ID
Displays the unique ID of the cashier who is opening the cashier session.
Administrators assign cashier IDs to agency staff on the Agency Staff page. You cannot open a cashier session if you do not have a cashier ID assigned to you.
Opening Balance
Enter the amount in the cash drawer at the beginning of the cashier session.
Click Save.
Modifying a Cashier Session
Select .
Click a row with a status of Open or Suspended on the Cashier Session page.
Note: You view cashier sessions with a status of Closed, but you can’t edit them.On the Cashier Session Details page you can:
Suspend an open cashier session by setting the Status to Suspended.
Reopen a suspended cashier session by setting the Status back to Open.
Close a cashier session by setting the Status to Closed. When you close a cashier session enter an amount for the Closing Balance.
Note: The system populates the End Time field with the date and time the session was closed.
Click Save.