6Recording and Billing Time
Adding Time Entries
Agency staff can record the time that they spend working on transactions for the purposes of billing and reporting.
Accessing Time Entry
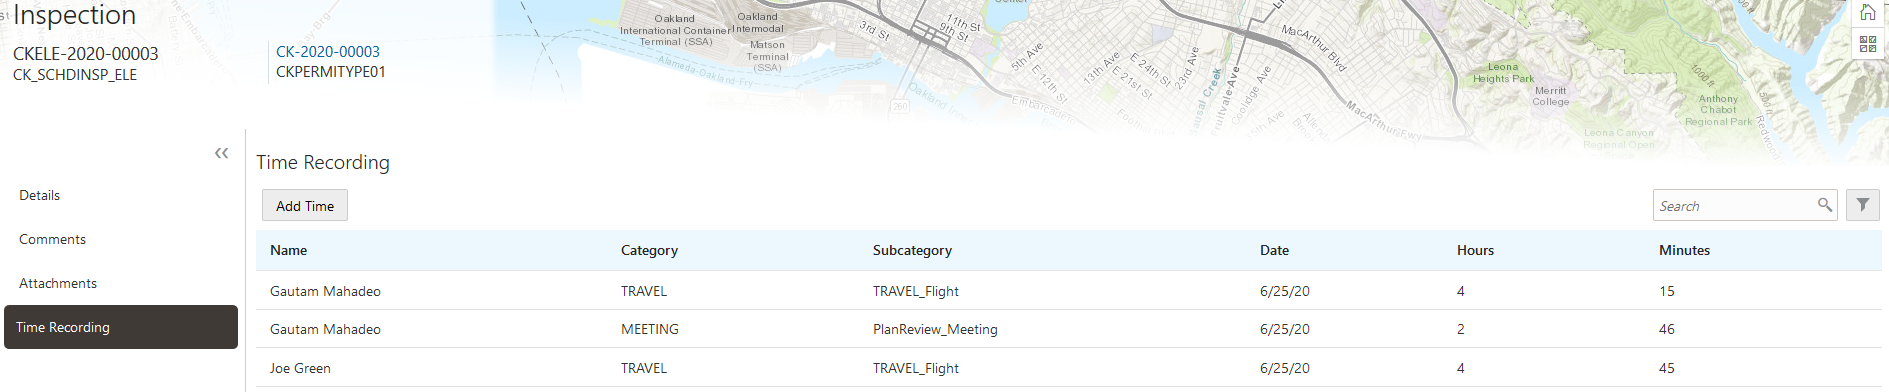
You add time entries directly on the respective pages for the transaction you are working on. For example, you can enter the time you spend working on a permit inspection using the Time Recording page of the inspection details.
This is an example of the Time Recording page for an inspection
Additionally, you can quickly access transactions that are assigned to you using the Time Recording tile on the Agency Springboard.
This is an example of the Time Recording page accessed from the Agency Springboard

By default, this page displays only your current transactions. For example, it won’t display expired permit inspections or completed plan review cycles. Turn on the Show All Statuses switch to show all transactions assigned to you regardless of status.
Click a row to access the transaction page where you can enter your time.
Adding a Time Entry
Access the transaction that you want to add time for.
Click Add Time.
This is an example of the Time Details page
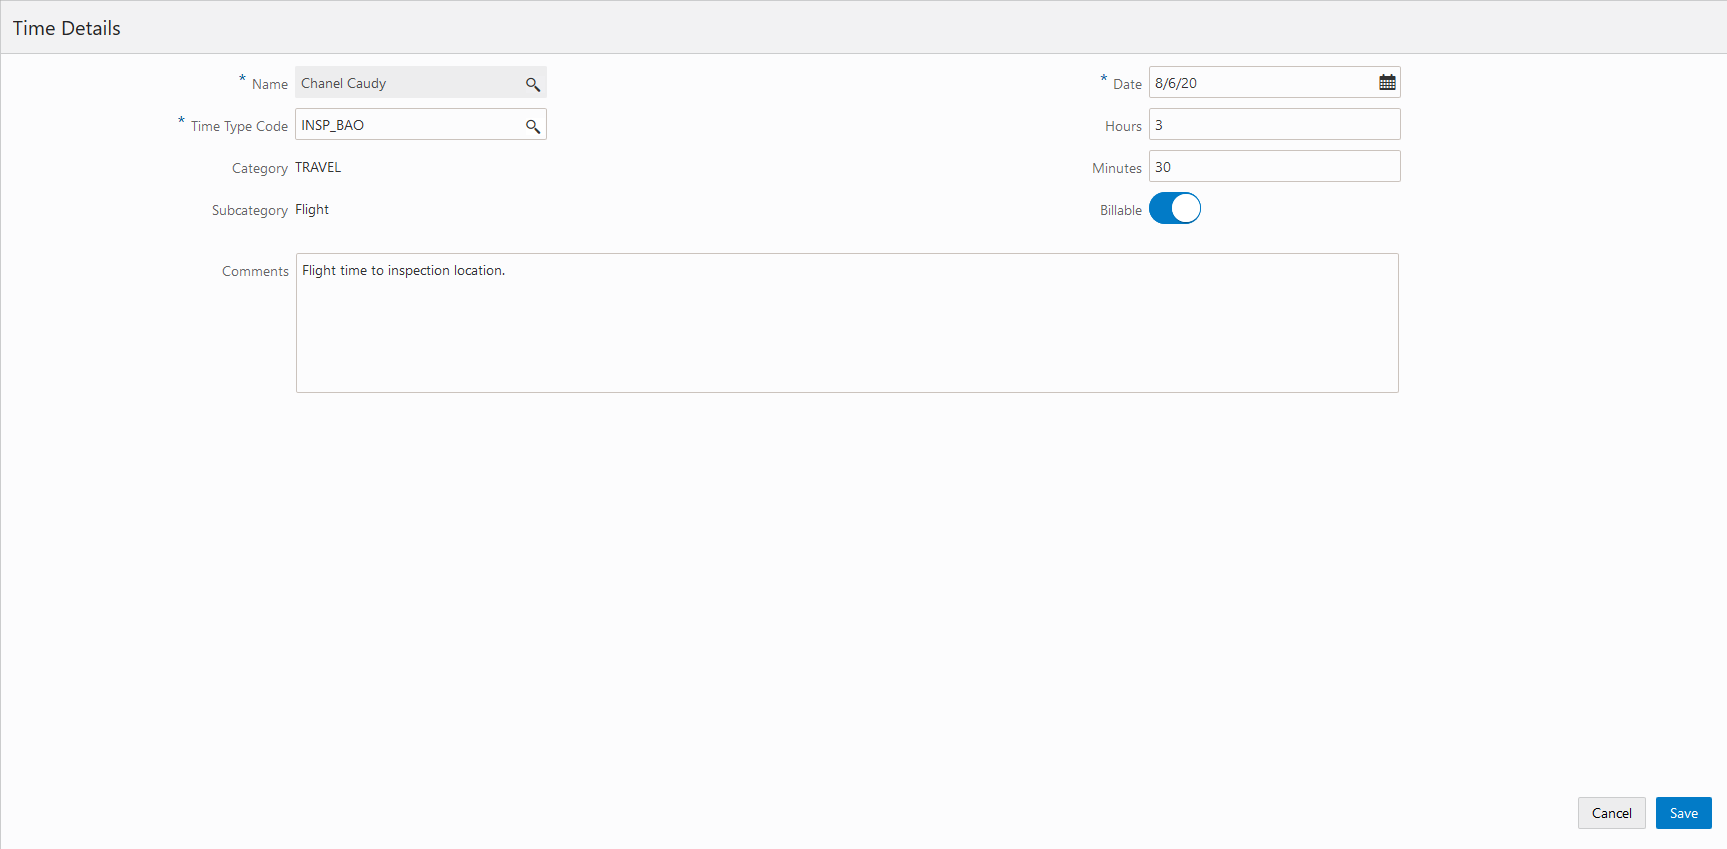
On the Time Details page, enter values for the following fields:
Page Element
Description
Name
Staff who have the ability to enter time for others, such as billing supervisors, can select any agency staff member in this field. All other agency staff automatically have their name populated in this field and can’t change it.
Date
Select the date that you’re entering time for. The current date is the default value.
Time Type Code
Enter the time entry type code that you want to use. The page displays the category and subcategory associated with the code that you select. The time entry type code also determines the default values of the Billable and Assess Now switches on this page and whether those default values can be changed.
For more information on time entry types, see Setting Up Time Entry Types.
Hours and Minutes
Enter the amount of time you spent on the transaction in hours and minutes. You can select 0 to 23 in the Hours field and 0 to 59 in the Minutes field.
Billable
Use this switch to indicate whether the time is billable. Whether this switch is turned on by default or can be overridden is determined by the time entry type that you select.
Assess Now
Use this switch to indicate whether the fees associated with this time entry are assessed immediately when you save it. Whether this switch is turned on by default or can be overridden is determined by the time entry type that you select.
Note: This switch appears only for staff who have the ability to enter time for others. It is disabled when the Billable switch is turned off.Comments
Enter any additional information you want to record for the time entry.
Click Save.
Modifying a Time Entry
Click a time entry row.
On the Time Details page you can:
Edit the time entry fields.
Delete the time entry. You will be prompted to confirm the permanent deletion.
Click Save.
Assessing Fees for Time Entries
Agencies can bill for time spent by their staff working on transactions.
Fees are automatically calculated when time is recorded. Time entries with the Assess Now switch turned on are immediately assessed when they’re saved and appear in the Fees and Payments page for the transaction. If the switch is turned off, an agency staff member must assess the fee explicitly.
You assess fees on the Time Recording page for a transaction.
This is an example of the Time Recording page for a permit
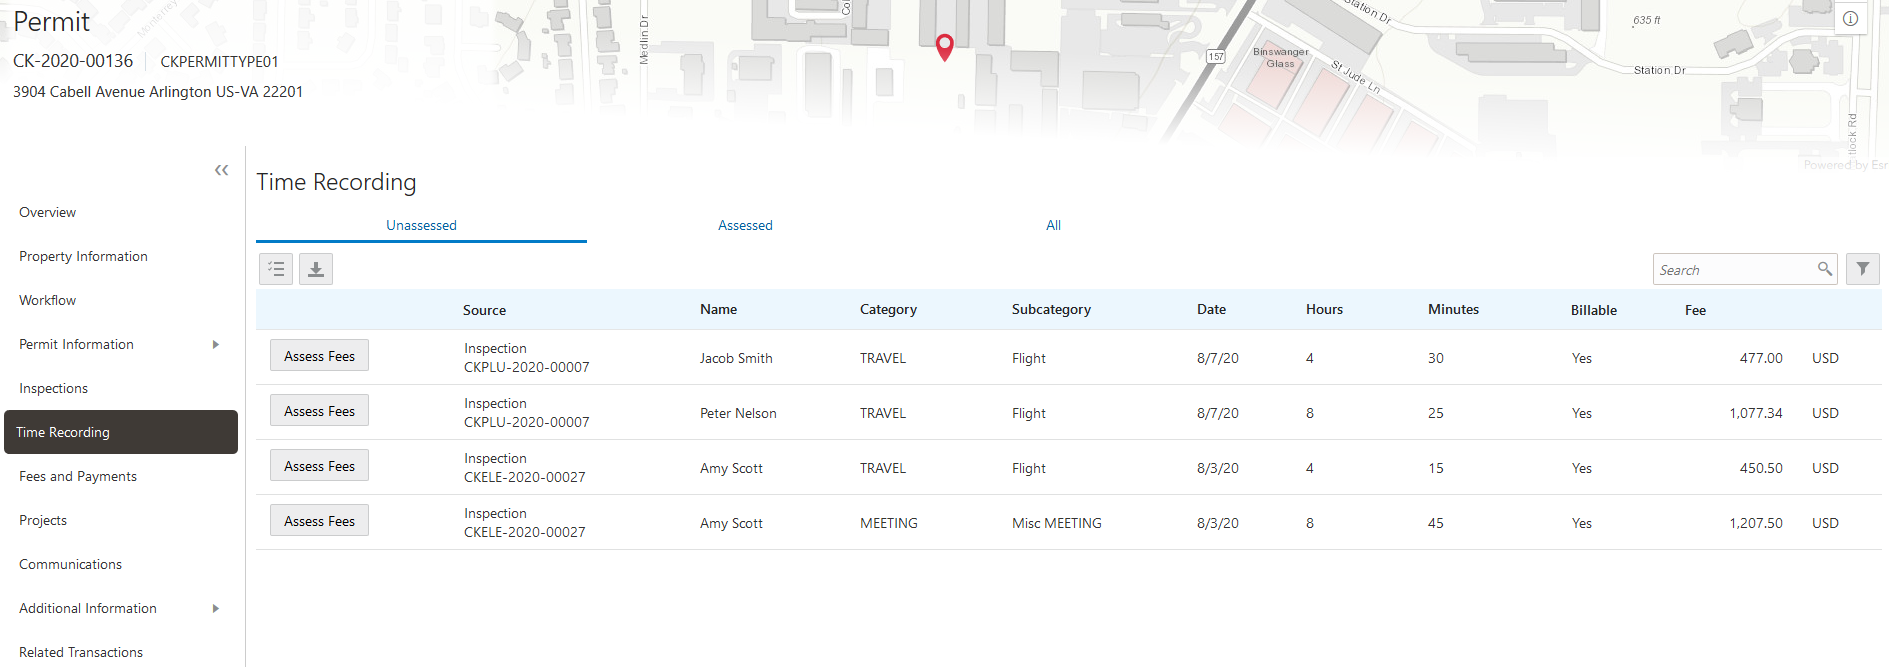
This page has three tabs:
The Unassessed tab displays all time entries for which fees have not yet been assessed.
The Assessed tab displays time entries for which fees have already been assessed.
The All tab displays all time entries for the transaction.
Assessing a Fee for a Time Entry
Access the Unassessed tab of the Time Recording page.
Click Assess Fees next to the time entry you want to assess.
The application moves the time entry from the Unassessed tab to the Assessed tab, and creates a fee for the assessed time entry on the Fees and Payments page.
For more information on the Fees and Payments page, see Working with Fees and Payments
Note: Even after a fee is assessed for a time entry, agency staff with permission to assess fees can modify it until the fee has been paid.
Assessing Fees for Multiple Time Entries
Access the Unassessed tab of the Time Recording page.
Click Select Multiple.
Select the check box next to each time entry you want to assess.
Click Assess Fees.
The application moves the selected time entries from the Unassessed tab to the Assessed tab, and creates a fee for each assessed time entry on the Fees and Payments page.
For more information on the Fees and Payments page, see Working with Fees and Payments
Note: Even after fees are assessed for a time entry, you can continue to edit it until the fee is paid.
Accessing Unassessed Time Fees from the Agency Springboard
You can quickly access transactions with unassessed fees using the Unassessed Time Fees tile on the Agency Springboard.
This example shows the Unassessed Time Fees page
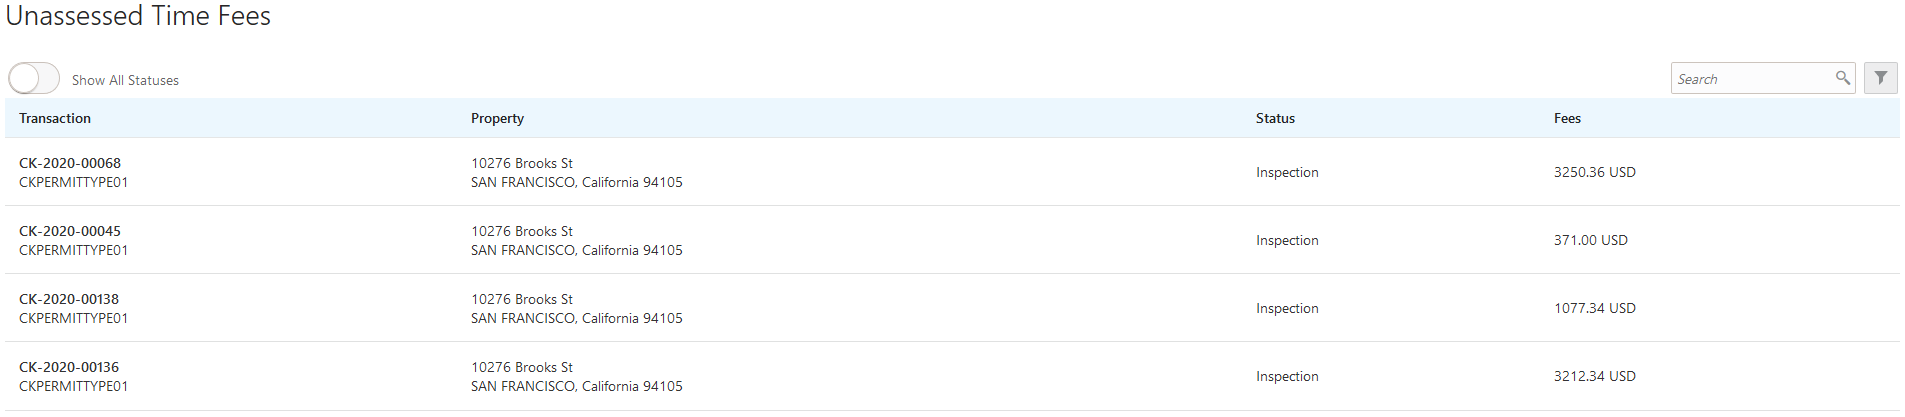
By default, this page displays only current transactions with unassessed fees. For example, it won’t display permits with expired inspections or completed plan review cycles. Turn on the Show All Statuses switch to show all transactions with unassessed fees.
Click a row to access the Unassessed tab of the Time Recording page.