2Applying for a Business License
Choosing an Application Type
Your agency sets up application types for permit applications, planning applications, and business license applications. Before starting an application, users must choose what type of application they need. The Apply page provides multiple tools to help users choose the appropriate application type.
Working With the Apply Page
The Apply page offers these options for finding application types:
| Option |
Description |
Available to Which Users |
|---|---|---|
| Search |
Search for an application type by name. |
All |
| Recent application types |
View the five application types for the applications that you most recently submitted. |
Registered public users, agency staff |
| Popular application types |
View the five application types that have been used most frequently in the last 30 days |
All |
| Browse application types |
Choose either business licenses, permits, or planning applications, then browse categories for the selected item. Expand a category to browse the specific application types within the category. |
All |
| Guided questionnaire (includes saving and retrieving recommendations) |
Answer questions about your needs, and the guide provides recommendations regarding the necessary application types. |
Registered and anonymous public users |
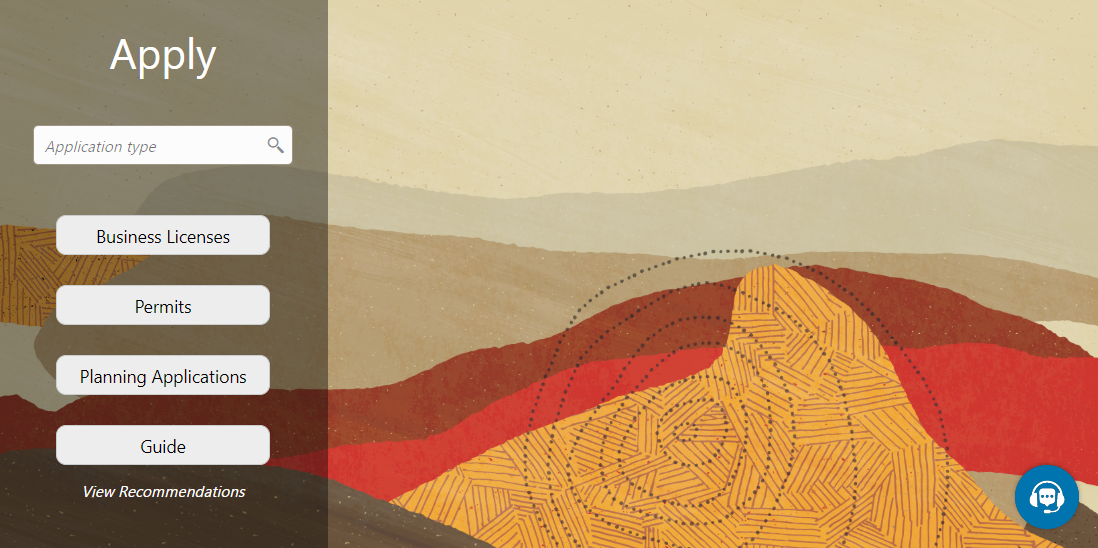
This example illustrates the Apply page for registered public users. The left side of the page has multiple options for finding application types. In this example, the user has not started looking for an application type, so the right side of the page does not have any information.
In this example, the user has started browsing for application types. As the user works with the tools on the left side of the Apply page, the related information appears on an overlay on the right side of the page. In this illustration, the user is browsing for business license types, so the overlay shows expandable categories for those applications.
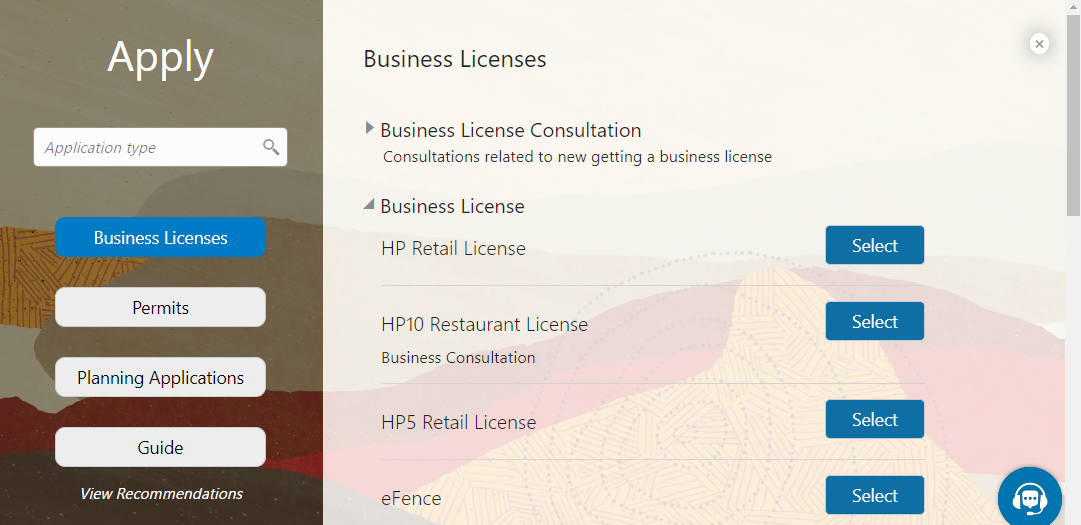
The descriptions of the categories and the application types come from the corresponding setup pages. Initially the overlay displays up to two lines of the description. If the description is longer, an icon at the end of the truncated description enables the user to expand it and see the full description.
For information about setting up the application type categories, see Setting Up Business License Display Groups, Setting Up Permit Display Groups, or Setting Up Planning Application Display Groups.
Accessing the Apply Page
Anonymous and registered public users can access the Apply page from the landing page by clicking the Apply tile. Anonymous users can explore application types, but they are prompted to sign in or register before actually starting an application.
Registered users and agency staff have these additional options
On the landing page or agency springboard, select the Start an Application quick action in the I Want To field, then click the Go button.
On the Applications page (registered users) or the Transactions page (agency staff), click the Apply button.
On the Explore Your City map (registered users) or the Main Map (agency staff), click the Apply button after selecting a parcel.
Searching for Application Types By Name
To search for an application type by name:
Click in the search field.
A drop-down list shows any matches.
If you don’t see the desired application type in the initial drop-down list, begin typing the name of the application type.
As you type, the drop-down list changes to show only application types that match your search criteria.
To start an application, click the desired application type in the drop-down list.
Searching for Popular and Recent Application Types
To search for popular and recent application types:
Click in the search field.
Review these lists of popular and recently used application types.
The lists appear in the overlay on the right panel of the Apply page. They can include a mix of business license, permit, and planning application types.
List
Description
Recent
Lists the application types (up to five) for the applications that the current user most recently submitted.
Note: Anonymous public users do not see a list of recent application types.Popular
List the application types (up to five) that have been used most often in the last 30 days.
To start an application, click Select for the desired application type.
Browsing for Application Types
To browse for application types:
Click the button for Business Licenses, Permits, or Planning Applications on the left side of the Apply page.
After you click a button, the overlay on the right side of the page lists categories for the specified type of transaction.
Expand categories to browse the application types.
To start an application, click Select for the desired application type.
Using a Guided Questionnaire to get Application Type Recommendations
To find application types using a guided questionnaire:
Click the Guide button to open the guided questionnaire.
This button appears only if the agency has configured an Oracle Intelligent Advisor policy for recommending application types.
Step through the questionnaire.
At the end of the questionnaire, the guide will recommend application types and provide an option to save the recommendations.
Optionally save the recommendations.
A registered user follows these steps to save the recommendations:
Enter a nickname for the recommendations in the Nickname field.
Click Save.
The recommendations are associated with the user account and can be retrieved from the Apply page.
An anonymous user follows these steps to save the recommendations:
Enter an email address in the Email ID field.
Enter a nickname for the recommendations in the Nickname field.
Click Save.
The system sends the user an email with an acknowledgement number that can be used to retrieve the recommendations from the Apply page.
Viewing Saved Recommendations from the Guided Questionnaire
Public users can view guided questionnaire recommendations that they save.
To view the recommendation that are already associated with a registered public user's account, the user follows these steps:
Sign in.
Click the Apply button on the registered public user landing page.
Click View Recommendations.
The recommendations appear in the right panel overlay under the heading Recommended Permits.
Both registered and anonymous public users can retrieve recommendations that were saved during an anonymous session. To retrieve these recommendations, the user follows these steps:
Access the Apply page.
Locate the Search Saved Recommendations link:
Anonymous users can find this link in the right frame of the Apply page.
Registered users who are signed in must click the View Recommendations link in the left panel. The resulting overlay on the right panel includes the Search Saved Recommendations link.
Click Search Saved Recommendations to open a new window.
Enter the Acknowledgement Number that was emailed to the user when the recommendations were saved.
Enter the Emailthat the user provided when saving the recommendations.
Click Search.
Getting an Online Fee Estimate
Agency staff and registered applicants can get fee estimates online outside of the application process.
The online calculator estimates application fees based on the fee structure of the application type.
After signing in, you can select the Estimate Fees action on the Agency Springboard. Public users select this action on the registered user landing page. From the Apply page you can initiate an application for a permit, but for a fee estimate you’ll launch the fee calculator from the fee estimate icon. Based on the fee structure for the application you choose, you’ll enter information that is relevant to the fees, without filling out an application. The estimated fees are calculated and displayed for your review with fee line descriptions and amounts. You'll also see whether a fee is due when you submit the application or payable later when required. You might want to simulate new scenarios simply by entering new values, or by selecting a different type of application. Once you have a fee estimate and decide to move forward, you can begin the application process, if desired.
Here’s how to get an estimate:
Go to the Agency Springboard if you are gathering information for a public user. Registered public users can go to their landing page.
In the I Want To quick actions drop-down list, select Estimate Fees.
Once you’re on the Apply page, find the application type you want and click the Estimate Fees icon. For example, if you want to get an estimate for a building permit, click the icon next to the button to start a building permit application.
Fill out the form to the best of your knowledge with the information required to calculate the fees. For example, enter the square footage of the building.
Click Calculate.
For different scenarios, enter new values and click Calculate to see the updated estimate.
The estimated fees are displayed for your review with the fee description, amount, and whether the fee is due when you submit the application or payable when required.
Completing an Application
Agencies configure the specific sections and fields for each type of application. Regardless of these specifics, the general interface for completing an application is consistent.
Applications for business license renewals and amendments also follow this process. For more information, see Applying for a Business License Renewal and Applying for a Business License Amendment.
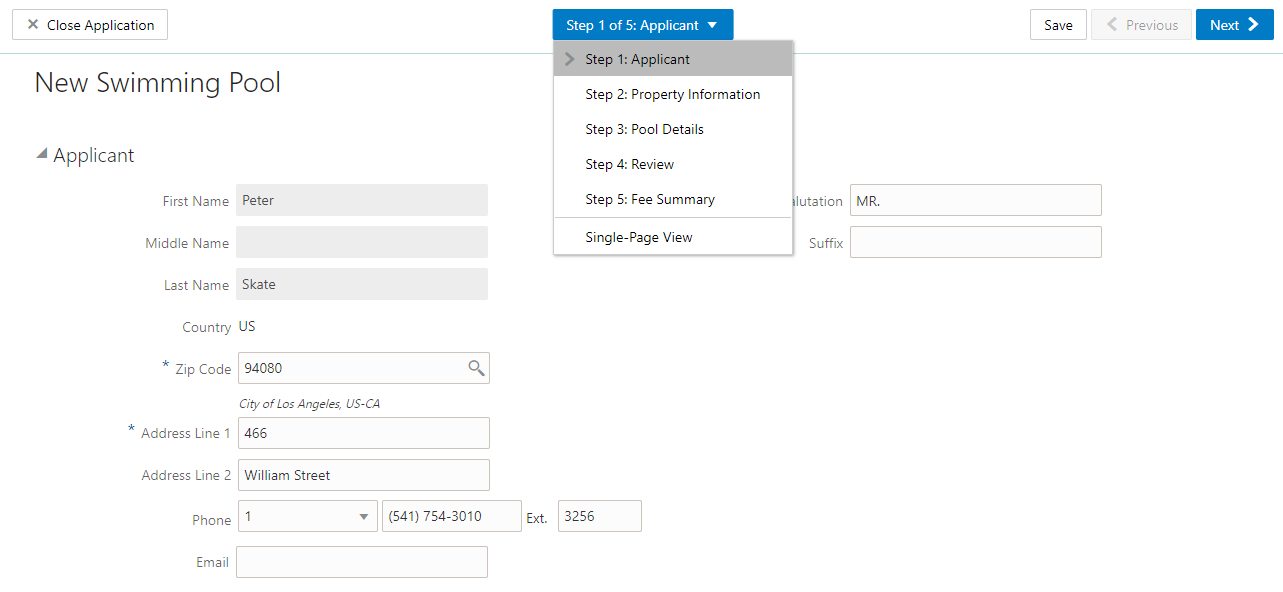
This example illustrates an application.
Data Entry Pages
The application begins with data entry steps that the agency configures. There can be one or many data entry steps. Agencies configure the sections and fields for each data entry step.
Data entry sections are generally self-explanatory, but the following table includes notes about certain sections:
| Section |
Notes |
|---|---|
| Applicant |
|
| Terms and Conditions |
|
| Contacts |
All applications:
Permits and planning applications:
Permit applications:
|
| Contractor |
Applicants who self-identify as contractors (or their authorized agents) are required to enter a license number, which can be used to retrieve additional information about the license and the business. That information can be retrieved from the agency’s main contractor records if the information already exists there. If you integrate with an external licensing body, the information can be retrieved from the licensing body’s records. Applicants who do not self-identify as contractors can enter information about the contractor who is performing the work. The license number is optional, and other fields such as the business name are unrestricted. For more information, see Contractor License Overview. |
Review Page
A Review step appears after the last data entry step for an application. The page for the Review step shows all of the data entry sections on a single long read-only page.
Confirmation Page
If the application includes a confirmation page, it appears after the review page. This page can have any name.
A common scenario is to show a fee summary on the confirmation page. Displaying a read-only fee summary at the very end of the application, after all data entry is complete, ensures that the fee calculations are final.
Single Page View and Multi-Page View
A drop-down field at the top of the application page lists the steps, including data entry pages, the Review page, and the confirmation page. Selecting a step takes the user directly to that step.
The final item on the step list is an option to toggle between the Single-Page View and Multi-Page View.
In single-page view, all of the data entry steps are combined into a single step labeled Step 1: Single-Page View. The review and confirmation steps remain separate.
General Navigation Controls
The banner above the application form includes these buttons for general navigation:
Previous and Next buttons enable users to move through the steps.
On the final step, a Submit button replaces the Next button.
Submitting an application initiates the workflow for the application. Registered public users can’t make changes to submitted applications.
Note: After submitting a business license application, you can’t make changes to the business information. Once the license is approved, you follow the amendment process for any changes. See Applying for a Business License Amendment.The Save button lets users save their progress without submitting the application.
You’ll see warnings when you save an incomplete application, but you can still save the application and complete it later.
The Close Application button closes the application and discards unsaved changes.
A warning message gives users a chance to return to the application instead of closing it.