Setting Up Document Groups
You set up document groups using the Document Group pages to organize the various categories of attachment files into a grouping.
When you assign a document group to a transaction type, the categories and subcategories associated with that document group can be selected for document attachments associated with those transactions.
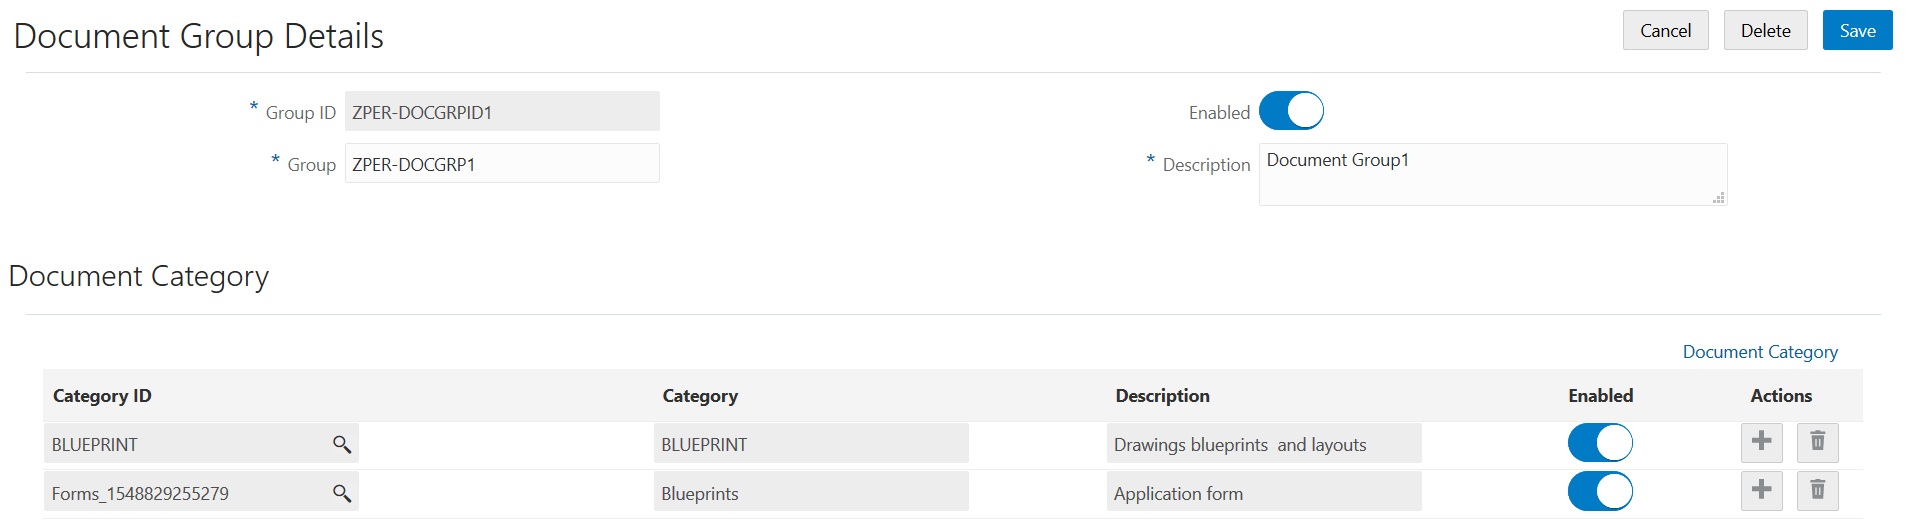
This example illustrates the Document Group Details page, which is described in the following text.
Adding Document Groups
Select .
On the Document Group page, click Add to add a new document group.
Enter values on the Document Group Details page:
Page Element
Description
Group ID
Enter an identifier for the group.
Group
Enter a name for the group.
Description
Enter a description of the group.
Enabled
Turn the switch on to make the group available for use. The group is disabled by default.
Click Save.
Add document categories that make up the grouping by clicking Add in the Document Category section.
Enter a document category ID or use the lookup prompt to find a category ID.
If desired, you can click the Document Category link to research which category to choose. For more information about document categories, see Setting Up Document Categories and Subcategories.
Click Save.
Modifying Document Groups
Select .
On the Document Group page, select the row for the group that you want to modify.
On the Document Group Details page, you can modify the group name and description, and turn the Enabled switch on or off.
Disabled document groups can’t be selected in the prompt list for a transaction type.
Note: Disabling a document group does not affect attachments for existing or new transactions associated with permit types to which that document group is assigned. The categories and subcategories associated with a disabled group continue to display for existing attachments, and are still available to select for new attachments.Click Save to save any changes.
You add, remove, disable, and enable document categories for the group in the Document Category section.
When you disable a single category associated with a document group, that category and its subcategories continue to display for existing attachments, but are unavailable for new attachments.
To modify a document category, you must go to the Document Category definition pages. See Setting Up Document Categories and Subcategories.
Note: If you disable a category on the Document Category Details page, but it’s still included in the list of enabled categories for a document group, it will continue to be available in the prompt list for attachments.
Deleting Document Groups
Select .
On the Document Group page, select the row for the group that you want to delete.
Click Delete on the Document Group Details page.
If you want to delete multiple document groups, you can delete them on the Document Group page:
Click Edit.
Select the check boxes for the document group rows to delete.
Click Delete.
To delete a document category from the group, click the Delete icon for the document category row in the Document Category section.