Creating Map-Based Public Notification Lists
The Public Notification map enables you to define an area on a map and generate .csv files for the parcels, owners, addresses, and neighborhood attributes that are included in that area. Use the .csv files to create your mailing list. The notification area consists of all properties that are at least partially within a specified distance of the selected property or properties.
A context-specific instance of this page is available for scheduling hearing notifications. See Generating a Hearing Notifications List.
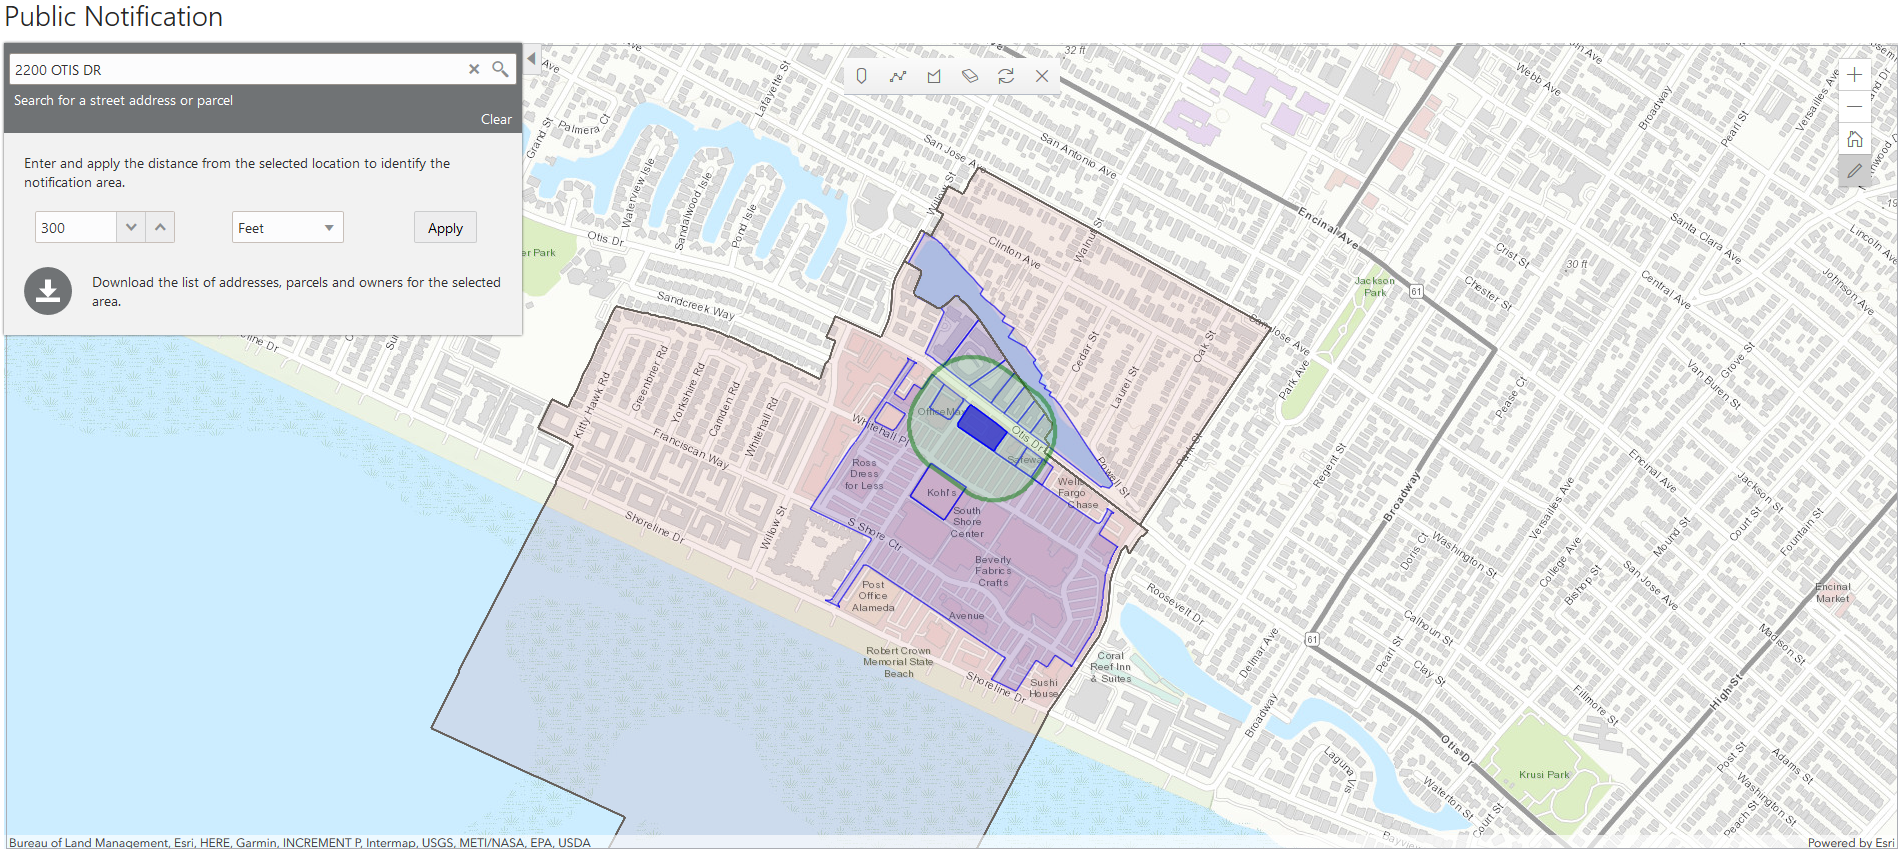
The following example illustrates the Public Notification page, where you can select properties, define a notification area around the selection, and download lists of addresses, parcels, owners, and neighborhood attributes in the notification area.
To define a notification area and generate notification lists:
Access the Public Notification page.
To access the page from the global header, click the Maps icon, then click Public Notification in the drop-down menu.
You can also access the page directly from the list of hearings for a planning application. If the hearing schedule is final, the action menu for the hearing includes the Generate Notifications List action. This action opens the Generate Notifications List window, which contains the Public Notification page. For more information, see Generating a Hearing Notifications List.
Select a property, or confirm the default property selection.
If you access the Public Notification page from a hearing for a planning application, the property or properties from the planning application are selected by default.
The two methods for selecting properties are:
Use the search field to search by street address or parcel number, then click the desired property in the type-ahead list or the search results.
Use selection tools such as Draw Point, Draw Polyline, or Draw a Polygon to select properties.
For detailed information on selecting properties, see Using the Main Map and Explore Your City Map
Define the notification area by entering a distance from the selected properties.
The fields for defining the notification area appear below the search field when a property is selected.
Enter a number, and select Feet, Miles, Meters, or Kilometers to enter a distance.
The fields for entering the distance appear below the search field as long as at least one property is selected.
Click Apply.
The notification area appears on the map. Visually, it appears as a bold green outline that follows the contours of the selected property at the specified distance. If you selected multiple properties, there can be multiple notification areas. Parcels that are fully or partially within the notification area appear with a blue outline so you can see which parcels are included in the notification list. If the map is enabled to show neighborhood groups that are fully or partially within the notification area, they appear as a pink layer with a black outline.
To change the notification area, modify the property selection, the distance for the boundary, or both, and then click Apply again.
If you use add or remove properties from your selection, the notification area is not updated until you click Apply.
To clear the property selection and the notification area, click either the Deselect All tool or the Clear link on the Search overlay.
If you are satisfied with the notification area, click the Download button that becomes visible after you apply a selection.
Three files are downloaded: Address.csv, Owner.csv, and Parcel.csv. If the map is enabled to show neighborhood groups that are fully or partially within the notification area, a fourth file is downloaded: Neighborhood Group Mapping.csv.
Files are saved to default folder defined in your browser settings. Your browser must be able to download multiple files.
Save the .csv files so your agency can use them to generate notifications.
The notification process is not part of the Oracle system.