Defining Fields Displaying a List of Values
This topic describes how to add a list-of-values (LOV) to user-defined fields.
Some of the user–defined fields that you can add to your form are considered “list-of-value” fields, or LOV fields. List-of-value fields enable end users to select field values from a predefined set of values (a lookup) to populate the field when entering data on the form. For example, radio sets and drop-down lists are list-of-value fields.
The list of values is a lookup type, and the individual items in the lookup type are lookup values.
When adding a list-of-value field type to your application form, you first add the field to the form, just as you would any other field. You then either select an existing lookup type to associate with the field, or you can create a new lookup type if needed. To manage lookup types you use the Custom Lookups page.
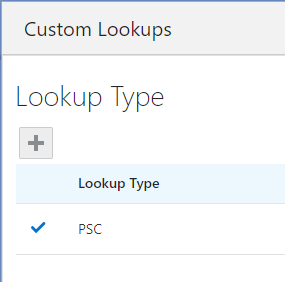
This example illustrates the Lookup Type page.

A list of values is a set of fixed field values defined for a specific purpose that is not expected to change over time. Removing items from the list, for example, could make previously saved data invalid.
An example of a field with a list of values could be the Property Zone Type field, where the values for a user to select are: Business, Residential, and Agricultural.
Once you have clicked the Select button, for a lookup type row, a check mark appears next to that lookup type to indicate it is the lookup type associated with the current LOV field.
This example illustrates the check mark that appears to the left of the lookup type to indicate lookup type selected for the current field.
A single user-defined lookup type should be used by only one user-defined field.
Once you have saved a user-defined field with a lookup type selected, its lookup type can’t be changed.
Identifying List of Value Type Fields
You associate a list of values with these field types:
Radio button set
Check box set
Drop-down list
Multi-select list
The following example illustrates a radio set, which is a set of radio buttons allowing a user to select a single value from the list of values.
Text surrounding the image describes it.

The following example illustrates a checkbox set, which is a list of multiple items allowing a user to select multiple values from the list of values.
Text surrounding the image describes it.

The following example illustrates a drop-down list, which is a list allowing a user to select a single value from the list of values.
Text surrounding the image describes it.

The following example illustrates a multi-select list, which is a drop-down list allowing a user to select multiple values from the list of values.
Text surrounding the image describes it.

If the field type is a Check box set or a Multi-select list and the field will be used to drive fee calculations, then the fee model input should be configured as a list type. As in, select the is List? checkbox when defining the decision model input data.
Selecting an Existing Lookup Type for a Field
To select an existing lookup type:
Add the list-of-value type field to your form layout.
Select the new field.
Click Manage List in the Field Attributes panel.
This opens the Lookup Type page.
On the Custom Lookups page, identify the lookup type to associate with the list-of-value field you added.
Use the Meaning column to identify the appropriate list, or you can click View More Details to view the description and the actual lookup values in the lookup type.
Click Select in the Actions column to associate the desired lookup type with your field.
Note:Once you select a lookup type, the Lookup Type page closes automatically. You can click Manage List to confirm your selection if needed.
Save the form layout.
Adding a New Lookup Type for a Field
Add the list-of-value type field to your form layout.
Select the new field.
Click Manage List in the Field Attributes panel.
This opens the Lookup Type page.
On the Custom Lookups page, click Add.
On the Lookup Type Details page, enter these values.
Page Element
Description
Lookup Type
The system name, beginning with PSC, using uppercase letters, numbers, or underscores.
For example, PSC_ROOF_TYPE.
Note:All lookup types created and used within the Intake Form Designer must begin with PSC.
Meaning
Add a short, user-friendly description. This value appears in the Meaning column of the list of lookup types, which can help to identify the contents of the list.
For example, Roof Type.
Description
Provide any additional information to help identify the purpose and intended usage of the lookup type.
Add lookup values to the lookup type.
In the Look Up Values grid, click Add.
Modify these values:
Page Element
Description
Lookup Code
A short code used to identify the lookup value to the system, like a key value.
Display Sequence
If required, you can set the sequence in which lookup values display in the lookup list, using a numeric sequence.
Enabled
By default, a new lookup value is enabled. To disable a lookup value, turn off this switch.
Start Date
Date on which a lookup value becomes valid.
End Date
Date on which a lookup value is no longer valid.
Meaning
The value that displays to the end user at runtime to select from the list.
Description
Any additional information to describe the content or purpose of a lookup value.
Click Save.
Repeat for additional lookup values in the lookup type.
Example:
This example illustrates the Lookup Type Details page, showing a completed lookup type with a set of lookup values.

On the Lookup Types page click Select to associate the new lookup type with the field.
Or, click Close to associate the lookup type with another field later.
Save the form layout.
Understanding the Scope of Lookup Types Created in the Intake Form Designer
The items in the following table describe the scope of the list of value fields that you can create and use in the Intake Form Designer.
|
Scope Item |
Description |
|---|---|
|
User-defined fields |
You can create a list of values for user-defined fields only. You can’t create a list of values for a field contained within a delivered field group. Some of the list of value fields in predefined field groups are associated with lookup lists that you can manage using the Manage List button. Note:
Once you create a lookup list for a user-defined field and publish the intake form, that lookup list can also be viewed outside of the designer using the Lookup Type page. However, it is recommended to manage lookup lists for user-defined fields only in the Intake Form Designer. For more information on the Lookup Type page, see Setting Up Lookups. |
|
Intake Form Designer-only |
The lookup types that you create within the Intake Form Designer can be used only within the Intake Form Designer. Only in specific circumstances can you associate a field in your form layout with lookup types created outside the Intake Form Designer. The interface used to
create and select lookup types for use in your intake forms looks
identical to the Lookups page (Navigator > Common Setup > Lookups),
which is the interface used to manage lookups for Public Sector Community
Development offering pages, such as the permit offering or the planning
and zoning offering. However, the lookup types created on the Lookup
pages can not be used for your intake forms nor visa versa. For example, you can’t use
the UOM Type lookup type (ORA_PSC_CC_UOM_TYPE) from the Lookup Type
page for your intake form fields.
|
|
Other licensed offering(s) in the same database |
In select cases, if you are an existing Fusion Application Cloud customer, and you have other licensed offerings in the same database as the Oracle Permitting and Licensing offerings, you can utilize lookup types not beginning with PSC for your intake form fields if required. For example, if you also license Fusion Application Cloud for Financials, which shares the same database as the Oracle Permitting and Licensing offerings, you can select lookup types using the Intake Form Designer interface, assuming you are aware of the values it displays and how it is maintained. To access these lookup types, you need to modify the filtering on the Lookups page. By default, the Intake Form Designer filters on PSC or the exact name of the selected lookup. Refer to the following example for more information on modifying the filtering option. |
Example: This example illustrates modifying the default filtering for the Intake Form Designer lookups.
To modify the filtering on the Lookup Type page:
Click the Filter By button.
Select how you want to filter, as in by Lookup Type or by Meaning.
Select the operator to use for your filtering, such as Starts with, Contains, and so on.
Click Apply.