Working with Application Attachments
Attachments available in the application details provide supporting documentation reviewed by agency staff when processing an application. This topic discusses the Attachments page for permit applications displayed using the Redwood Experience.
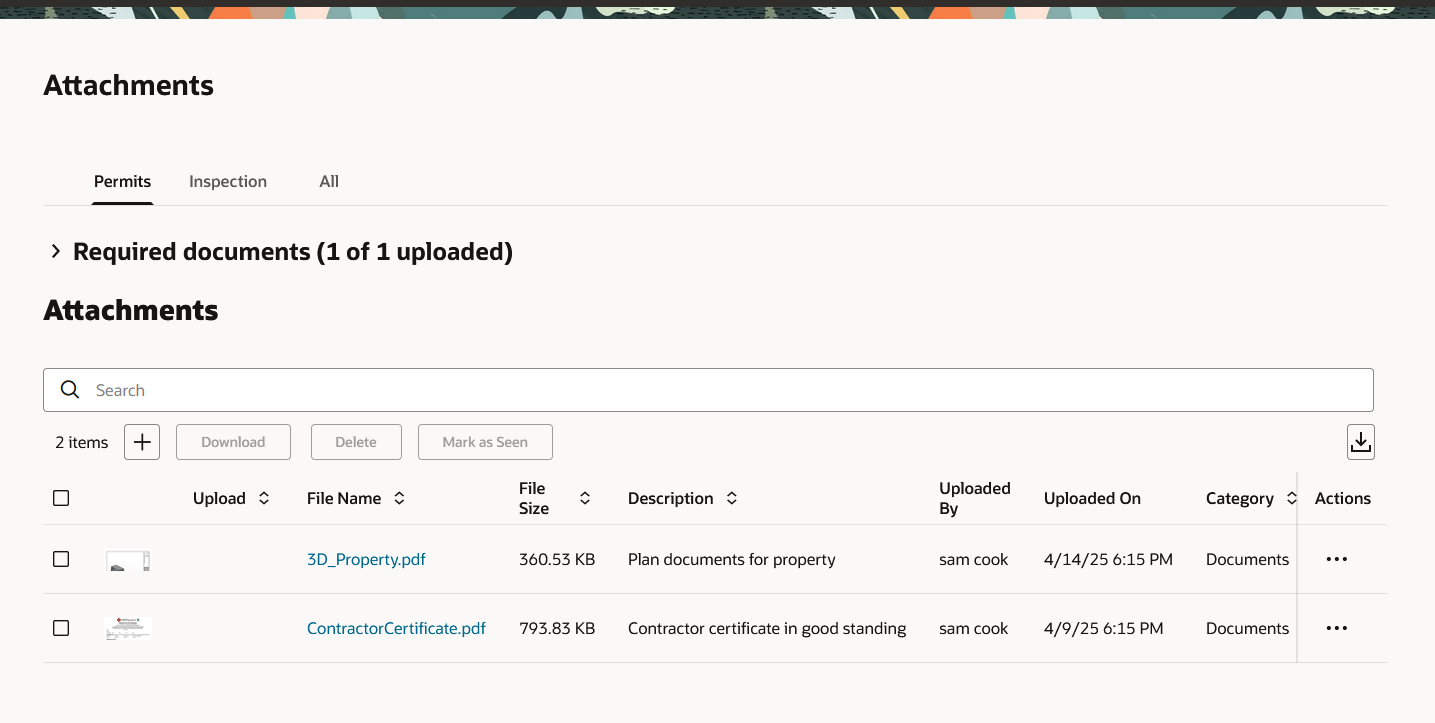
The page tabs and elements may vary on the Attachments page depending on the type of application or record. For example, the Attachments page for a permit displays the Permit, Inspection, and All tabs.
Here's information about the permit attachments tabs:
-
The Permits tab displays attachments added through the permit's Attachments page and required documents, if set up by your agency.
For more information about required documents, see Working with Required Documents.
-
The Inspection tab displays attachments that building inspectors uploaded in the Inspector Application related to the inspection checklists, inspection checklist items, or overall inspection.
For more information about Inspector Application for permit and business license inspections, see Performing Inspections on the Inspector Application and Working with Inspection Details.
-
The All tab displays attachments added from all sources, including the Attachments page, the Workflow page, the Inspector Application, plan reviews, and web form responses.
For more information about managing attachments for a permit workflow task displayed using the Redwood Experience, see Using Workflow.
The actions you can perform depend on your permissions.
Actions for Working with Attachments
Depending on your permissions for working with attachments, you can perform these actions:
|
Page Element |
Description |
|---|---|
|
Search |
Enter text to the search field to find attachments in the table. |
|
Click to add or upload a file as an attachment to the application on the Permits tab. You can also add attachments in the Required documents section. For more information, see Working with Required Documents. |
|
|
Download |
Select one or more attachment rows in the table and click to download the files. |
|
Delete |
Select one or more attachment rows in the table and click to delete. Note:
For permits, the Delete action appears only on the Permits tab. Furthermore, the security associated with your user ID may limit which actions are available to you. |
|
Mark as Seen |
Select one or more attachment rows in the table and click to indicate that the attachment was seen or read on the Permits tab. |
|
Click the three-dot actions icon in each attachments row to select and perform an action. Actions may include:
Note:
For permits, the Delete action appears only on the Permits tab. Furthermore, the security associated with your user ID may limit which actions are available to you. |
Viewing Attachment Details
Here's information about the attachments page in the detail pages for a permit application.
Click the Attachments link in the left panel to open the Attachments page. You may need to expand the section that includes the link.
On the Attachment page, you can view the attachments in each of the tabs. Here are the various page elements available when working with attachments.
|
Page Element |
Attachments Tab |
Description |
|---|---|---|
|
Preview image |
Permits, Inspections, All |
Click the small preview image to open the Attachment details drawer. On the drawer, you can see the first page of a PDF document or a larger version of an image file. Attachment preview is available for permits, planning applications, business licenses, code cases, account management, and contractors. |
|
Upload |
Permits |
Displays a New badge when an applicant uploads a PDF document to a permit or planning application that's in a plan review status. Only Permits or Planning and Zoning agency staff can see the badge, which is available on the Permits tab only. The badge is displayed until the document is marked as seen in the Plan Review Console or on the Attachments page, or added to a plan review cycle. It isn't available on phones or in the list view on the Permits tab. |
|
File Name |
Permits, Inspection, All |
View the filename with file type extension. Click the link to open the attachment preview. |
|
File Size |
Permits, Inspection, All |
View the file size. For example, 12.95 KB. |
|
Description |
Permits, Inspection, All |
View the description of the attachment as entered by the person who added the attachment. |
|
Uploaded By |
Permits, Inspection, All |
View the name of the person who uploaded the file. Registered public users see Staff instead of a name. |
|
Uploaded On |
Permits, Inspection, All |
View the date and time when the person uploaded the file. |
|
Category and Subcategory |
Permits, All |
View the document category for the attachment. The category and subcategory are available when a document group is specified during setup for the transaction type or in the contractor license options. The category and subcategory appear automatically when you upload an attachment from the Required documents section. Note:
This field isn't available for code enforcement case attachments. |
|
Protected |
Permits |
Displays an icon when a protected PDF document is added to an application in the system. The icon displayed depends on how your agency handles protected documents for permits and planning applications. A protected PDF document has any setting that is controlled by a password or is otherwise secured. Protected document icons can look like this:
Caution:
The system will always prevent you from uploading to an application password-protected documents that require a password to open. |
|
Source |
All |
View the source of the attached file on the All tab. Valid values can include:
For example, attachments added through the Inspector Application display Inspection in this field. Attachments added to web form questionnaire responses display Permits in this field. Note:
This column appears only on the All tab of the Attachments page for permit and business license applications. |
|
Source |
Inspection |
View the associated permit ID and whether the building inspector uploaded the file to an inspection checklist, inspection checklist item, or the overall inspection in the Inspector Application. Note:
This column appears only on the Inspection tab of the Attachments page for permit applications. |
|
Reference |
Inspection |
View inspection attachment information:
For inspection-level attachments, the field is blank. |
|
Required |
Permits |
Indicates whether the attachment satisfies the criteria for a required document. For more information, see Working with Required Documents. |
|
Final |
Permits |
Displays Yes when agency staff turn on the Final Document switch on the Attachment Details page for permit attachments. |
Adding Permit Attachments
You upload files to the Attachments page in the application details using the New attachment drawer. The attachments on the Inspection tab are uploaded by building inspectors in the Inspector Application.
The maximum file size is 150 MB depending on the page that you're uploading to in Oracle Permitting and Licensing. It may take several minutes to upload large files. The maximum file size in the Inspector Application is 25 MB.
Here's how to add permit attachments
-
Click the Add icon button.
-
Select the file to upload in the browser dialog box and click Open.
The file name appears on the New attachments drawer.
-
On the New attachments drawer, optionally enter a description of the file.
-
If the Category and Subcategory fields appear on the drawer, optionally select a document category and subcategory.
The category fields appear if the transaction type is associated with a document group. The document group defines the available values in these fields.
For more information, see the implementation documentation for Setting Up Document Categories and Subcategories.
Note:The document group for a transaction is based on the document group that was defined for the transaction type at the time the transaction is saved.
-
Click the Upload button.