Using the Main Map and Explore Your City Map
The agency-facing Main Map and the public-facing Explore Your City map provide options for viewing existing applications and projects on the map and for selecting properties so that you can start new applications.
To provide different types of users with the most appropriate interface, there are separate main maps for agency users, registered public users, and anonymous public users. These maps can have different map profiles, giving you control over whether various map options are available to each audience. See Setting Up Map Profiles.
Transactions that are missing shape or geometry information can’t be displayed on the map. Oracle recommends that your agency run the Update Shape on Transactions process after migrating transactions from the legacy system and after restarting the GIS servers due to maintenance. For more information, see Using the Process Monitor
Selecting Properties Using the Basic Search
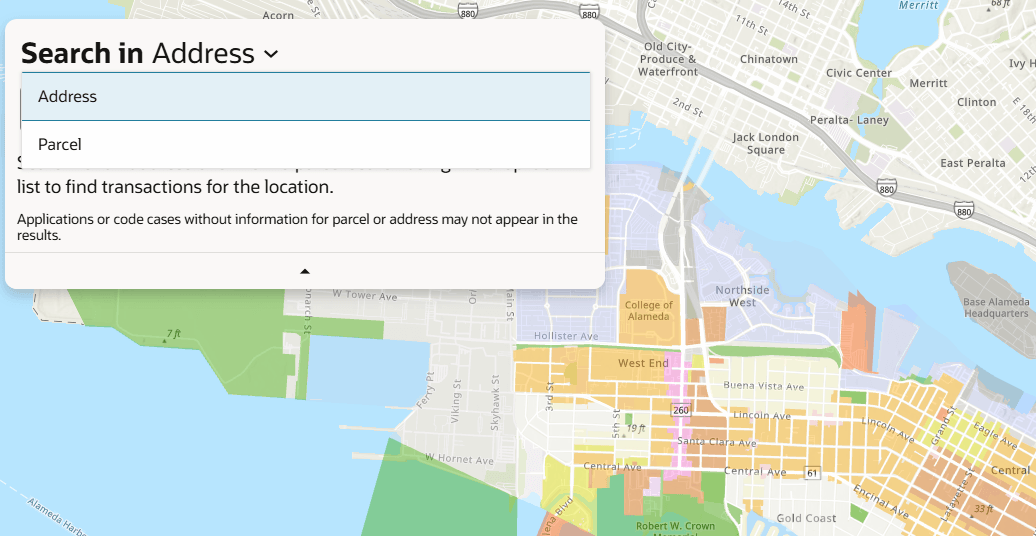
Use the basic search panel to find a location by address or parcel number. The panel appears over the map and includes a drop-down list, search field, optional filters, help text, and an expand or collapse control.
This example illustrates the Search in menu on the Explore Your City map. Users can choose Address or Parcel before entering search text.
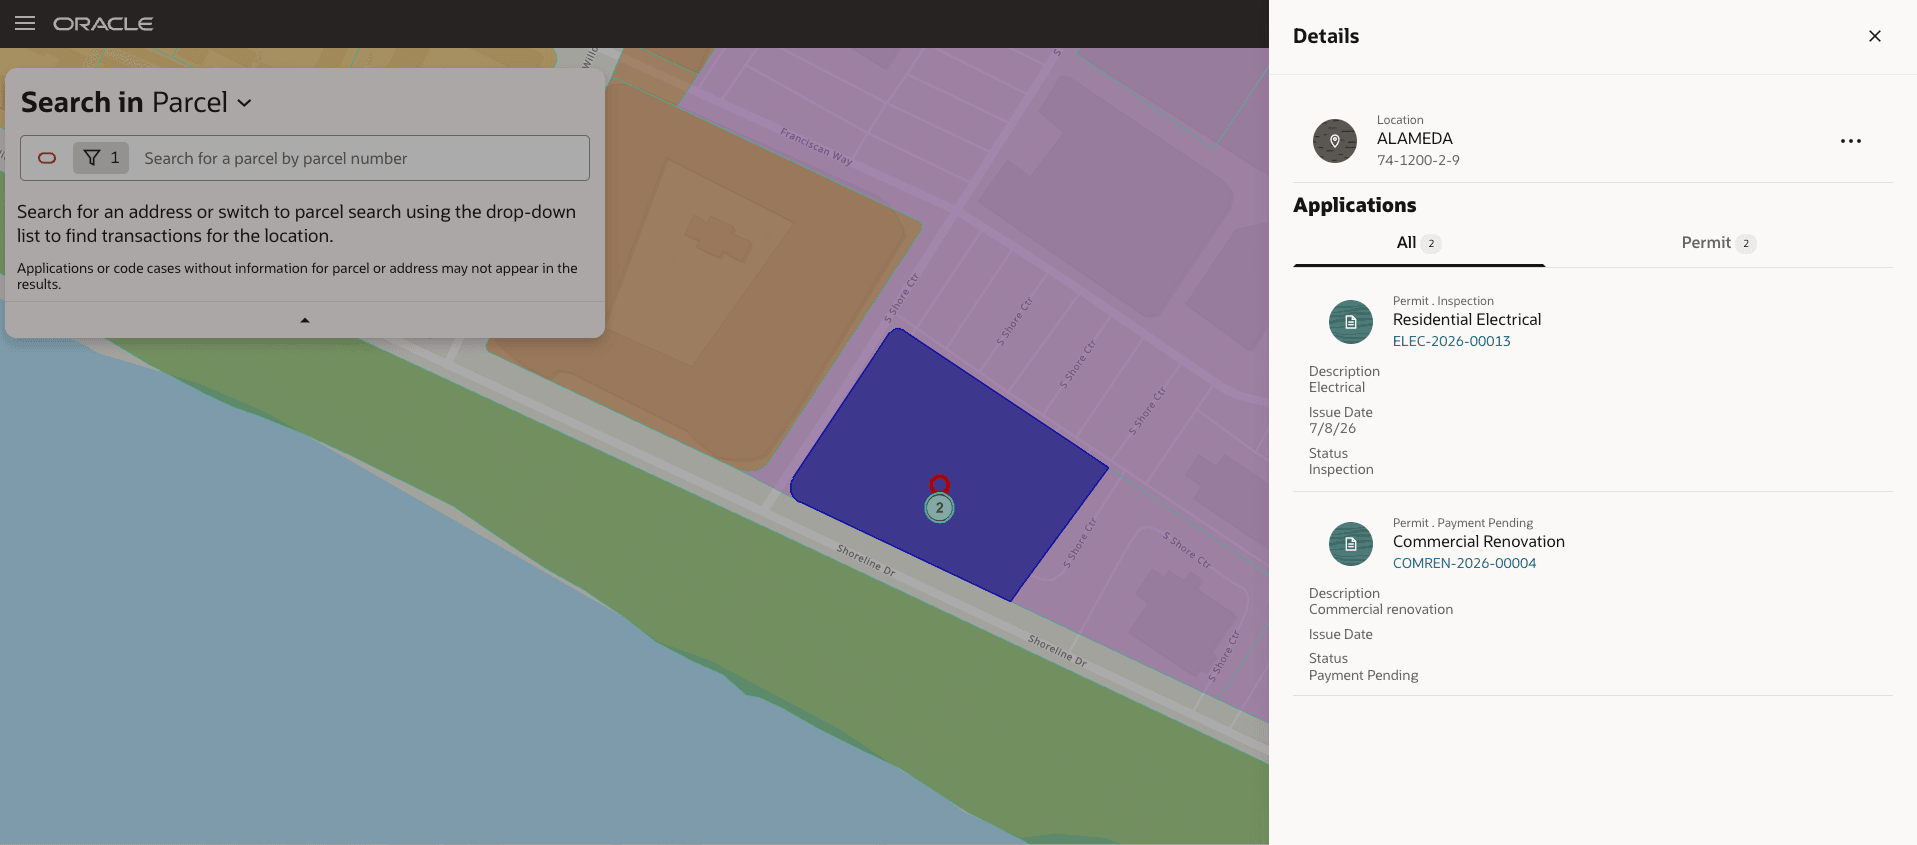
This example illustrates a parcel search result after a map marker is selected. The Details drawer shows the selected location and the related applications.
To search for properties and view transactions:
-
Users can search either by Address or Parcel. Address is selected by default, and users can use the drop-down list to switch between Address and Parcel when searching for locations and related transactions.
-
Enter a full or partial value in the search field.
-
Use the search suggestions when they appear or perform the search from the search field.
-
Review the matching location markers on the map. A transaction-count marker appearshen applications are associated with the selected location.
-
Select the map marker or transaction-count marker to open the Details drawer for the location.
Agencies can choose to hide their business license and other business information from appearing in the search results and on the maps. For details on how to hide business information, see Setting Up Agency-Level Options for Business Licenses and Managing Business Information.
Selecting Properties Using the Selection Toolbar
Selection Tools
Selection tools are used to select actual properties or parcels from the underlying map layer. These tools are available only when they are enabled for the map profile.
In Explore Your City, users can select only one property or parcel at a time. Because of this, the Selection toolbar displays only the Point selection tool. Users can click a point on the map to select the property that intersects with that point.
After selecting a property, users can view existing transactions for that property or start a new application, depending on their role and access.
Sketch Tools
Sketch tools are used to draw temporary markings on the map. These drawings are for visual reference only and do not select actual property records from the map layer. Sketches are temporary and are not saved.
Users can sketch on the map using tools such as:
| Sketch Toolbar Button | Description |
|
Draw a point |
Click one or more points on the map to select the properties that contain the points. |
|
Draw a polyline |
Click two or more points on the map to draw a multi-segment line connecting the points that you click. Double-click the final point to stop drawing. All properties that intersect the resulting polyline are selected. |
|
Draw a polygon |
Click three or more points on the map to draw a polygon. Double-click the final point to stop drawing. All properties that are at least partially within the resulting polygon are selected. |
|
Draw a rectangle |
Click and drag on the map to draw a rectangular selection area. All properties that are at least partially within the resulting rectangle are selected. |
|
Draw a circle |
Click and drag on the map to draw a circular selection area. All properties that are at least partially within the resulting circle are selected. |
|
Select by rectangle |
Click and drag to draw a rectangular selection area on the map. Properties within or intersecting the rectangle are selected. |
|
Select by lasso |
Click and drag to draw a freehand selection area around properties on the map. Properties within or intersecting the lasso area are selected. |


Using the Selected Locations List
The selected location details drawer enables users to review information about a location and the transactions associated with that location. Selecting a map marker opens the details drawer.
To review information on the location details drawer:
-
Select a location marker on the map.
-
The drawer displays the selected address or parcel in the Location section.
-
The All tab shows the total number of associated applications. Additional tabs, such as Permits, Planning, Licenses, and Cases, appear based on the enabled offerings and available records.
-
Select a transaction-type tab to filter the application list to that transaction type.
-
Review information of each associated application, that includes the transaction type, status, application name, record number, description, issue date, and status details.
-
Click a linked record number to open the corresponding detail page in a new browser tab. Depending upon the user’s application access, only relevant information will be displayed.
-
Click the Close icon in the Details drawer to close the drawer and return to the map view.
-
To start an application for the selected properties, click the Apply button (not available to anonymous users).
The Apply page appears so you can select an application type and start an application. If the application intake form includes a Property section, the property information will be prepopulated based on the selected properties.
The actions Go to address details and Go to parcel details are available only to agency users. Business license and case detail hyperlinks are not available to anonymous users.
Anonymous users do not have access to actions that require sign-in, such as starting an application.
If the selected property has an associated business license that is marked to be hidden, then the icon label will not include it in its count.