New User Defined Content Task Type for Journeys
You can now use the new User Defined Content task type to display custom content from external end points in journeys. This feature allows the user to define a journey task using the new task type and invoke a custom REST API. The journey task UI displays the response returned by the API call, as formatted text in the panel drawer and task section.
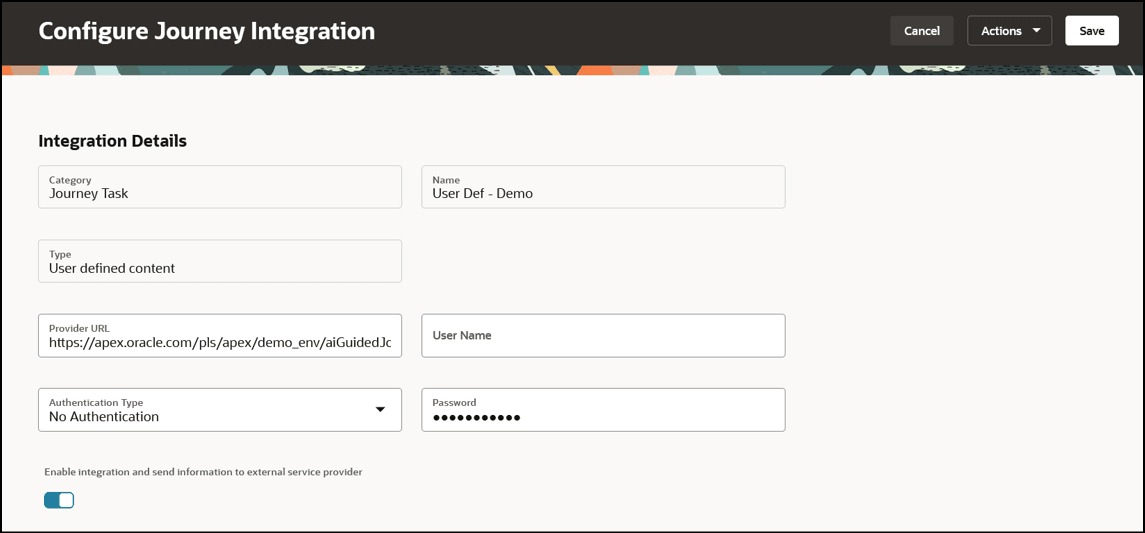
Configure Integration for User Defined Content
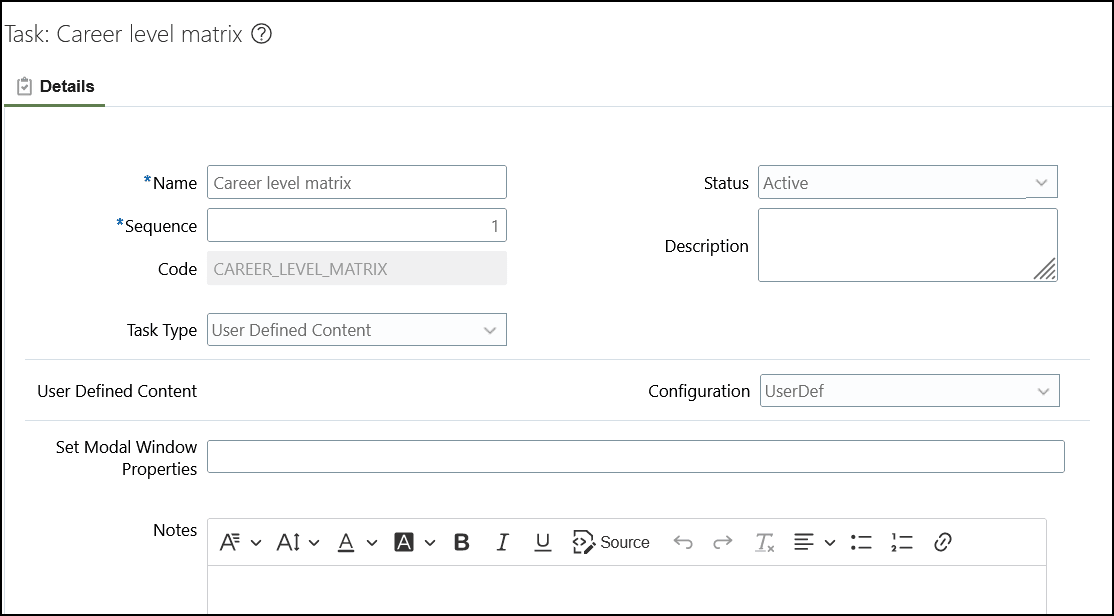
Associate Task with the Integration
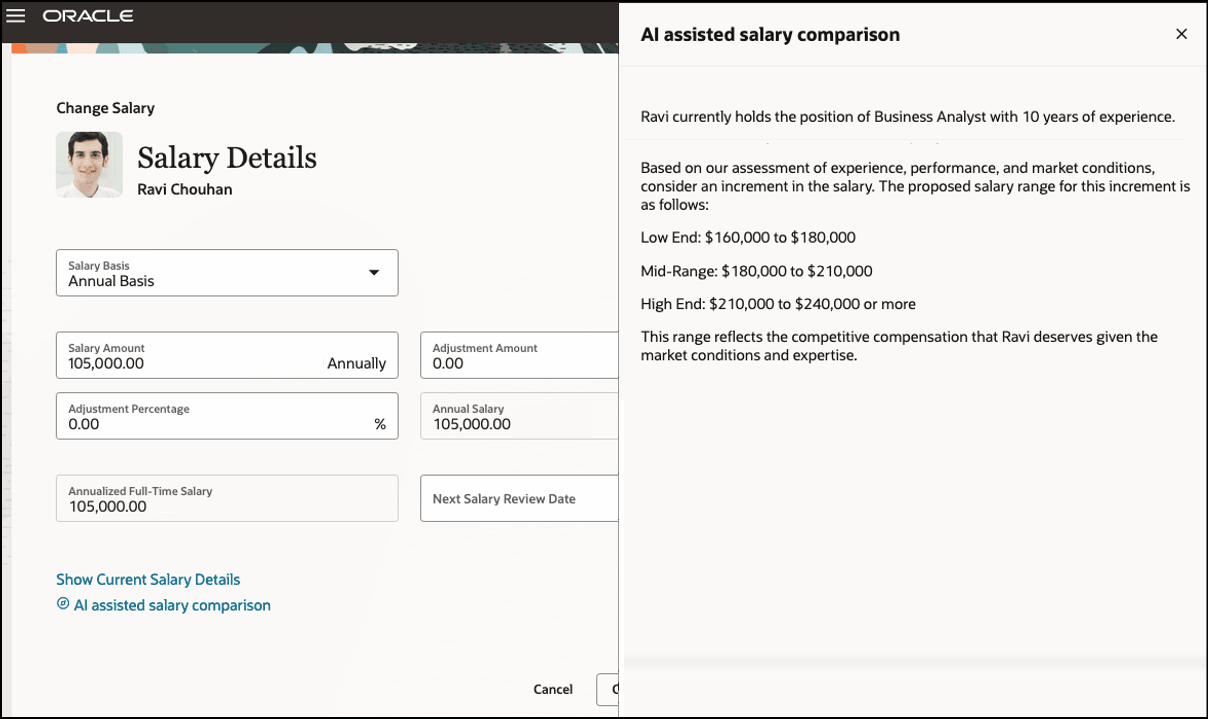
Formatted Text in Panel Drawer of Guided Journey UI
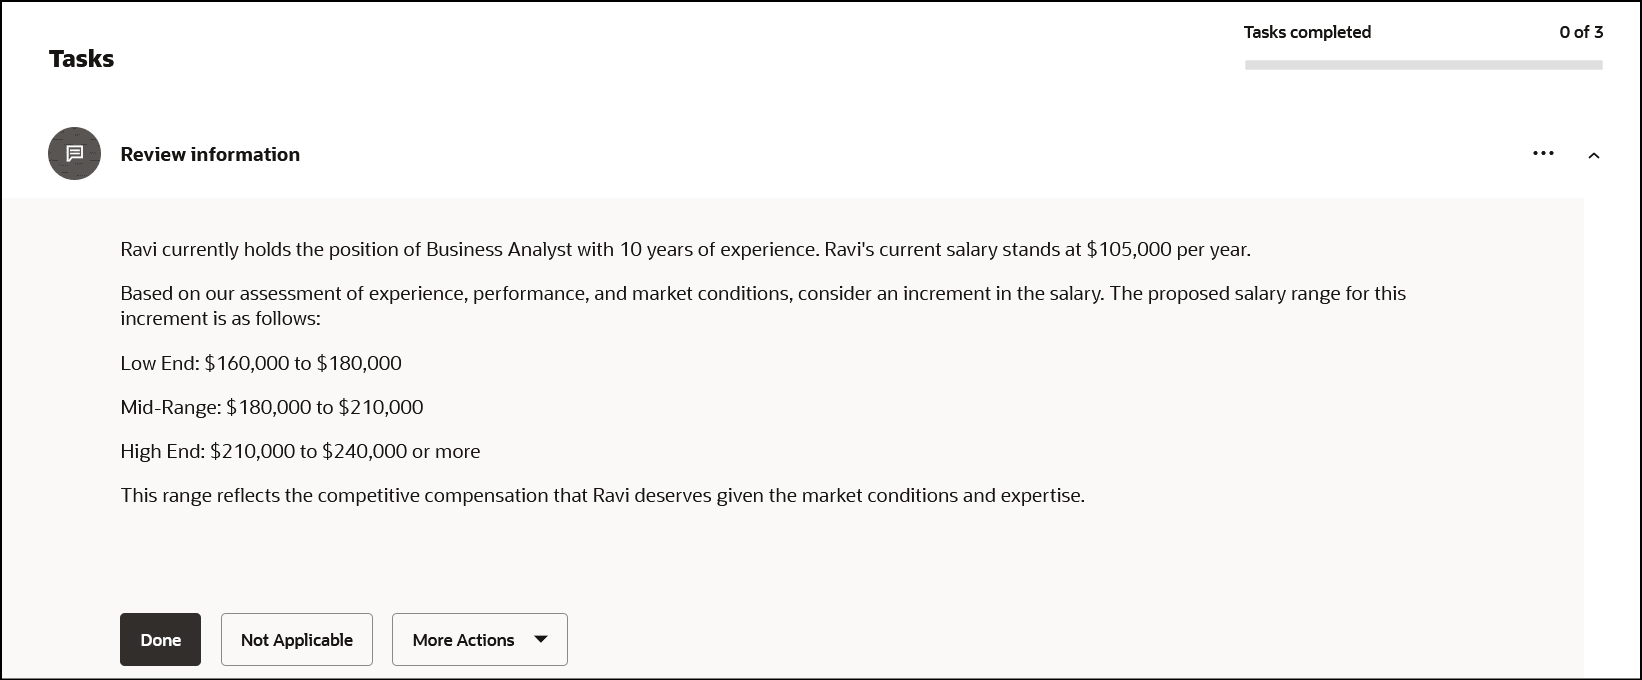
Formatted Text in Task Section of Journey UI
The new task type allows the user to connect to a custom defined REST API to display additional content.
Steps to Enable
-
Configure the journey integrations task. To do this, follow these steps:
-
On the home page, click the My Client Groups tab.
-
Click Show More under QUICK ACTIONS.
-
Click the Checklist Templates quick action in the Employment area.
-
In the Checklist Templates page, click the Integrations tab, and then click Add.
-
Enter the values as shown in this table:
-
Field Value Integration Category
Journey Task
Name
User-defined name for the integration, the name you enter here becomes available in the list of values when you configure the journey task.
Integration Type User defined content. Provider URL
Enter the URL to invoke your custom REST API.
User Name
Enter the user name to invoke the custom REST API.
Authentication Type
Select the appropriate authentication value for your custom REST API.
Password
Enter the password to invoke the custom REST API.
-
Select the Enable integration and send information to external service provider check box.
-
-
Validate the integration. To do this, follow these steps:
-
Click Validate to confirm that the integration works.
-
Click Save and Close. The integration is successful if no errors are displayed.
-
-
Create a journey task and associate the journey integration you created. To associate the journey integration, follow these steps:
-
Navigate to the Checklist Templates page.
-
Click the journey name for whose task you want to associate the journey integration.
-
Click the Tasks tab.
-
Click the task name for which you want to associate the journey integration.
-
On the Details tab, in the Task Type list, select User Defined Content.
-
In the Configuration field, select the integration code you defined when configuring the journey integrations task.
-
Click Save and Close two times.
-
Click Done.
-
Tips And Considerations
-
Only 4000 characters of the response will be displayed in text format.
-
The response is only displayed on the UI and not stored anywhere.
-
This feature is only available when using guided journeys on Redwood pages.
-
This feature is available for all journey categories except the Survey category.
Key Resources
For more information about journeys, refer to the Implementing and Using Journeys guide on Oracle Help Center.