Redwood Experience: Job Application Filter Enhancements
Configure which job application filters are available on job application lists, including extensible flexfields (EFF).
EFF Filters for Job Applications
With this new feature, you can provide the job application filters users need to find the best candidates. Also, the filters UI can be simplified by hiding any filters that aren't relevant.
Steps to enable and configure
Here are the steps to configure job application filters.
Step 1: Configure extensible flexfields (EFF) context and segments for job application filters
- In the Setup and Maintenance work area, click the Tasks icon.
- Click Search.
- Search for the Manage Extensible Flexfields task.
- Click the task name.
- On the Manage Extensible Flexfields page, search for the name Person EIT Information.
- In the Search Results section, select the Person EIT Information row.
- In the Actions menu, click Edit.
- On the Edit Extensible Flexfield: Person EIT Information page, click Manage Contexts.
- On the Manage Contexts page, in the Search Results section, click the Create icon.
- On the Create Context page, create the context you need. Enter values for Display Name, Code, API Name, Behavior (single row or multiple rows).
- On the Context Usages tab, click the Create icon to define the usage of the context.
- Click Save.
For details on extensible flexfields, see the Extensible Flexfields chapter in the Configuring and Extending Applications guide.
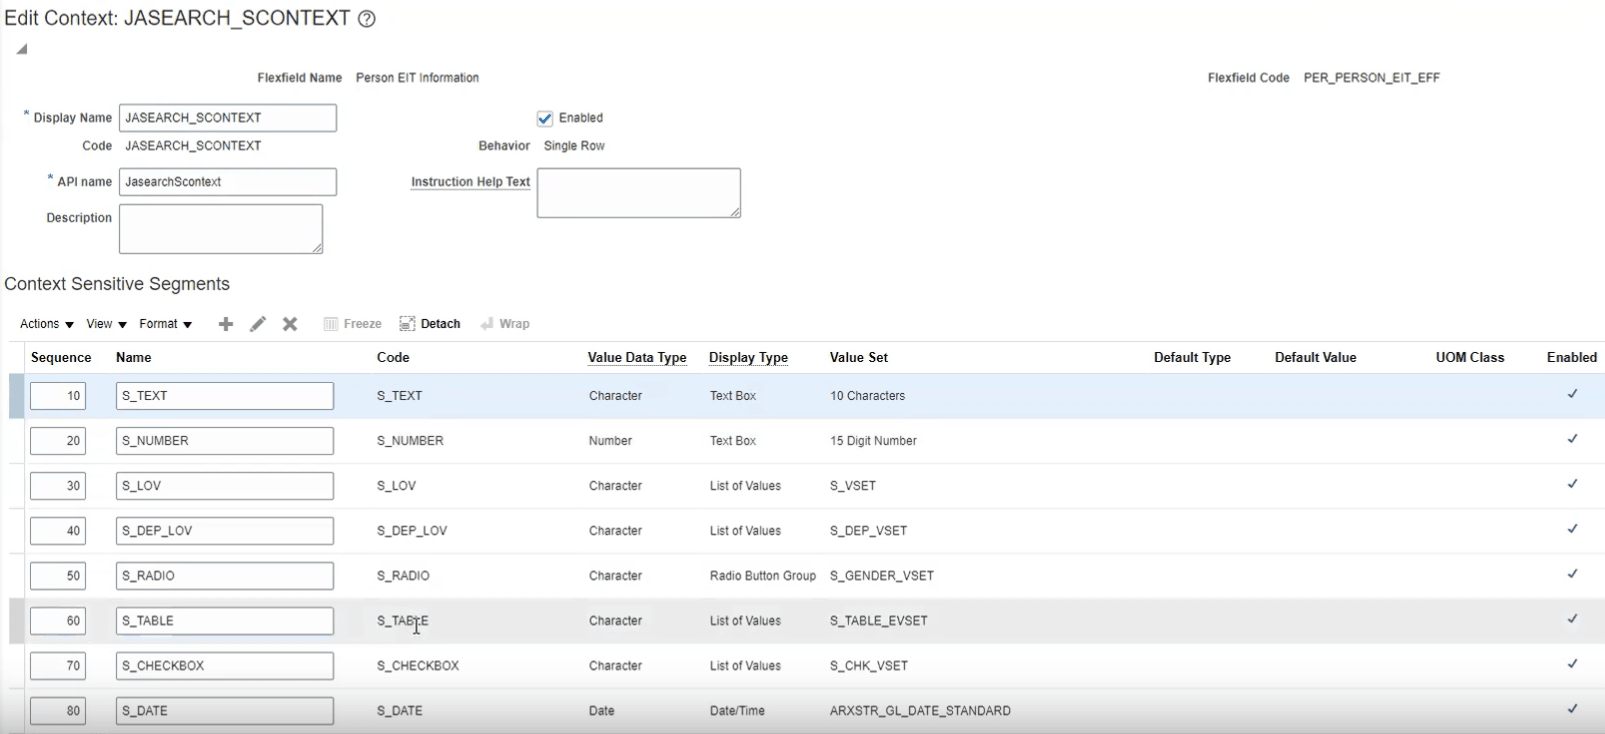
Example of Single Row Context Configuration
Step 2: Configure EFFs that need to be dynamically indexed in the job application index
- In the Setup and Maintenance work area, click the Tasks icon.
- Click Search.
- Search for the Manage Search Indexes task.
- Click the task name.
- On the Manage Search Indexes page, search for the fa-hcm-jobapplication index.
- Click the Configure icon. The page displays all the filters but only EFFs can be configured on this page.
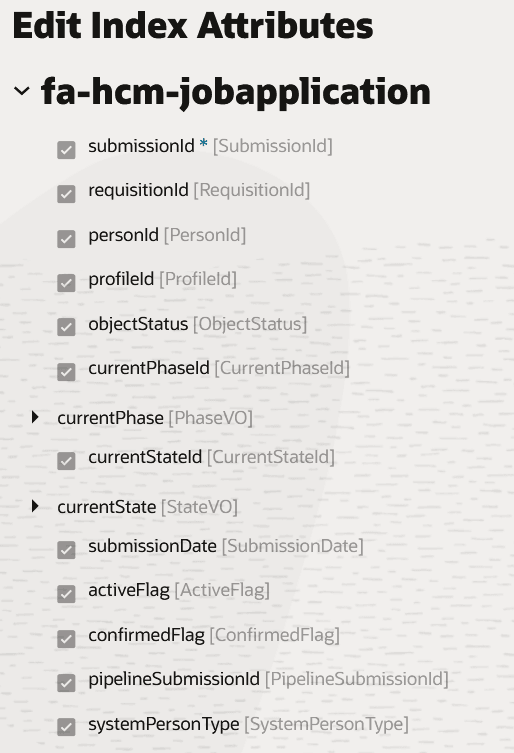
Index Attributes
- The EFF segments that you created appear under extraInfoDataEff.
- For proper ingestion, always select these mandatory fields for each flexfield.
- EFFLineId
- SubmissionId
- PeiInformationCategory
- If you select a LOV, Checkbox, or Radio button segment:
- Select the value and description if valueset is not table based.
- Select segment name if valueset is tablebased. Value and description are not applicable for table based.
- Click Save and Close.
You then need to run the full ingestion. In Tools > Scheduled Processes, run the scheduled process ESS job to create index definition and perform initial ingest to OSCS. The Index Name to Reingest is fa-hcm-jobapplication.
If you haven't yet enabled advanced filters in responsive UI, you need to enable the job application attachment indexing, prior to running the initial ingestion of the search index. For details, see the Enable Advanced Job Application Filters topic in the Implementing Recruiting guide.
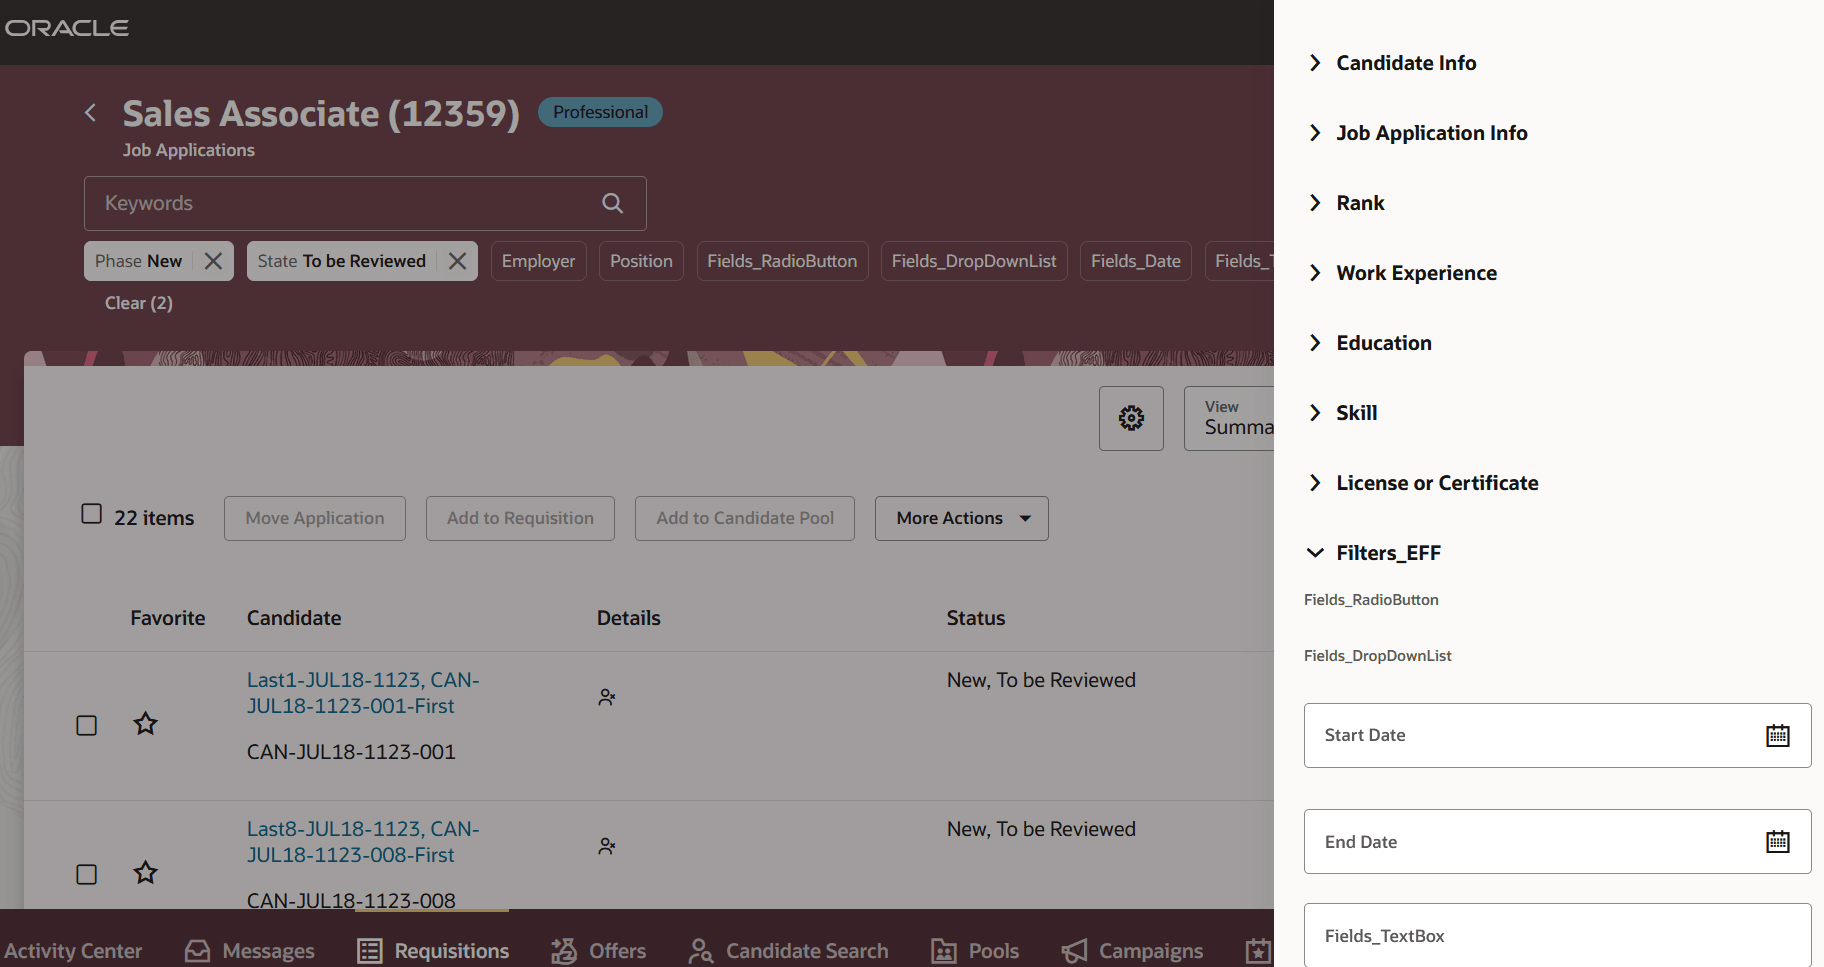
Step 3: Personalize filters
You can decide which filters are displayed on the Redwood job applications list page.
You need the HRC_MANAGE_SEARCH_VIEWS_PRIV privilege to access the Search Views page.
- Go to My Client Groups > Quick Actions > Show More > Data Exchange > Search Views.
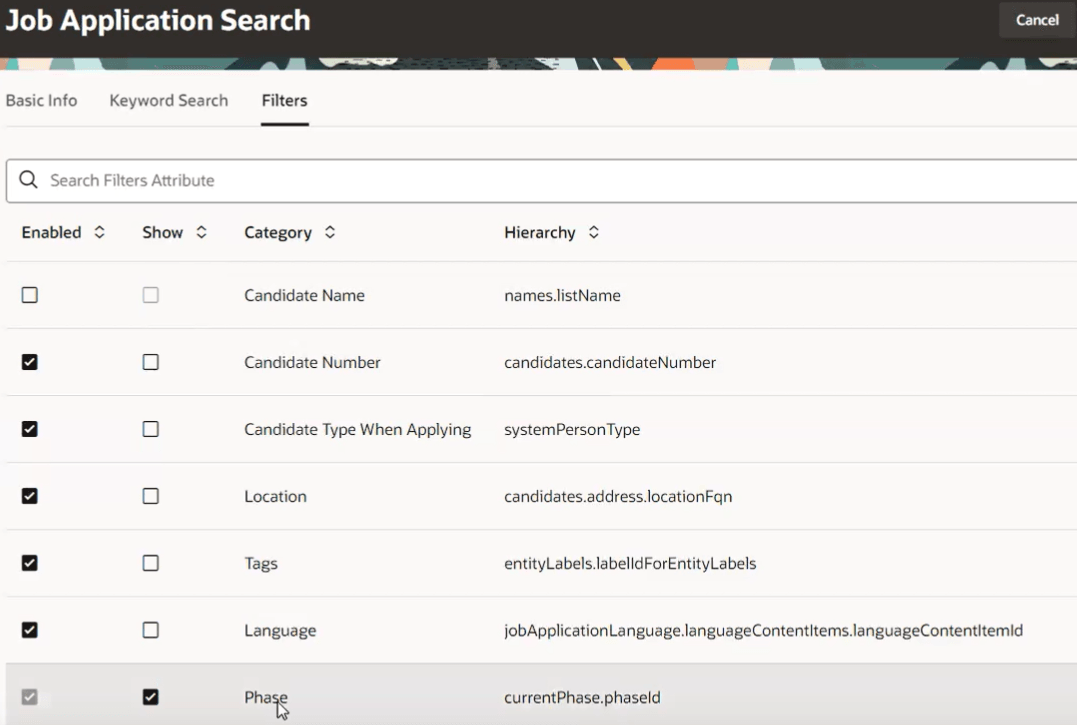
- On the Search Views page, click Job Applications Search.
- On the Job Applications Search page, click the Filters tab. All filters are displayed. EFFs filters are labeled Custom Field.
- Select the Enabled checkbox to indicate which filters you want to display in the Filters panel.
- Select the Show checkbox to indicate this is a default filter that will appear as a filter chip on the job application list page. Otherwise, the filter will appear in the Filters panel.
- For the EFF filters, select Dynamic facet for the filter type.
- Click Save and Close.
Job Application Search View