Menu Manager
This feature provides you with a greatly improved Menu Manager which has been designed to simplify and improve the process for creating and editing your menus. The new Menu Manager will replace the previous Menu Manager - now labelled as Menu Manager (Legacy) in an upcoming update.
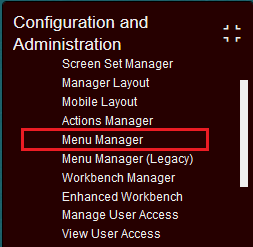
The new Menu Manager page is accessed via Configuration and Administration > User Configuration > Menu Manager.
Menu Manager
The example below highlights the navigation, usage and improvements provided with the new Menu Manager.
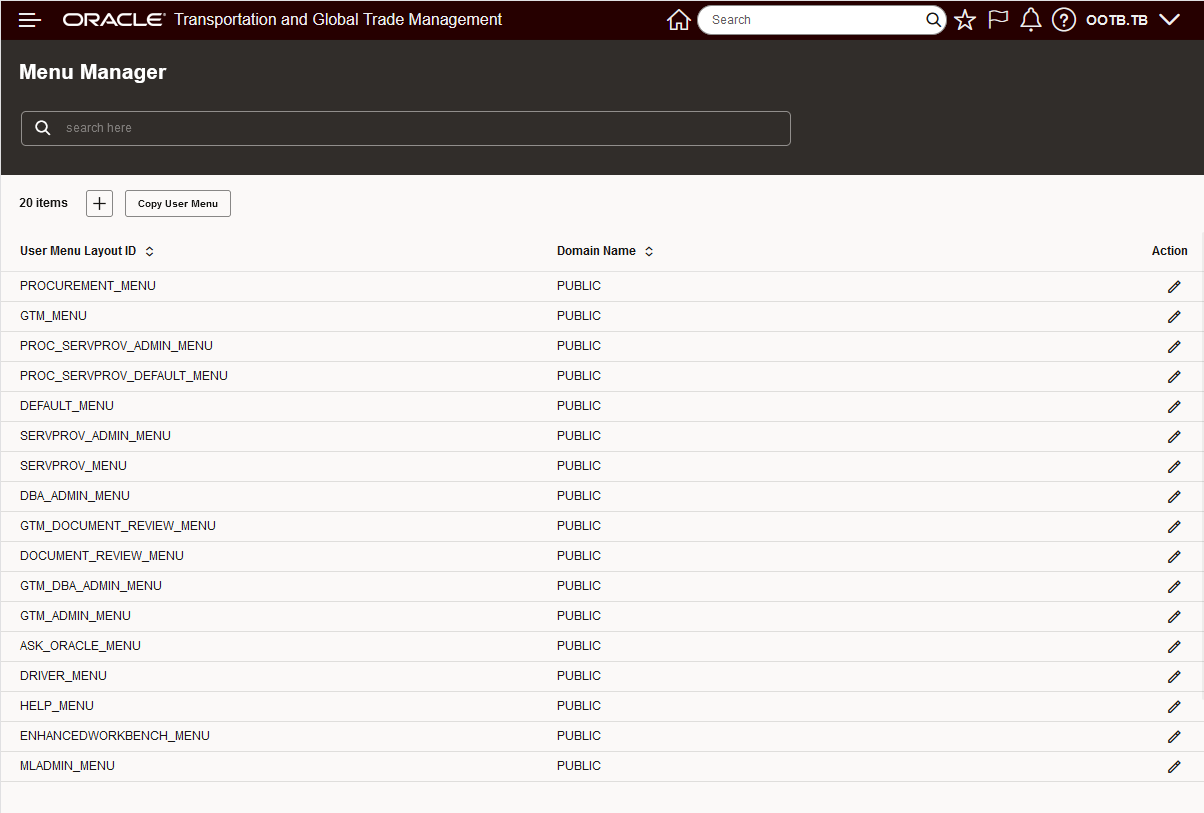
When the Menu Manager is selected, the UI below is provided.
Menu Manager
You will notice that the new Menu Manager follows a new pattern (vs the standard Finder and Finder Result pattern) for displaying results and searching/filtering the results. The Menu Manager initially displays the results in the User Menu Layout ID grid, the search is used to filter the list to the layout(s) desired. In the example below only the PUBLIC and GTM User Menu Layouts are shown. This was accomplished by entering the search criteria PUBLIC and GTM in the Search. Note that the values entered here are called Filter Chips and the condition between the filter chips entered is an AND, so PUBLIC AND GTM.
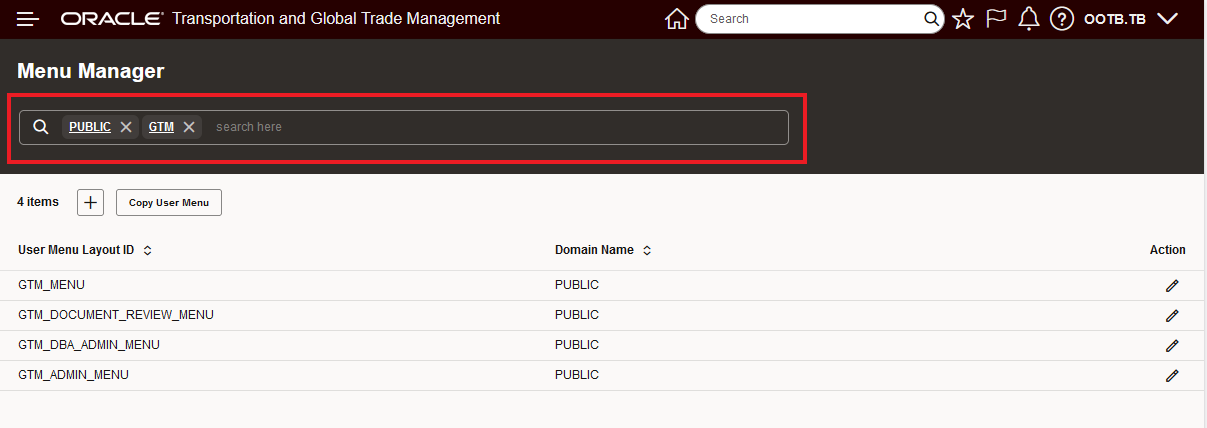
Search Example - GTM and PUBLIC
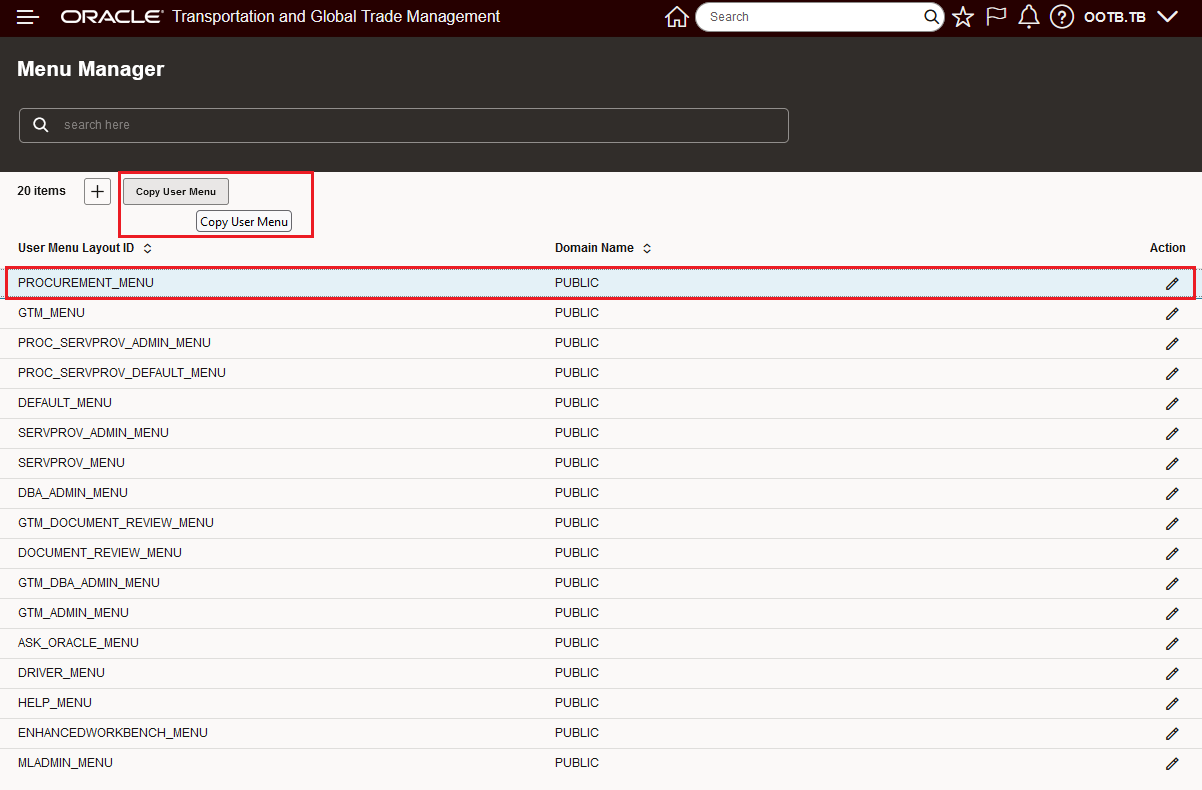
The Copy User Menu action, like in the legacy Menu Manager, allows you to select and copy an existing User Menu Layout ID. In the example below the PROCUREMENT_MENU will be copied and then used to demonstrate some of the new features and capabilities provided.
Copy Layout Example
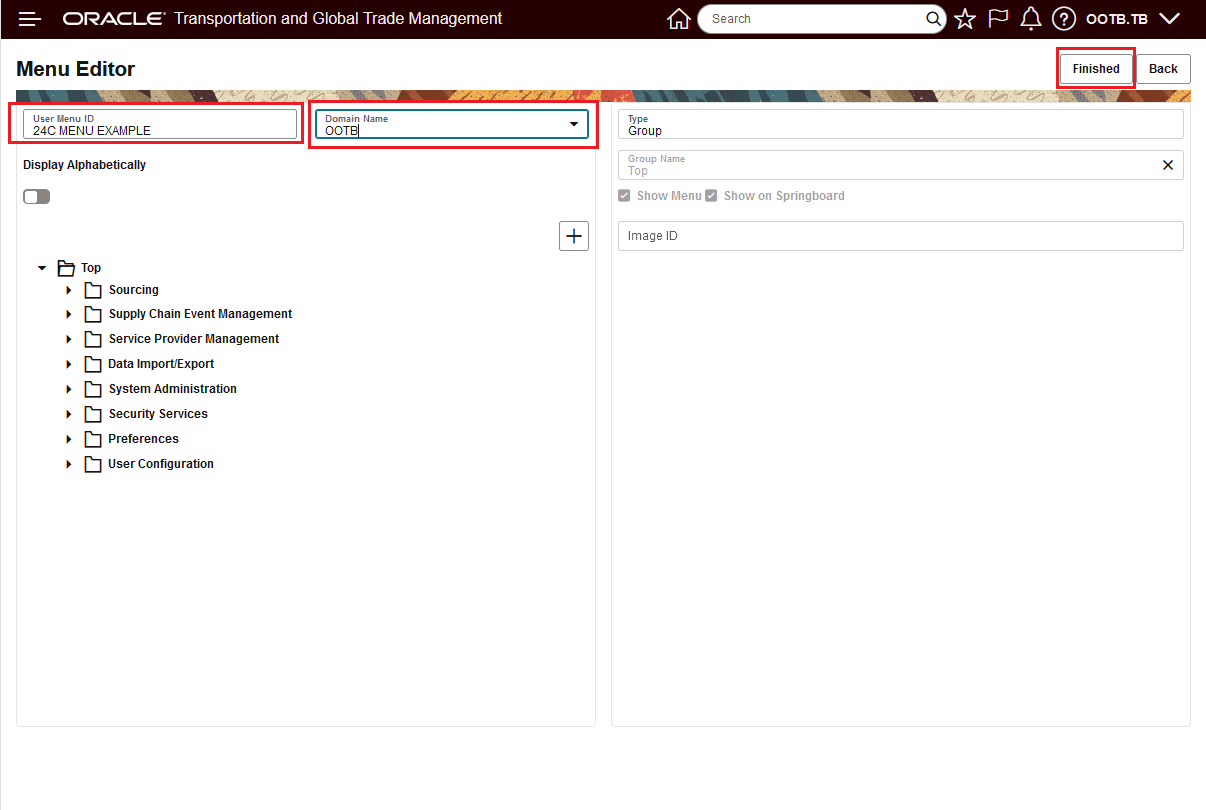
After selecting Copy User Menu action you are automatically be taken into the Editor, in this example the only changes will be to provide a new layout name for the menu and select the Domain Name. Once the new Layout Name and Domain are provided, select Finished to save the change.
Copy Layout Example - Menu Editor
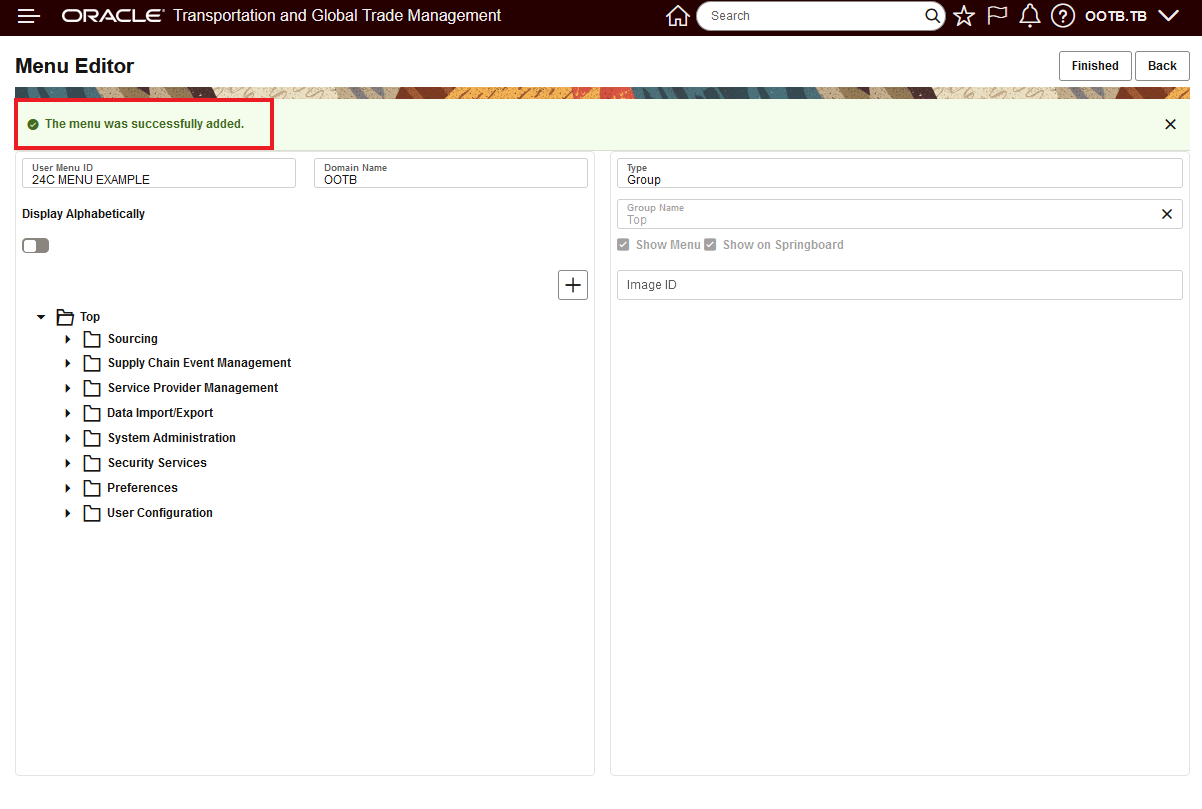
After selecting Finished, the acknowledgement screen below is displayed, note that selecting Finished does return you to the Menu Manager, but keeps you in the Menu Editor.
Copy Layout Example - Finished Confirmation
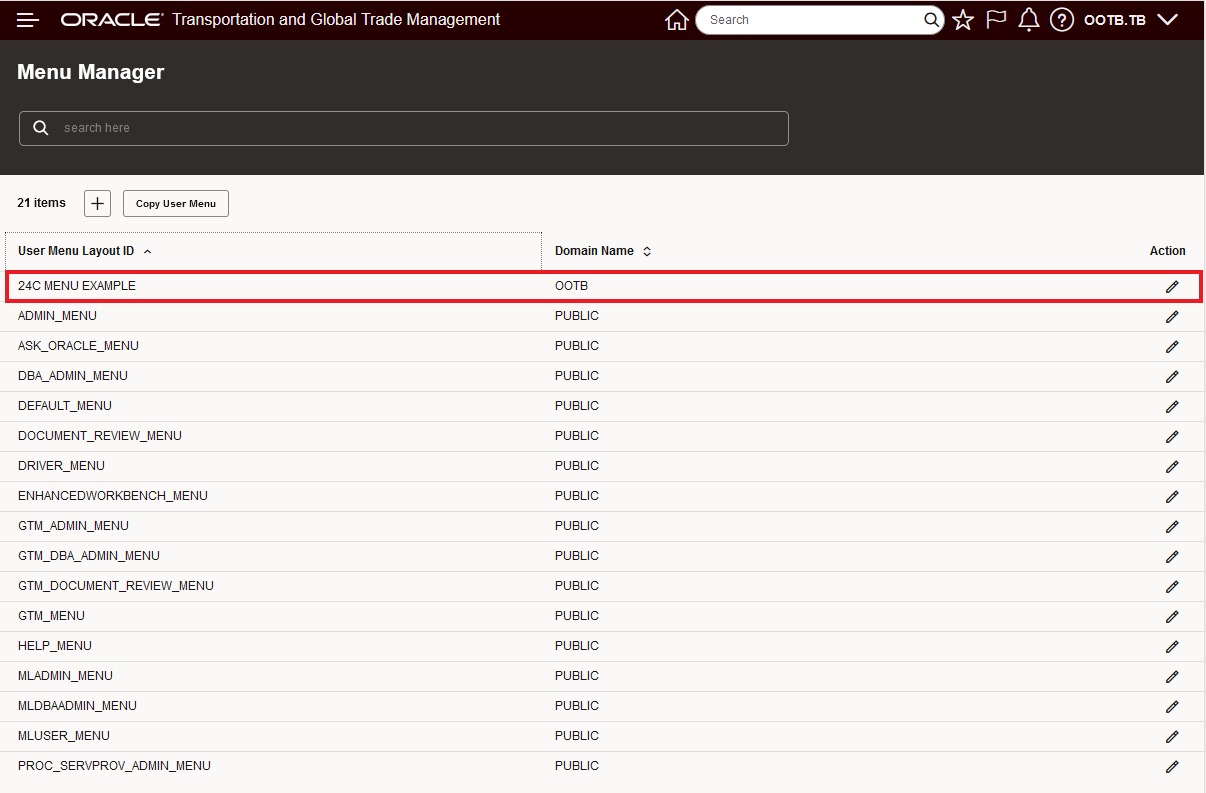
To navigate back to the Menu Manager, you must select the Back option in the Menu Editor. The copied User Menu Layout is below -- the list has been sorted to show the new User Menu Layout ID on top.
.
Copied Layout Example - Menu Manager
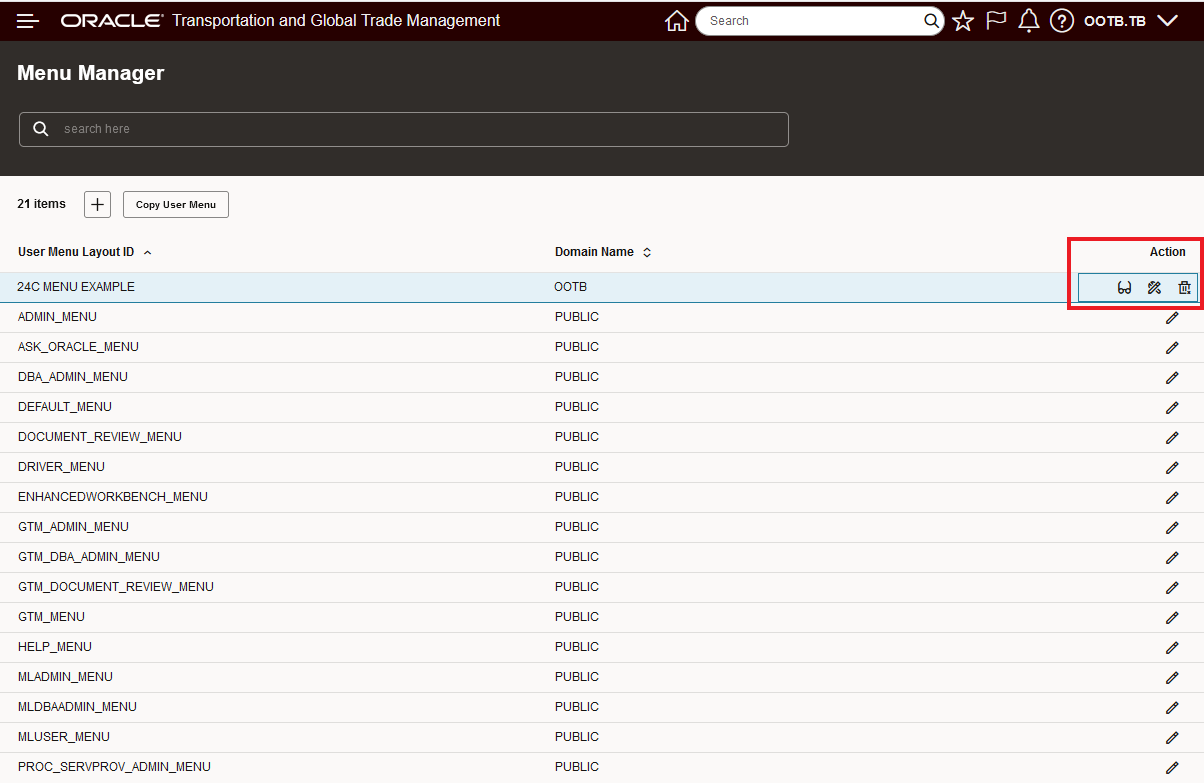
The Action menu under the pencil icon supports three actions for the selected User Menu Layout-> View, Edit, Delete.
User Menu Layout - Actions - View, Edit, Delete
In the example below, the 24C MENU EXAMPLE will be Viewed using the View option (glasses) from Action menu.
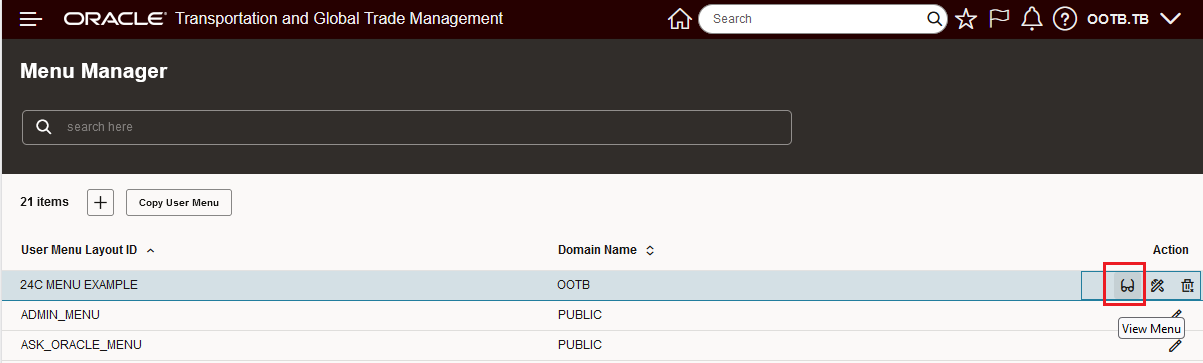
View Action
User Menu Layout ID Menu Editor View.

User Menu Layout View
In the example below, the 24C MENU EXAMPLE will be Edited using the Edit option from the Action menu.
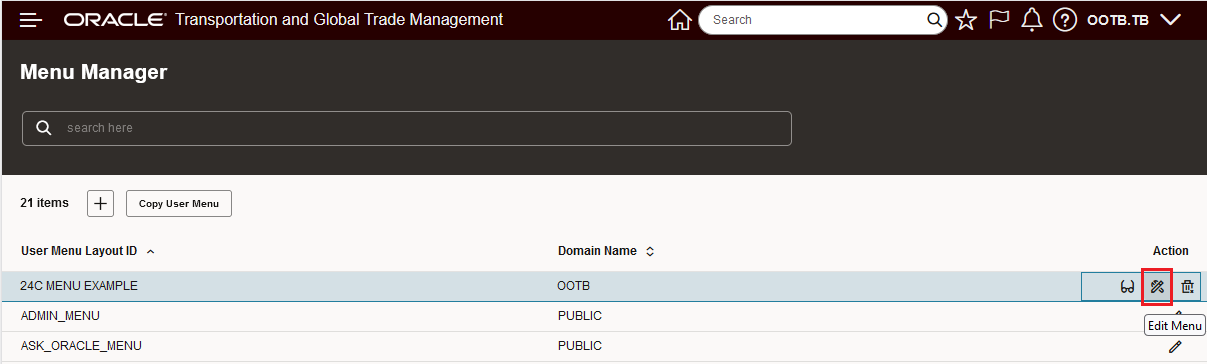
User Menu Layout Edit
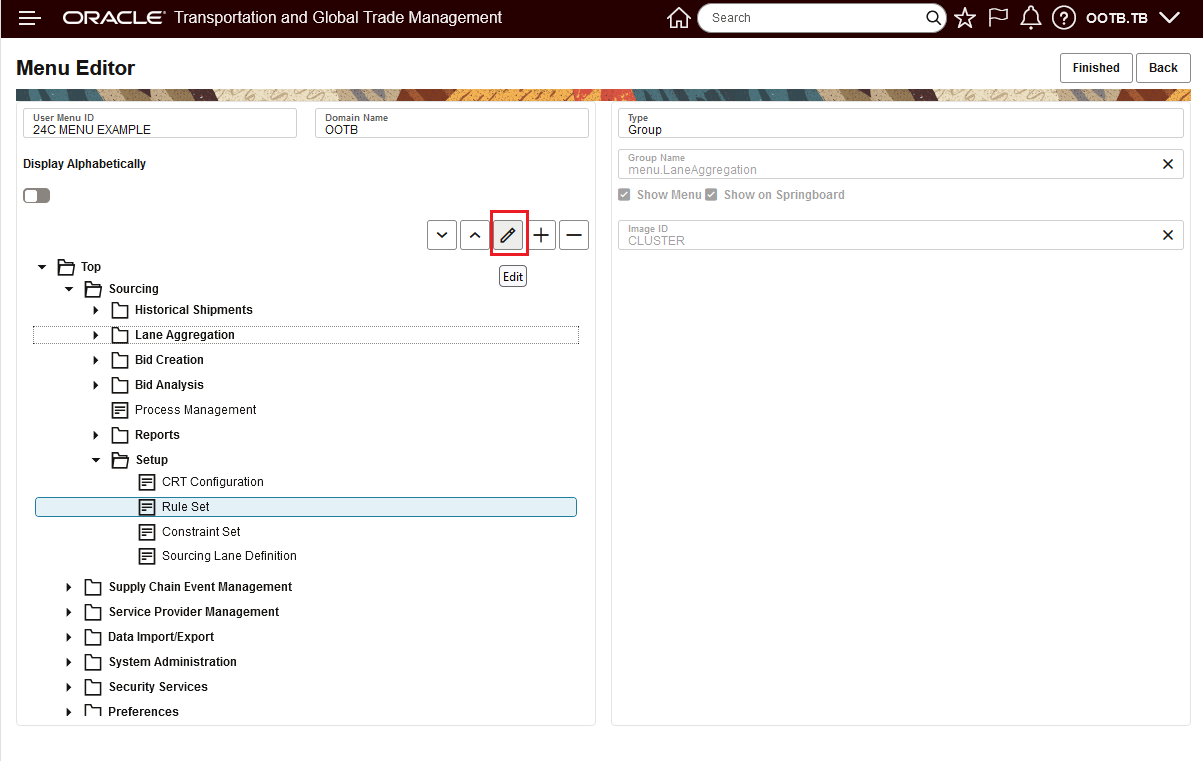
Shown below is the Menu Editor, provided in Edit mode. Options available include: Move Down, Move Up, Edit, Add, and Delete.
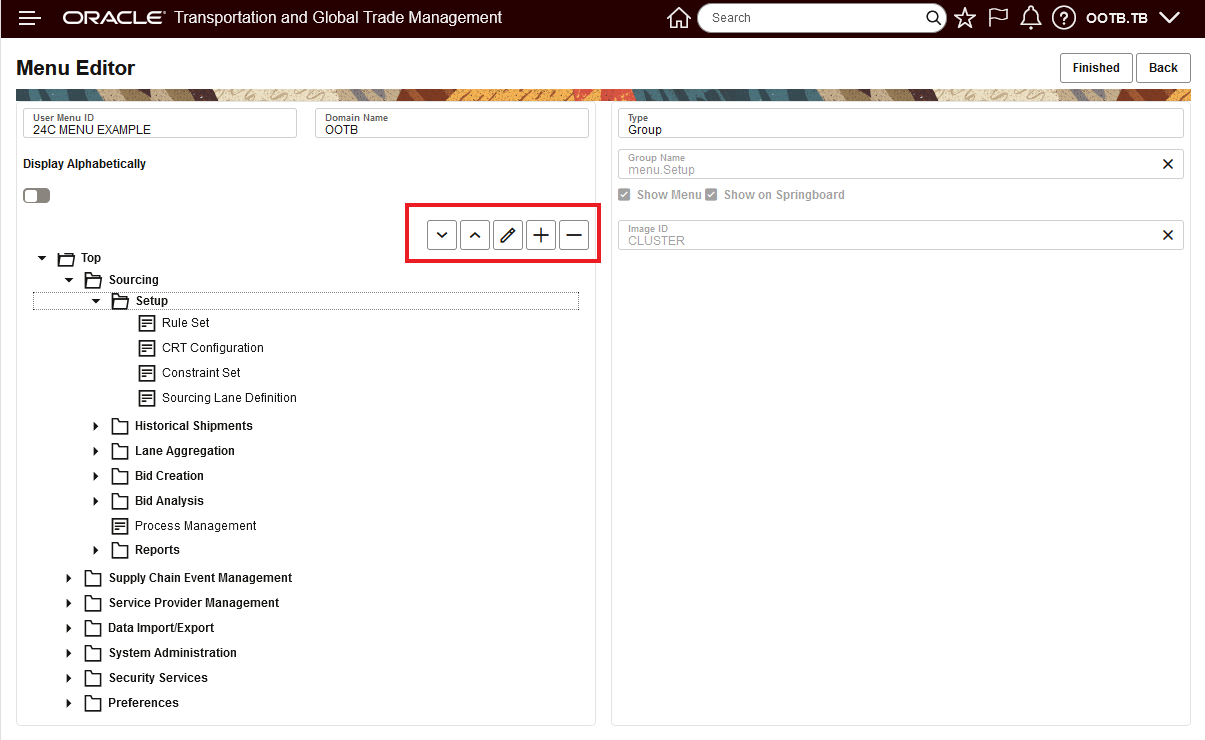
Menu Editor - Edit Options
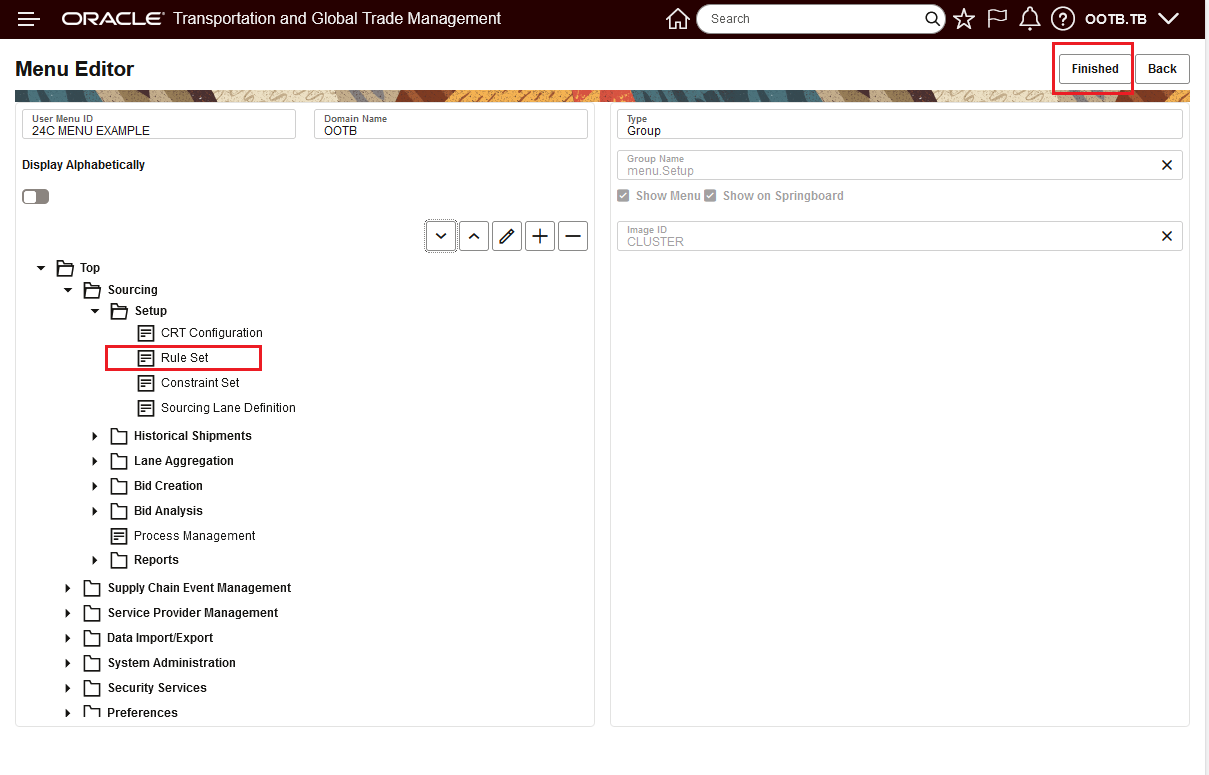
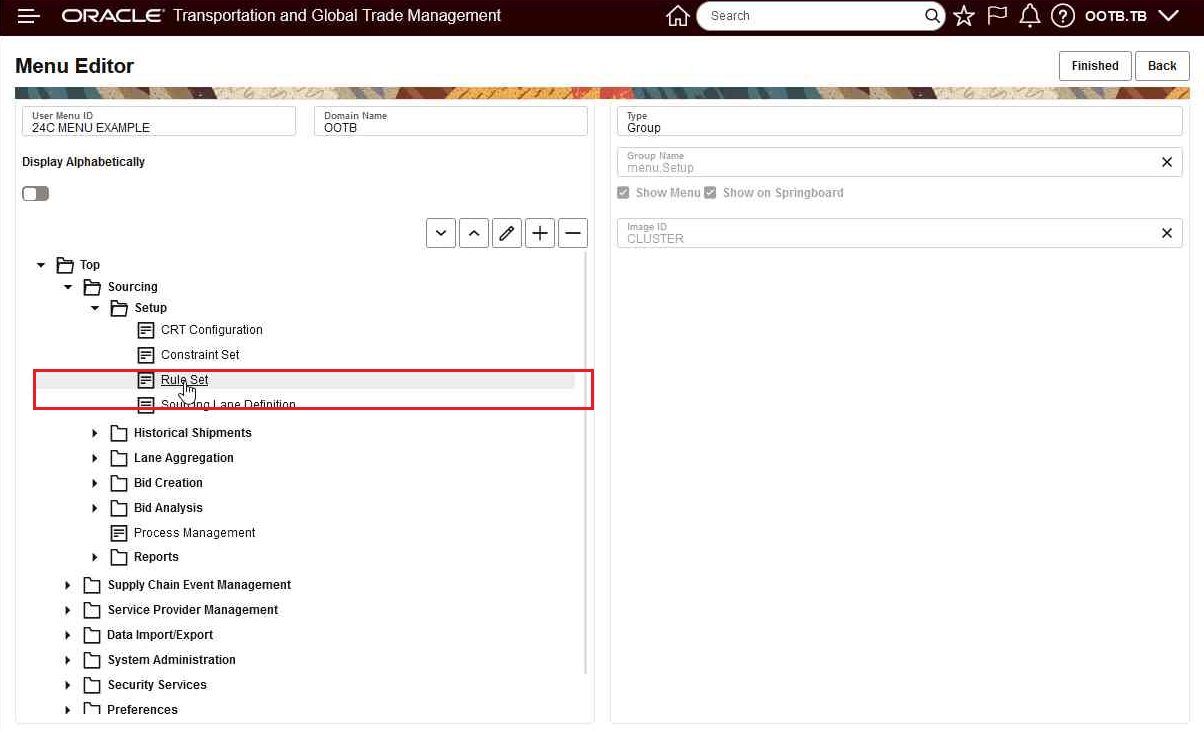
In the example below, the Rule Set will be moved down in the Setup Group.
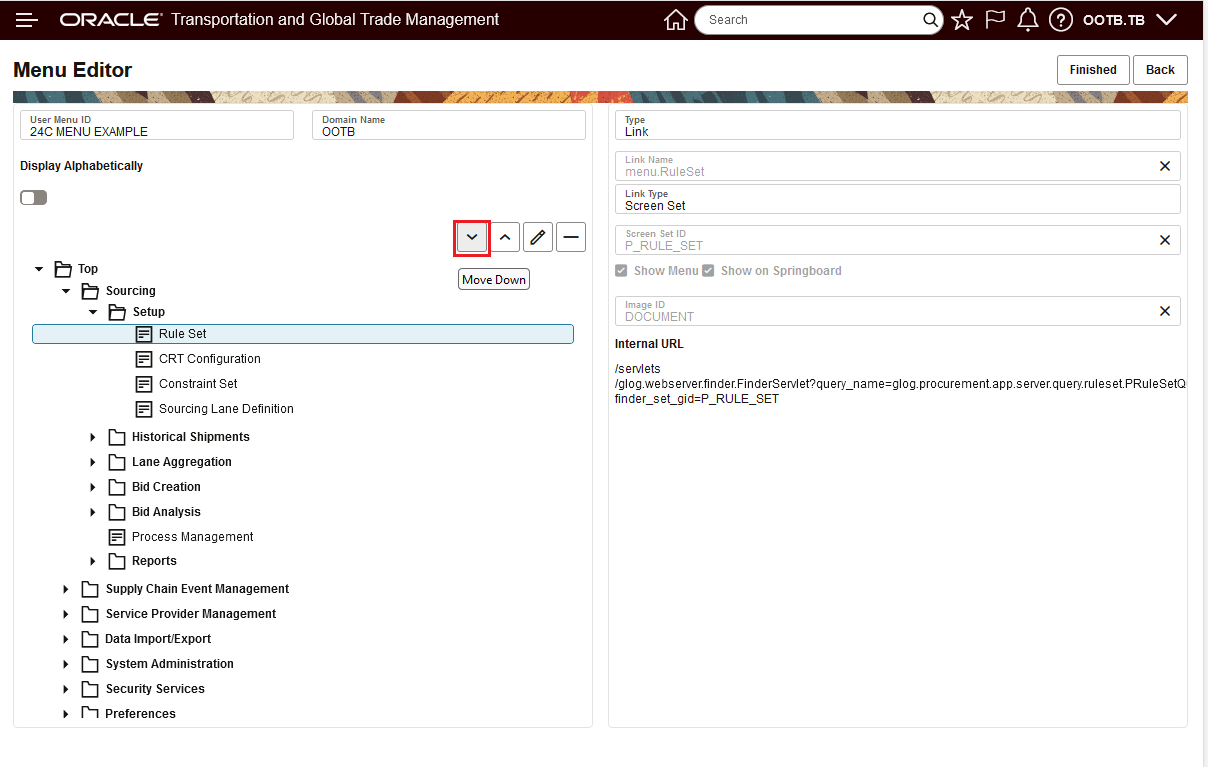
Move Down
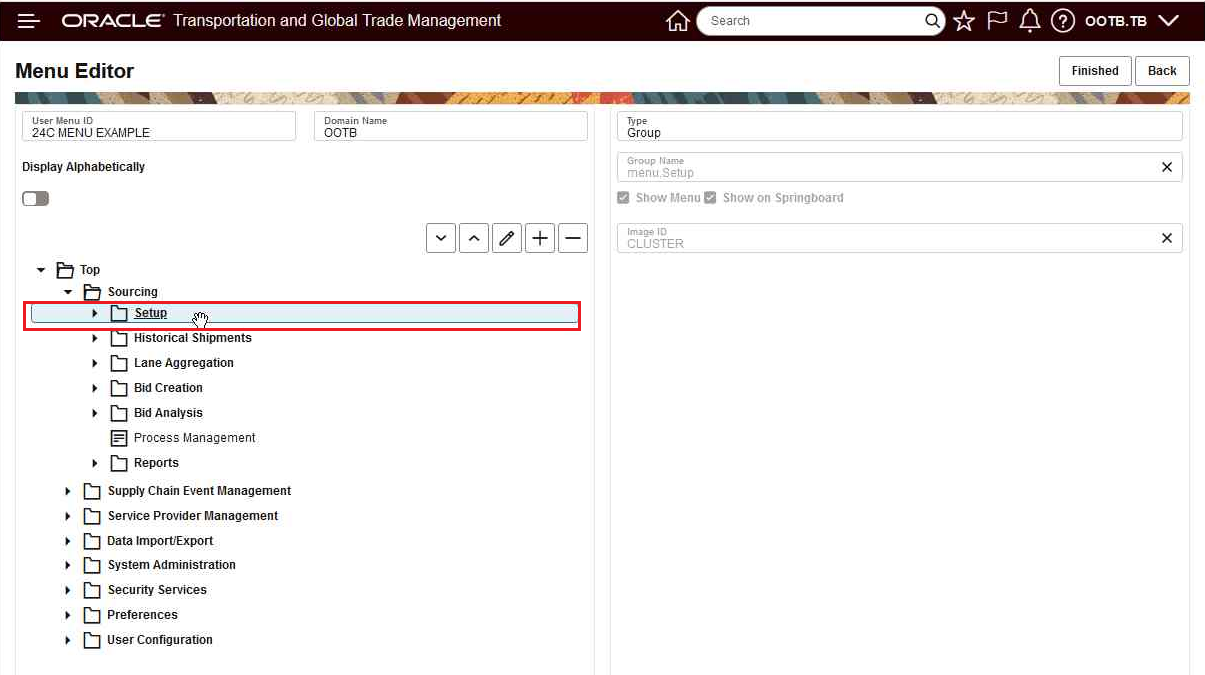
Below is the result of the Move Down. Note that Finished must be selected to save the change.
Move Down Move Result
In the example below, the Historical Shipments group will be moved up.
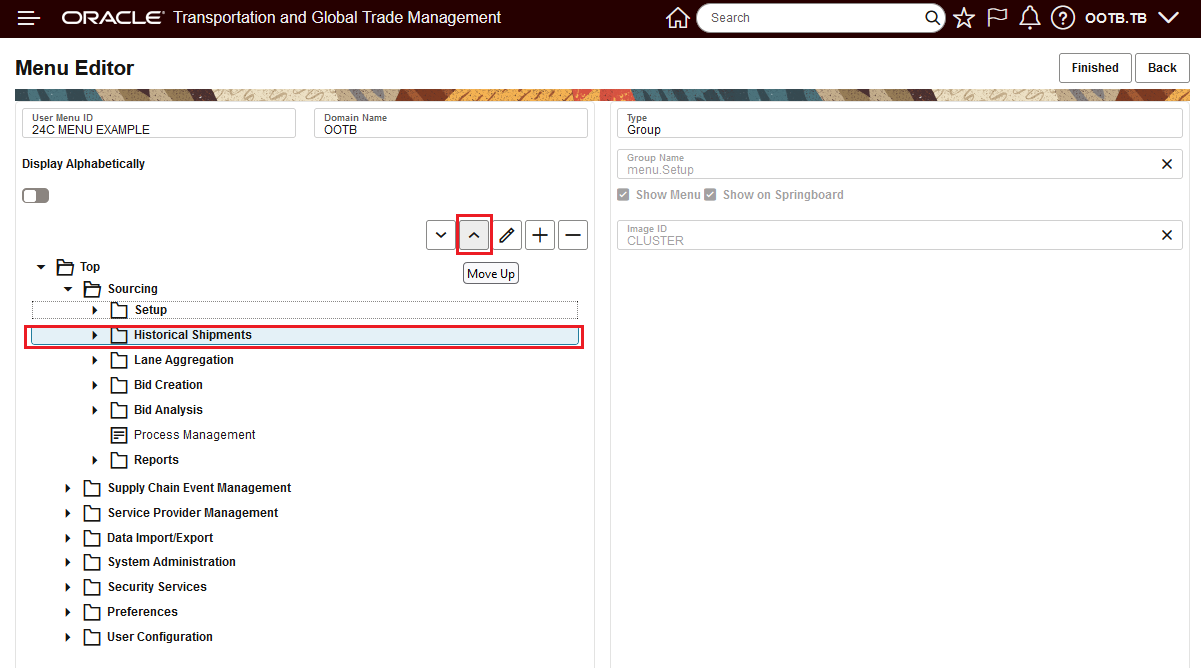
Move Up
Below is the result of the Move Up. Note that Finished must be selected to save the change.
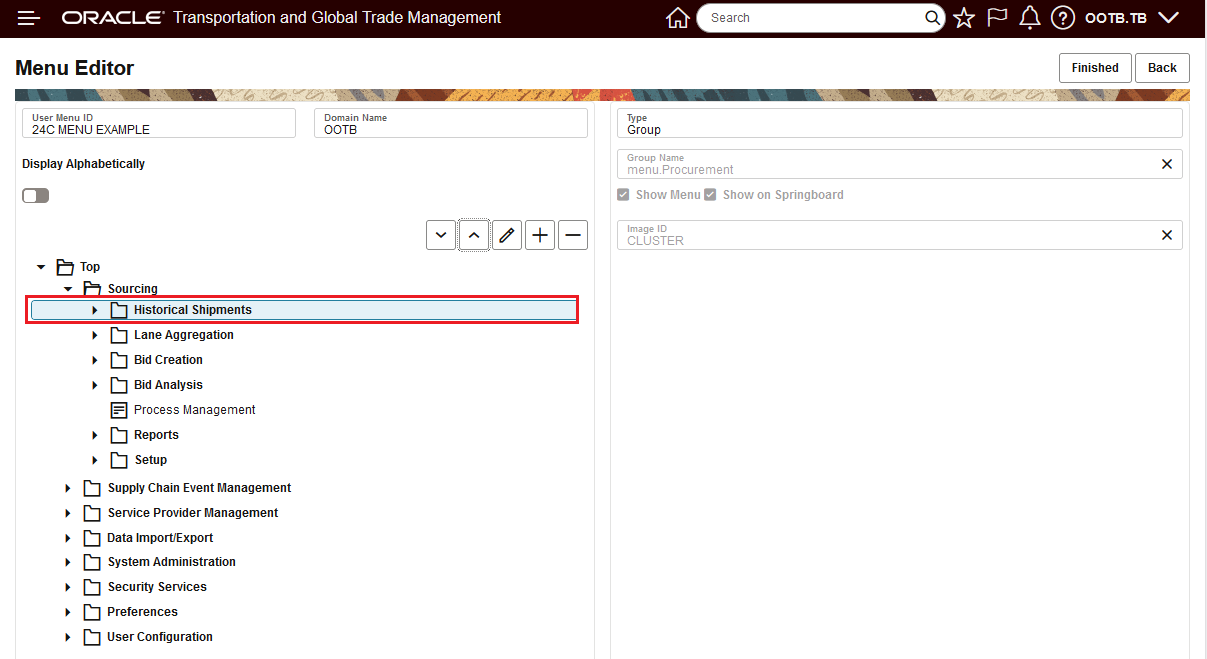
Move Up Result
The Move Down and Move Up are similar to what was available in the legacy Menu Manager - the new Menu Manager also supports a Drag and Drop approach for moving objects within the menu layout. In the example below the Rule Set will be moved via Drag and Drop.
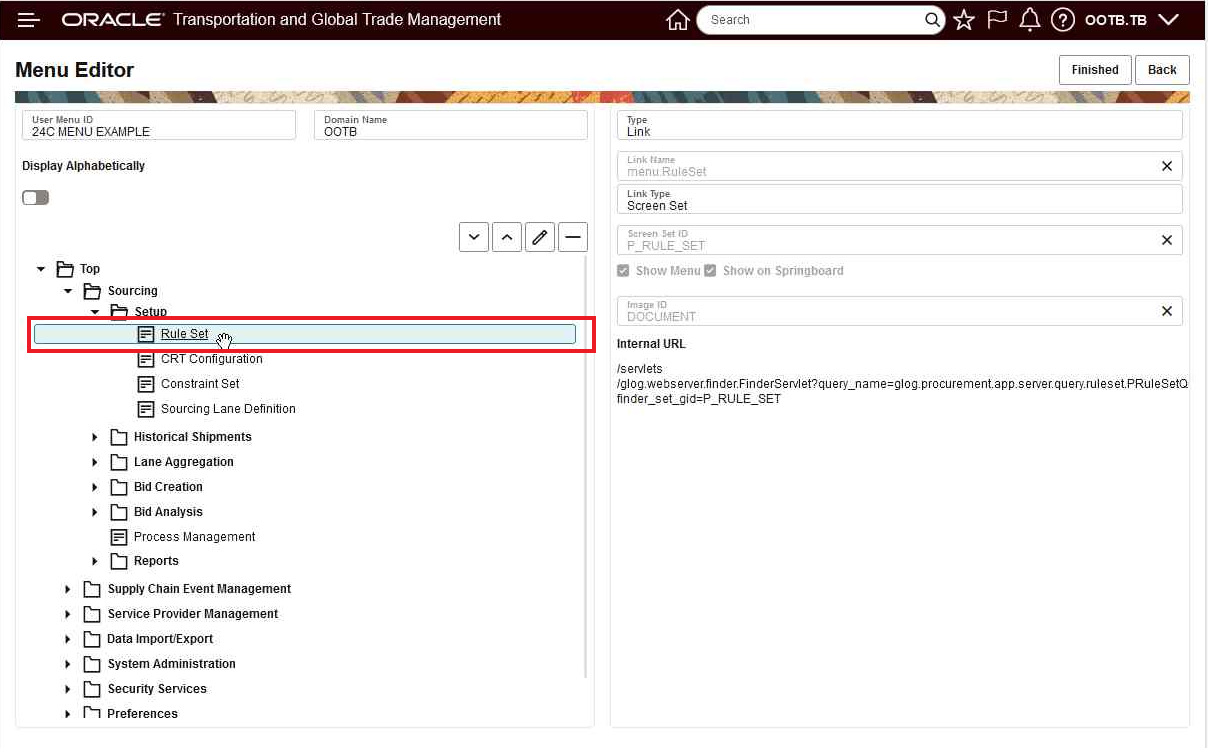
Select the Object to Move
Drag to the desired location and drop, the drop is below.
Drop Object
The Drag and Drop supports Drag and Drop at both Group and Link level. In the example below the Setup Group is moved via Drag and Drop.
Drag and Drop for Rule Set
Below is the drop for Setup to its new location. Again, remember to select Finished to save these changes.
Drop for Rule Set
The screens below show the Edit option.
Edit
Edit option allows you to edit different elements of the menu item, for example the Link Name was edited/changed in the example below.
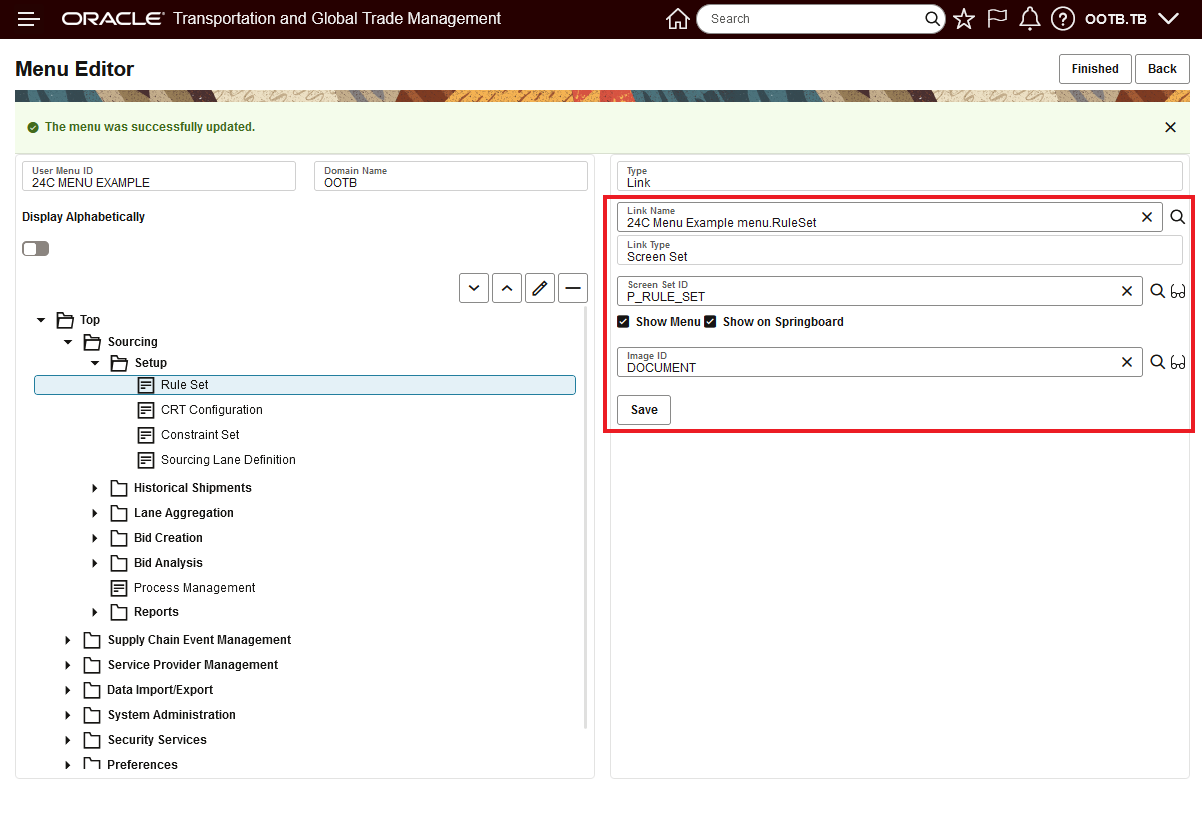
Edit Options
The screens below show the Add option.
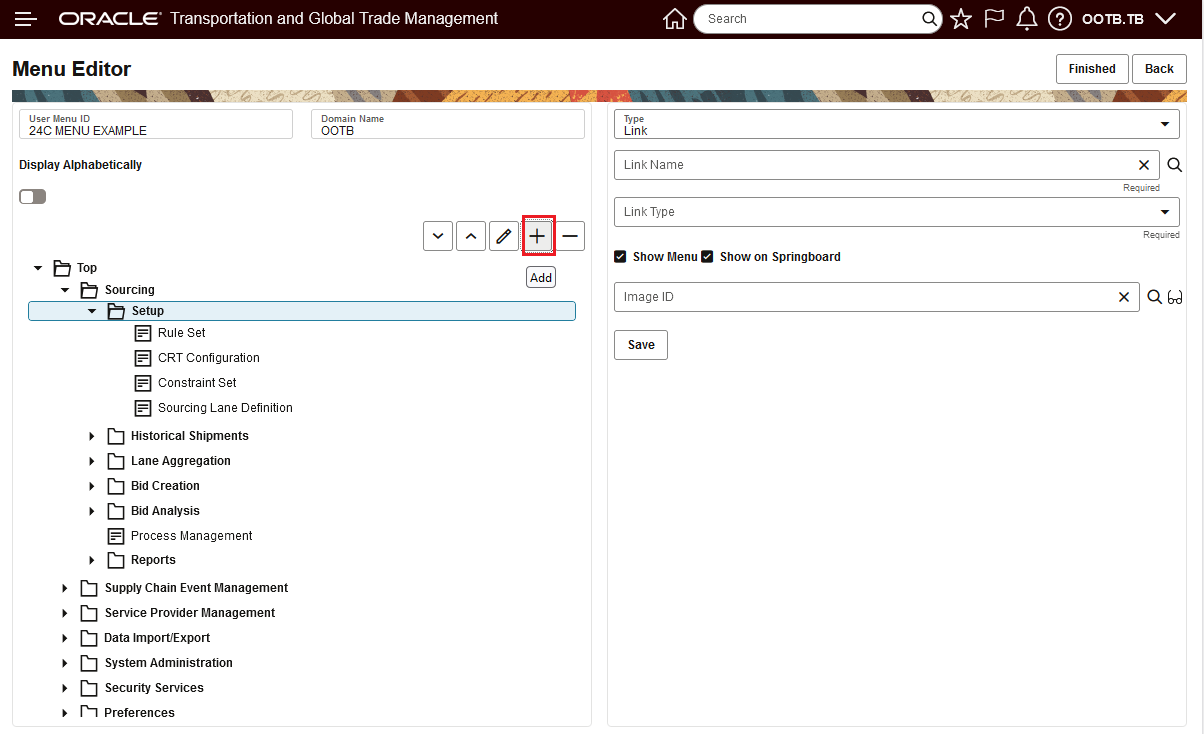
Add
Below is the Add example.
Add Example
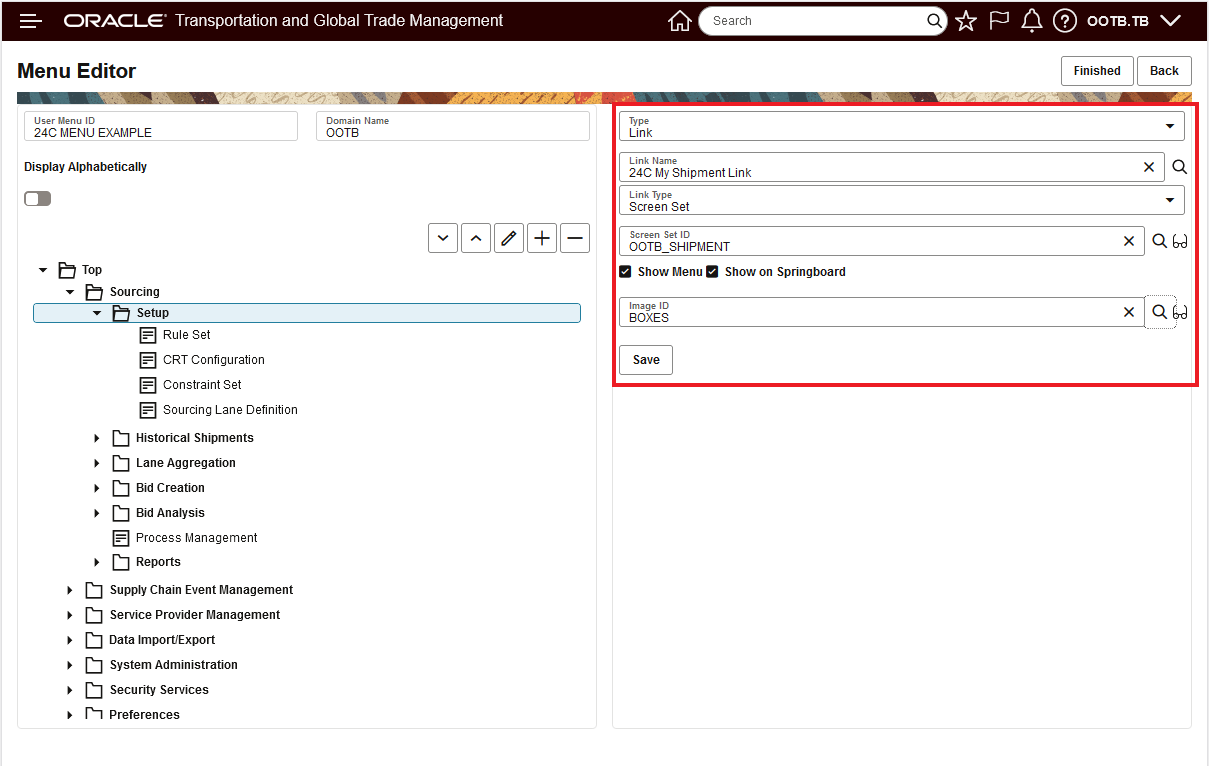
Below is the result of the Add - note -you need to select Finished and then Back to see the results.
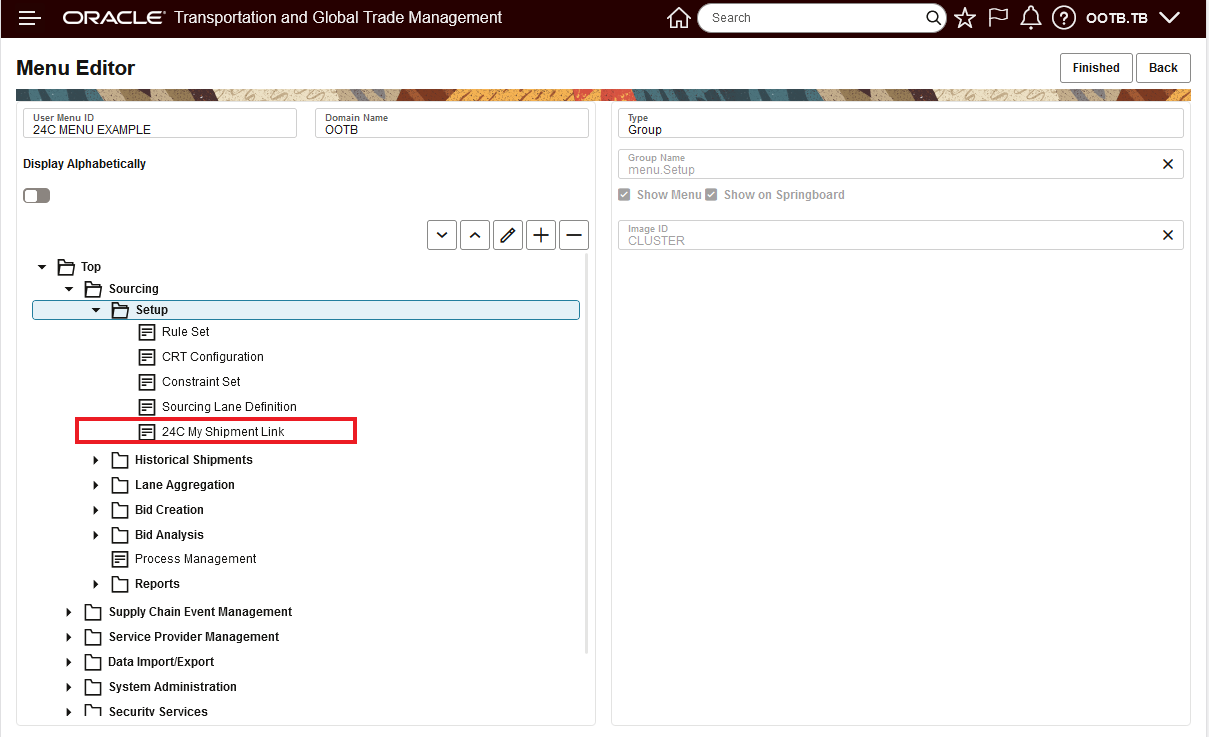
Add Example Result
The Delete options is shown below.
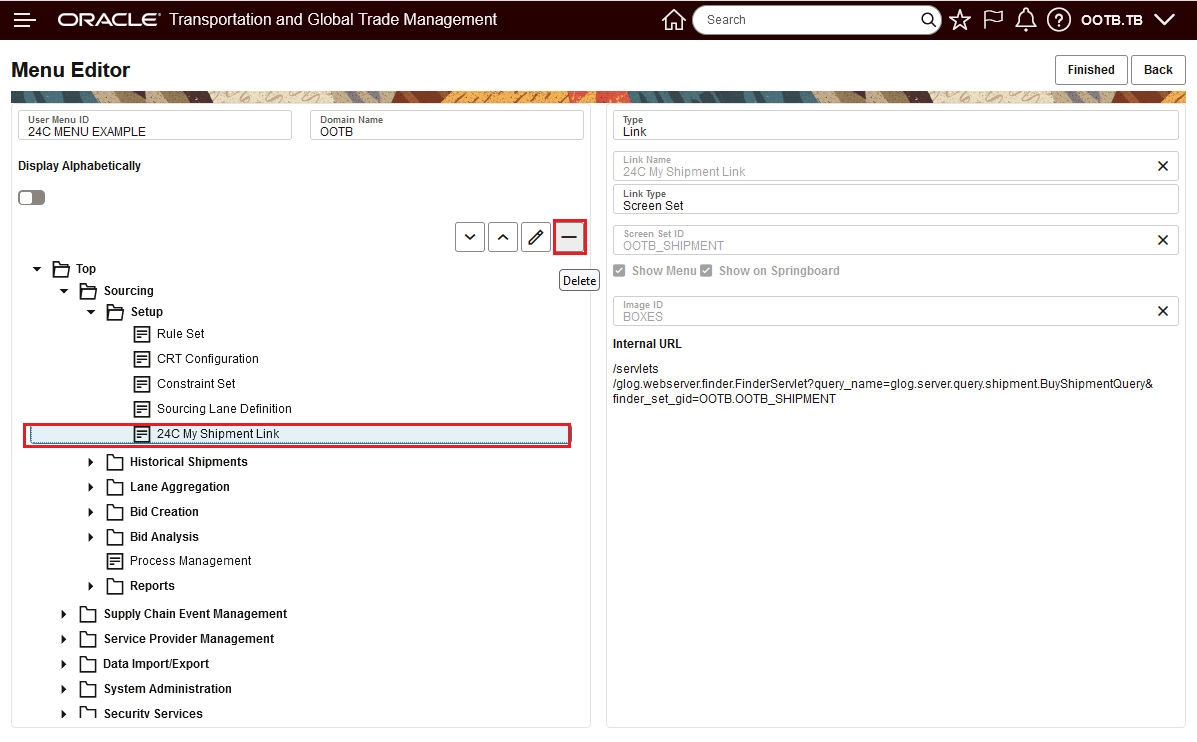
Delete
Confirmation of the Delete is below.
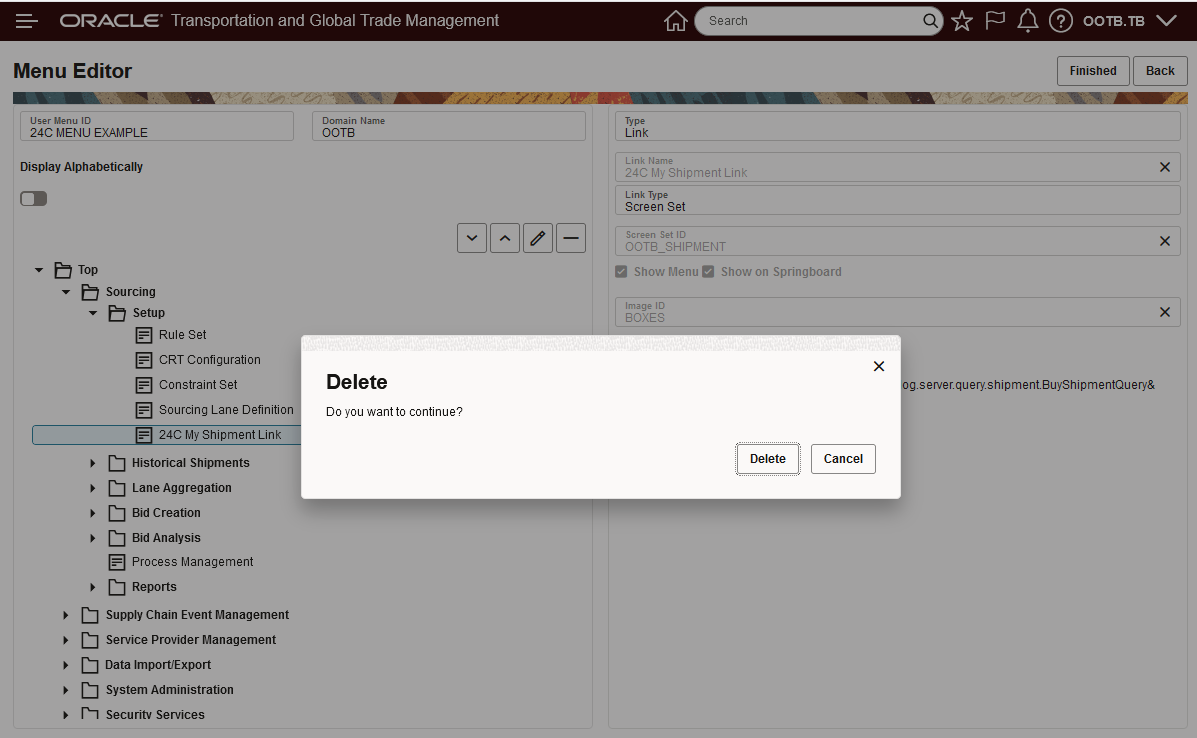
Delete Confirmation
For completion, the result of the delete is shown below.
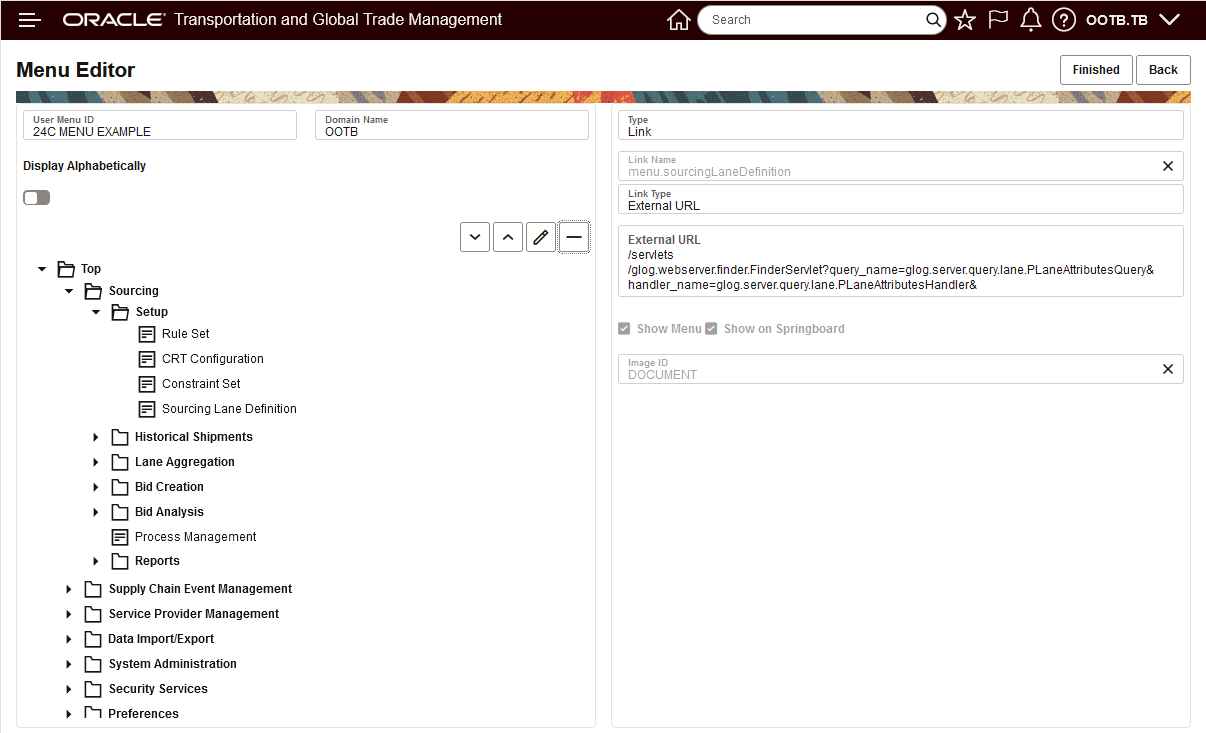
Select Item Deleted
The Menu Manager provides a number of usability improvements for creating, editing, moving and deleting menu objects.
Steps to Enable
While the Menu Manager does not require any Steps To Enable, the migration to the new Menu Manager format does require you to migrate your legacy User Menu Layouts to the new Menu Manager format. All PUBLIC User Menu Layouts are migrated for you, only your configured User Menu Layouts need to be migrated.
Migration is handled from the Menu Manager (Legacy) manager, accessed via Configuration and Administration > User Configuration > Menu Manager (Legacy).
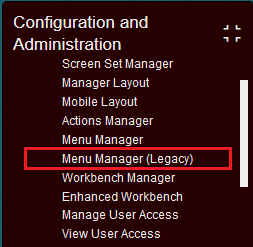
Menu Manager (Legacy)
When you open the Menu Manager (Legacy), you will notice several changes from the previous version of the legacy Menu Manager. The first change is the additional Migrated Column for the Layouts - as shown below. This Column indicates if the User Menu Layout has or has not been migrated to the new format. In the image below, all of the PUBLIC menus are shows as migrated.
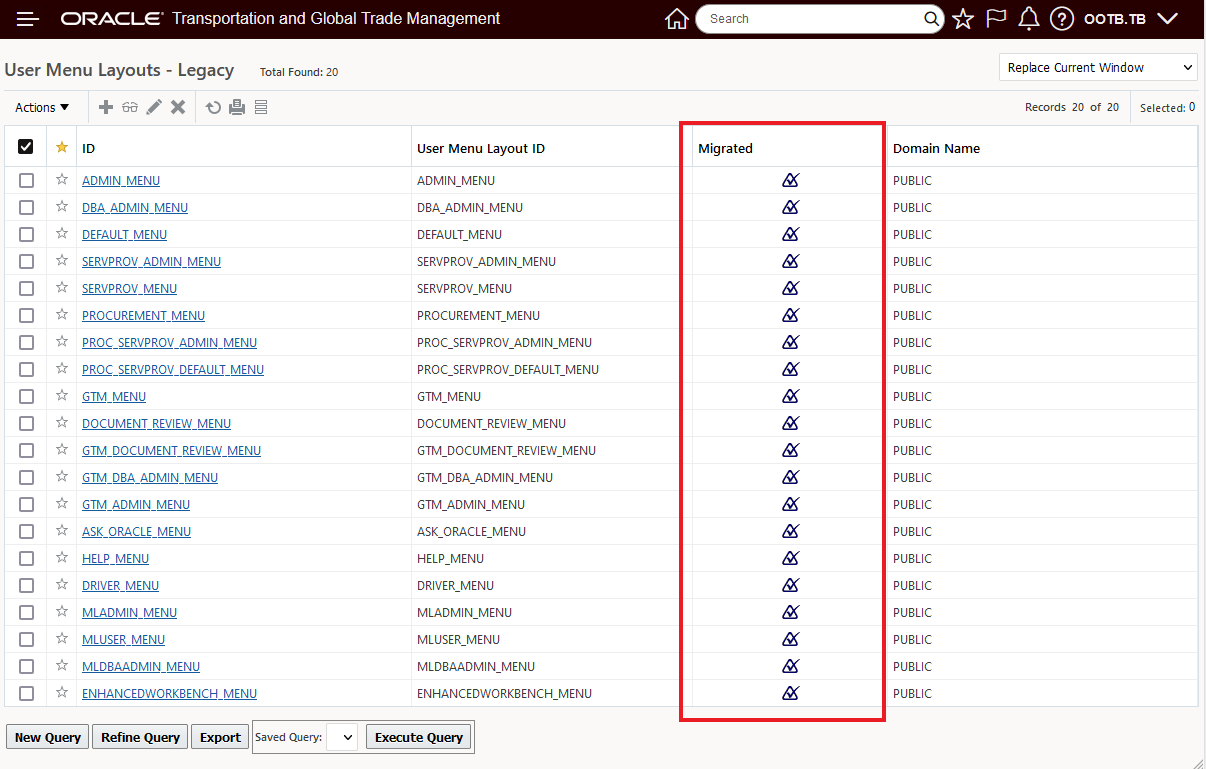
Menu Manager (Legacy) Finder Results - Migrated Column
The Actions available within the Menu Manager (Legacy) have been extended to include actions specifically related to the Migration Process -> Migrate Menus - migrates the User Menu Layout to the new format and Restore Migrated Menus - revert the format back, if necessary. The Copy User Menu option is also provided, as it was previously.
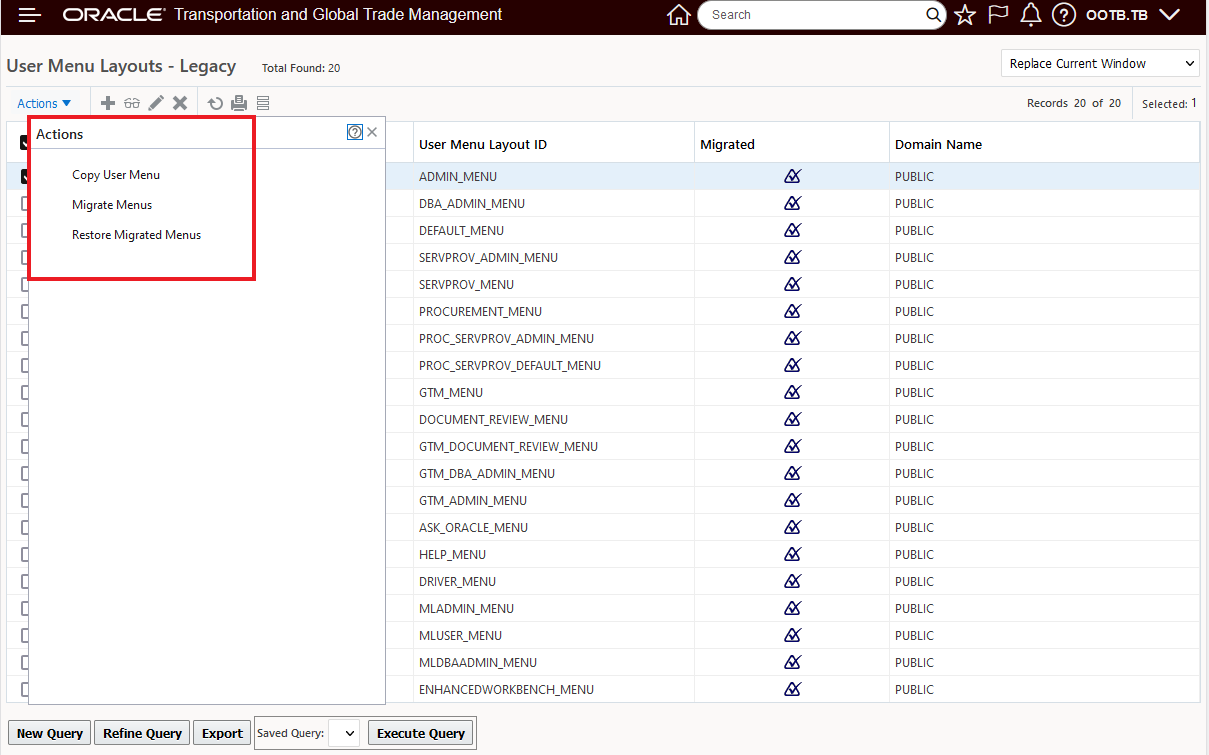
Menu Manager (Legacy) - Actions
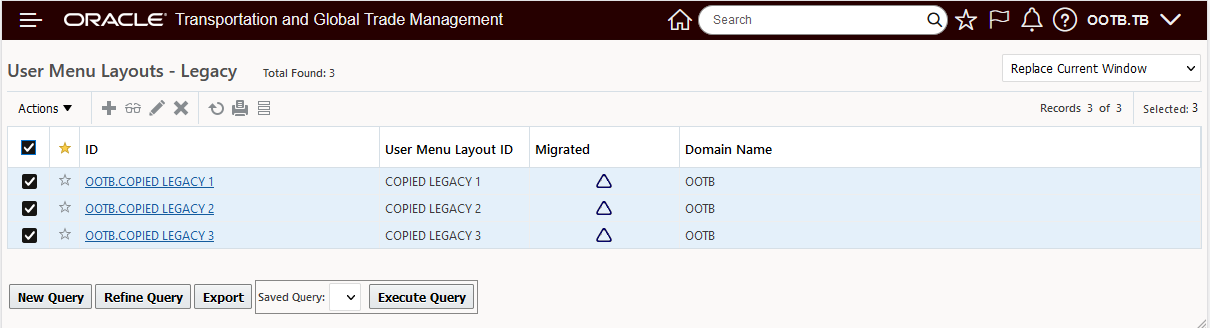
In the example below, all three of the selected User Menu Layouts - Copied Legacy 1-3 will be migrated.
Migrate Menus Example
Select the Migrate Menus action to perform the migration.
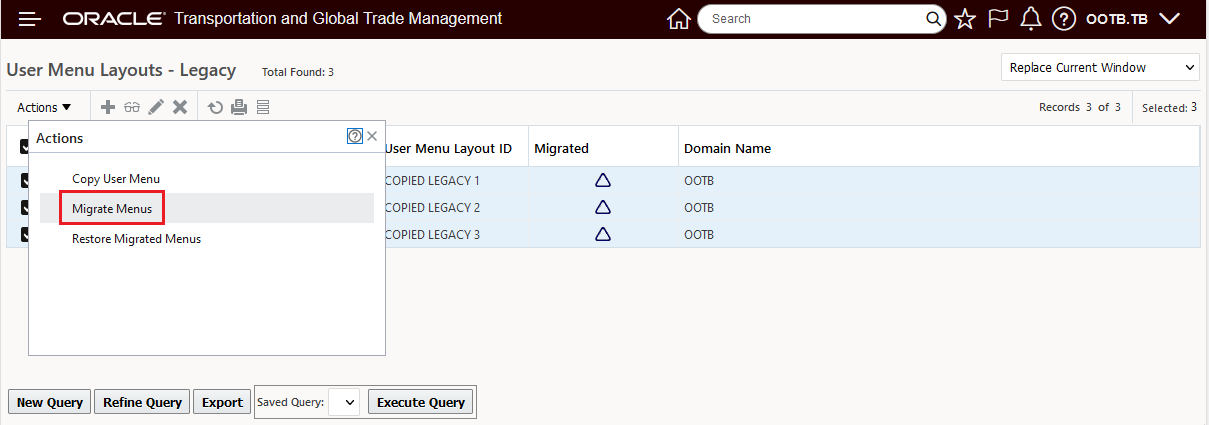
Migrate Menus Action
Below is the result. A success message is provided and the selected User Menus are migrated.
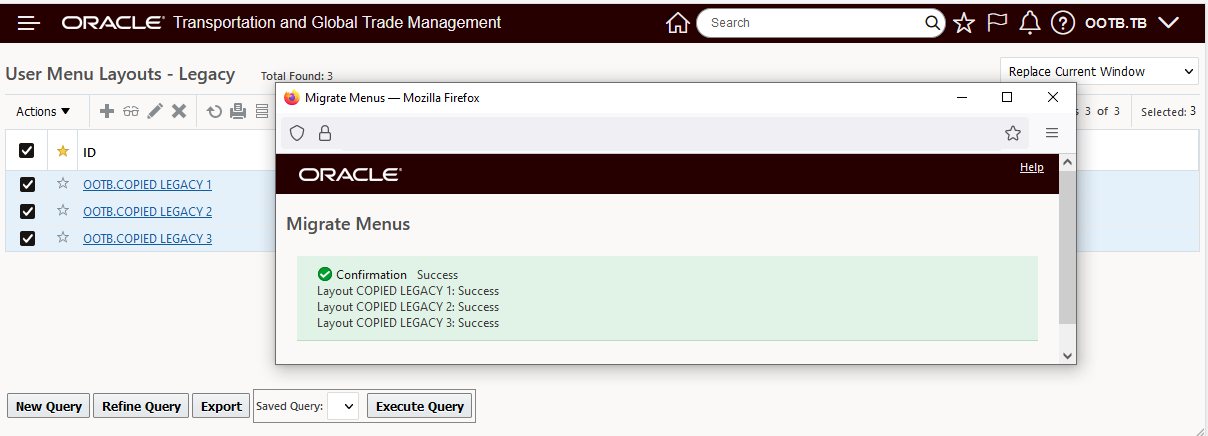
Migrate Menus Action Success
The selected Menus are now Migrated.
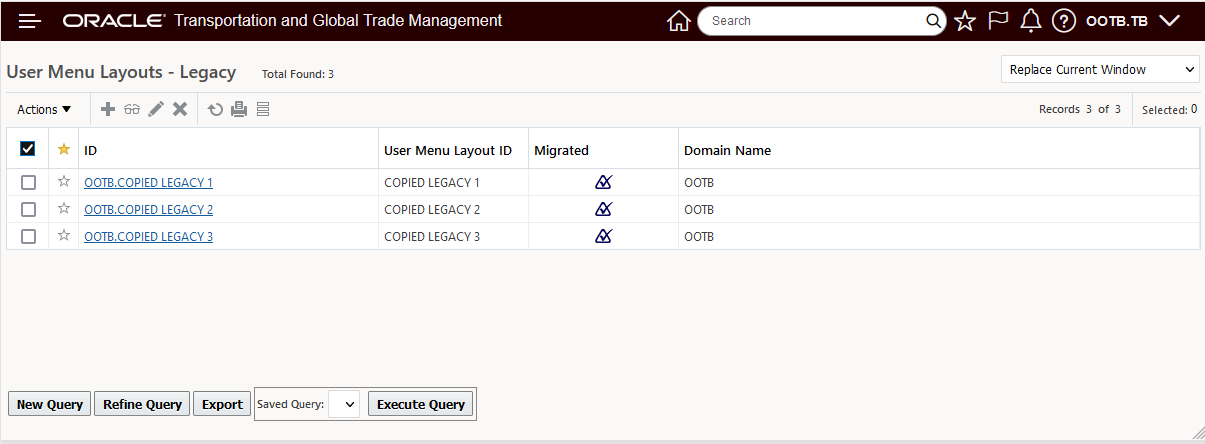
Migrate Menus Action Result
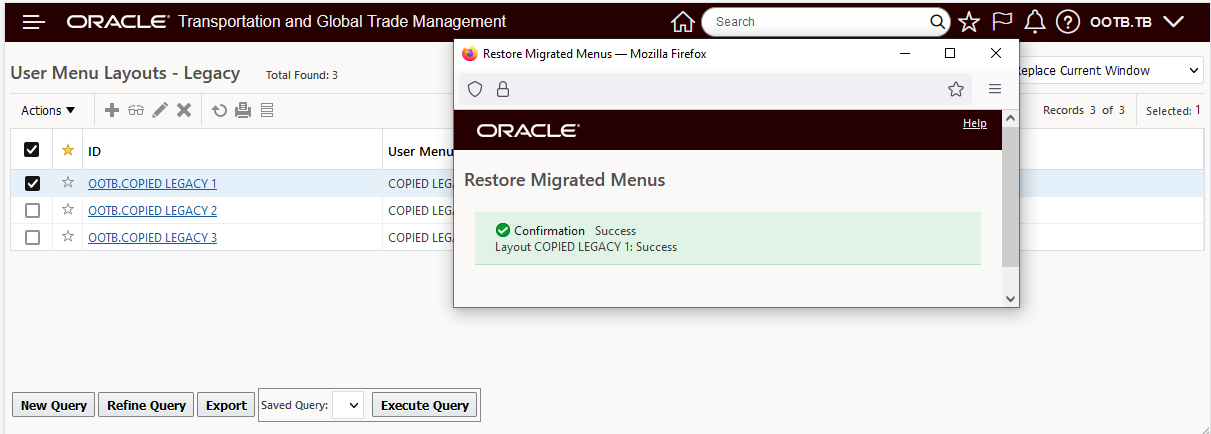
As noted, if necessary the migrated menu can be reverted using the Restored Migrated Menus action. In the example below the first User Menu has been reverted.
Restored
Below is the finder results after the Restore Migrated Menus has been run on the first User Defined Menu.
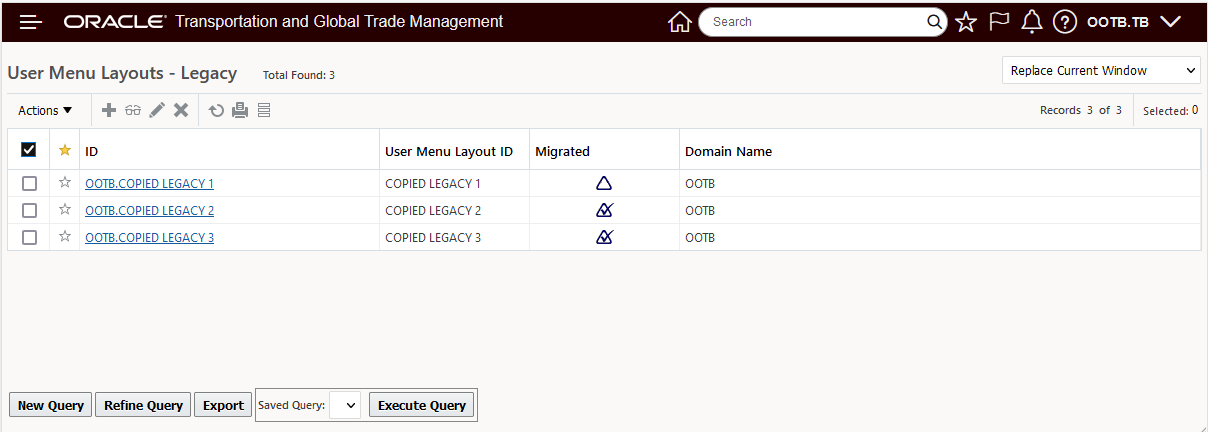
Restore Migrated Menus - Results
Note you cannot convert a User Defined Menu that was created in the new Menu Manager format back to the legacy format - when this is attempted the error message below is displayed.
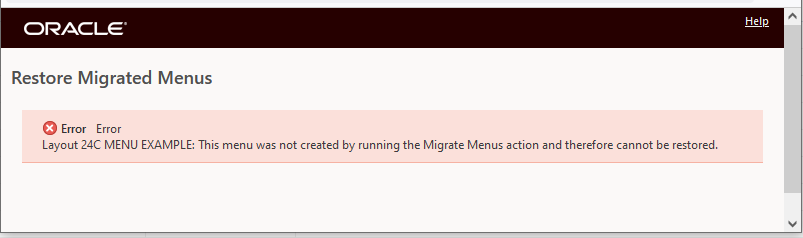
Attempt To Restore New Format to Legacy
Tips And Considerations
All of your legacy menu layouts are migrated for you as part of the upgrade and are displayed on the Menu Manager page.