 Mobile - New Planner Flow
This feature introduces a new Mobile app flow that can be used by non-service provider users (e.g.: planner, dispatch team, yard personnel etc.) when they are away from their desk systems. It also enables such users to view shipment details such as status, events, and indicators.
The dashboard screen in this flow has only one dynamic box by default called Planner Shipments. It will run the new "MOBILE FAVORITE SHIPMENTS" saved query which will return all the user's favorite shipments. You can modify the mobile layout to add other dynamic boxes or modify the saved query in the default box as needed.
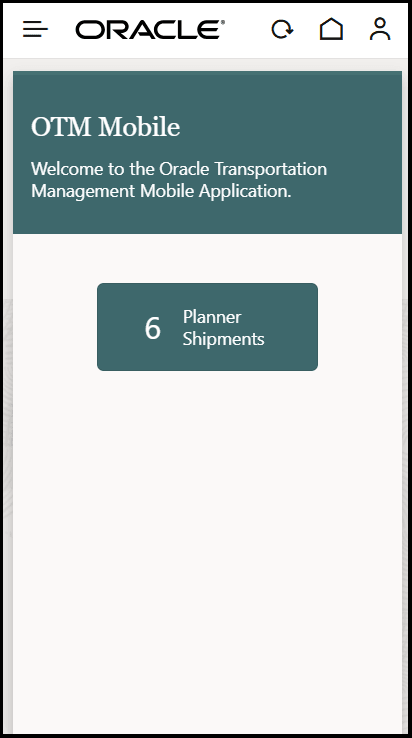
Planner Flow Dashboard
When you select the "Planner Shipments" box, you navigate to the Shipment List screen. You will be able to search for shipments from the database by using the new search icon (magnifying glass icon).
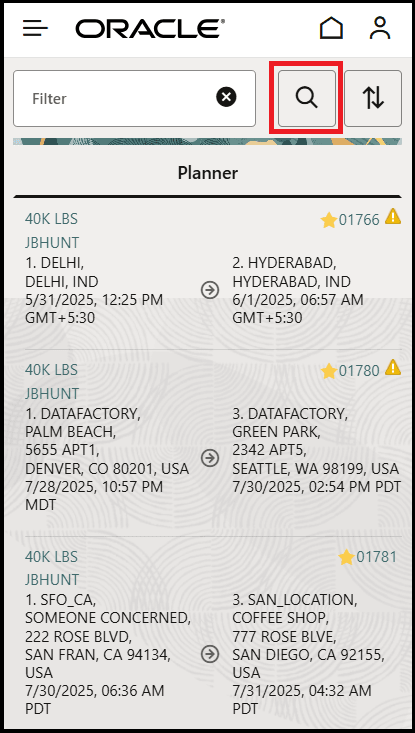
Search Icon
When you tap the Search icon, a popup screen appears. You can either fill in one or more fields on the top or select a saved query from the list. The list shows all of the "BuyShipmentQuery" saved queries with "Enable For Mobile Use" enabled.
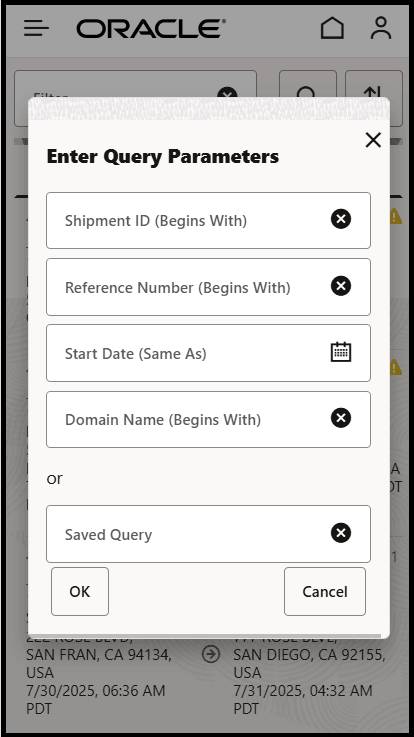
Search Shipments Popup
By default, the text fields use a criteria of "Begins With" and the Date field will use "Same As". These can be changed in the Mobile Layout:
"searchCriteria": {

       "shipmentXid": "sw",

       "shipmentRefnumValue": "sw",

       "startTime": "eq",

       "domainName": "sw

    }
The possible criteria are:
Text Fields:
- Starts With: sw
- Contains: co
- Ends With: ew
- Same As: eq
Date Fields:
- After: gt
- Before: lt
- Same As: eq
Once you select OK, the database will be queried and any new shipments returned will be added to the Shipment List.
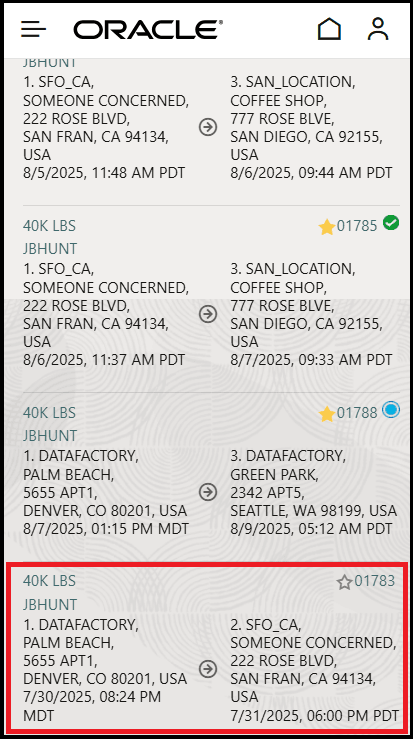
Searched Shipment added to Shipment List
Refreshing the data by logging out and back in or hitting the Home or Refresh buttons will rerun the saved query and lose any added shipments.
The Shipment Details screen also provides critical shipment information such as statuses, cost, events, dates, locations, and indicators.
The following elements in the mobile layout determine the details shown:
- showCost: When set to true, it will display shipment costs on the shipment details.
- shipmentStatuses: Works like showShipmentRefnums. It is hidden by default. When enabled, it shows a link to view the status. By default, only the SECURE RESOURCES, ENROUTE, and PAYMENT statuses are shown, but that can be changed in the mobile layout. If popupEnabled is set to false, then statuses will show as an accordion which can be set to open automatically.
- userDefinedIconGidAsIndicator: 'userDefined5IconGid': Changing the numerical value in userDefined5IconGid controls which of the 5 valid images are used on shipments in the mobile app. The valid images all end in "_INDICATOR". When you run the Set Image action in OTM against a shipment and want to have an image displayed on the mobile app, you must choose one of the "_INDICATOR" images. The default is to use the 5th image defined by the action, as defined by the "5" in "userDefined5IconGid". If you want to change which image is displayed in the mobile app to be the 3rd image you define in Set Image, for example, change the 5 value in userDefined5IconGid to userDefined3IconGid.
Six new PUBLIC Images have been added as shown below:
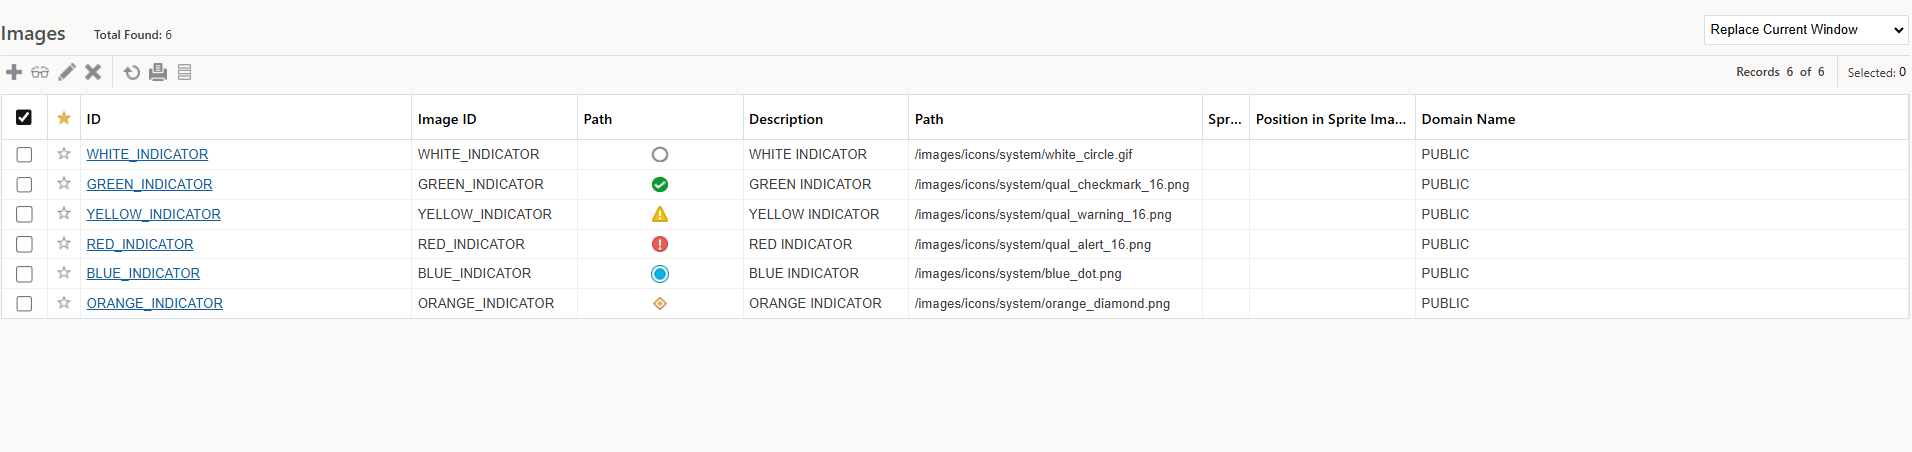
Indicator Public Images
To set an Image on the shipment you need to run the Actions > Shipment Management > Utilities > Set Image action in the main OTM application. When set, you will see the images on the Shipment List and Shipment Detail screens as shown below:
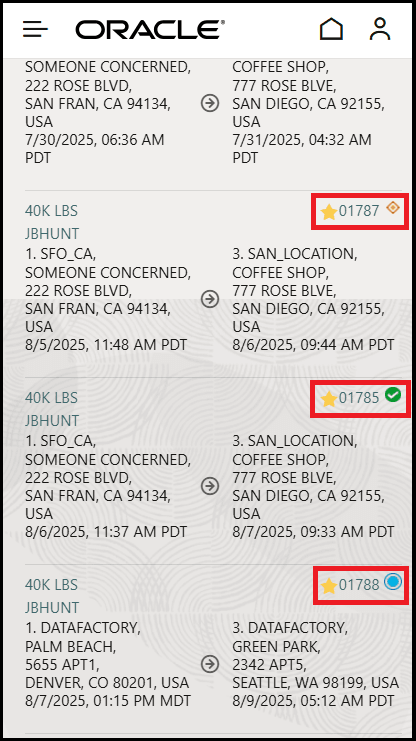
Indicators Enabled
Indicators have also been added to the Driver and Service Provider flows. You can enable them for those flows following the same steps listed above.
Business Benefit: Non-Service Provider users can quickly and easily understand the status of a shipment (or set of shipments) when they’re away from the office and do not have access to the full web application.
Steps to enable and configure
You don't need to do anything to enable this feature.
Tips and considerations
- Ensure your ADMIN user has Mobile Web Application REST - View and Mobile Web Application REST - Update ACRs assigned.
- Sign in as your ADMIN user. Copy the PLANNER_MOBILE_LAYOUT and assign it to your user.