Redwood Mobile: introduce user configurable screens
Oracle WMS now lets you create user-defined, multi-page mobile workflows with the User Defined Mobile Designer and expose them in Redwood Mobile menus. Customers can build focused mobile flows that collect input, call WMS REST APIs, and display returned data without creating a new standard mobile screen.
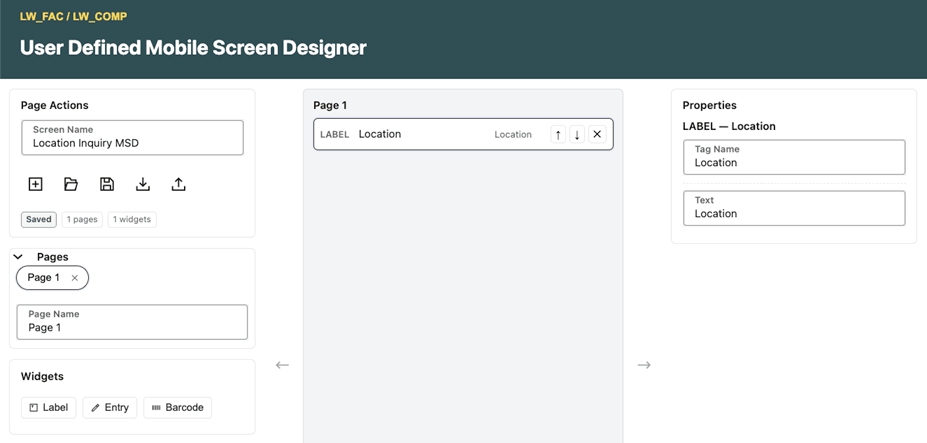
User Defined Mobile Screen Designer
Create user-defined mobile workflows
Use the User Defined Mobile Designer to create a screen with one or more pages. The current designer supports barcode fields, text entry fields, and labels. A screen can guide a user through a linear workflow, such as scanning an LPN, reviewing returned information, entering a lock code, and submitting the update. Use unique field tag names and page names without spaces. Tag names can contain letters, numbers, and underscores, and they are used to pass input and returned values between pages. Define required fields when the user must provide a value before selecting Next.
Configure API calls and data substitutions
Configure the Next action on a page to call a WMS REST API. Use a relative API path that starts with /wms; the service uses the current WMS environment and does not support calls to external environments from a user-defined mobile screen.
Use substitutions in API paths, request bodies, and labels to reference captured values and API results. For example, use @{tag_name} to insert the value from a field or a value returned by an earlier API call. Select the fields or values list entries that later pages need; only selected response values are available for use in the workflow.
- Barcode fields validate against the barcode types selected in the designer. After a user selects Next, the configured API performs the functional validation. If an API call does not return a result or returns an error, the user remains on the page and sees the API error message.
- GET API requests automatically respect the user's eligible company and facility access. You generally do not need to hard-code a company or facility in the screen definition.
Add user-defined mobile screens to RF menus
After saving a user-defined mobile screen, open the Screens UI and use the Screen Type filter to locate User Define Mobile screens. Select a screen and choose Add to Current Group Menu, or add the screen through the RF menu configuration. Menus can contain both standard RF screens and user-defined mobile screens. Save the screen definition and the RF menu after adding the screen. Users must sign out of and restart Redwood Mobile to load the updated menu and screen definition.
Redwood Mobile availability
User Defined Mobile Screens are available only in Redwood Mobile. When users select one of these screens from a Redwood Mobile menu, the configured workflow launches and runs the WMS API calls defined for its pages.
NOTE: User-defined mobile screens are intended for focused, linear workflows. Conditional branching, drop-down or list-of-values entry fields, configurable success messages, and other advanced RF behaviors are not currently supported. These screens extend Redwood Mobile; they do not replace all standard RF transaction capabilities.
Steps to enable and configure
- Open the User Defined Mobile Designer and create a screen.
- Add one or more pages and configure barcode fields, text entry fields, and labels. Use unique field tag names and page names without spaces.
- Configure the Next action for each page. Add the WMS REST API path, request parameters or body, response fields or values list entries, and the next page when applicable.
- Save the screen. In the Screens UI, filter by User Define Mobile, select the screen, and choose Add to Current Group Menu. Save the RF menu.
- Sign out of and restart Redwood Mobile. Open the configured RF menu and select the user-defined mobile screen.