Assign B2B Account Numbers to Your Ship-to Locations
You can use the new Import B2B Account utility to assign B2B account numbers to ship-to locations for each of your suppliers. These account numbers are included in the POs you send to your suppliers via the GHX service provider. Any required edits can be made using the B2B Account Numbers task.
In addition to this, the new version of the PO message definition for the GHX service provider also incorporates data elements for Bill Only special handling type POs.
The PO header elements are:
- Physician Name
- Reference Number
- Date of Service
The PO line level elements are:
- Lot
- Serial Number
Partners can use the account number to identify the customer's ship-to location when they receive an order, thereby simplifying their order planning and fulfillment process.
Steps to Enable
Use the Opt In UI to enable this feature. For instructions, refer to the Optional Uptake of New Features section of this document.
Offering: Manufacturing and Supply Chain Materials Management
After you opt in, follow these steps to setup and use your B2B account numbers:
- Import your B2B account numbers.
- Review and edit B2B account numbers.
- Update the outbound collaboration messages of your GHX service provider to use the GHX-OAGIS-10.1-Purchase-Order-Collaboration-Message-Out-V2 message definition.
Import B2B Account Numbers
- Select B2B Accounts from the Tasks panel tab.
- Click Import and select the file with your B2B account number information.
- Click Submit.
The import file must contain the following information in the order specified:
- Account Number
- Supplier Name
- Supplier Number
- Site
- Procurement BU
- Ship-to Location Code
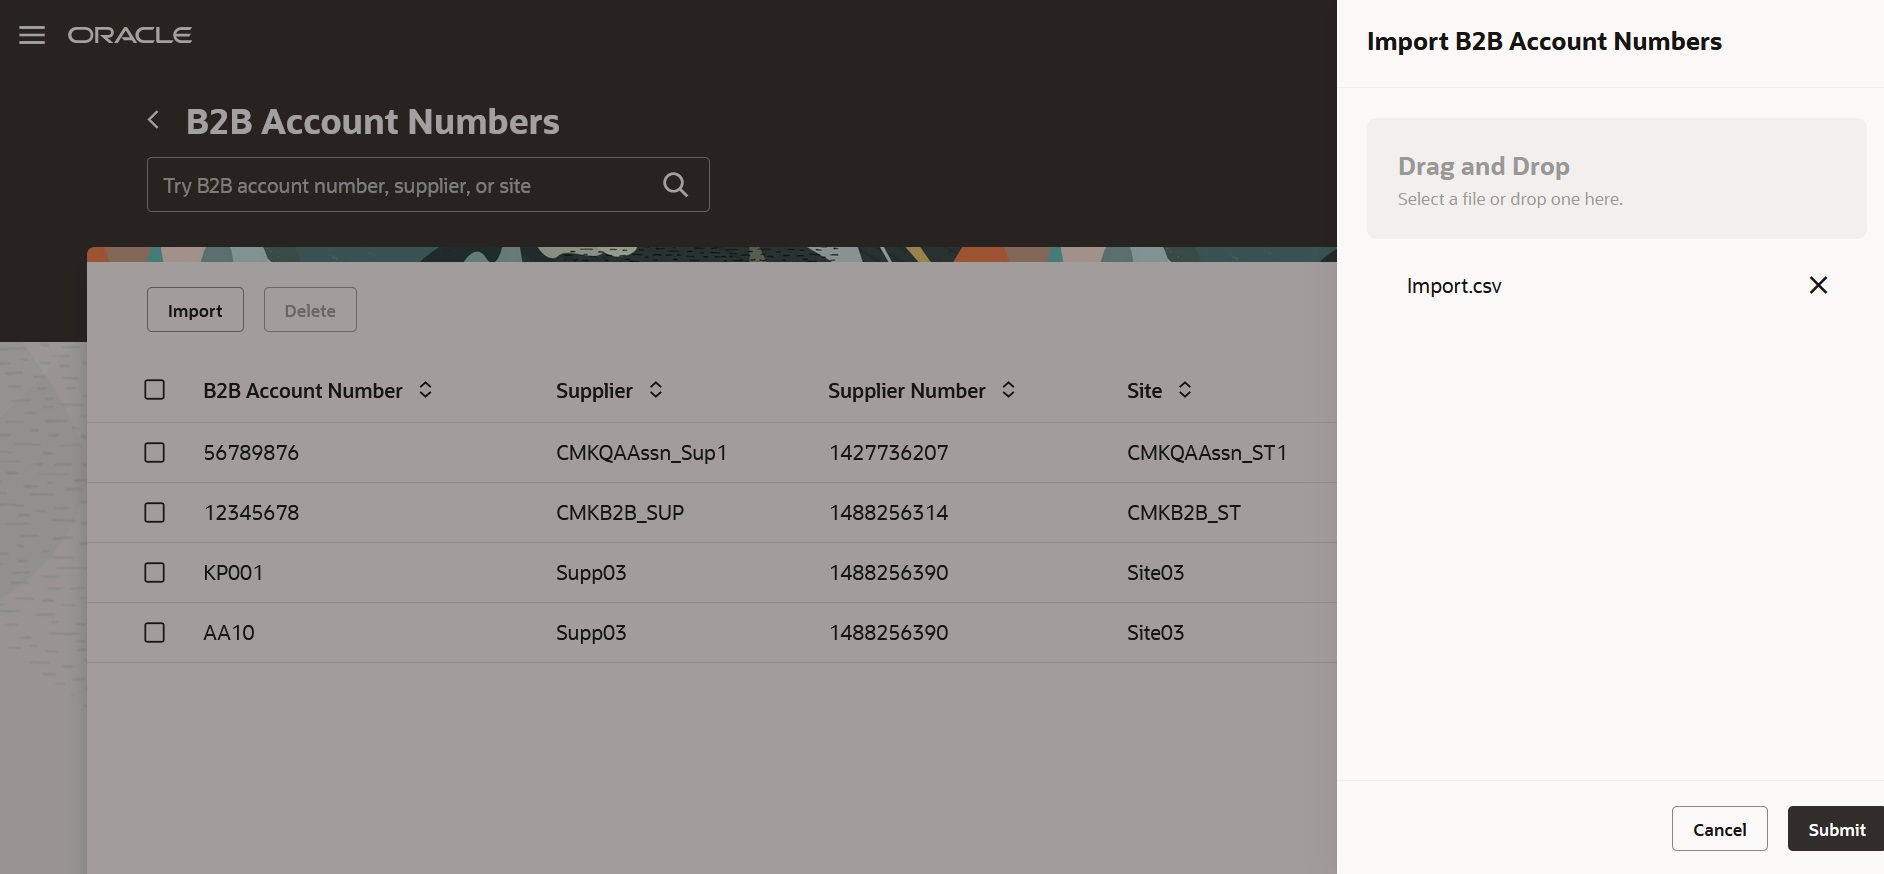
Import B2B Account Numbers
Review and Edit B2B Account Numbers
- Select B2B Accounts from the Tasks panel tab.
- Search for specific B2B account numbers by account number, supplier, site, procurement BU, or location.
- Click Create on the B2B Account Numbers page to create B2B account numbers manually.
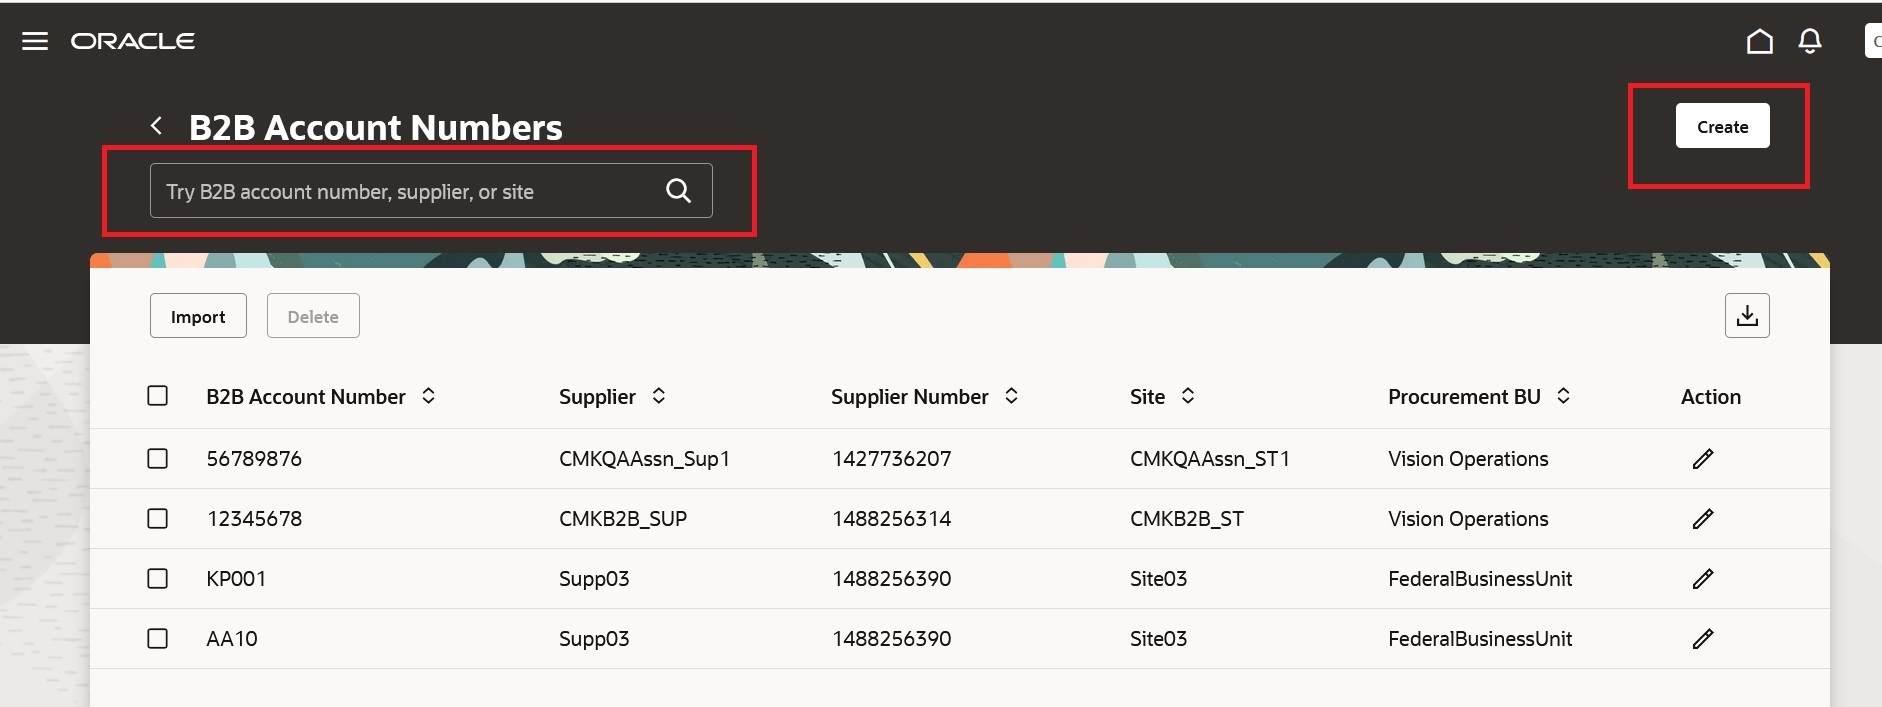
Create B2B Account Numbers
- Click the edit icon to access the B2B Account page. Here, you can review the ship-to locations associated with the B2B account number and add or delete more locations.
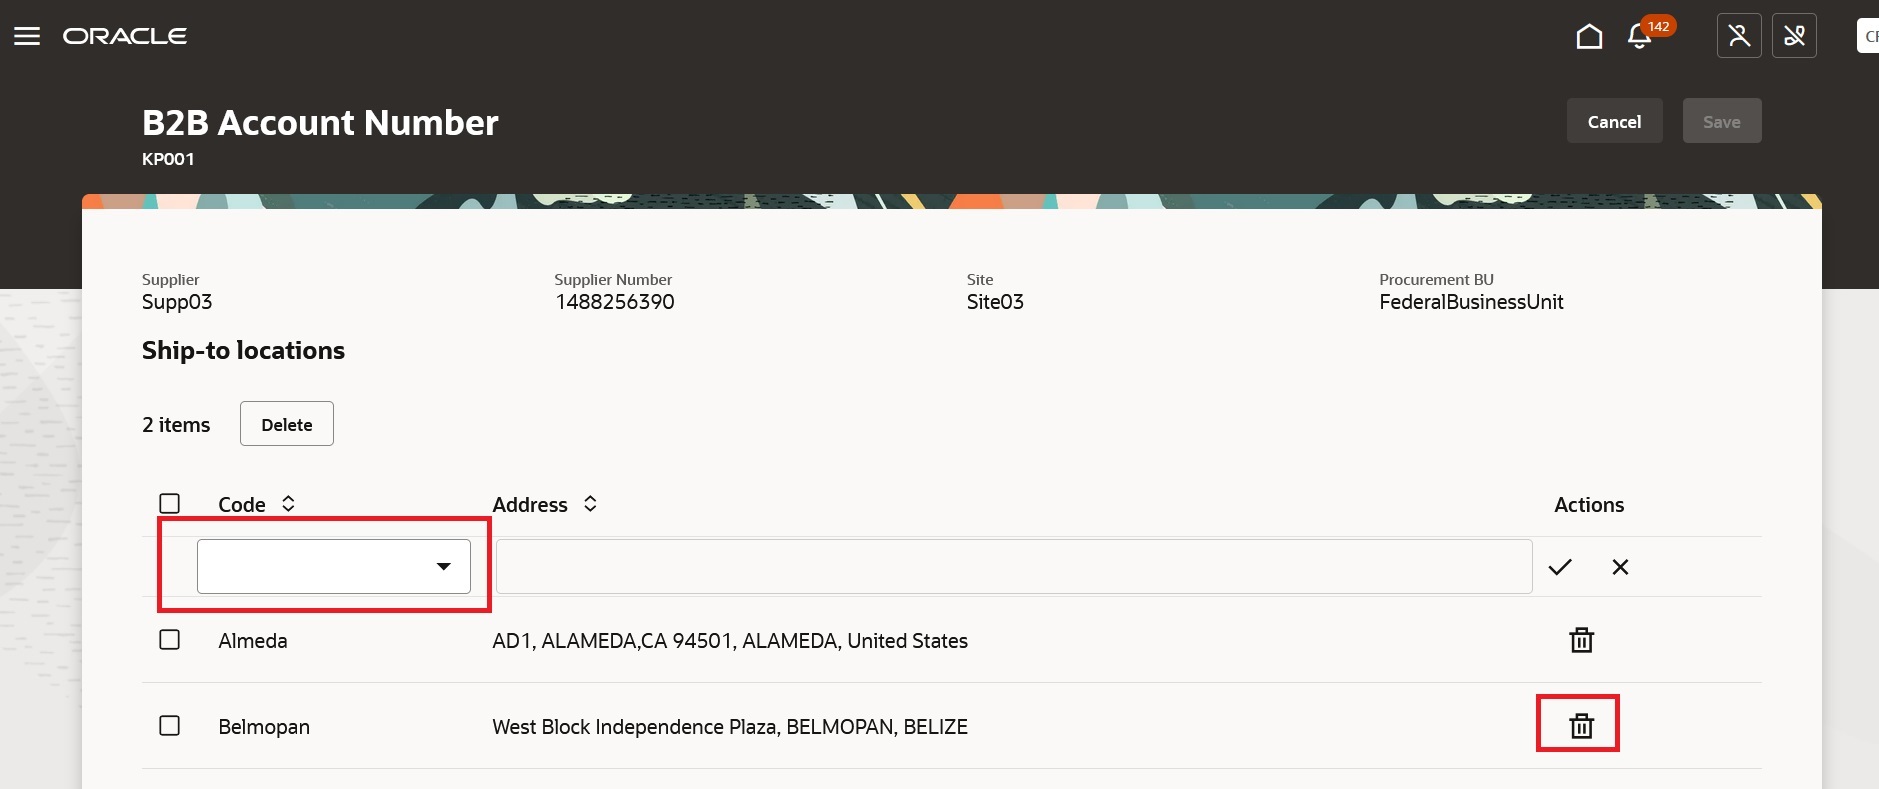
Edit B2B Account Number Information
Update the Outbound Collaboration Messages of GHX Service Provider
- Select Manage Collaboration Messaging Service Providers from the Tasks panel tab.
- Search for and select the GHX service provider.
- Select Actions > Edit, and on the Service Provider: GHX page, select the Outbound Message Setup tab.
- If the GHX-OAGIS-10.1-Purchase-Order-Collaboration-Message-Out-V2 message definition is not selected, set the status of the current message definition for the document type of Process Purchase Order to Inactive. Select GHX-OAGIS-10.1-Purchase-Order-Collaboration-Message-Out-V2 from the Collaboration Message Definition drop-down and set the status to Active.
- Select Save and Close.
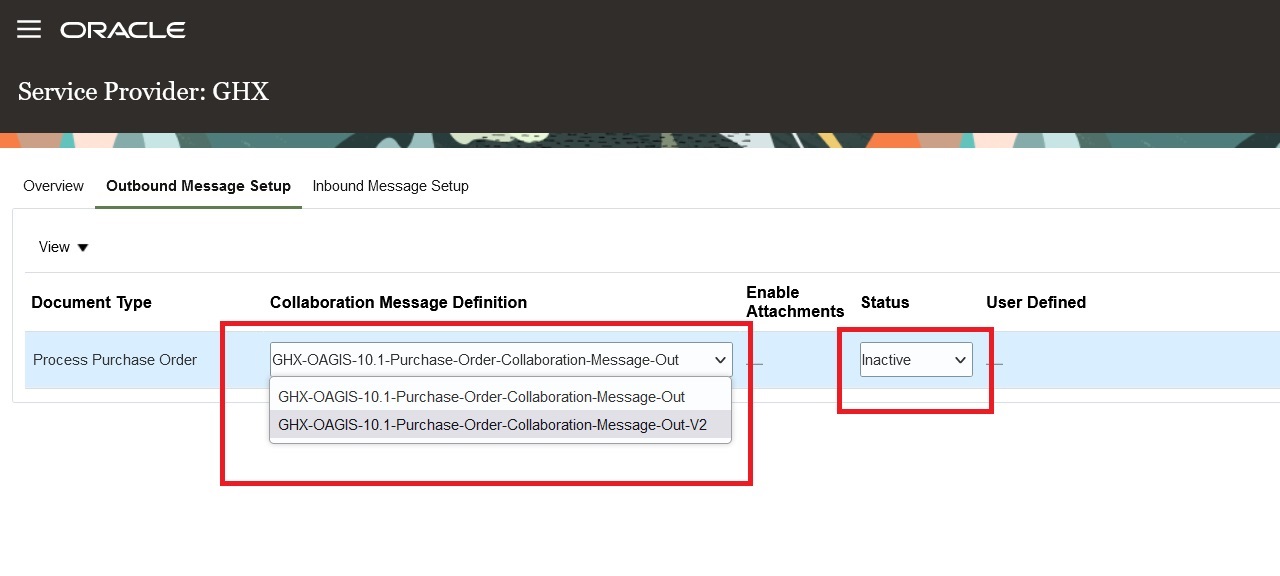
GHX-OAGIS-10.1-Purchase-Order-Collaboration-Message-Out-V2
Tips And Considerations
- If you want to use B2B Account Numbers and you don’t use GHX as a service provider, you can modify the XSL for your outbound purchase orders to include B2B account numbers.
- If you want to incorporate the special handling type POs, you can modify your PO XSL.
Key Resources
- Refer to the Configuring and Managing B2B Messaging for Oracle Fusion Cloud SCM guide on the Oracle Help Center.
Access Requirements
Users who are assigned a configured job role that contains these privileges can access this feature:
- Manage Account Numbers by web service (CMK_MANAGE_B2B_ACCOUNT_NUMBERS_WEB_SERVICE_PRIV)
This privilege is new in this update.