Redwood: Manage Demand Priority Rules Using a New User Experience
You can now use the Redwood user experience to define demand priority rules, which determine the order rescheduling sequence. Using the Demand Priority Rules task, you can create, edit, duplicate, and delete these rules. Additionally, you can configure user-defined attributes to augment the standard attributes used for prioritization.
Using the Demand Priority Rules page, you can:
- Search for or filter the demand priority rule based on the rule name
- Sort the list of demand priority rules
- Create, edit, duplicate ,or delete a demand priority rule
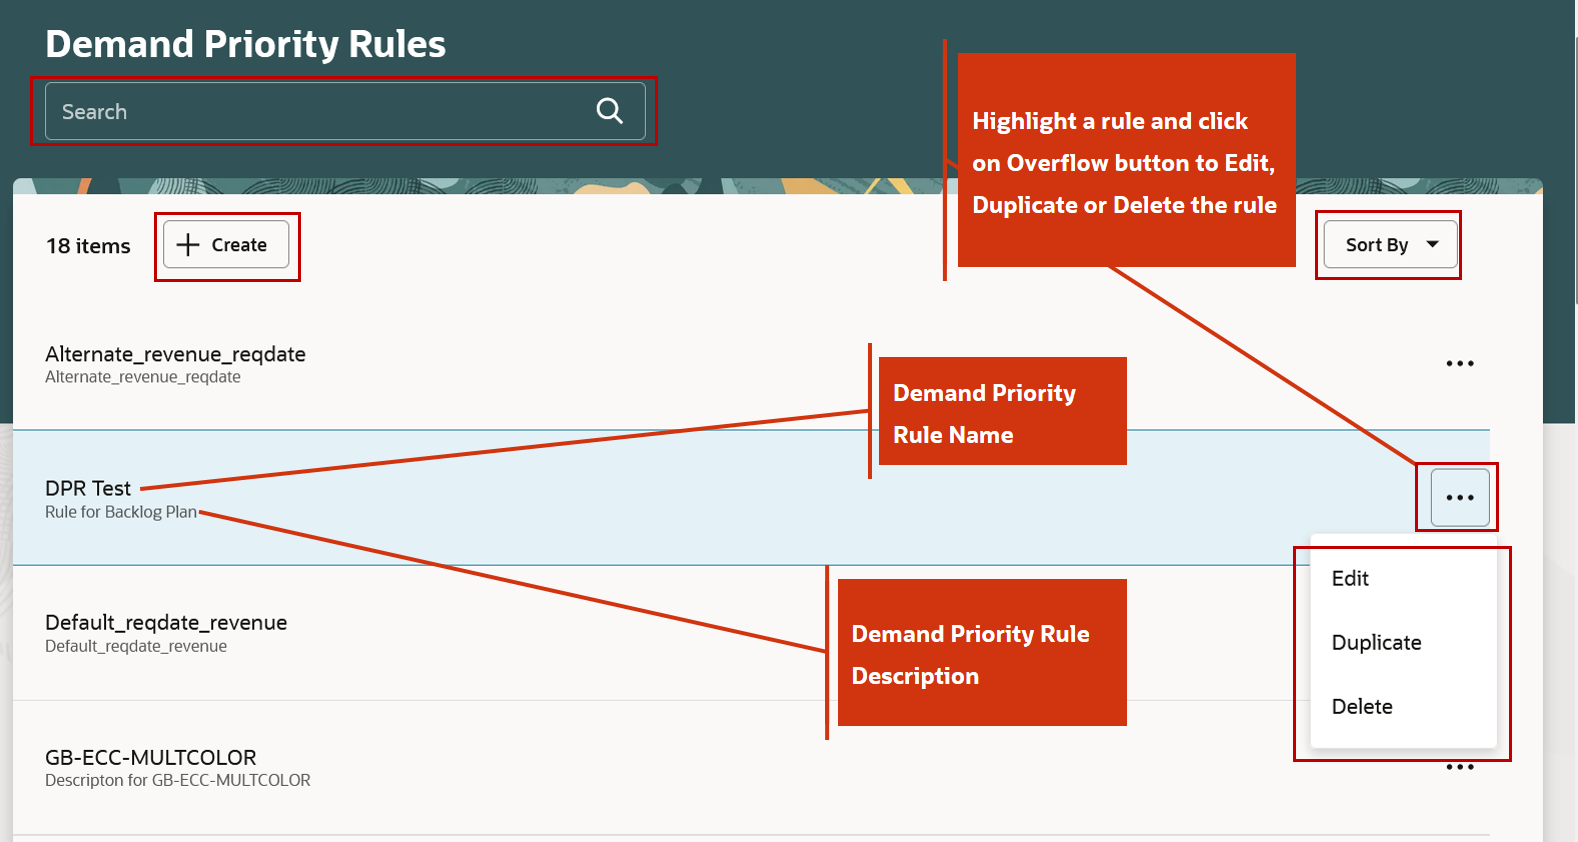
Fields of Demand Priority Rules Page
To create a demand priority rule you need to:
- Click the Create button in the Demand Priority Rules page.
- Enter the Name and Description of the demand priority rule.
- Click the Add button to add an attribute to the rule.
- In the Add attribute drawer, select the attribute, and sort order, then click the Apply button.
- The attribute will be added to the new rule.
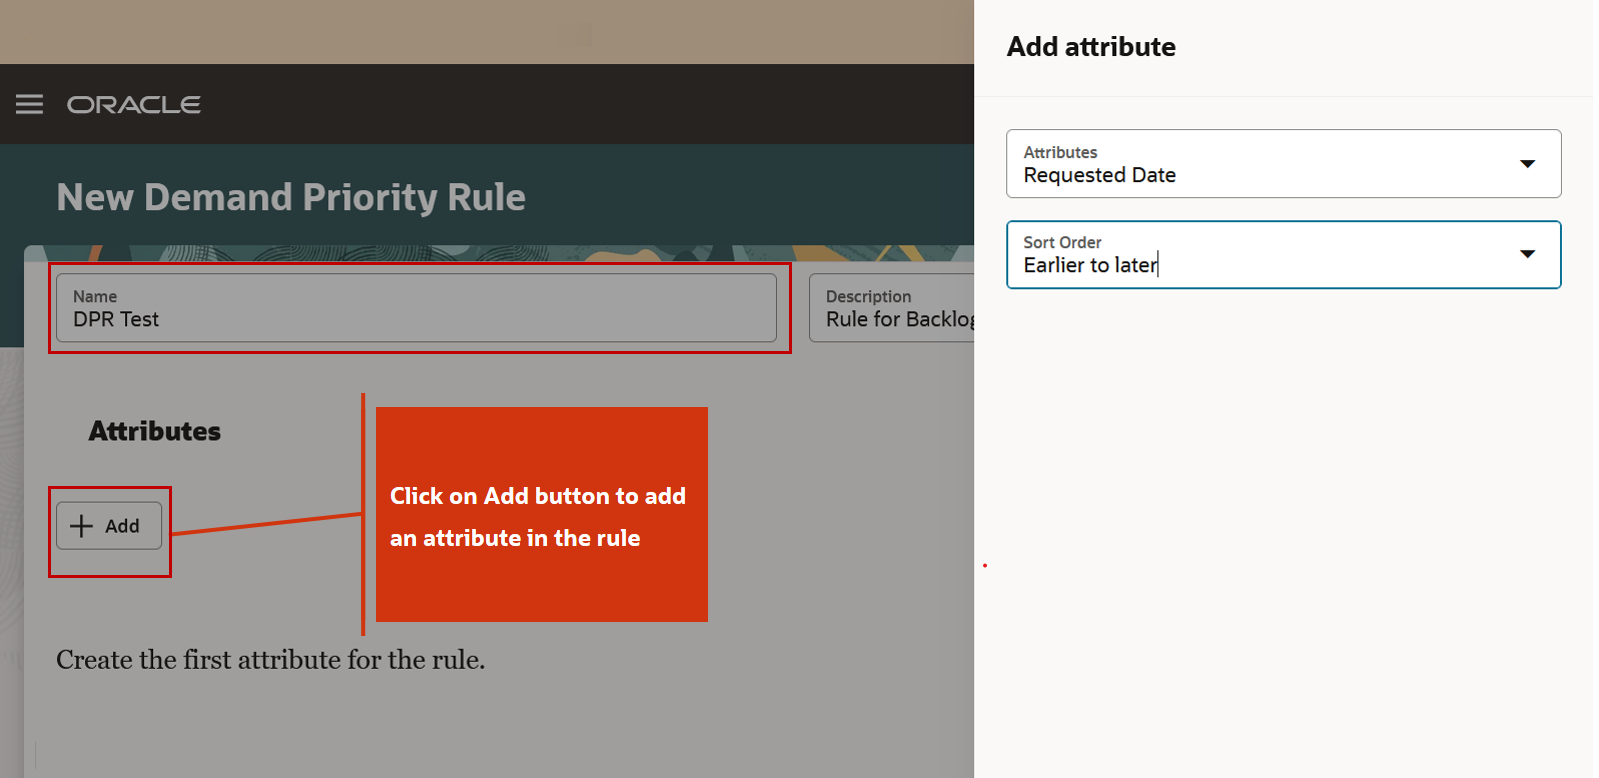
Add Button Used to Add Attribute in the Rule
You can add multiple attributes to a demand priority rule. Available attribute types are date, number, and display. You can use the drag and drop button to change the priority of an attribute within a rule. Click the Save and Close button to save the rule.
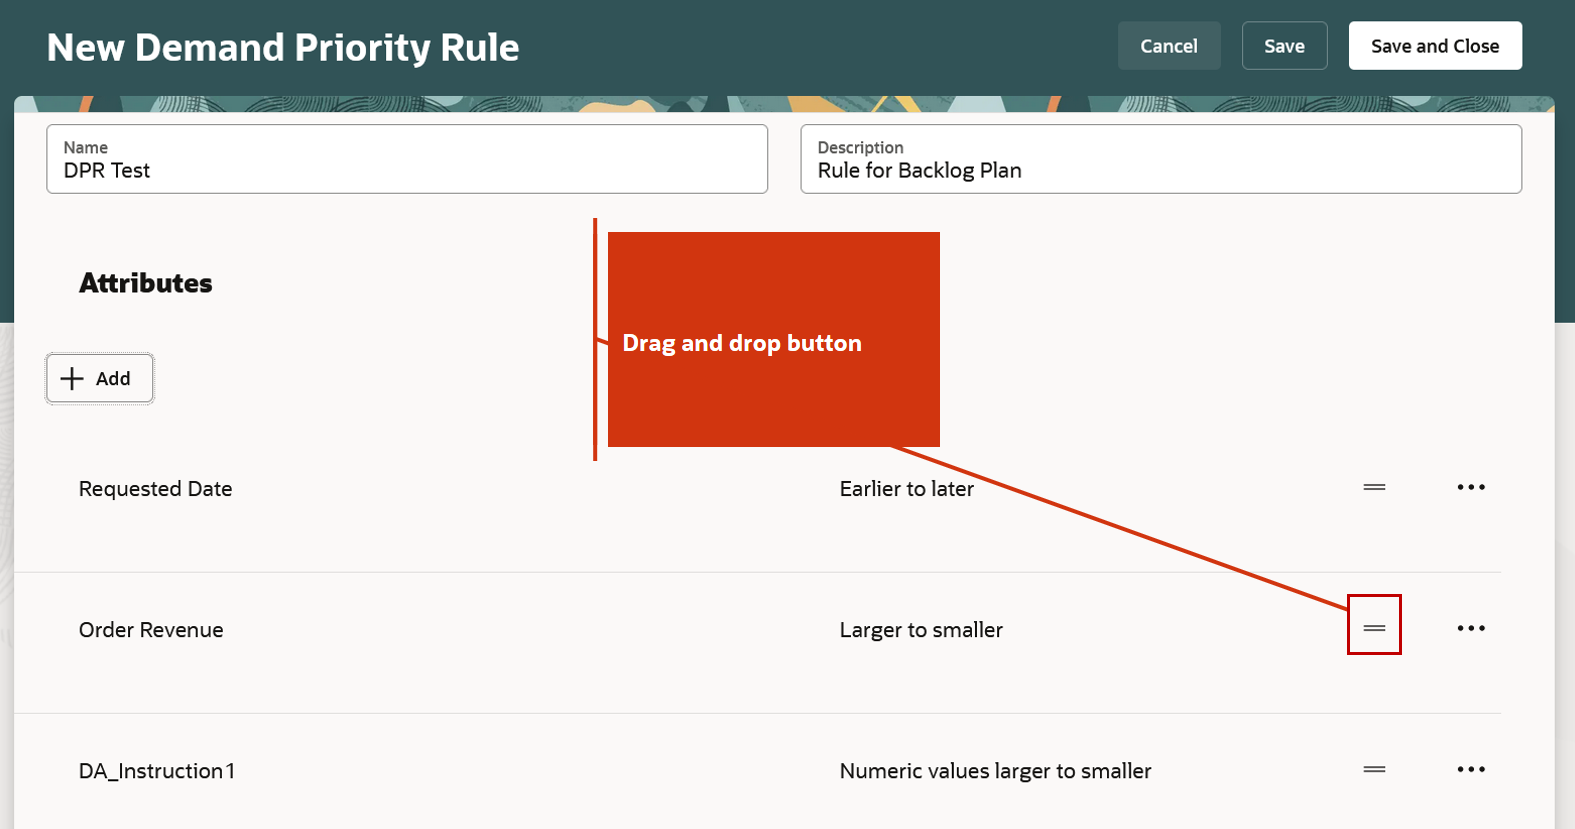
Drag and drop Button to Modify Priority of Attributes within Rule
You can prioritize demands using attributes that have enumerated values. For such attributes, you can configure the sequence of values that indicate the highest down to the lowest demand priority:
- In the Attributes field, select an enumerated attribute such as Demand Class.
- Click the Add Attribute Values button to select the individual values for this attribute that you want to use for demand prioritization.
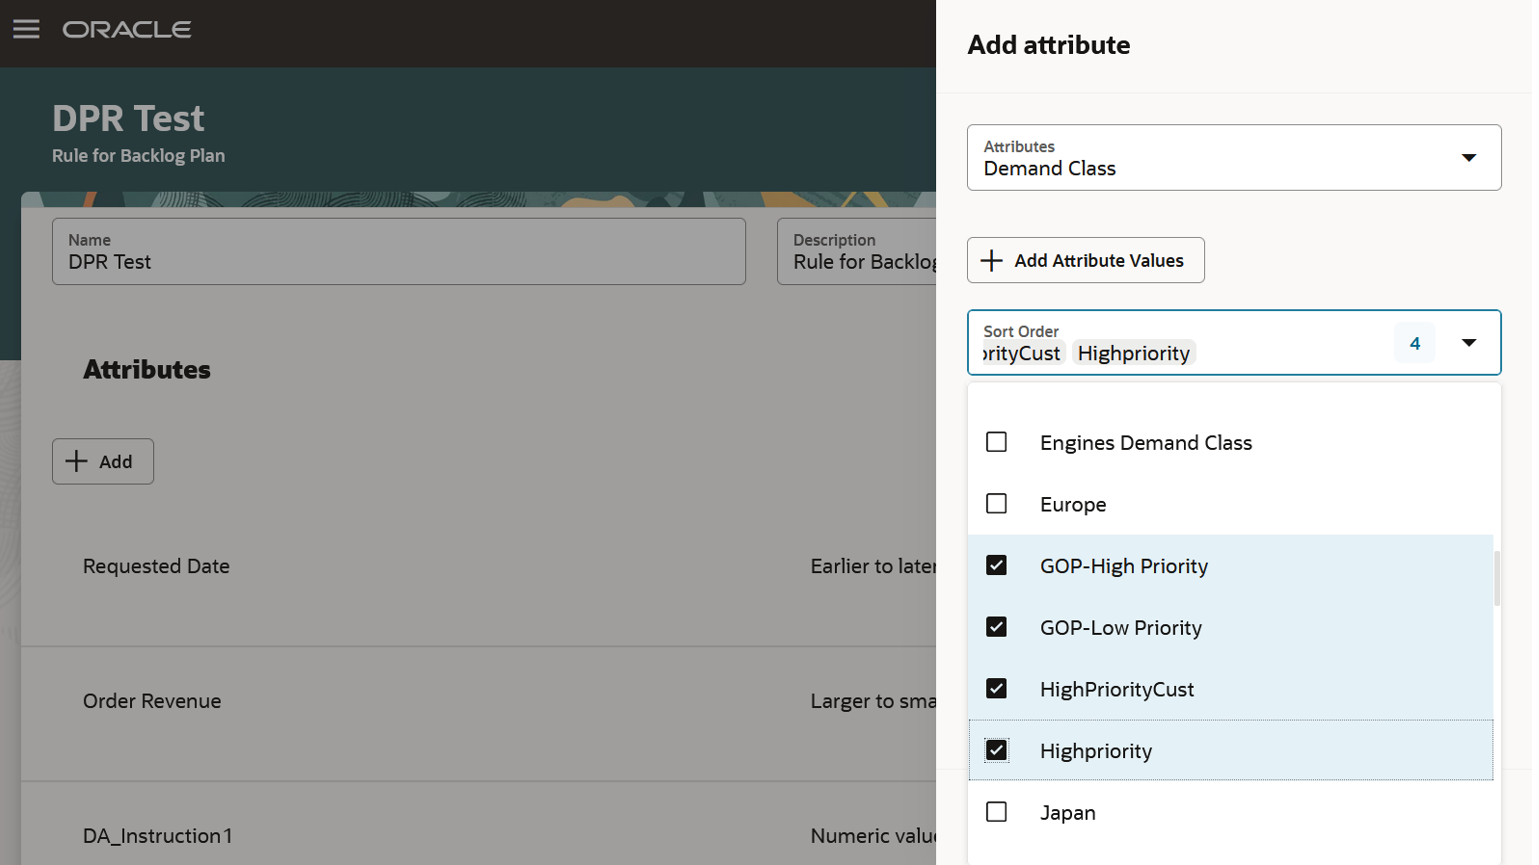
Values Selected for Demand Class Attribute from List of Values
Click the Save button to save the selected list of attribute values.
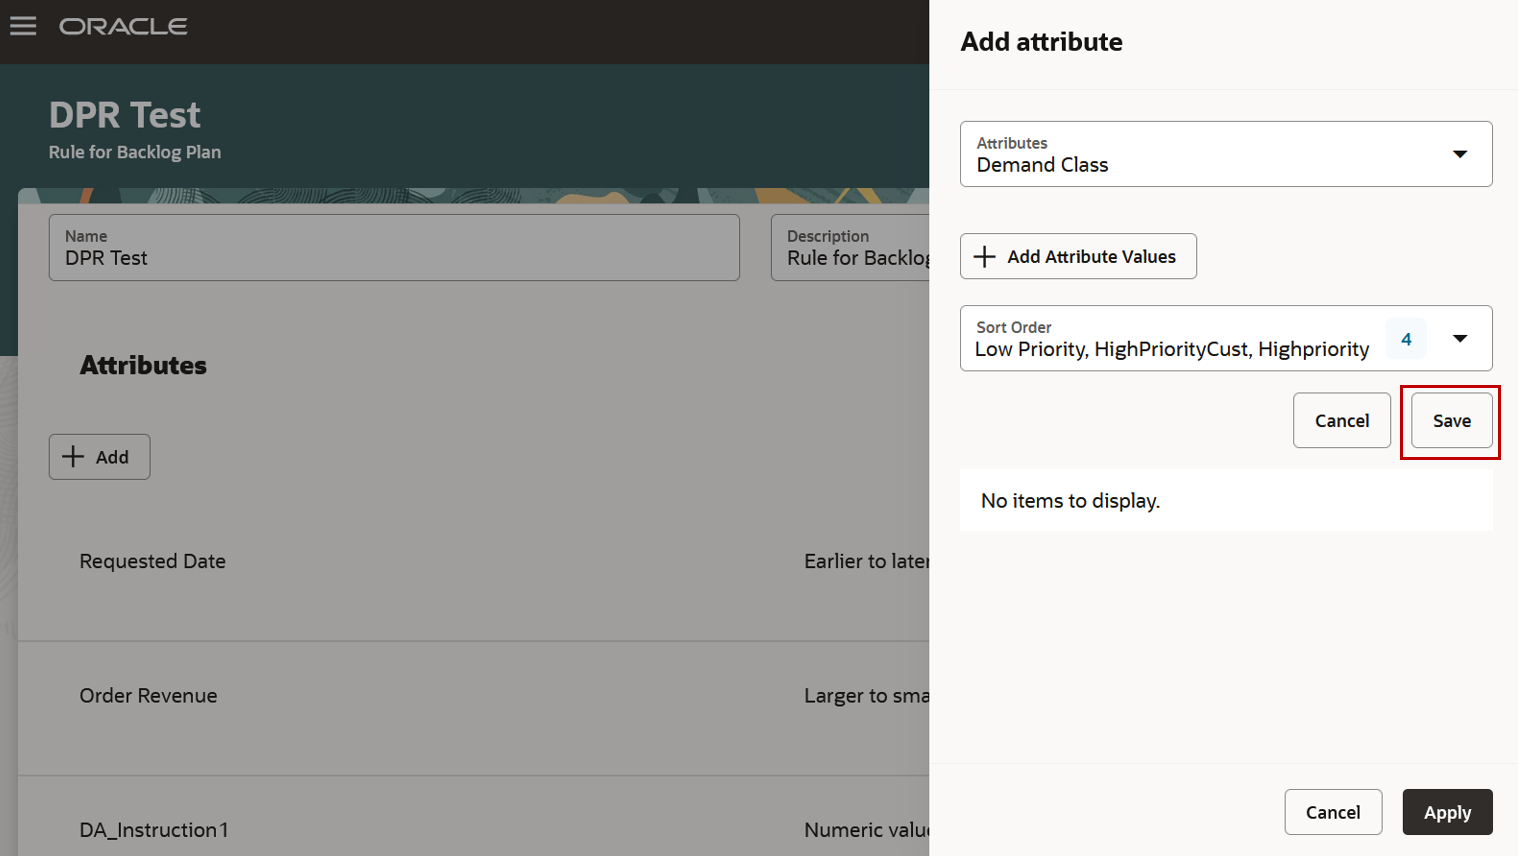
Save Button to Save Selected List of Attribute Values
You can drag the attribute values to change the relative priority of the attribute values. Click the Apply button to add the attribute to the rule.
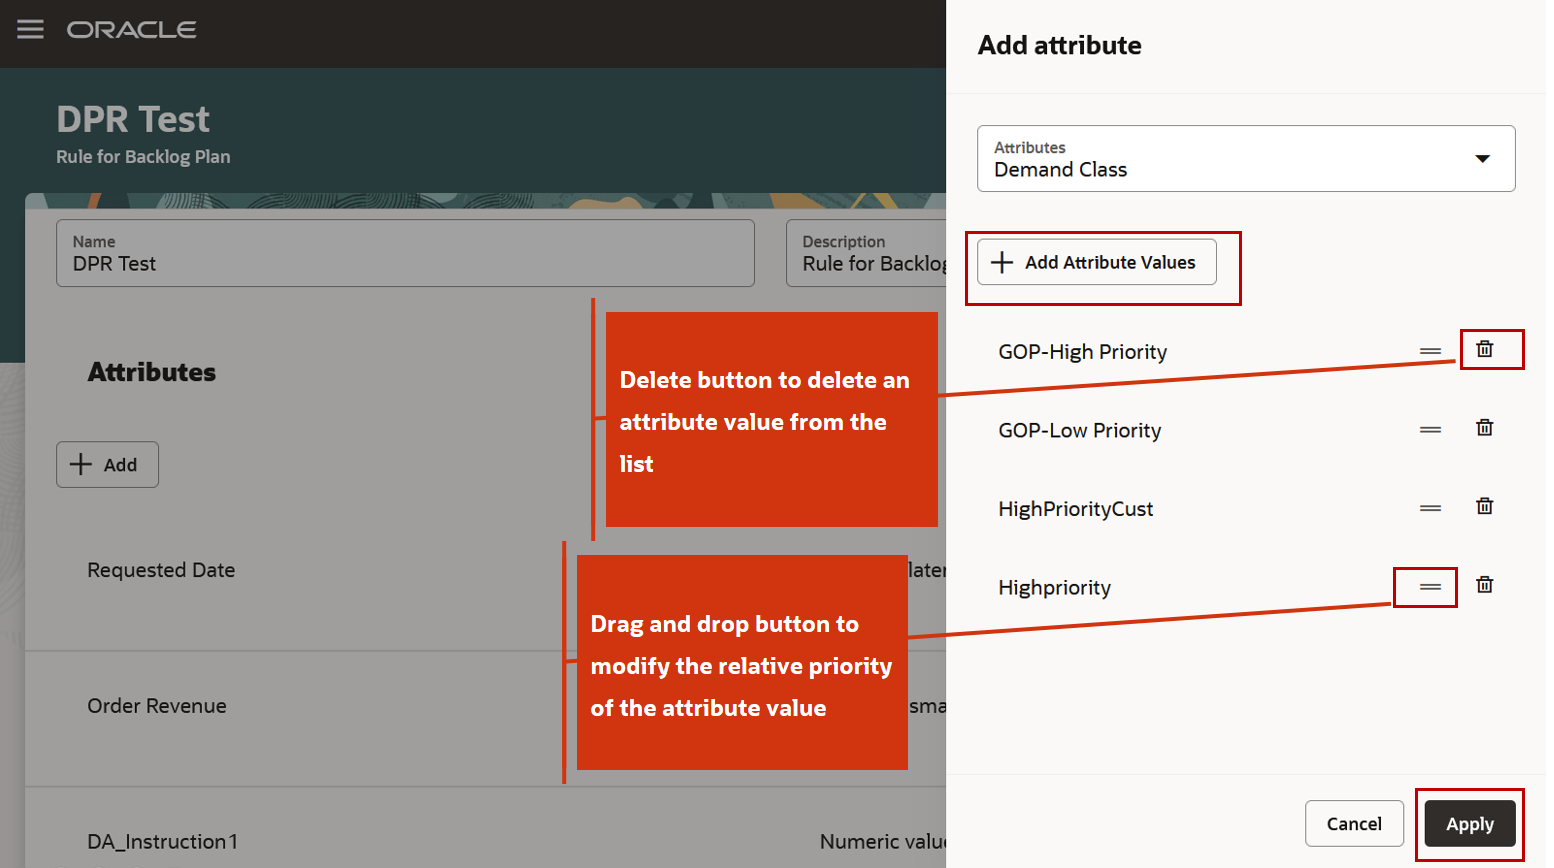
Drag and drop, Delete, and Apply Buttons
Click the Overflow button to edit or delete an attribute in the rule.
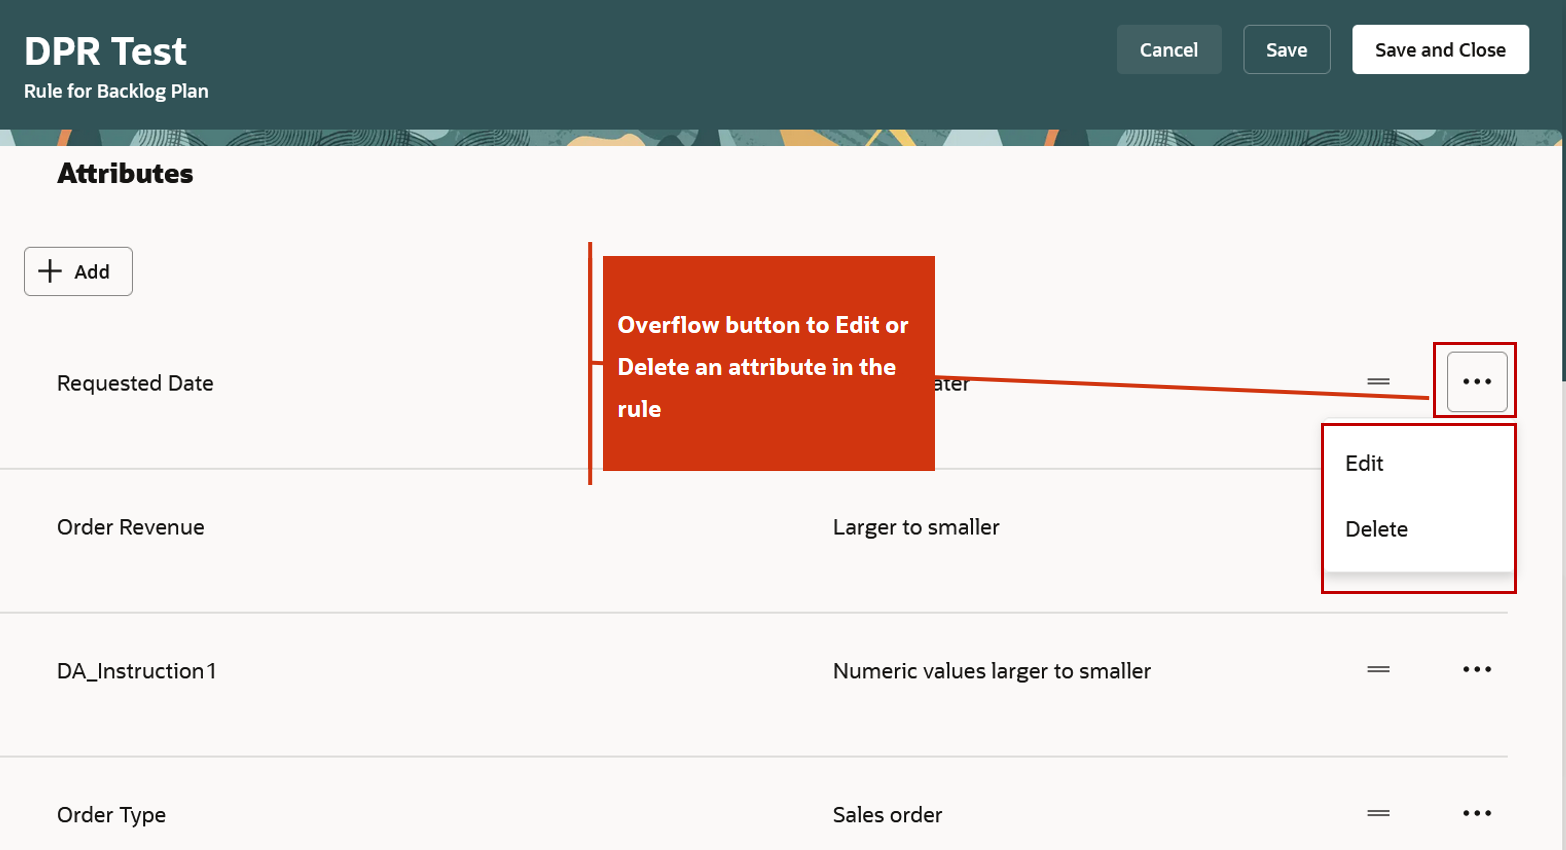
Overflow Button to Edit and Delete an Attribute
Steps to Enable
If you want to use the Manage Demand Priority Rules Using a New User Experience feature, then you must opt in to its parent feature: Order Backlog Management. If you’ve already opted in to this parent feature, then you don’t have to opt in again. To enable or disable the Redwood: Manage Demand Priority Rules Using a New User Experience feature:
-
In the Setup and Maintenance work area, search for and select the task Manage Administrator Profile Values.
-
On the Manage Administrator Profile Values page, search for and select the ORA_MSC_DEMAND_PRIORITY_RULES_REDWOOD_ENABLED profile option code.
-
In the Profile Values section, set the Site or User Level to Yes or No. The default value is No
- Yes = enables the feature
- No = disables the feature
-
Click Save and Close
-
After setting the profile value to enable the Redwood page, you need to log out and log in again to access the Demand Priority Rules Redwood page
After you set the profile option value to Yes, sign-in again. The Demand Priority Rules task is displayed in the Tasks panel. You can similarly access the Redwood Demand Priority Rules page from the Task panel in Supply Planning and Demand and Supply Planning work areas.
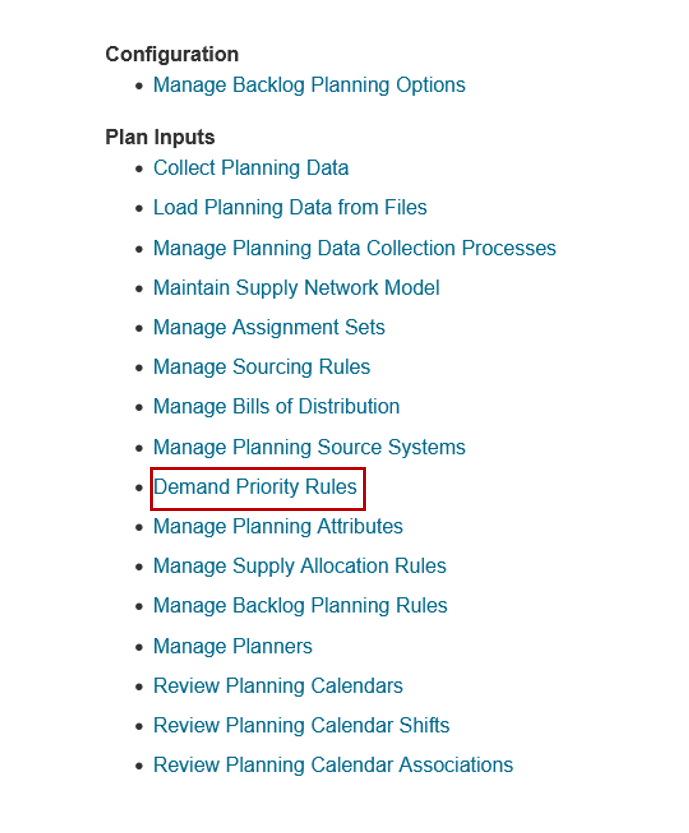
Tasks Panel in Oracle Backlog Management Work Area
Tips And Considerations
-
Demand priority rules set up in previous releases will be seamlessly shown on the Redwood page after the upgrade.
-
The search for an attribute is case sensitive, in the Add attribute drawer on the rule page.
-
If you select same attribute multiple times in a rule, the rule cannot be used in a Backlog Management plan but the rule may be valid for a supply plan.
-
If you add an attribute in a rule that is not valid for supply plan, then that rule can’t be added in supply plan’s plan options.
-
When you select attribute values for an attribute in a demand priority rule, the attribute values selected in the sort order need to be saved. If you select attribute values but doesn't save them and directly clicks the Apply button, an error message is displayed asking you to save the attribute values.
-
You cannot delete a rule that is referenced as the default rule in backlog planning options or used in a supply plan or a demand and supply plan.
-
You can search, view, create, edit, duplicate, or delete a demand priority rule using a Demand Priority Rules REST Endpoints.
Key Resources
- Recommended related training:
- Introduction to Backlog Management (update 19D) Readiness Training
- Enable Demand Priority Rules with More than 500 Unique Values (update 24C) What’s New
- Oracle Supply Chain Planning Enhancements - Specify Demand Prioritization Rules (Update 23D) Readiness Training
- You can search for “REST API for Oracle Fusion Cloud SCM” in Oracle Help Center (https://docs.oracle.com/en/)
Access Requirements
Users who are assigned a configured job role that contains these privileges can access this feature:
- Edit Demand Priority Rules (MSC_EDIT_DEMAND_PRIORITY_RULES_PRIV)
- View Demand Priority Rules (MSC_VIEW_DEMAND_PRIORITY_RULES_PRIV)
These privileges were available prior to this update.