Redwood: Manage Discount Lists
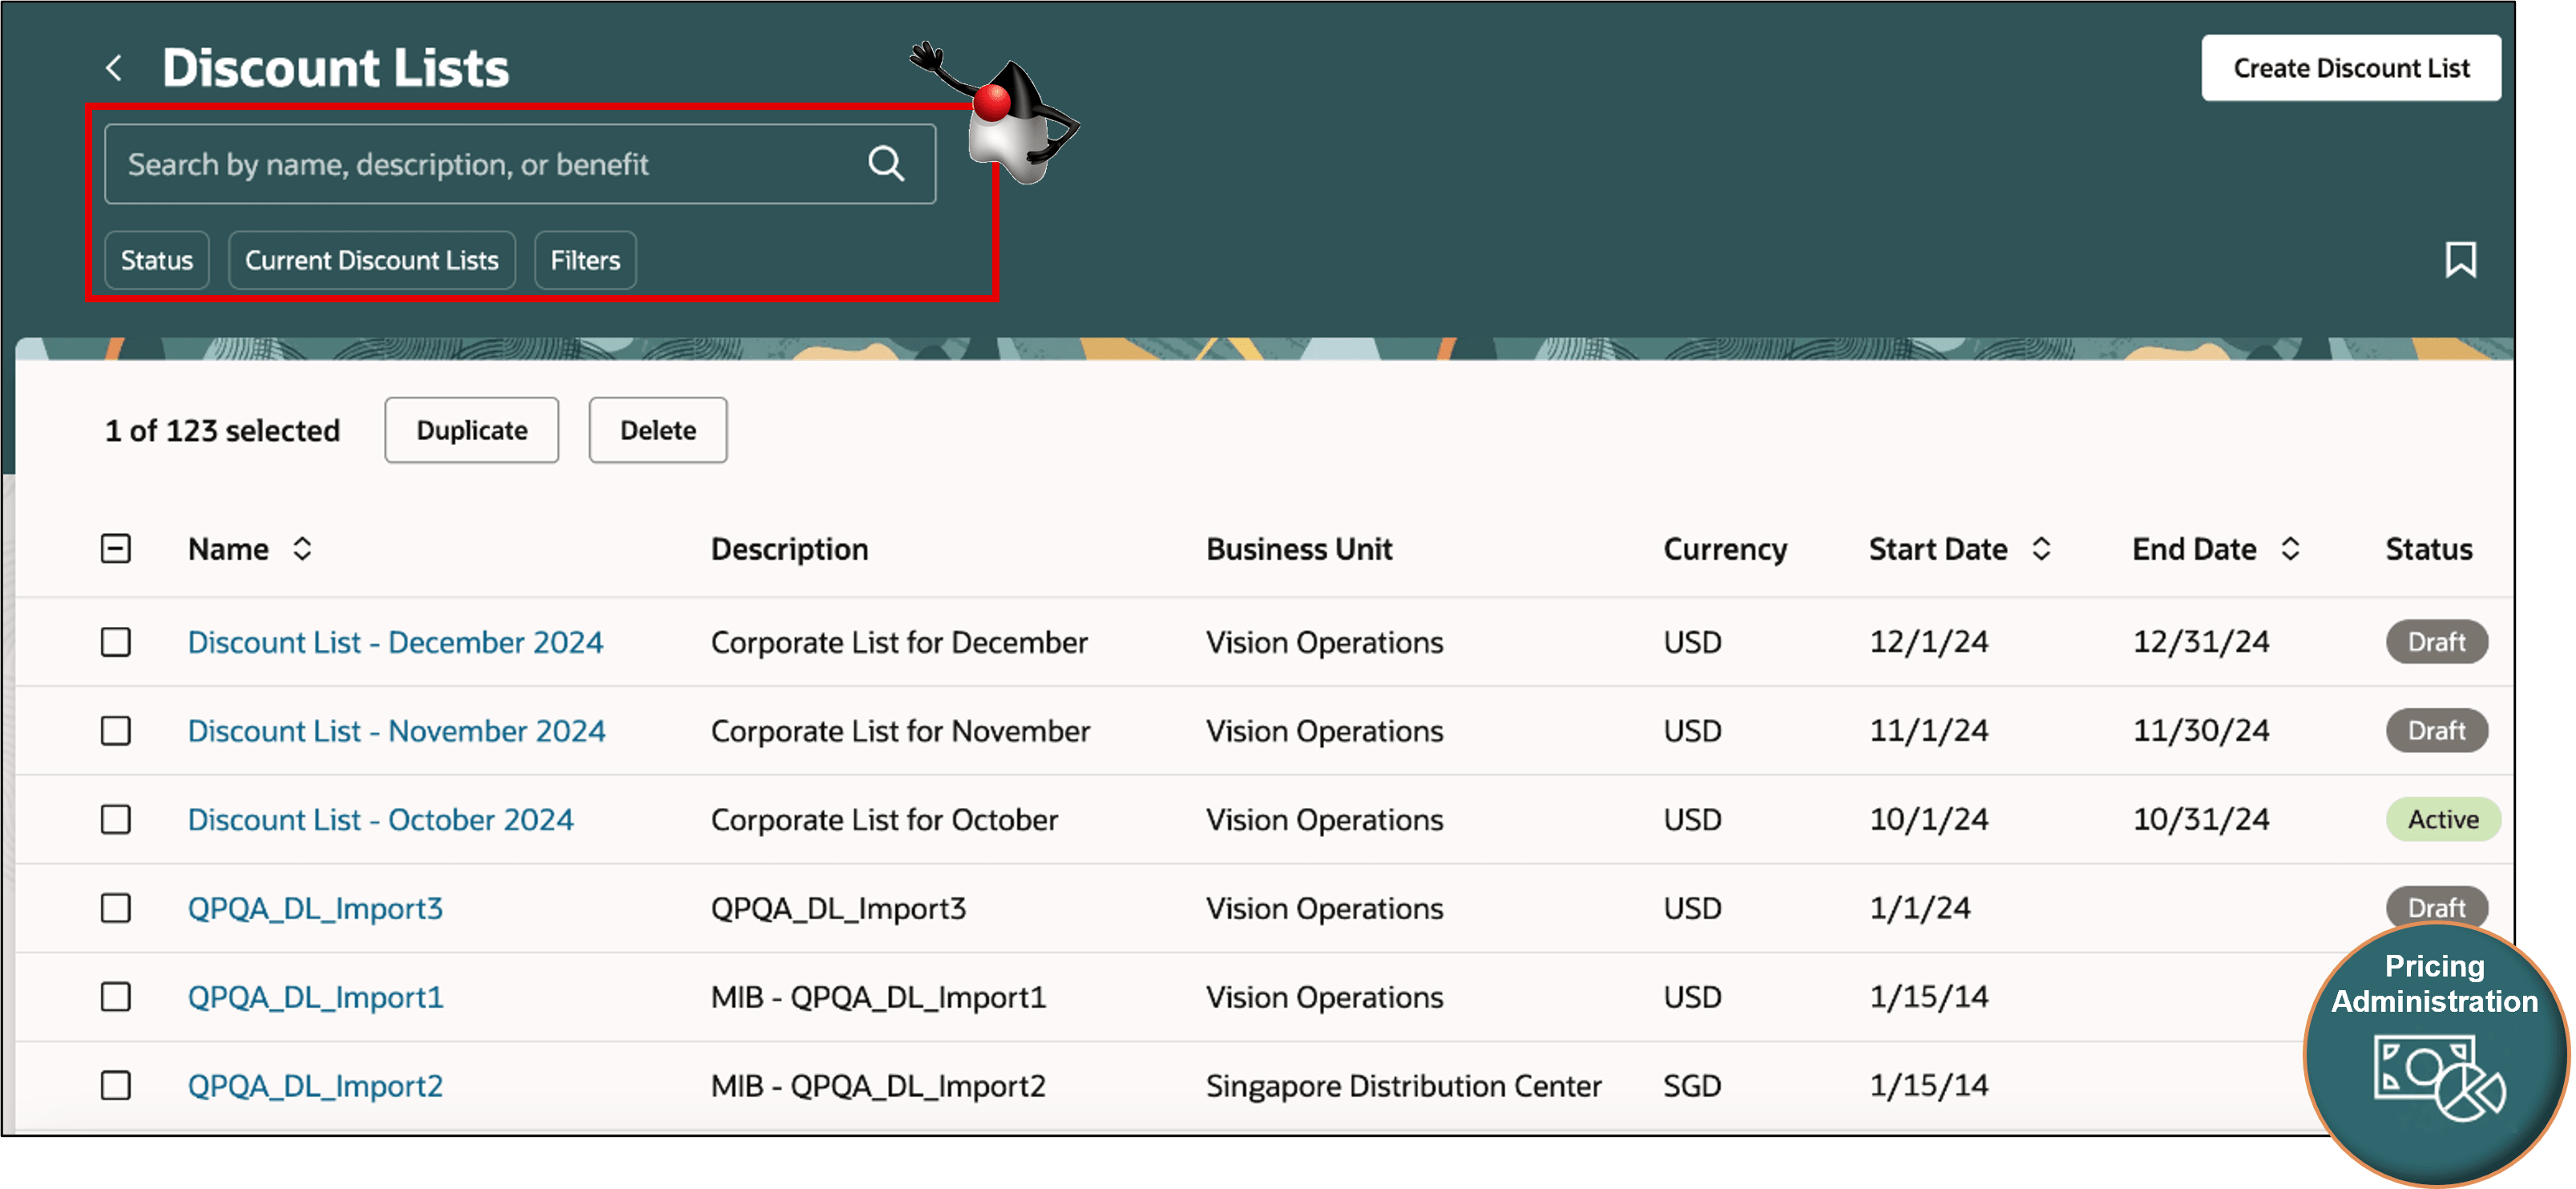
Use the redesigned Discount Lists page to search, create, and edit your discount lists. You can set up a simple, tiered, or matrix discount. You can also use descriptive flexfields to capture pricing data that's specific to your business needs.
To start, use keywords, filters, and attributes to search your discount lists:
Click Create Discount List, then set up your list:
NOTE:
-
For example, create a discount list named October 2024.
-
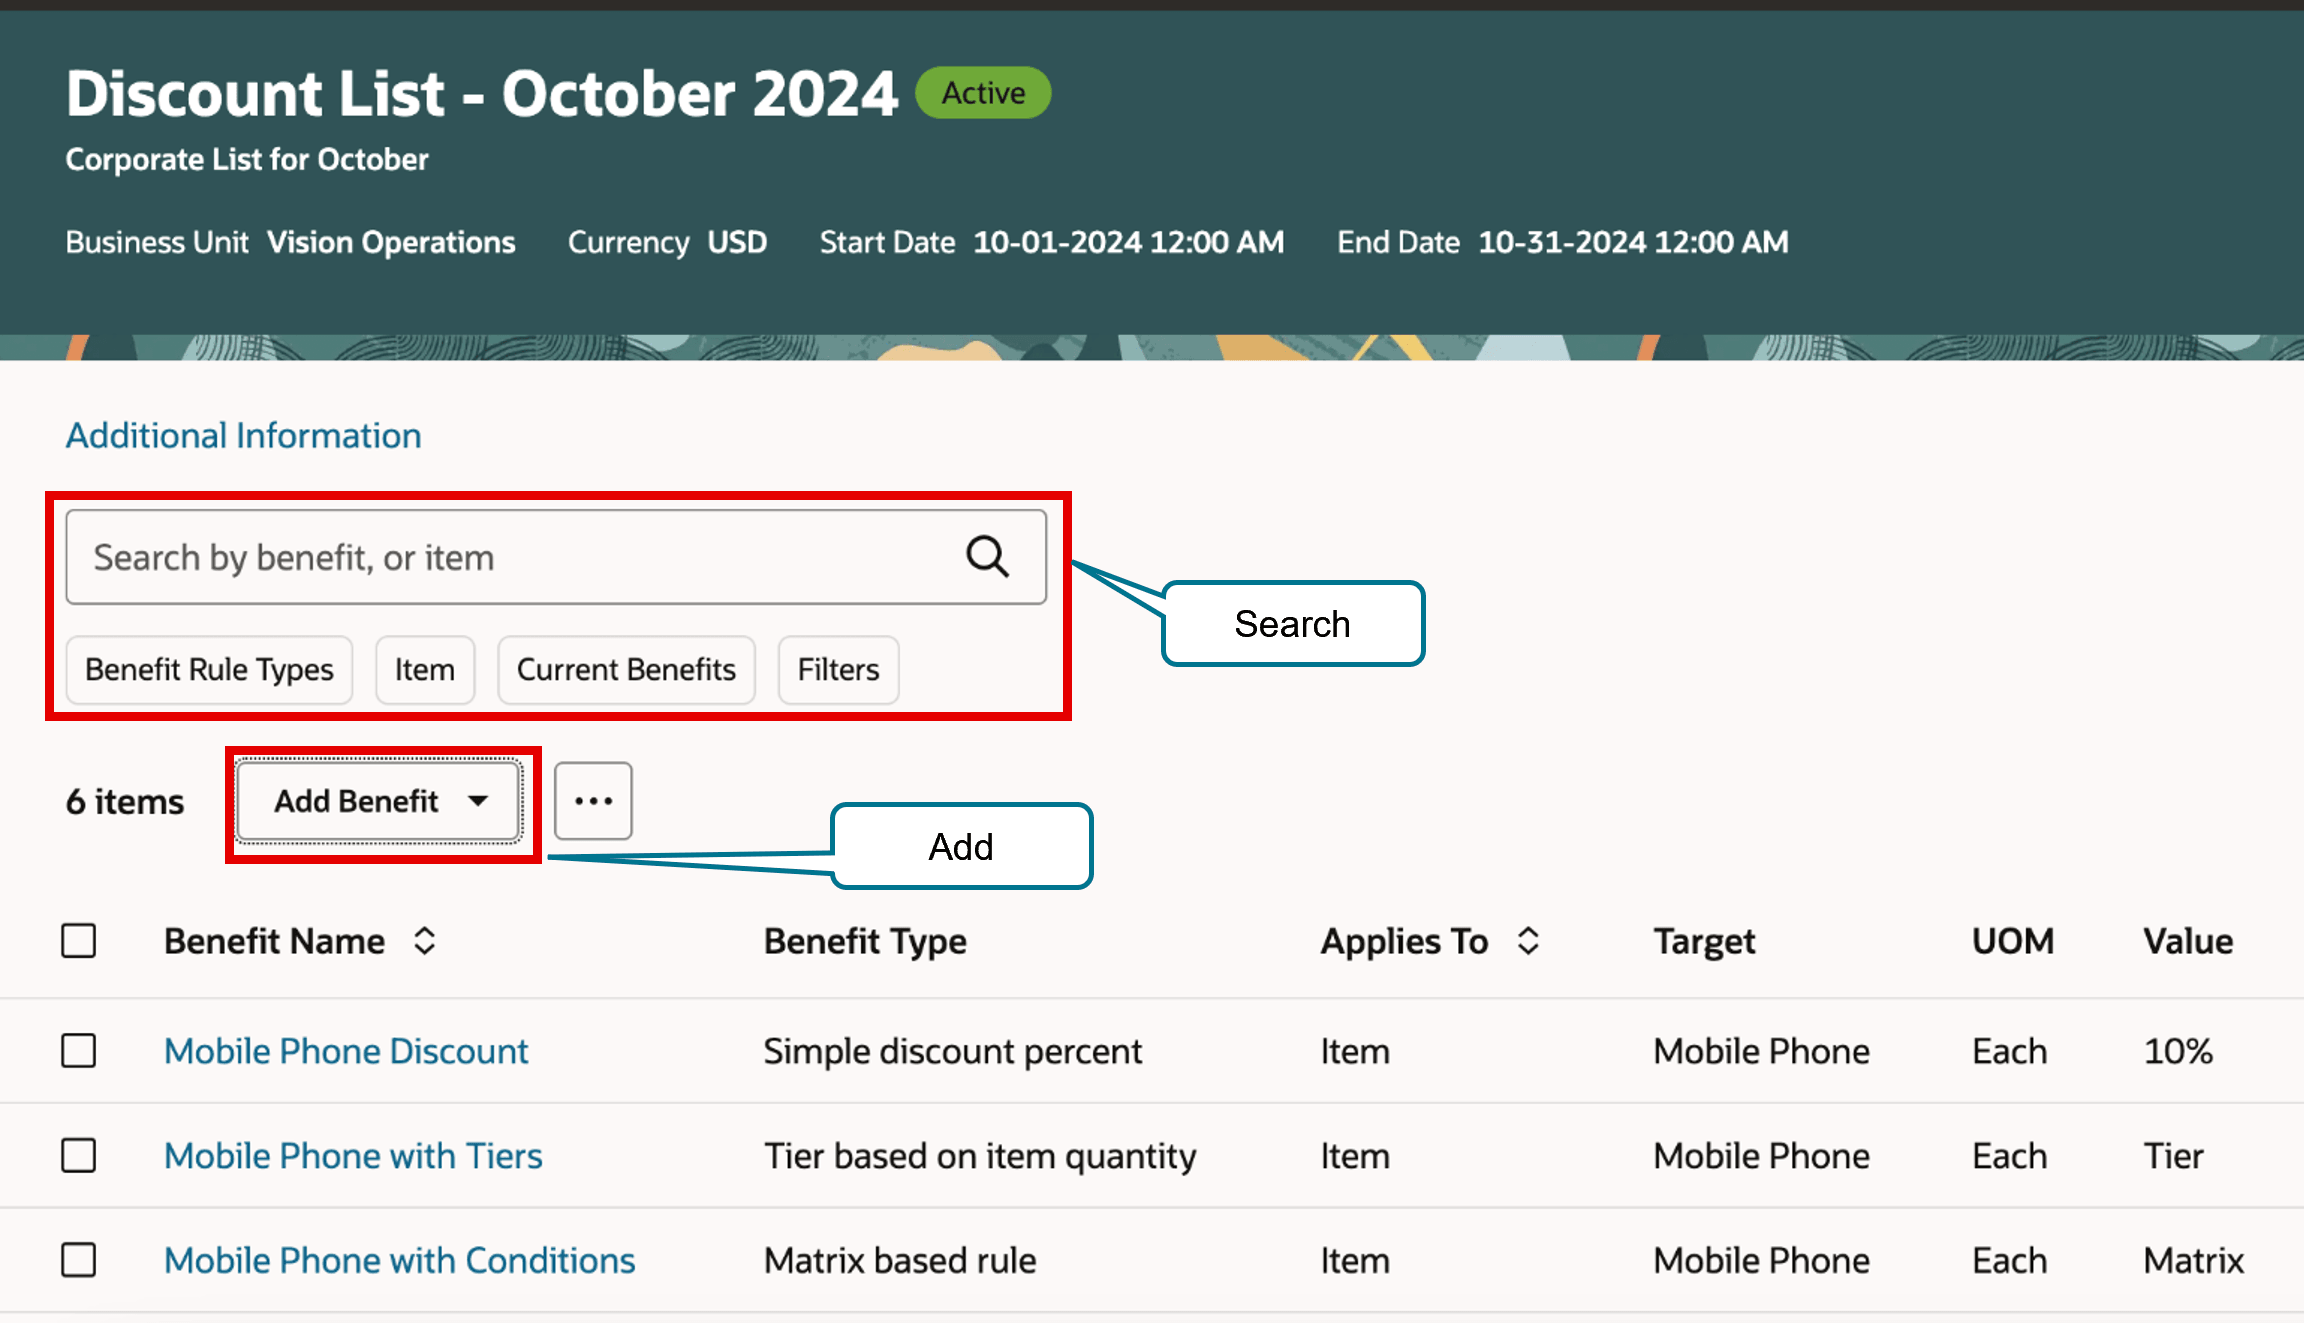
Create and manage benefits on the list.
-
Use keywords, filters, and attributes to search across benefits.
-
Click Add Benefit, and then click an action to create a simple, tier, or matrix benefit.
-
Click Additional Information to get details about access sets and descriptive flexfields.
Simple Benefits
It's easy to create a simple benefit:
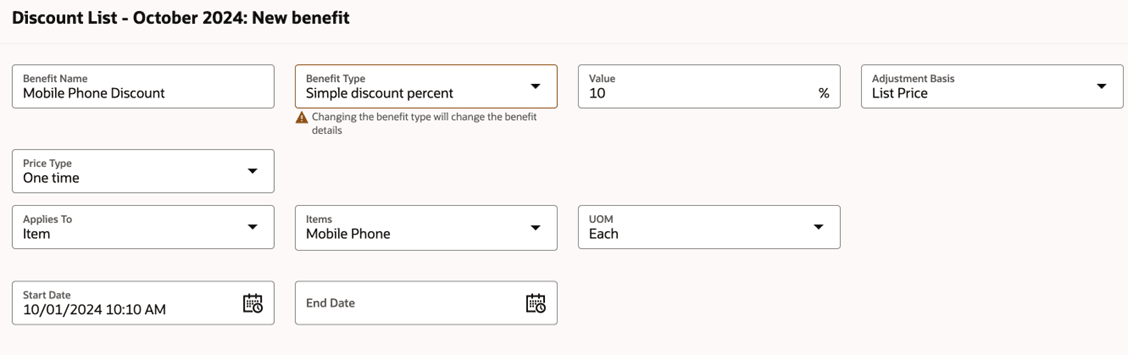
Try it:
- Enter the name.
- Select the type, such as discount percent, discount amount, markup percent, markup amount, or price override.
- Enter the value as a percent or amount.
- Select the item.
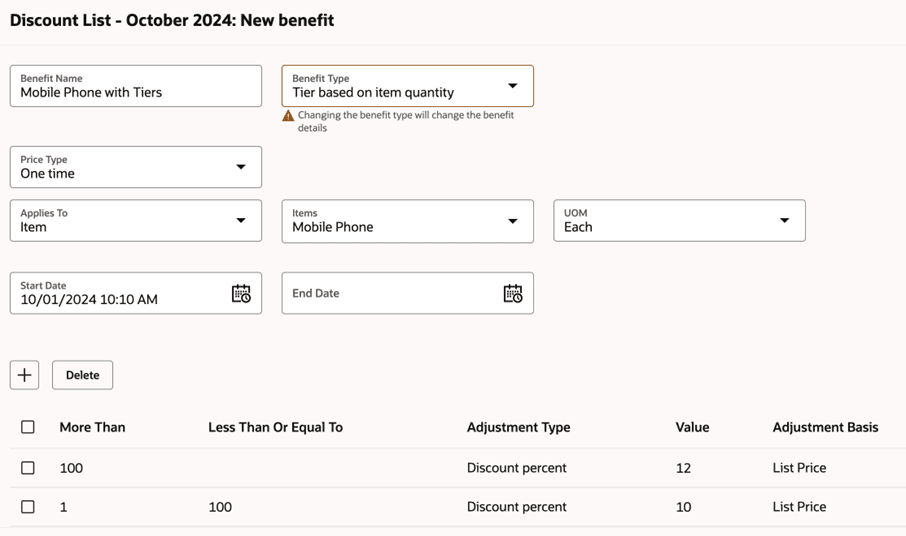
Tiered Benefit
It's similar to how you create a tiered rule on the classic pages:
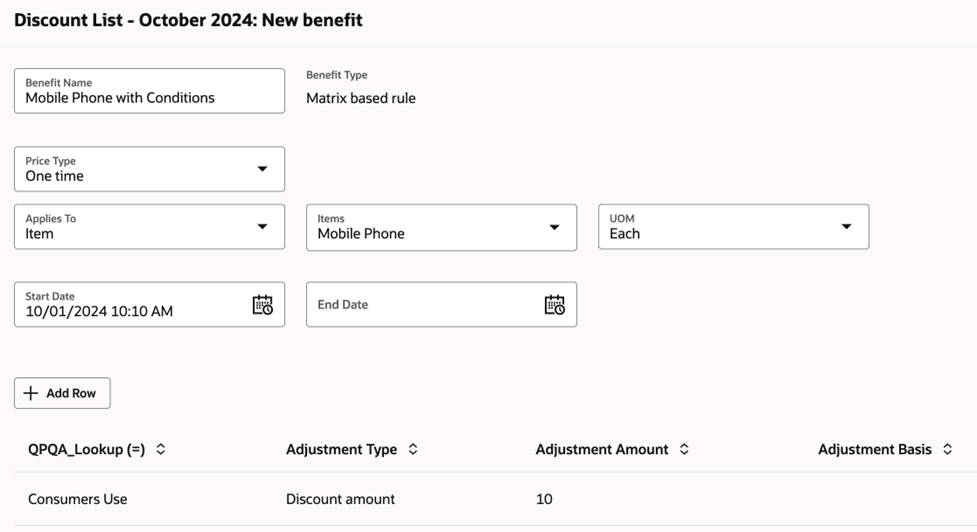
Matrix Benefit
It's also similar to how you create a matrix rule on the classic pages:
Customize Your Discount List Page
You can use a business rule to set the default value for attributes, to show attributes you need, and to hide ones you don't. For example, the discount list comes predefined to display only a small set of attributes when you create a benefit. You can add more. Here's how:
Try it:
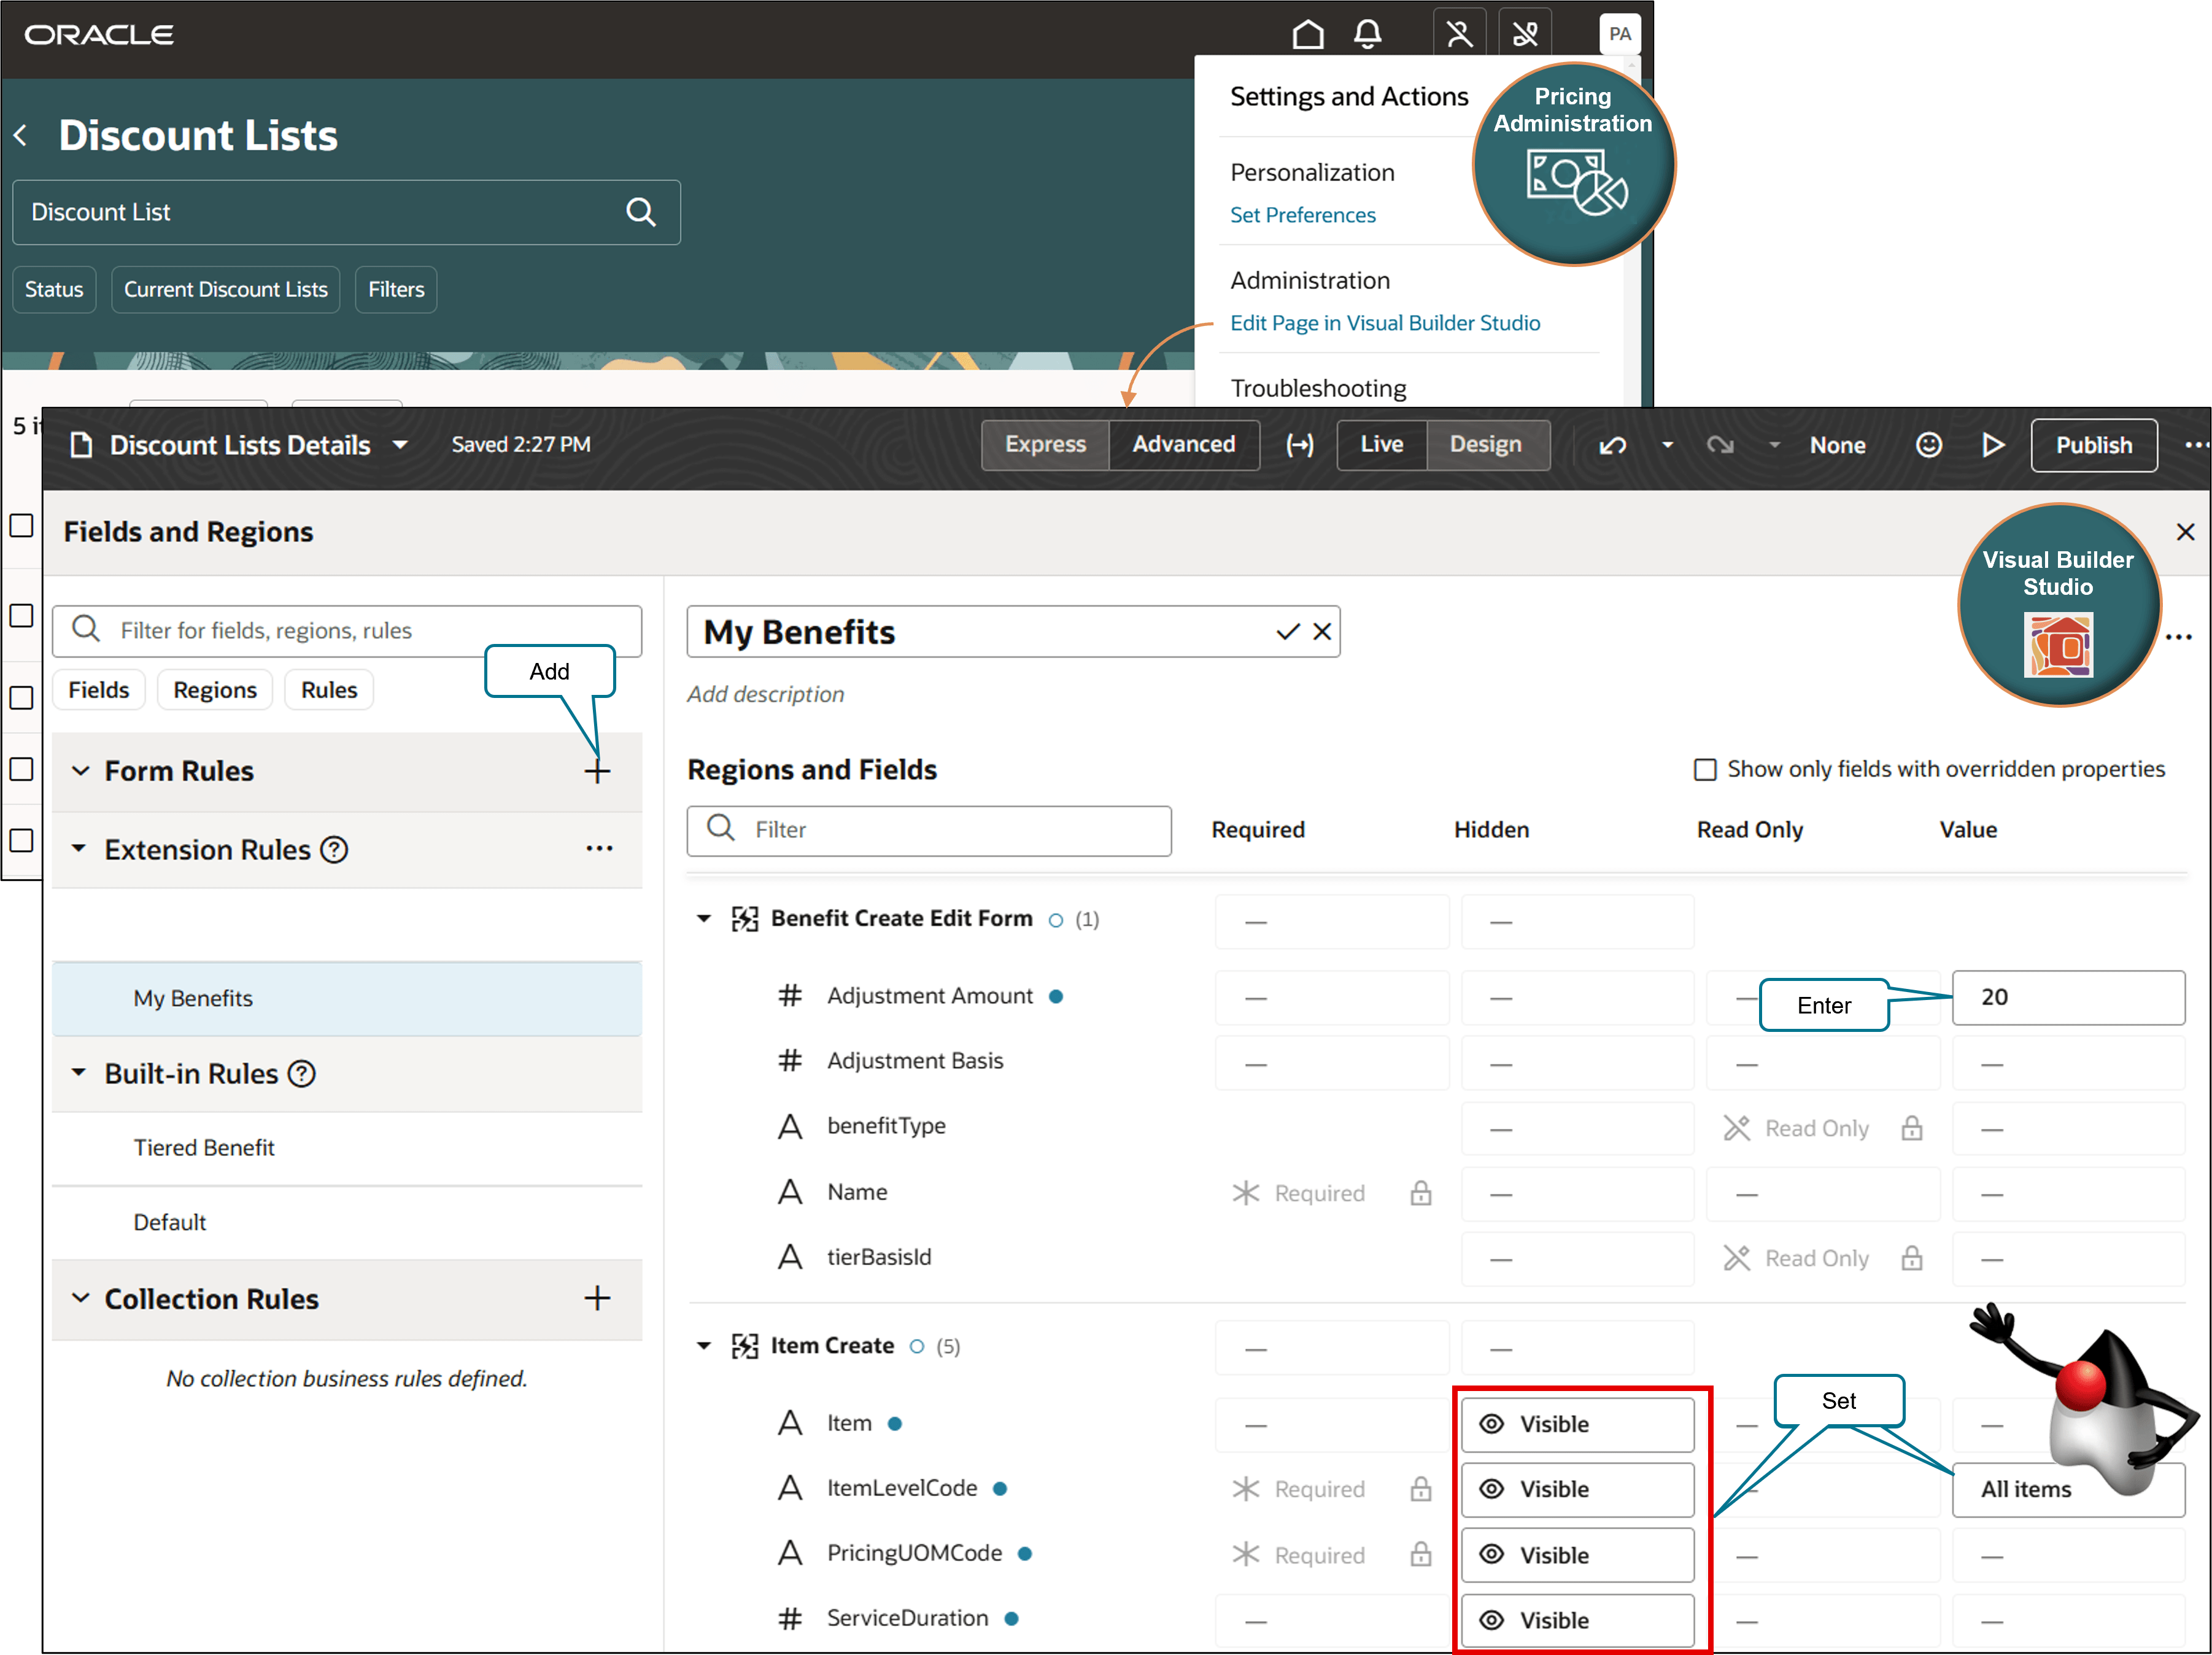
- Go to the Pricing Administration work area, then click Tasks > Manage Discount Lists - New.
- Click Settings and Actions > Edit Page in Visual Builder Studio > Configure Fields and Regions.
- In the Fields and Regions dialog, click the plus sign next to Form Rules.
- Set the values that you need. Here are some examples:
Attribute
Hidden
Value
Adjustment Amount
-
20
Item
Visible
-
ItemLevelCode
Visible
All Items
PricingUOMCode
Visible
-
ServiceDuration
Visible
-
ServiceDurationPeriodCode
Visible
-
Charge Subtype
Visible
Price
Charge Type
Visible
Activation Fee
Price Periodicity
Visible
-
Price Type
Visible
Recurring
- Click Publish.
- Wait a few minutes until you see the Build Finished dialog. It should say something like:
- Create a benefit, then verify that the page displays the attributes you made visible and sets the default values you specified.
For details, see:
- Extend SCM Redwood Application Pages Using Visual Builder Studio
- Extend Oracle Cloud Applications in Visual Builder Express Mode
- Set up VB Studio to Extend Oracle Cloud Applications
Use a redesigned page that simplifies how you search for and manage your discount lists.
Work more efficiently and improve your user experience. Create a business rule that sets the default values for attributes and that shows and hides attributes.
Steps to Enable
You don't need to do anything to enable this feature.
Tips And Considerations
Set up a guided journey for your discount page. For details about how, see Guided Journeys.
Key Resources
Access Requirements
Users who are assigned a configured job role that contains these privileges can access this feature:
- Manage Pricing Rules (QP_MANAGE_PRICING_RULES)
- Approve Discount Lists (QP_APPROVE_DISCOUNT_LISTS)
- Manage Discount Lists (QP_MANAGE_DISCOUNT_LISTS)
- Manage In-Progress Discount Lists (QP_MANAGE_IN_PROGRESS_DISCOUNT_LISTS)
- View Discount Lists (QP_VIEW_DISCOUNT_LISTS)