Redwood: Manage Planning Attributes Using a New User Experience
You can now use the Redwood user experience to view, create, edit, or delete planning attributes. This includes display, allocation, and netting attributes.
The Redwood Planning Attributes page enables you to:
- Create, edit, view, and delete planning attributes and their mappings and allocation levels
The Planning Attributes page can be accessed from Plan Inputs, supply plans, demand and supply plans, and Backlog Management in the Redwood Supply Chain Planning work area. The Planning Attributes page can also be accessed from Oracle Global Order Promising.
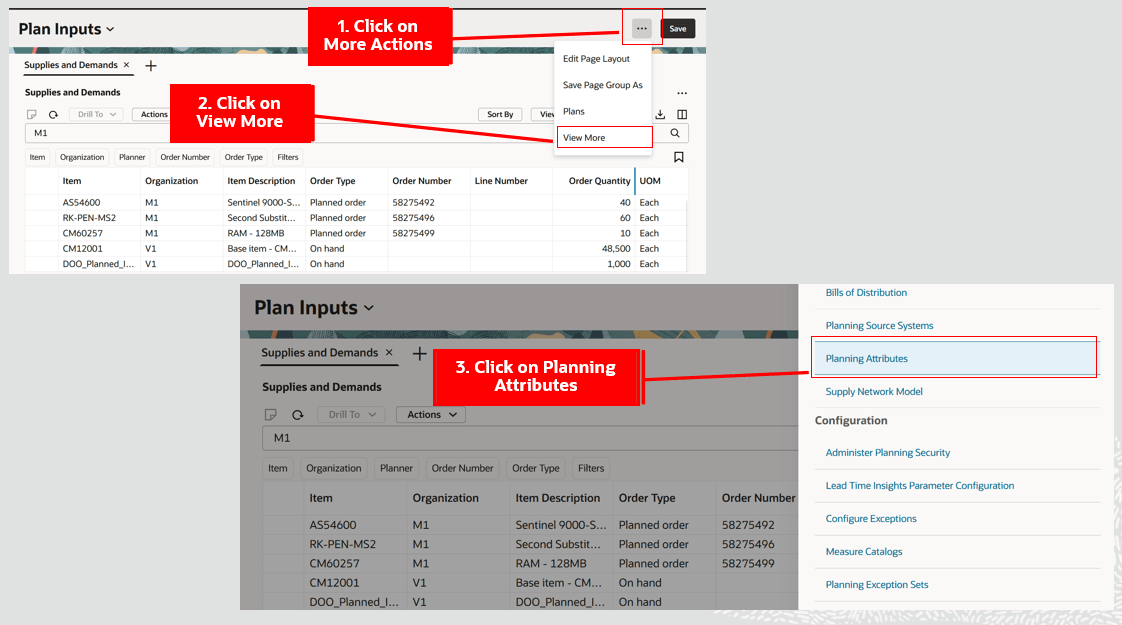
To access the Planning Attributes page:
- Click the More Actions (...) icon.
- Click View More.
- Click Planning Attributes in the Plan Inputs section.
The Planning Attributes page opens in a new browser tab
Navigate to the Planning Attributes Page
Planning Attributes Page
Planning Attributes Page
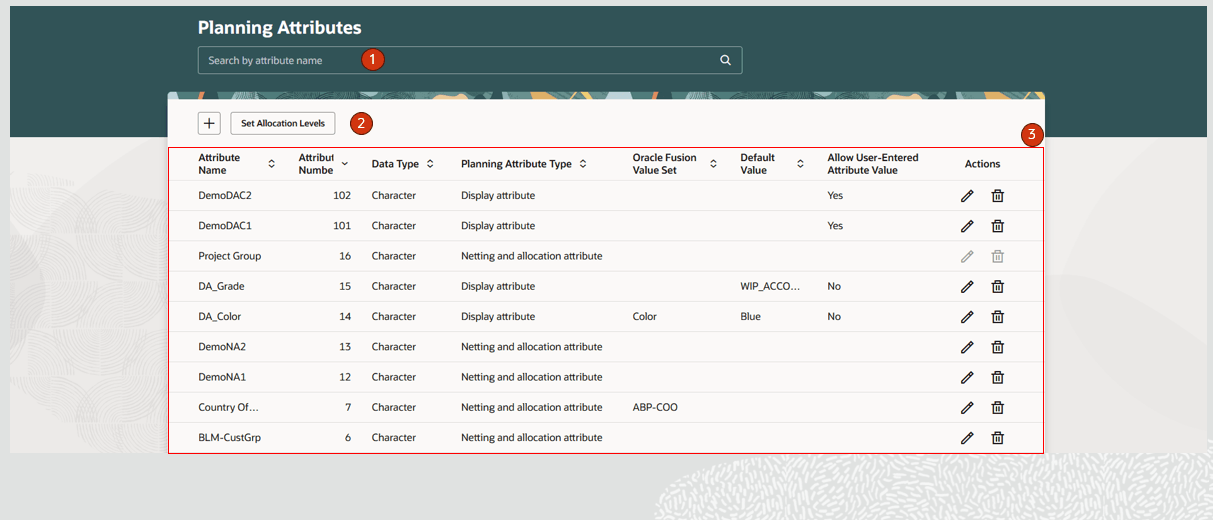
The Planning Attributes page contains the following:
- Keyword search - Lets you search across the Planning Attributes page. You can search by attribute name. The search is case insensitive and uses the contains operator.
- Action toolbar - Lets you create planning attributes and set allocation levels.
- Planning Attributes table - Displays planning attribute details. The details displayed are:
- Attribute Name – Name of the planning attribute.
- Attribute Number – Attribute number assigned to the planning attribute during the Create process.
- Data Type – Data type of the planning attribute – Character or Number.
- Planning Attribute Type – Netting and allocation attribute or Display attribute.
- Oracle Fusion Value Set – Name of the value set associated to the planning attribute. Used to collect attribute values from Oracle Fusion Cloud SCM.
- Default Value – Default value for a display attribute for which Allow User-Entered Attribute Value is No.
- Allow User-Entered Attribute Value – Yes or No. Applicable for Display attributes.
- Actions – Edit a planning attribute and its mapping. Delete a planning attribute.
Planning Attribute Actions
Let’s now look at actions you can take on the Planning Attributes page.
Create Planning Attribute
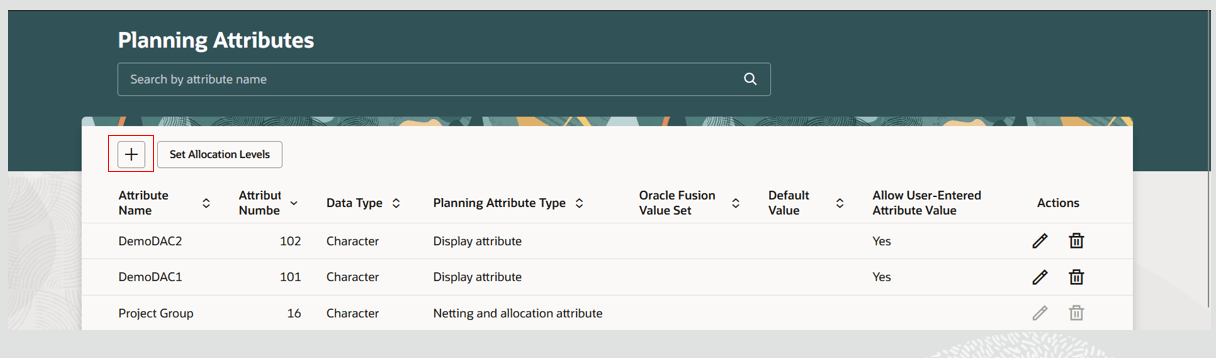
To create a planning attribute:
- Click the Add (+) button on the Planning Attributes page.
Create a Planning Attribute
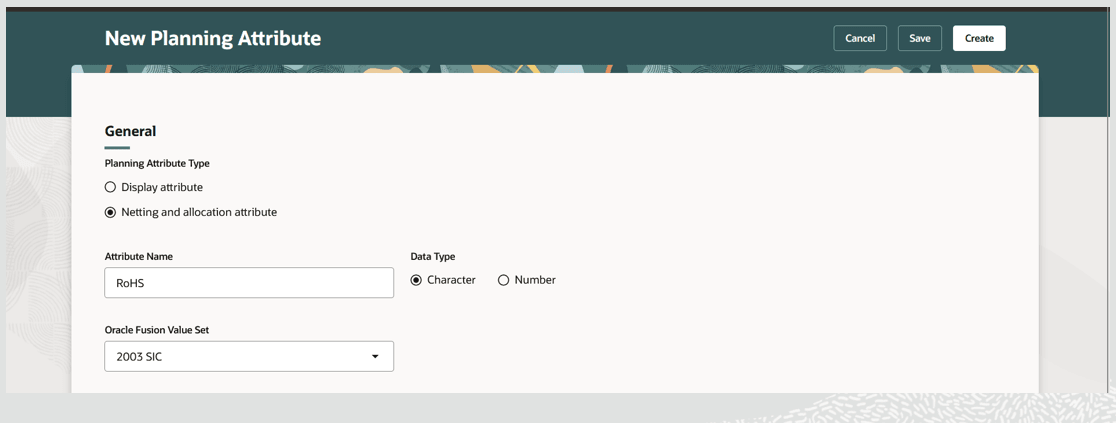
- A New Planning Attribute page opens in the same tab.
- Provide a planning attribute name, select the planning attribute type, select an Oracle Fusion Value Set, and select a Data Type. Some of the options vary based on the planning attribute type selected.
- To create a Netting and allocation attribute:
a. If you’re collecting planning attribute values from Oracle Cloud SCM, select the appropriate Oracle Fusion Value Set name from the list of values.
b. For Planning Attribute Type, select Netting and allocation attribute.
c. For Data Type, select Character or Number.
Create a Netting and Allocation Planning Attribute
- To create a Display attribute based on a list of values:
a. For Planning Attribute Type, select Display attribute.
b. For Data Type, select Character or Number.
c. If you’re collecting planning attribute values from Oracle Cloud SCM, select the appropriate Oracle Fusion Value Set name from the list of values. The Default Value for the planning attribute in edit mode can be selected only after running data collections for planning attribute values..
d. Leave the Allow User-Entered Attribute Value checkbox unselected.
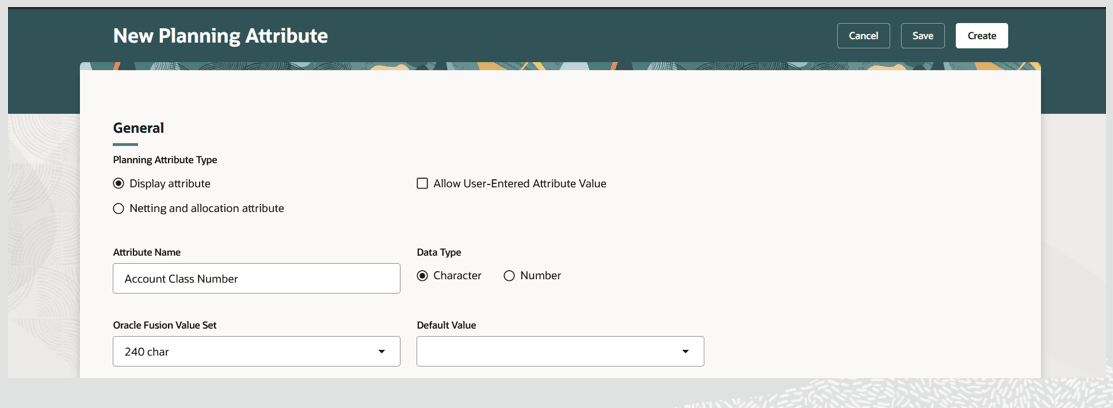
Create a Display Planning Attribute Based on List of Values
- To create a Display attribute based on user-entered attribute values:
a. For Planning Attribute Type, select Display attribute.
b. Select the Allow User-Entered Attribute Value checkbox. The Data Type then defaults to Character and can’t be changed.
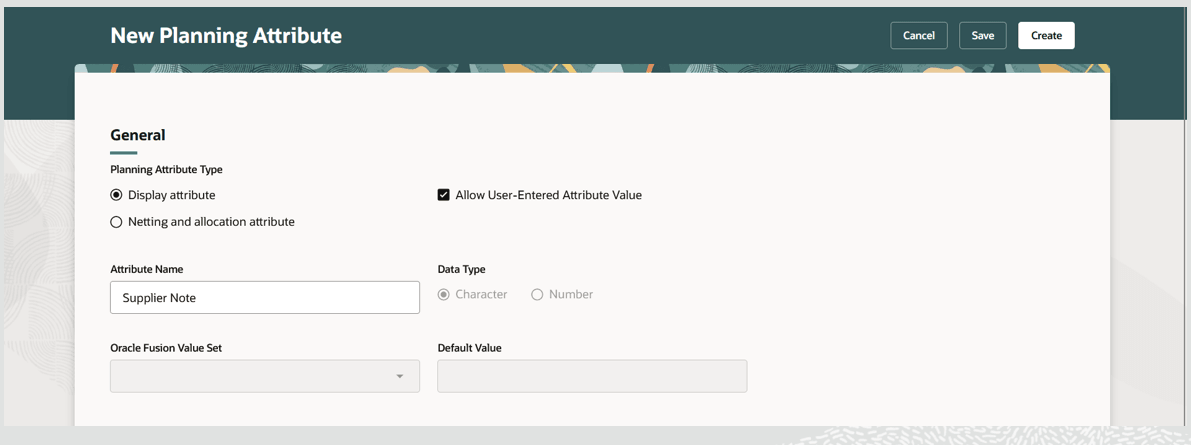
Create a Display Planning Attribute Based on a User-Entered Attribute Value
- Click Create.
The planning attribute is created and is now displayed on the Planning Attributes page.
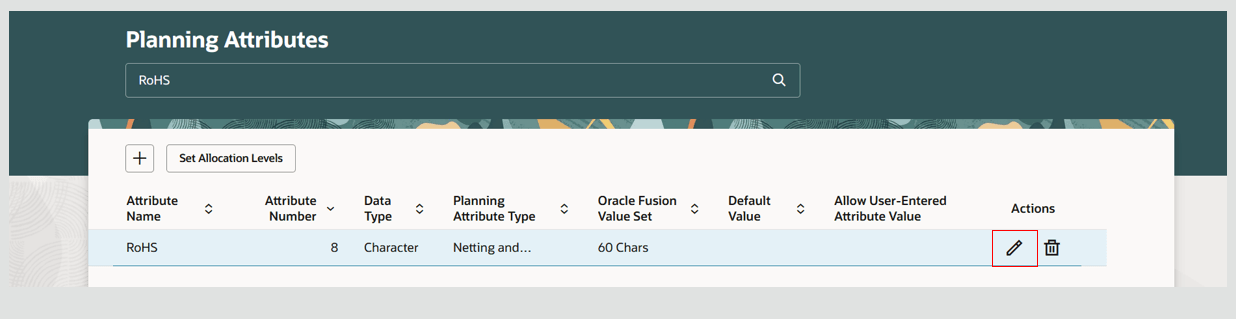
Edit Planning Attribute
To edit a planning attribute:
- Click the Edit icon in the Actions column.
- The selected planning attribute is opened for editing in the same tab.
- Make your desired changes directly in the table cells and then click Save.
- When you’re done making changes, click Update to save all the changes and return to the Planning Attributes page.
Delete Planning Attribute
To delete a planning attribute:
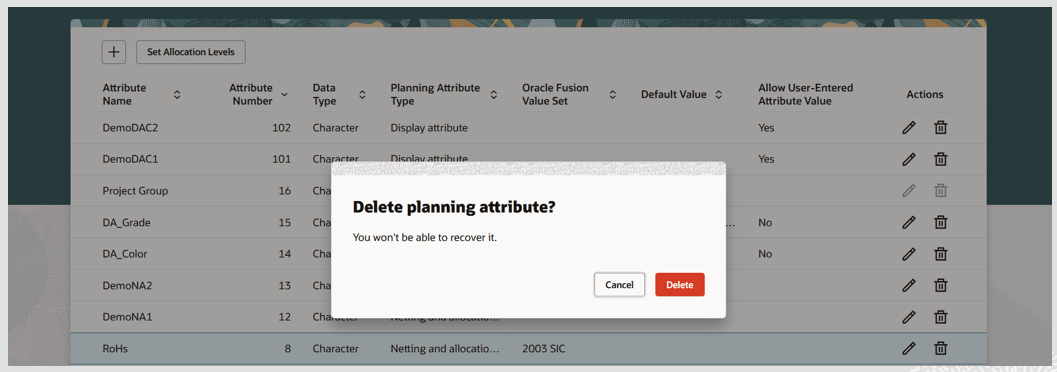
- Click the Delete icon in the Actions column.
- A confirmation message is displayed. Click the Delete button to confirm that you want to delete the planning attribute.
Delete Planning Attribute
- The system performs some validations. If the validations are successful, then the planning attribute is deleted. If the validations aren’t successful, then an error message is displayed. You must resolve the errors to successfully delete the planning attribute. Refer to the “Validations for Deleting a Planning Attribute” section later in this document
- Once the deletion is successful, a final confirmation message is displayed.
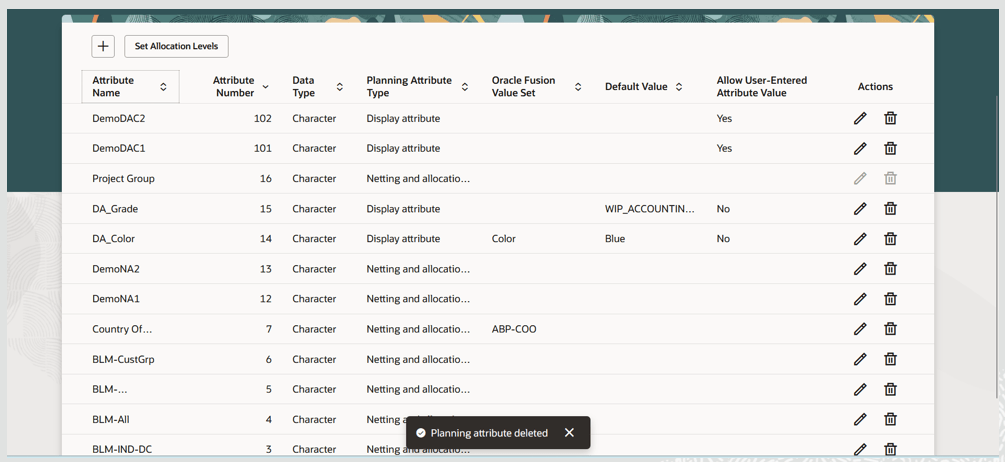
Confirmation Message Displayed After Planning Attribute Is Deleted
Additional Details for Planning Attributes
Planning Attribute Mapping
Planning attribute mapping is required if you’re collecting attribute values for supplies and demands from Oracle Cloud SCM.
To create or edit planning attribute mapping:
- Click the Edit icon in the Actions column.
Edit Planning Attribute
- In the Planning attribute mapping section, click the + icon.
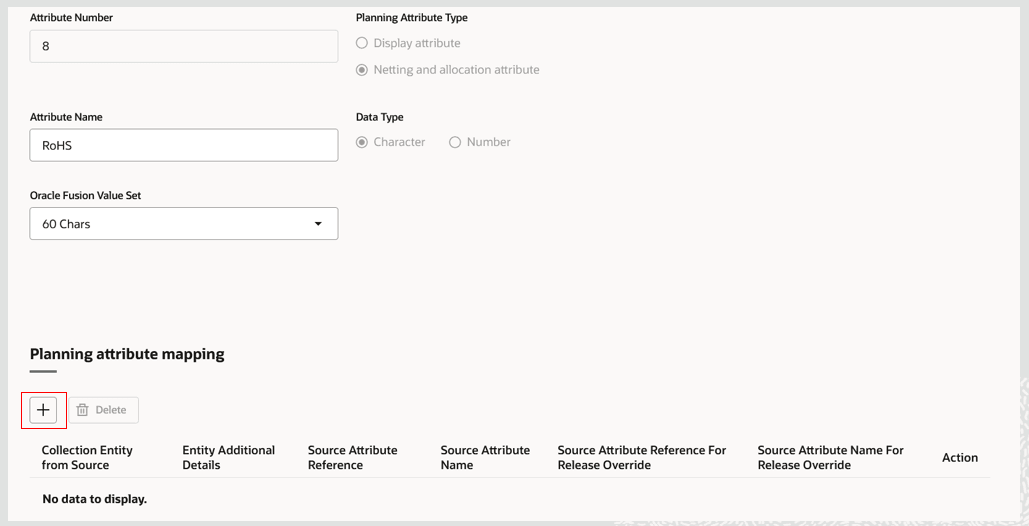
Create Planning Attribute Mapping
- Select an option from the list of values for Collection Entity from Source, its associated Entity Additional Details, Source Attribute Reference, and Source Attribute Name. Then click on the check mark.

Add Attribute Mapping for an Entity
- The Source Attribute Reference For Release Override and Source Attribute Name For Release Override fields can be selected only if it’s a purchase requisition entity and the source attribute name is NOTE_TO_BUYER, NOTE_TO_SUPPLIER or NOTE_TO_RECEIVER.
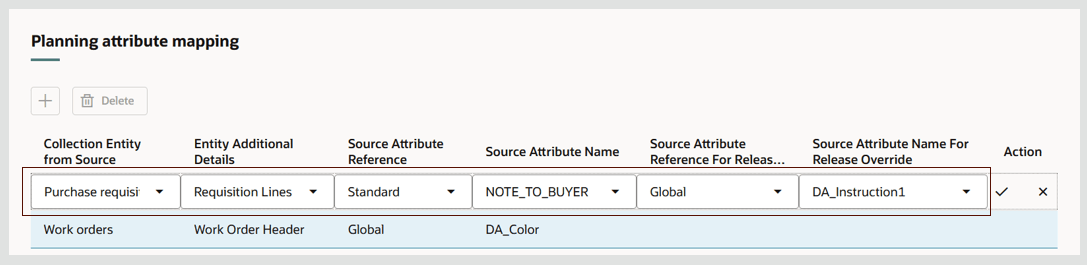
Add Source Attribute Reference for Release Override Details
- The Planning attribute mapping is added.

Planning Attribute Mapping Added
- Review the message displayed, which informs you that after saving changes planning attribute mappings, that you’ll need to run targeted collections for selected entities to collect entity details with planning attribute values.
- Click Save to save the mapping. You can continue to add another mapping or edit planning attributes. When done, click Update to save the changes and return to the Planning Attributes page.
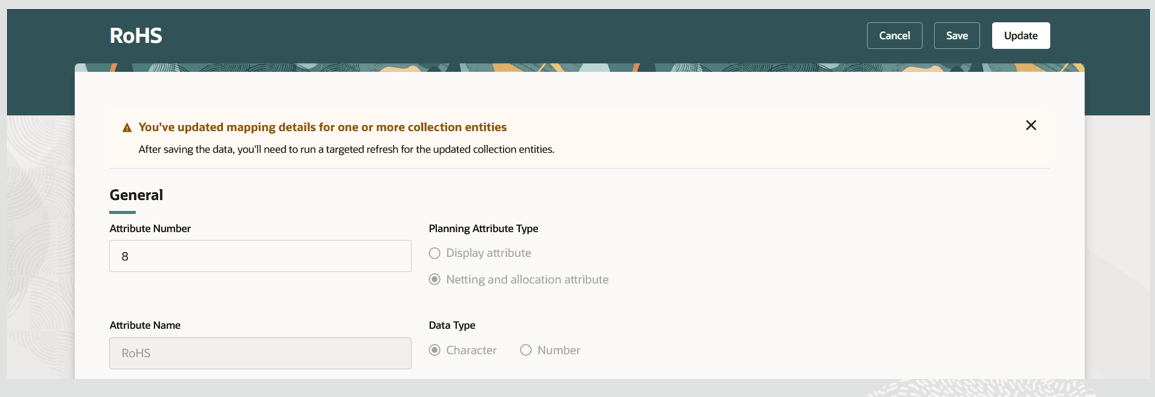
Save Planning Attribute Mapping
Delete Planning Attribute Mapping
To delete a planning attribute mapping:
- Click the Edit icon in the Actions column for the planning attribute.
- In the Planning attribute mapping section, select a mapping and then click Delete.
- A message will be displayed, informing you to run targeted collections for the entity for which the planning attribute mapping is deleted.
- Click Save or Update.
Set Allocation Levels
To configure planning attributes as allocation levels for Global Order Promising and Backlog Management:
- Click the Set Allocation Levels button on the Planning Attributes page.
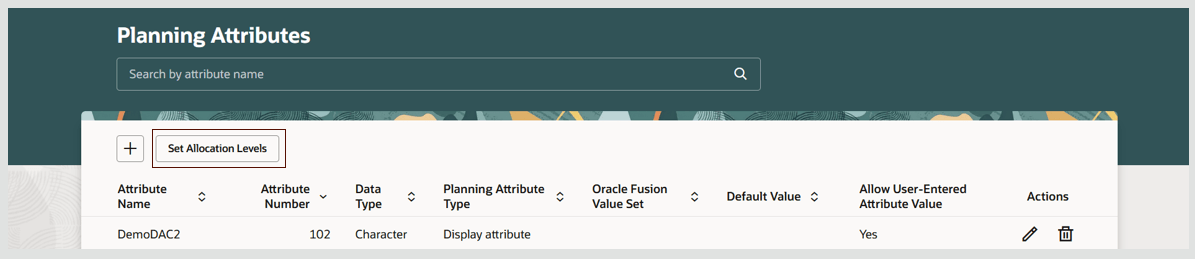
Set Allocation Levels
- The Allocation levels drawer opens.

Allocation Levels Drawer
- Select netting and allocation attributes for the allocation tiers. You can select an attribute for any of the following combinations:
- Allocation Tier 1
- Allocation Tier 1 and Allocation Tier 2
- Allocation Tier 1, Allocation Tier 2 and Allocation Tier 3
You must always start with Allocation Tier 1, followed by Allocation Tier 2, and then Allocation Tier 3.
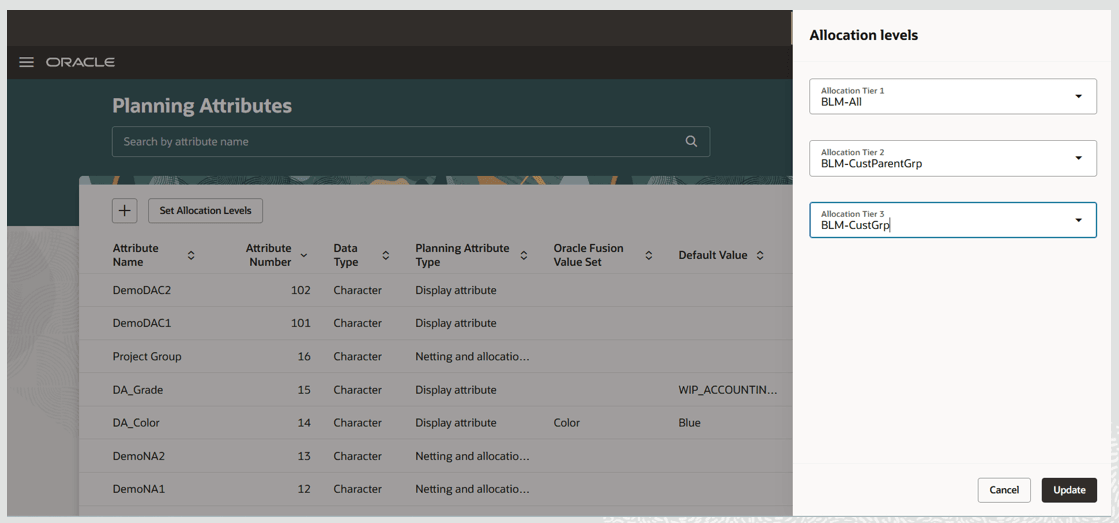
Select Planning Attribute for Allocation Level
- Click Update to save the allocation levels.
Validations for Deleting a Planning Attribute
When you attempt to delete a planning attribute, the system performs the following validations:
- Planning attribute shouldn’t be assigned to a netting rule.
- Planning attribute values shouldn’t be available in collected data.
- Netting and allocation attribute values shouldn’t be available in plan data.
- Planning attribute shouldn’t be assigned to any allocation tier in Set Allocation Levels.
- Planning attribute shouldn’t be assigned within a demand priority rule.
- Planning attribute dimension shouldn’t be used in a measure.
Quick Actions
You can now navigate to the Planning Attributes page from Quick Actions. To enable Quick Actions to navigate to the Planning Attributes page:
- Go to Navigator > My Enterprise > Setup and Maintenance.
- Search for and select the Manage Administrator Profile Values task.
- Search for the profile display name Redwood Page for Planning Attributes.
- Set the Profile Value to Yes and save. (You can set this profile at the User or Site level.)
Quick Actions for planning attributes in Supply Chain Planning and for Global Order Promising in Order Management will now navigate to Redwood Planning Attributes page.
Steps to enable and configure
Use the Opt In UI to enable this feature. For instructions, refer to the Optional Uptake of New Features section of this document.
Offering: Supply Chain Planning
Tips and considerations
- If you want to use the Redwood: Manage Planning Attributes Using a New User Experience feature, then you must opt in to its parent feature: Order Backlog Management. If you’ve already opted in to this parent feature, then you don’t have to opt in again.
- You can enable a guided journey for the Planning Attributes page.
- Project Group, Project, and Task are predefined planning attributes. You can’t delete or edit predefined planning attributes.
- You can create up to 13 planning attributes that are based on lists of values. All 13 planning attributes can be Netting and allocation attributes or you can create a maximum of 4 display attributes based on lists of values, with the remaining being netting and allocation attributes.
- You can create a maximum of 3 display attributes based on user-entered attribute values.
- You can edit the planning attribute name only if the attribute values haven’t yet been collected and planning attribute mappings haven’t yet been added.
- The planning attribute number is assigned during the create process and is noneditable.
- The create process of a netting and allocation planning attribute will also create a dimension, hierarchy, and its associated levels.
- To create netting and allocation planning attributes on the Planning Attributes page, you must opt-in to Project-Driven Supply Chain or Attribute-Based Planning.
- To create display planning attributes on the Planning Attributes page, you must opt-in to Attribute-Based Planning.
- To configure planning attributes in Set Allocation Levels on the Planning Attributes page, you must opt-in to Attribute-Based Planning.
- Planning attributes are global entities and are supported across Fusion and external source systems.
Key resources
- Refer to the 20C release feature “Plan Project-Specific Supply” for additional details on enabling Project-Driven Supply Chain opt-in.
- Refer to the 21C release feature “Map and Collect Supply Demand Entities with User-Defined Attributes” for additional details on enabling Attribute-Based Planning opt-in and additional details on planning attributes configuration and planning attributes mapping.
- Refer to the 22B release feature “Display User-Defined Attributes on Orders” for additional details on displaying planning attributes based on a list of values.
- Refer to the 23A release feature “Manage User-Defined Text Attributes on Supply and Demand Entities” for additional details on displaying planning attributes based on a user-entered attribute value.
Access requirements
Users who are assigned a configured job role that contains these privileges can access this feature:
- Monitor Supply Planning Work Area (MSC_MONITOR_SUPPLY_PLANNING_WORK_AREA_PRIV)
- Monitor Demand and Supply Planning Work Area (MSC_MONITOR_DEMAND_AND_SUPPLY_PLANNING_WORK_AREA_PRIV)
- Monitor Backlog Management Work Area (MSC_MONITOR_BACKLOG_MANAGEMENT_WORK_AREA_PRIV)
- Monitor Order Promising Work Area (MSC_MONITOR_ORDER_PROMISING_WORK_AREA_PRIV)
These privileges were available prior to this update.