Introduce and plan for new business
You can create and manage member introductions for new product, customer, and organization launches by copying selected measures from existing members to target members. Using the Introductions page, you can create or duplicate an introduction, define its scope, select measures, and map source measures to target measures for new members. You can define introductions for levels of the Product, Customer, Organization, and Demand Class dimensions and use these levels as filters. You can use the functionality to only create combinations or also copy data for selected measures.
After snapshot processing, the plan run processes each active introduction, creates or updates combinations, copies data for measures marked for incremental data copy, and moves introductions from the Active to Complete status when the introduction date is reached. This capability helps improve planning consistency for new business launches by defining new member introductions, copying selected measure data, and processing active introductions during plan runs. The capability reduces manual preparation and helps teams plan for new products, customers, and organizations with clearer governance.
In the Redwood work area named Supply Chain Planning, for a demand or demand and supply plan, select More Actions > Introductions to open the Introductions page.
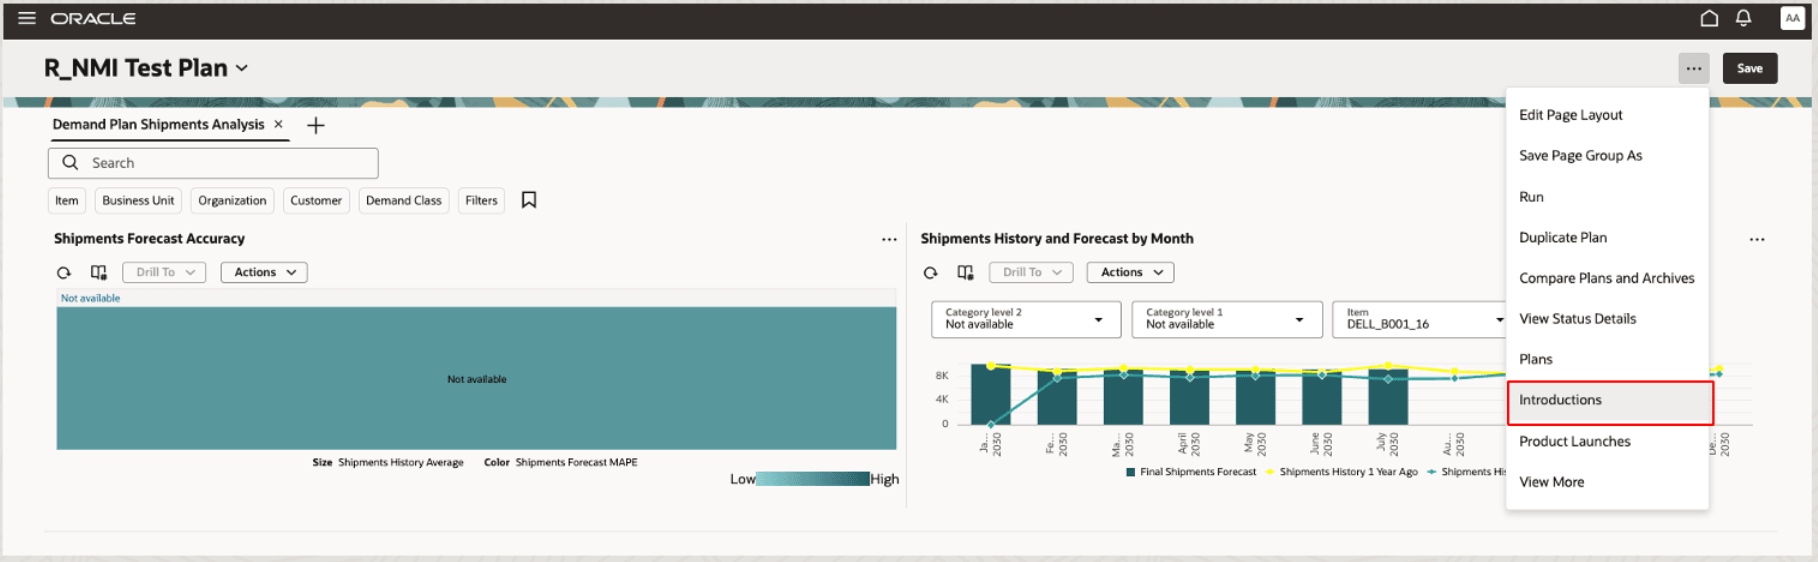
Menu option for Introductions page
The Introductions page opens on another web browser tab and lists introductions already defined and associated with the plan.
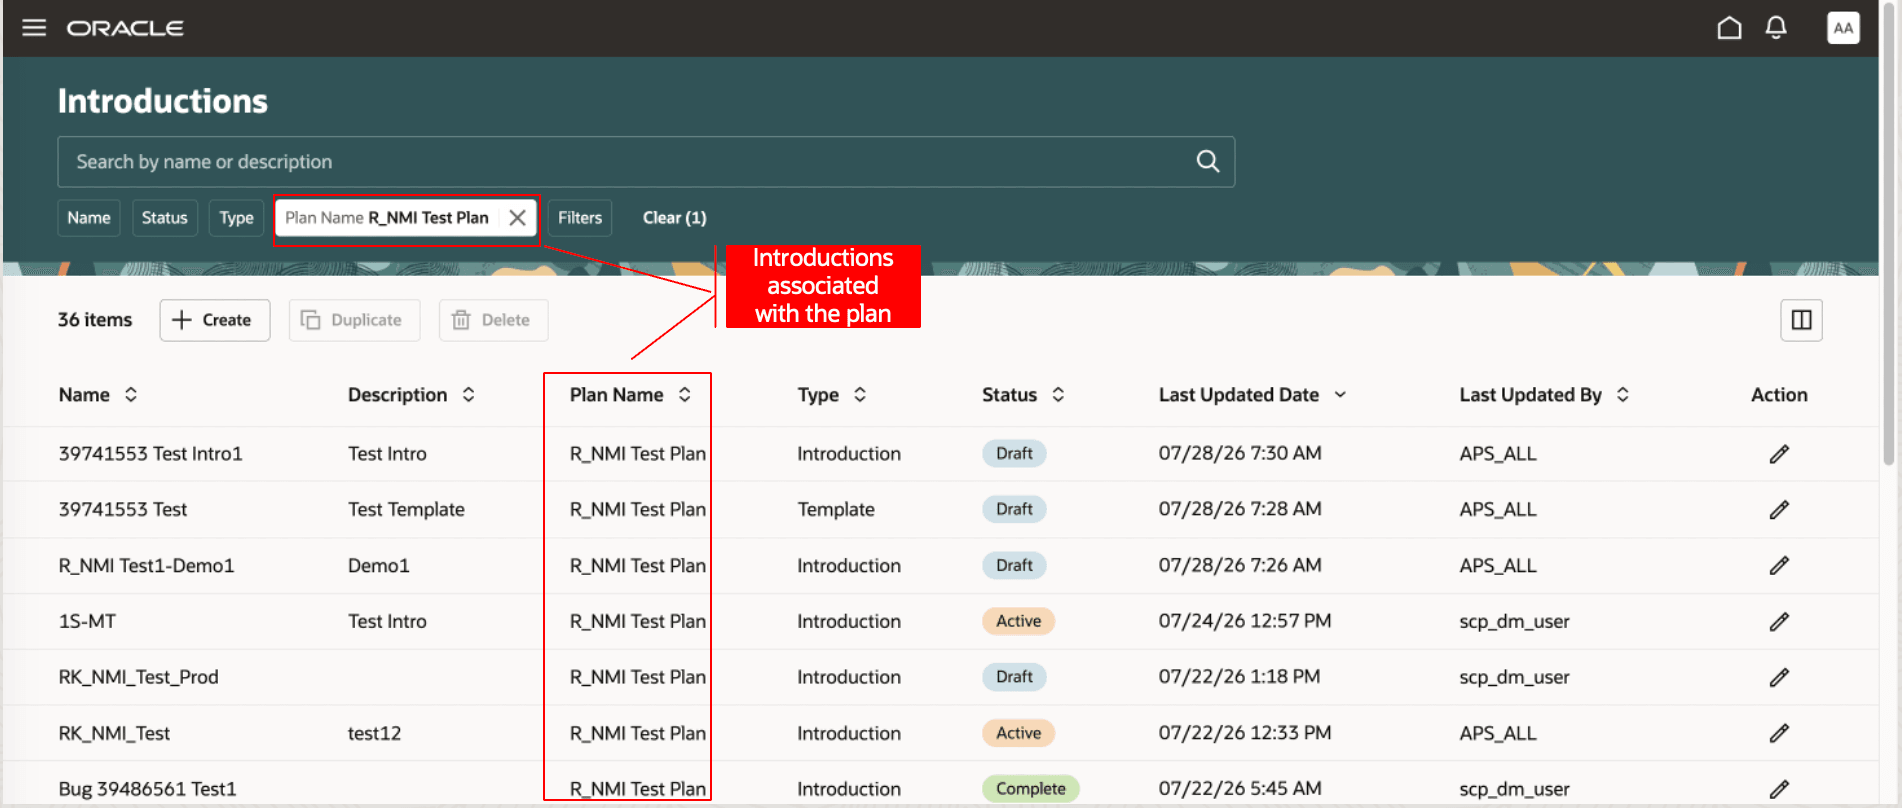
Introductions page
You can use the suggested filters to limit the list of introductions or see other introductions.
Create introductions
To create an introduction, follow this procedure:
- On the Introductions page, select the Create button.
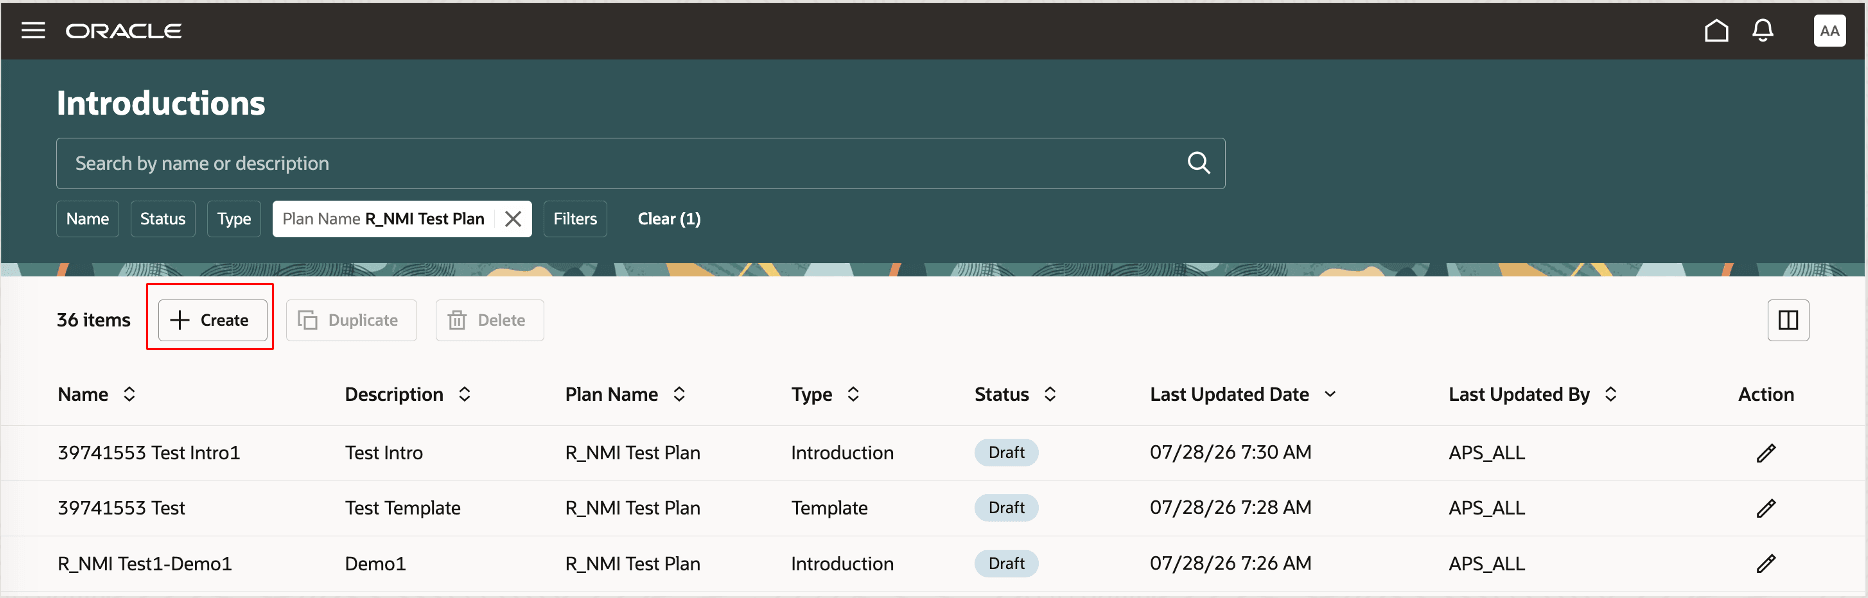
Create button on Introductions page
The guided process for creating introduction will open on the same web browser tab. You’ll see four steps in the guided process.
While creating the introduction, you can move from a step to the next step or previous step.
For example, you can introduce members for the new product family called LAPTOP_GAMING with reference to an existing product family called LAPTOP_EDUCATION and for only the customer region named EAST_REGION. The rest of this procedure will walk you through this example.
- In the General step, provide these details
- For the type, select Introduction.
The Introduction type is the default and requires you to provide details in all four steps of the guided process.
The Template type lets you define an introduction as a template that contains most of the common data for your members. You can use the template to prepopulate information in the guided process. You can use different templates for different scenarios. With the Template type, you can streamline the creation of introductions.
-
- Enter the name and description.
- If you want the introduction to be based on a template, select an introduction template.
Only templates in the Active status are available for selection.
-
- Select the Draft status if you are yet to finalize the configuration.
If you select the Active status, you don’t need to perform Step 6, and you can go directly after Step 5 to Step 9.
-
- Select the demand or demand and supply plan for the introduction.
- Select the introduction date on which the new members should be launched.
- Select Continue to move to the Scope step.
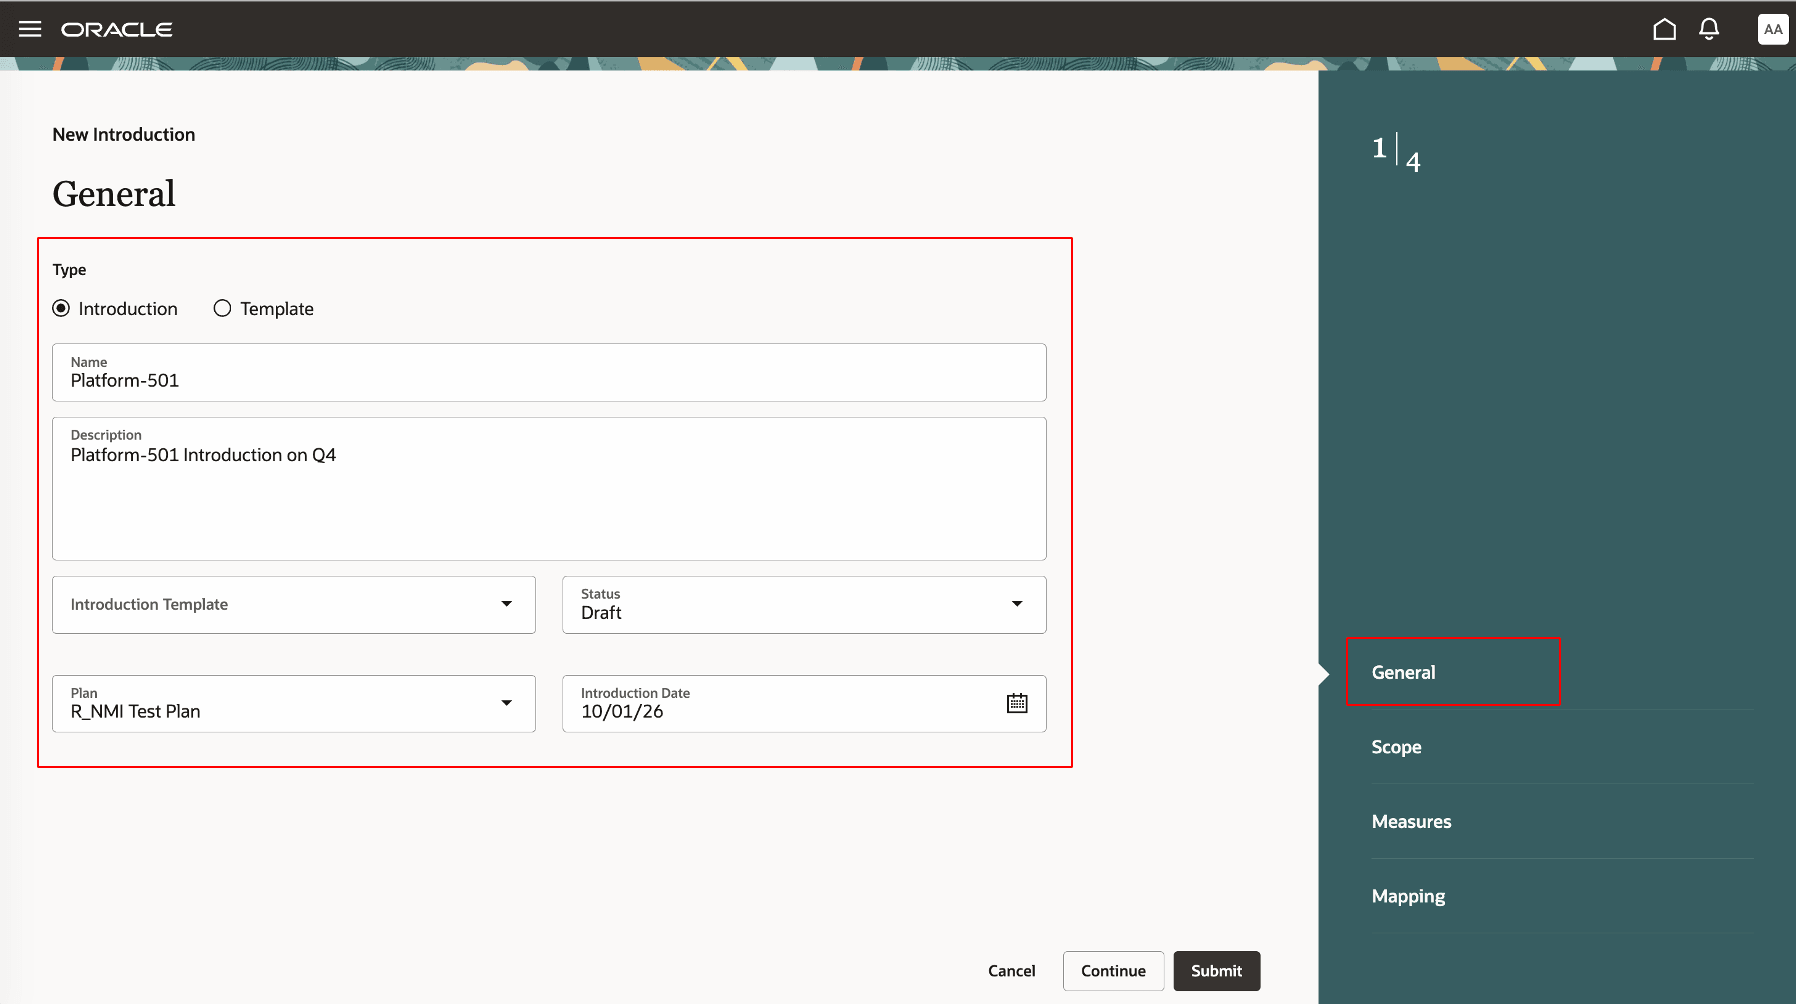
General step in guided process
- In the Scope step, define the members, such as products, product families, customer zones, and organizations, that you want to introduce for the new business. You can introduce members across all or a part of your supply chain.
- Select the Add icon.
A row will appear in the step.
- Select the Add icon.
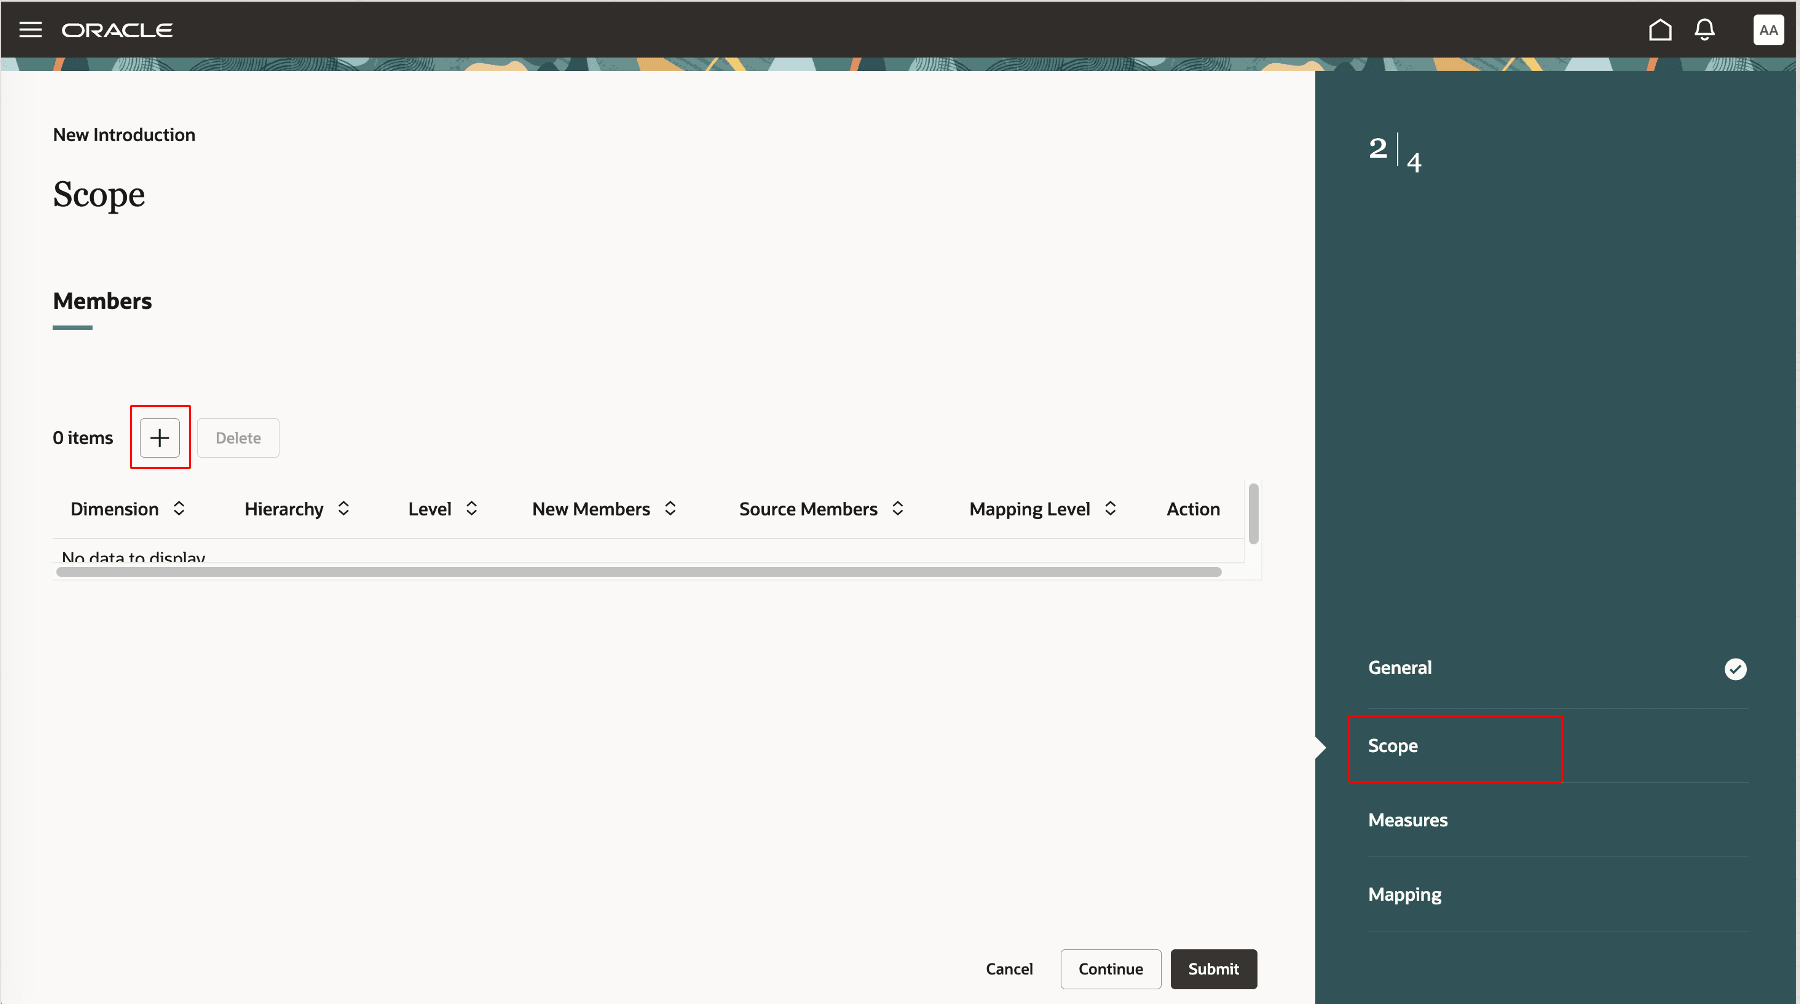
Add icon in Scope step
-
- Select the dimension, hierarchy, and level for the new members.
In the following screenshot, the Product dimension, product hierarchy R_NMI_LAPTOP_CAT, and level Product_Family have been selected.
- Select the dimension, hierarchy, and level for the new members.
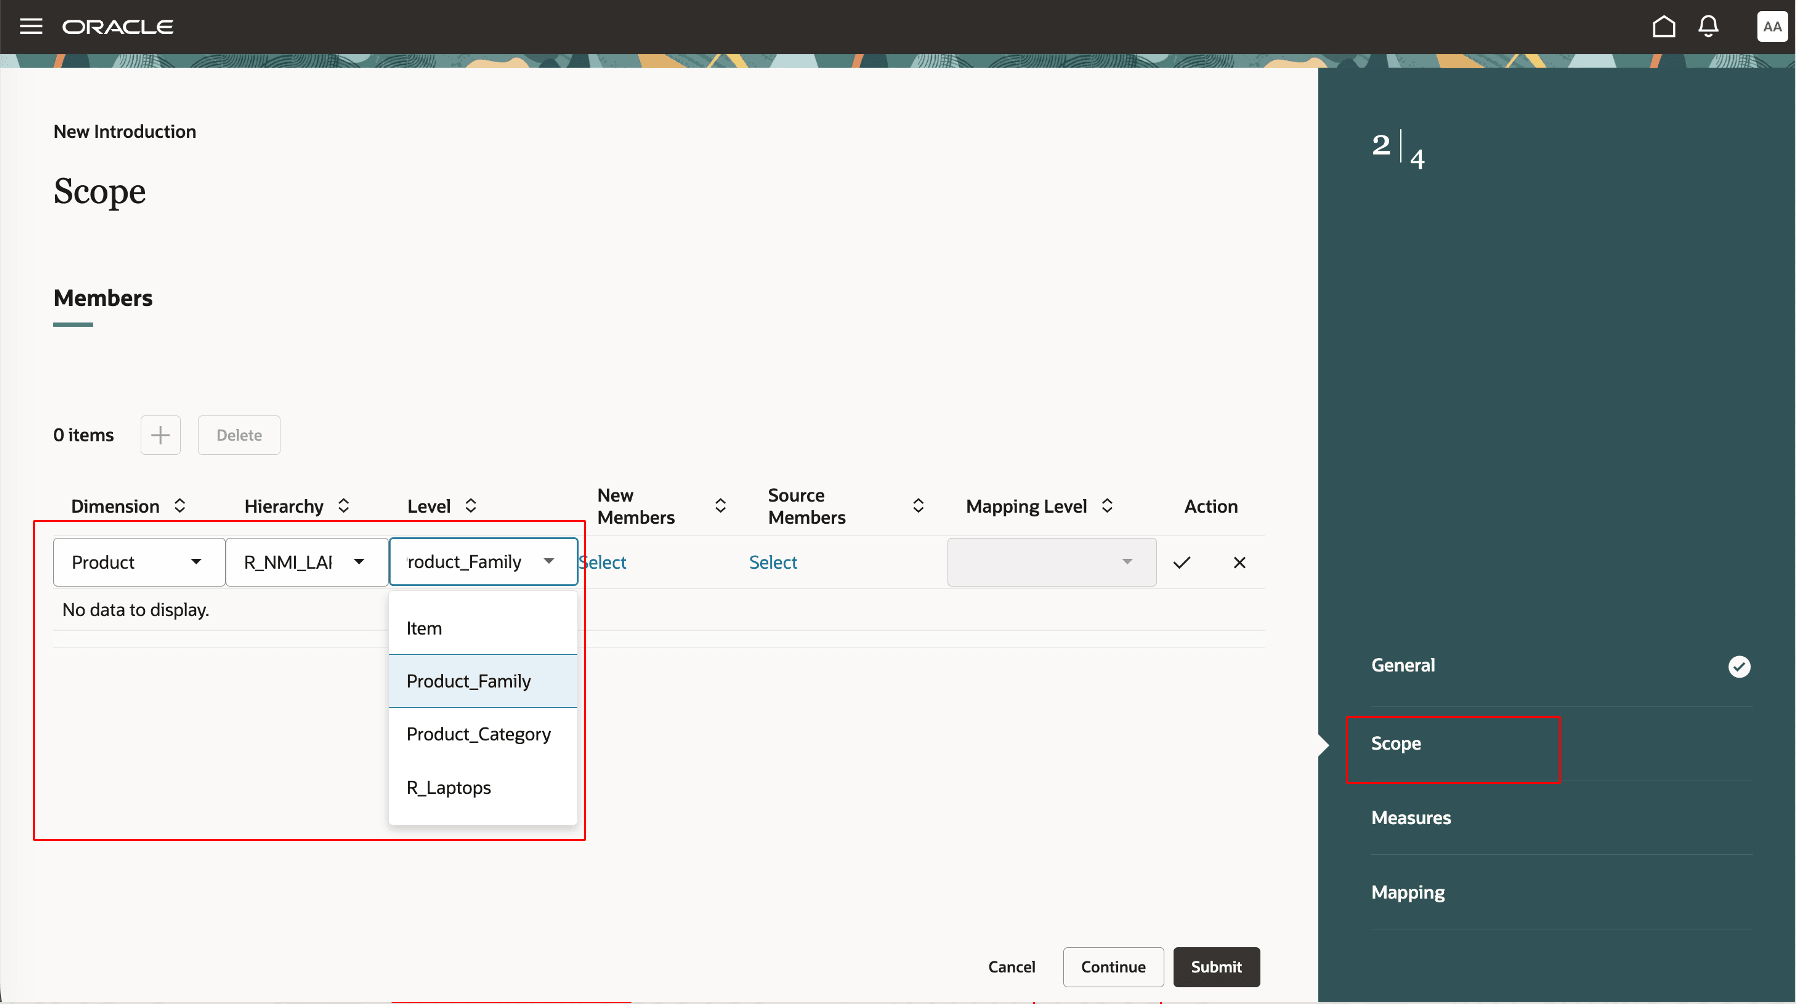
Dimension, hierarchy, and level for members
-
- In the New Members column, select the link, and select the new members.
In the following screenshot, members from product family LAPTOP_GAMING have been selected.
- In the New Members column, select the link, and select the new members.
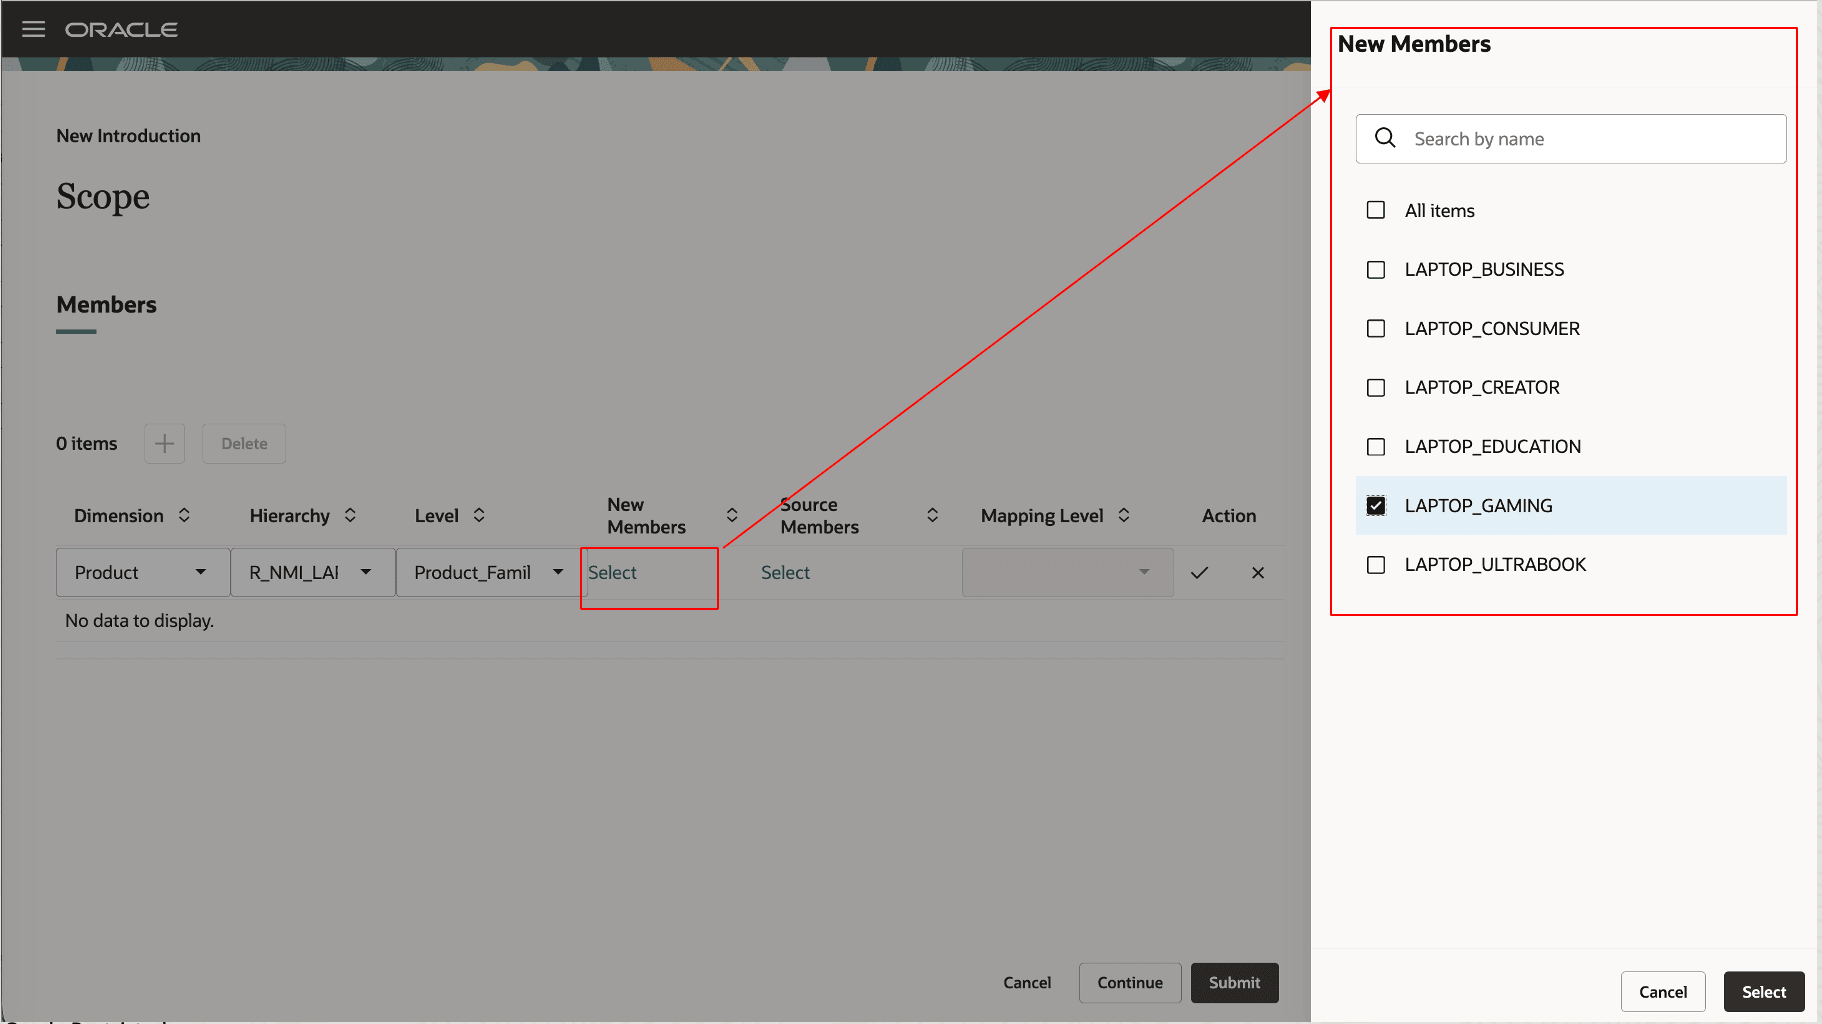
Drawer for new members
-
- In the Source Members column, select the link, and select the source members.
In the following screenshot, members from product family LAPTOP_EDUCATION have been selected.
- In the Source Members column, select the link, and select the source members.
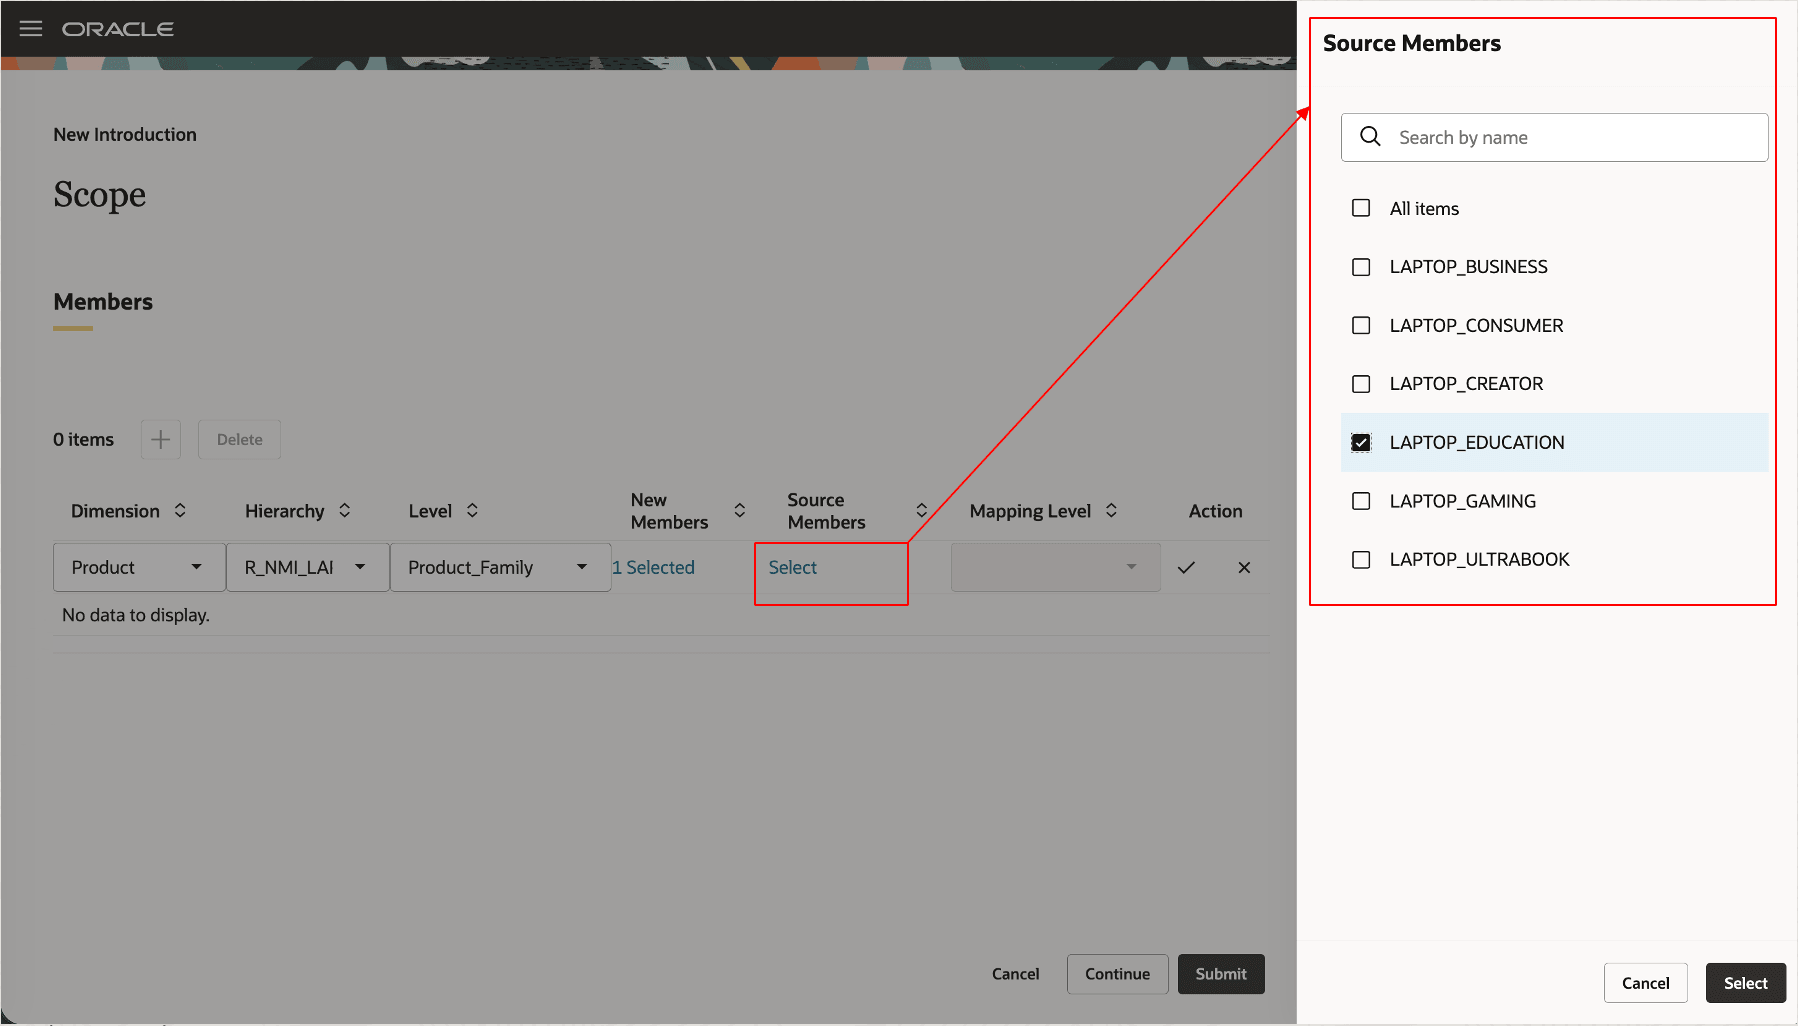
Drawer for source members
-
- Select the mapping level.
The mapping level must be the lowest level for the selected hierarchy. When you select new and source members, you must select a mapping level.
- Select the mapping level.
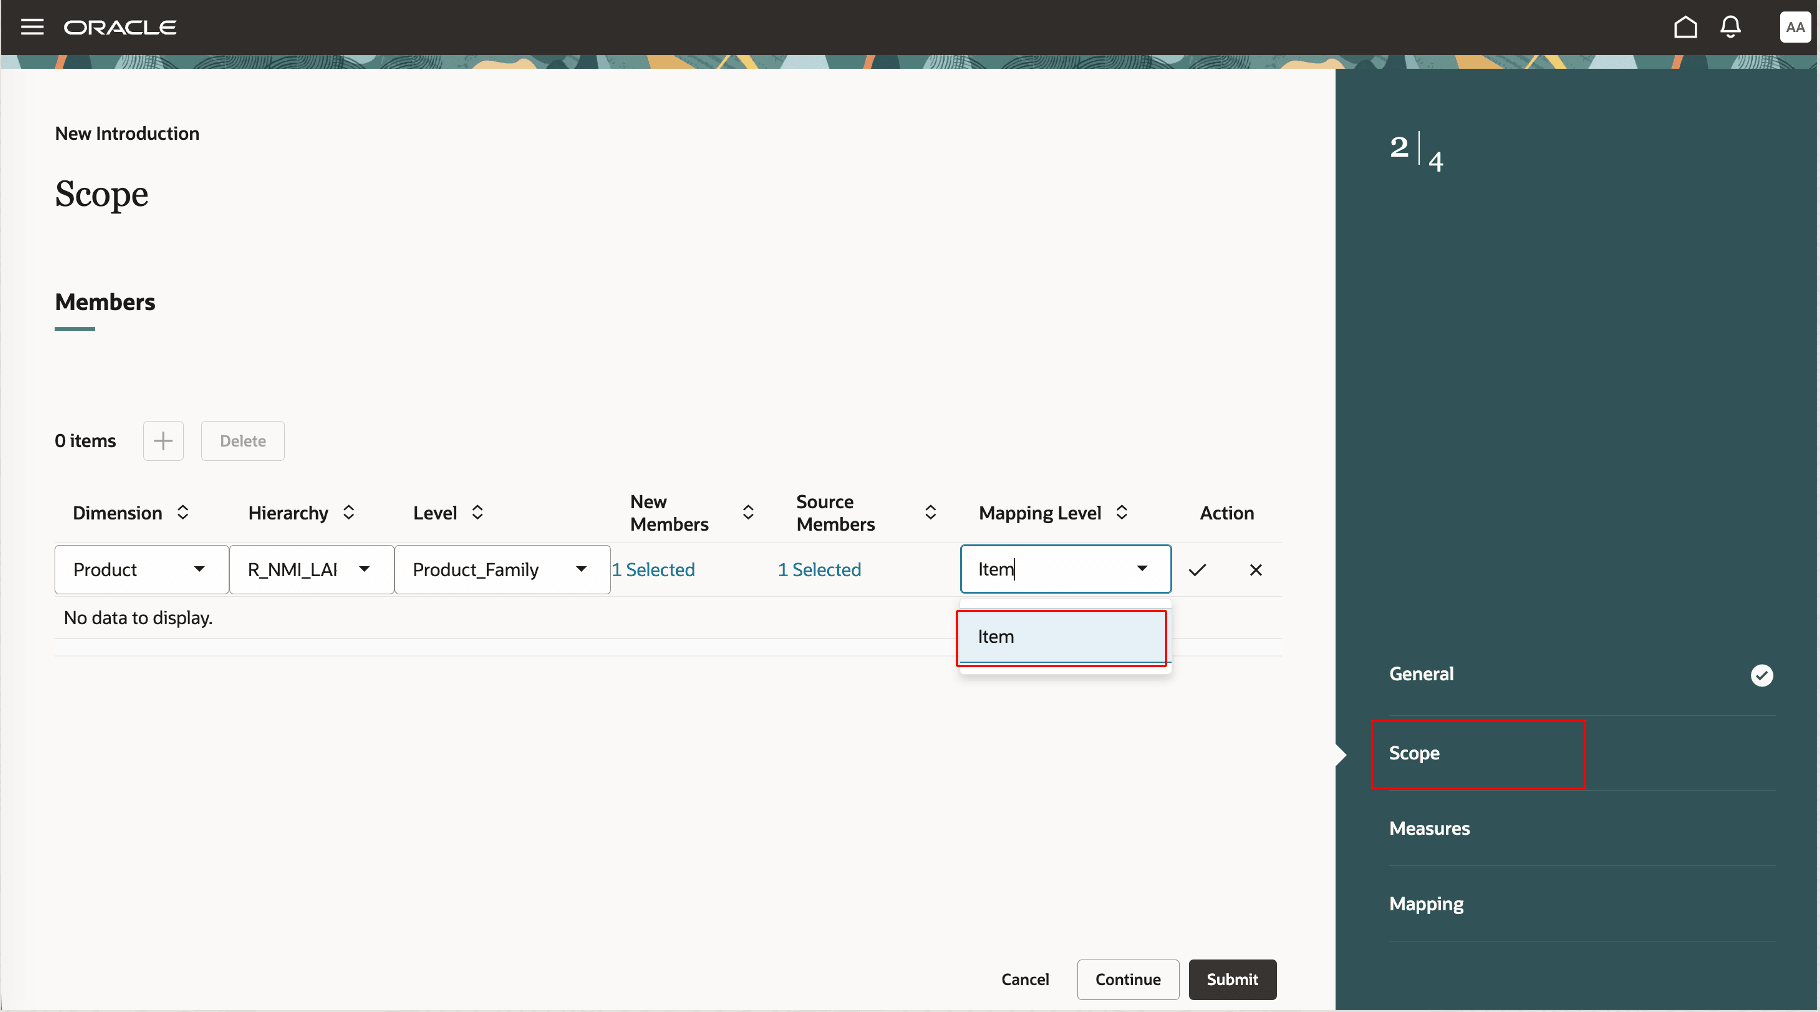
Mapping level in Scope step
-
- Select the Apply icon to save the row.
- To restrict the introduction to customer region EAST_REGION, add another row for the introduction filter.
- Select the dimension and level for the introduction filter.
In the following screenshot, the Customer dimension, hierarchy R_LAPTOP_UD_CUSTOMER, and level Customer_Region have been selected.
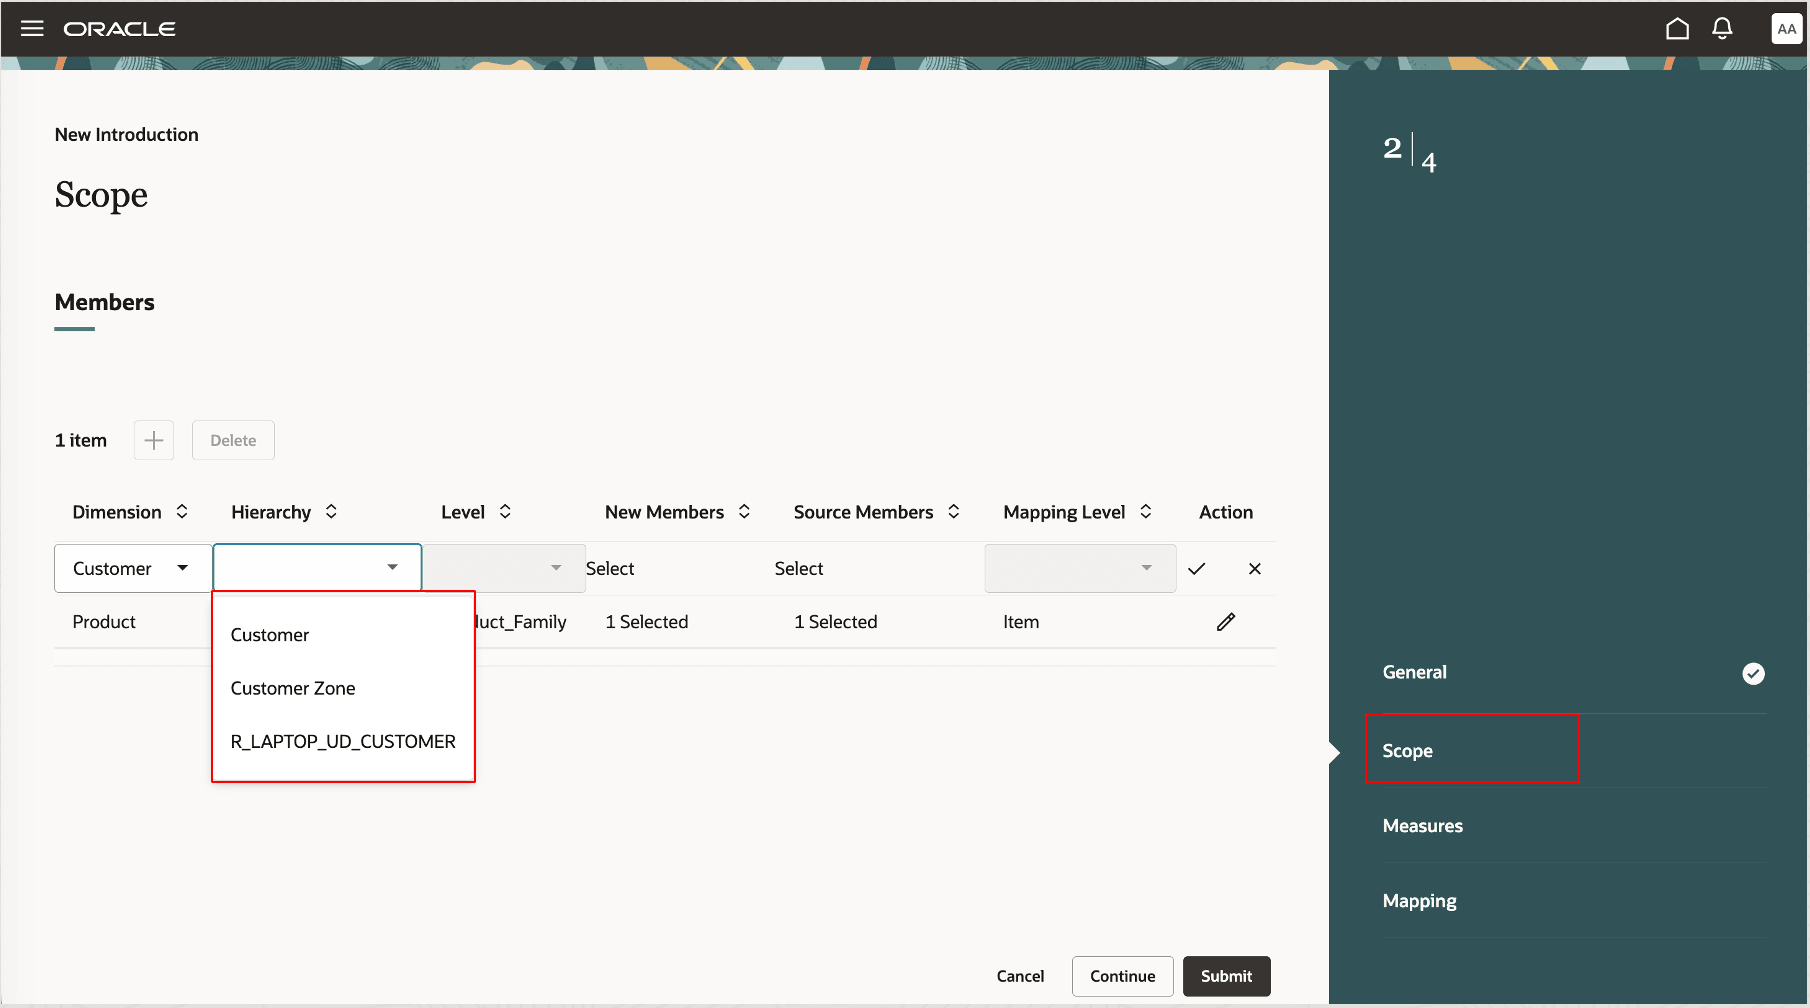
Dimension and level for introduction filter
-
- Select only the new members for the introduction filter.
In the following screenshot, customer region EAST_REGION has been selected.
- Select only the new members for the introduction filter.
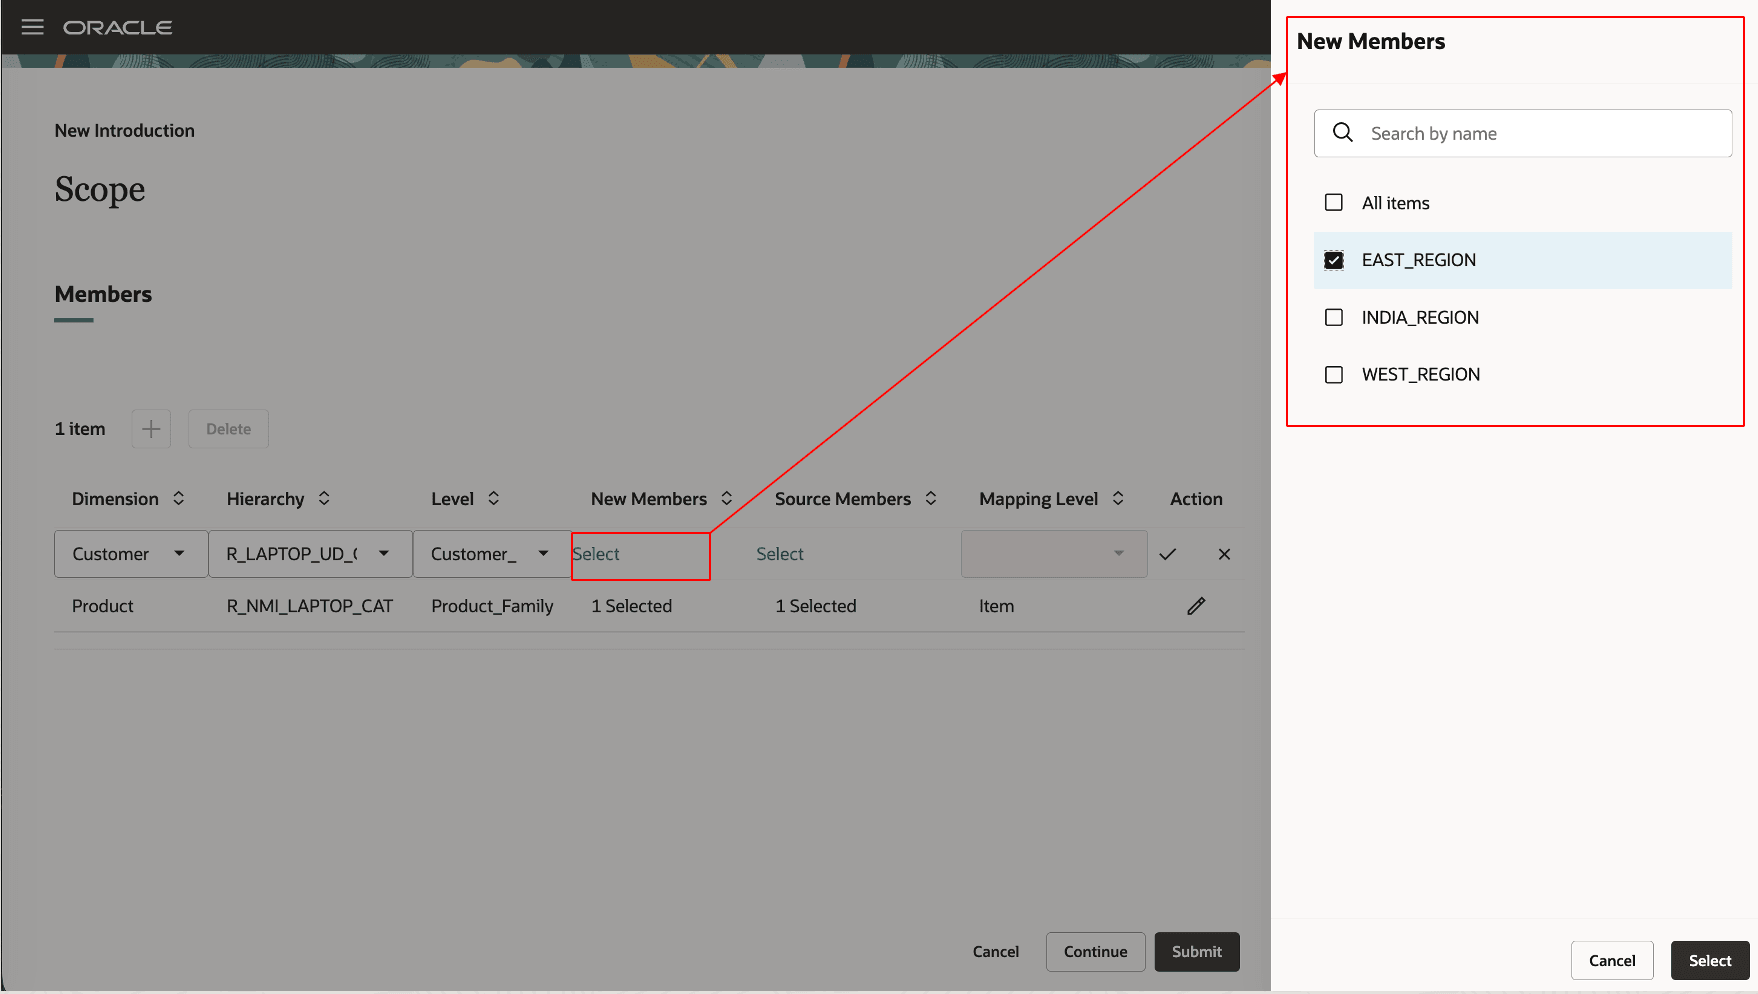
New members for introduction filter
-
- Select the Apply icon to save the row.
- Select Continue to move to the Measures step.
- In the Measures step, select the measures for copying data from source members to target members.
- Select the Add icon.
A row will appear in the step. - Select the source and target measures.
- Select the copy type.
- Copy data: This selection is the default and is used for creating member combinations and copying data.
- Create combinations only: This selection is used for only creating member combinations. Use this selection when you want to manually enter the measure values instead of copying data from the source member combinations.
- Select the Add icon.
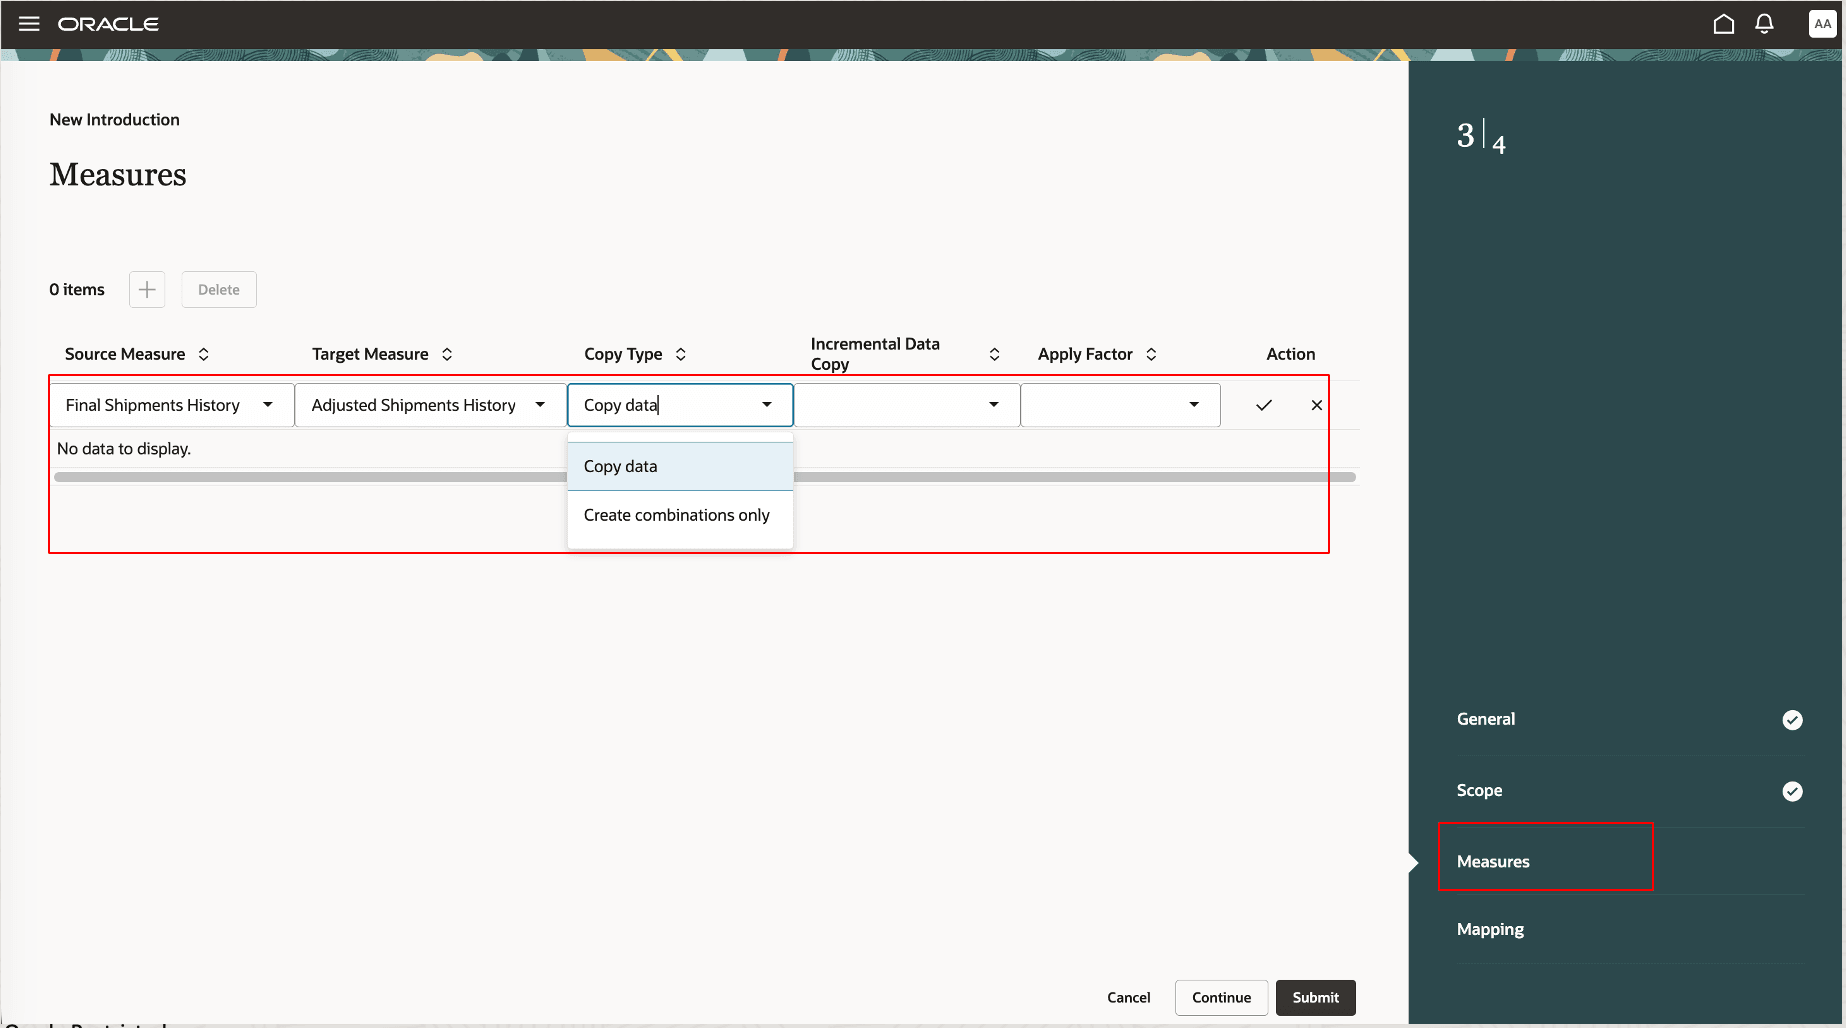
Copy types in Measures step
-
- In the Incremental Data Copy column, if you select Yes, the incremental copy of measure data will be done as a part of the plan run until the introduction date. If you select No, measure data is copied only once when the introduction is moved to the Active status.
- In the Apply Factor column, specify if you want to apply a factor.
When you select Yes, you can select the data copy factor in the Mapping step for each mapping row. If you select No, the factor is considered to be 100%, and the same data is copied from the source measure to the target measure.
-
- Select the Apply icon to save the row.
- Select Continue to move to the Mapping step.
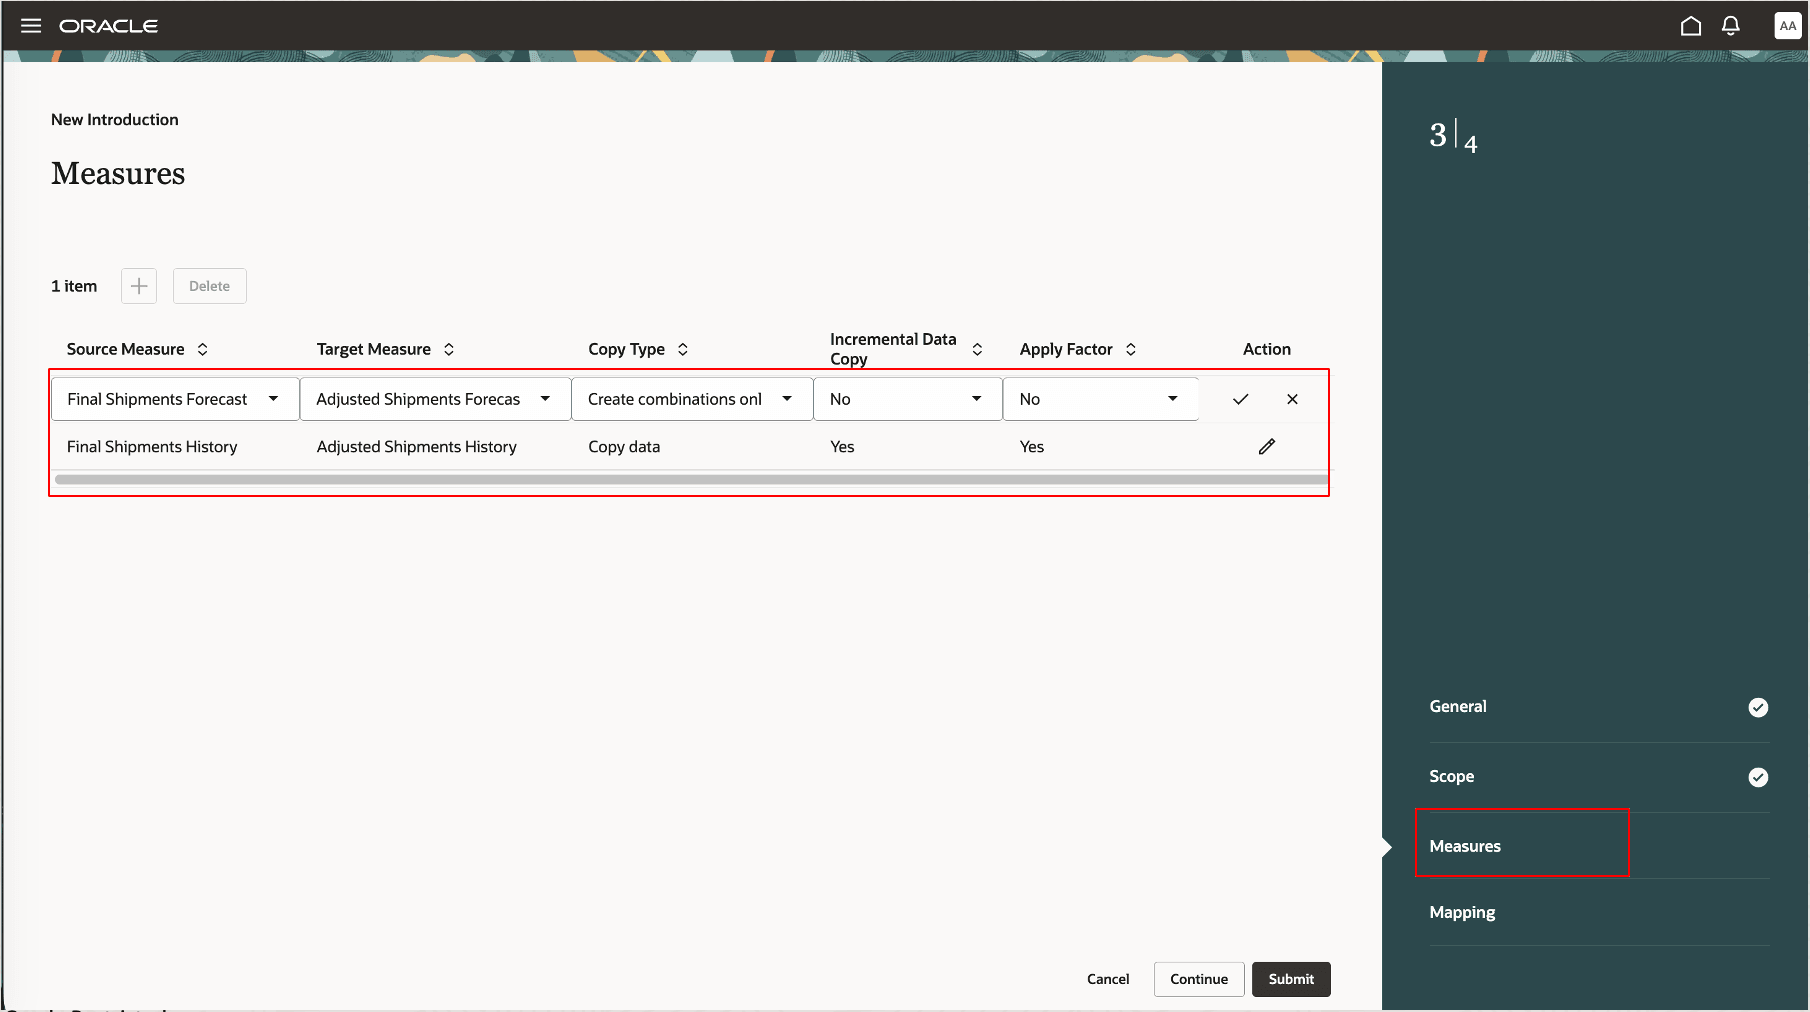
Saved rows in Measures step
- In the Mapping step, you can specify the source members for which measure data will be copied to the new members for generation of the forecast. You can export the mappings to a Microsoft Excel file, edit them in the file, and import the edited mappings into the introduction. However, you must ensure that the data format for the file isn’t changed.
- In the column for new members, view the new members that you previously selected in the Scope step.
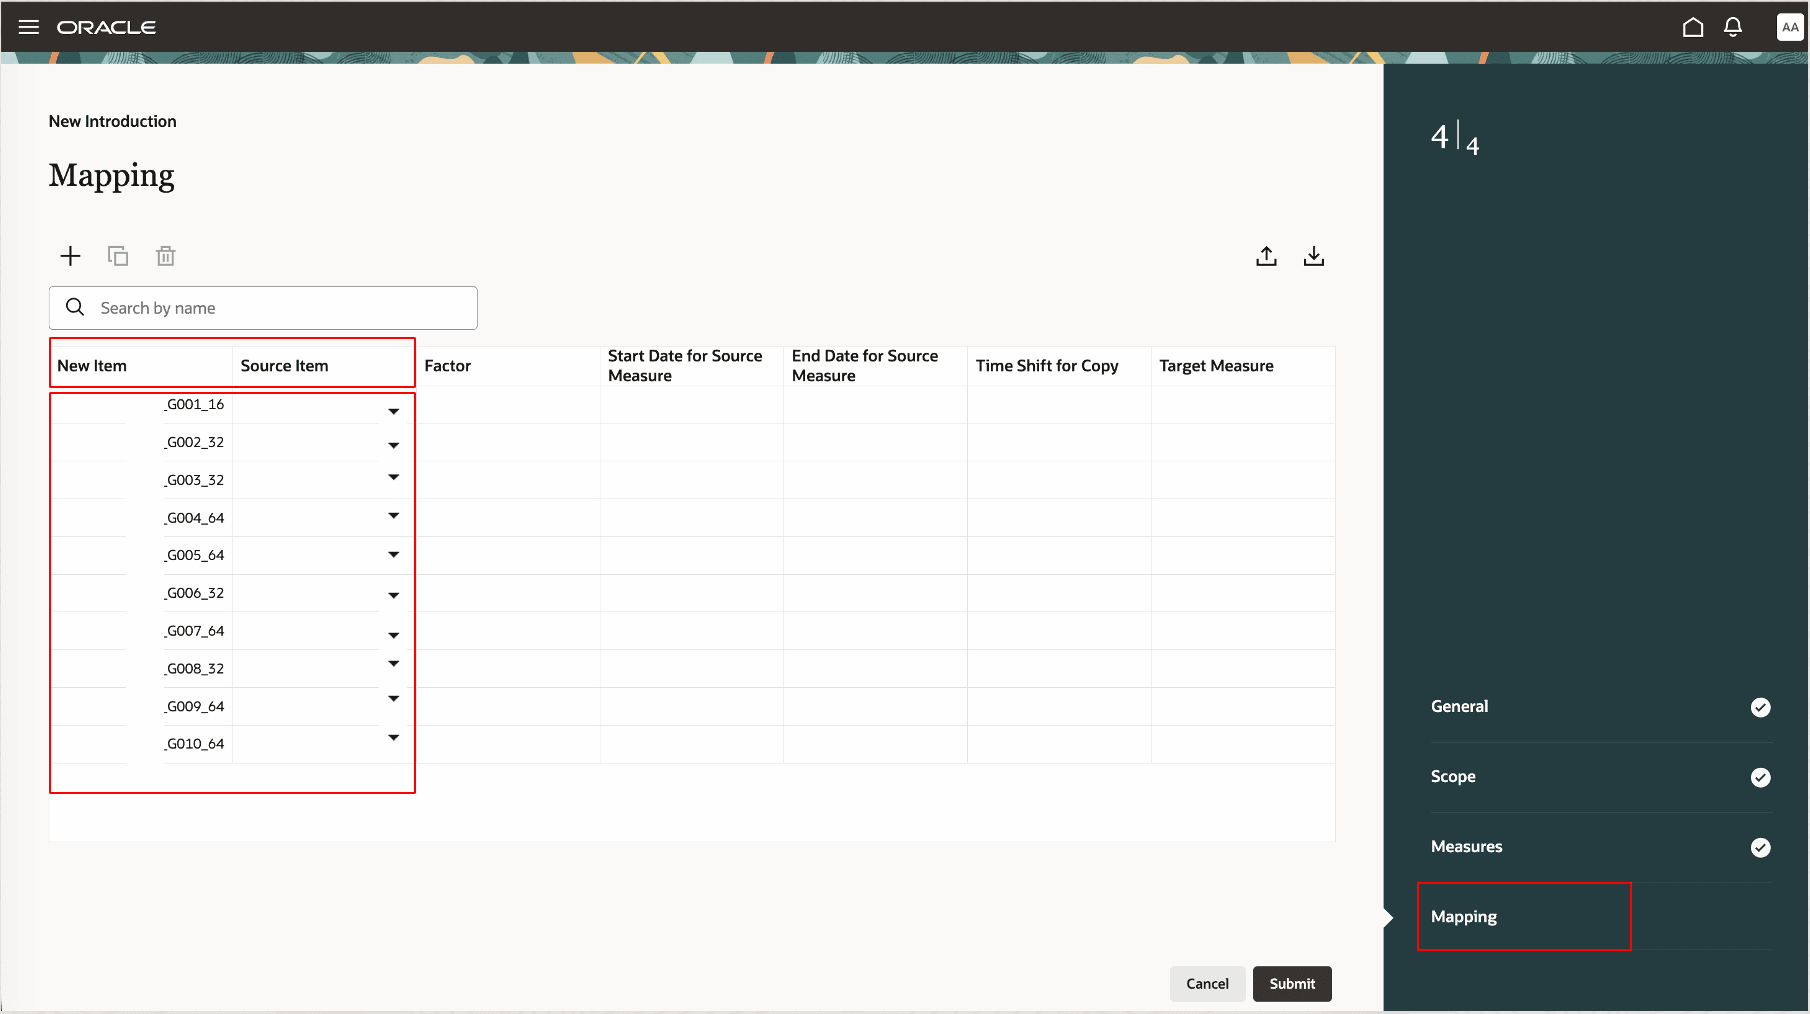
New members in Mapping step
-
- In the column for source members, select the source members for which measure data should be copied for the new members.
If you don’t select the source member for a row, it will be ignored.
- In the column for source members, select the source members for which measure data should be copied for the new members.
-
- Enter the factor, and select the start and end dates for which the measure data in the source measure is considered.
Note the values for source item _E002_16, new item _G001_16, and the associated factor.
- Enter the factor, and select the start and end dates for which the measure data in the source measure is considered.
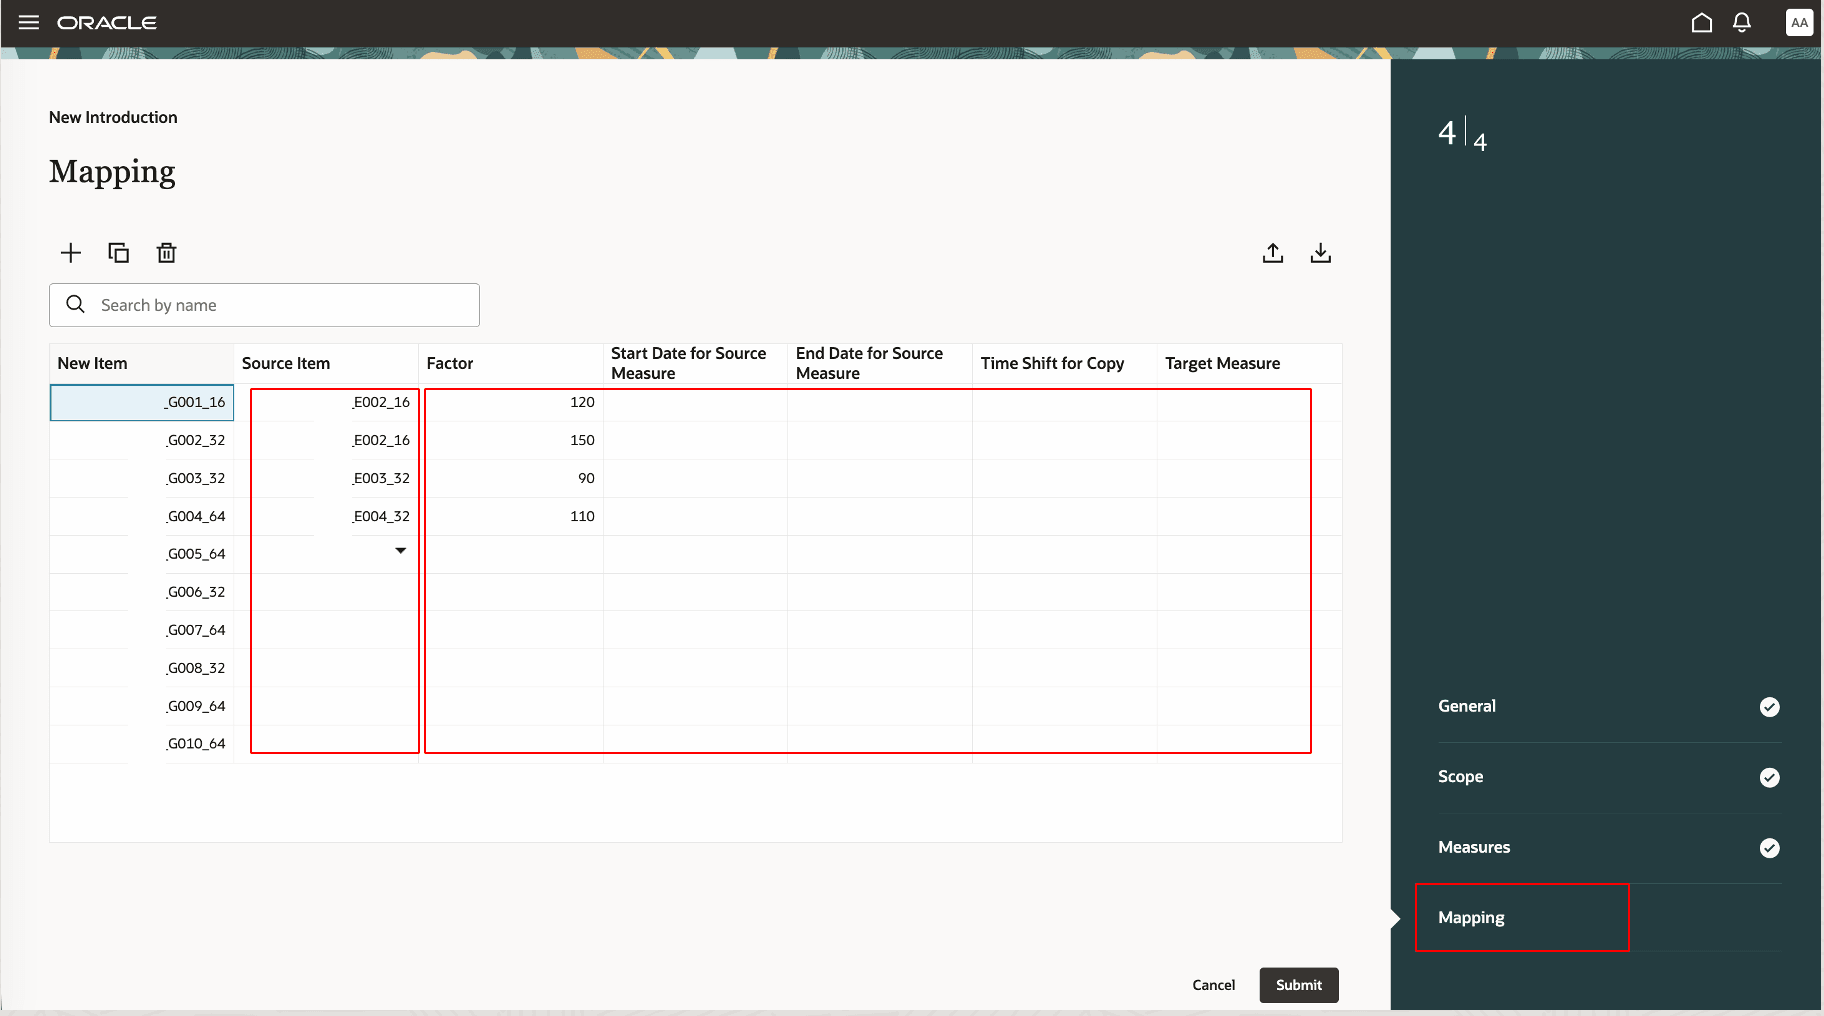
Source members and factors in Mapping step
-
- If you want to shift the time period for copying the measure data, enter a positive integer in the Time Shift for Copy column.
The value refers to the planning time level of the plan. For example, if the time-level date is 01-Jan-2027, column value is 2, and planning time level is Month, then the source measure data will be shifted by two months and copied to the time-level date of 01-Mar-2027 for the target measure.
- If you want to shift the time period for copying the measure data, enter a positive integer in the Time Shift for Copy column.
-
- Select the target measure for the mapping. Otherwise, the mapping details will apply to all the target measures in the Measures step.
The available measures are those that you selected in the Measures step.
- Select the target measure for the mapping. Otherwise, the mapping details will apply to all the target measures in the Measures step.
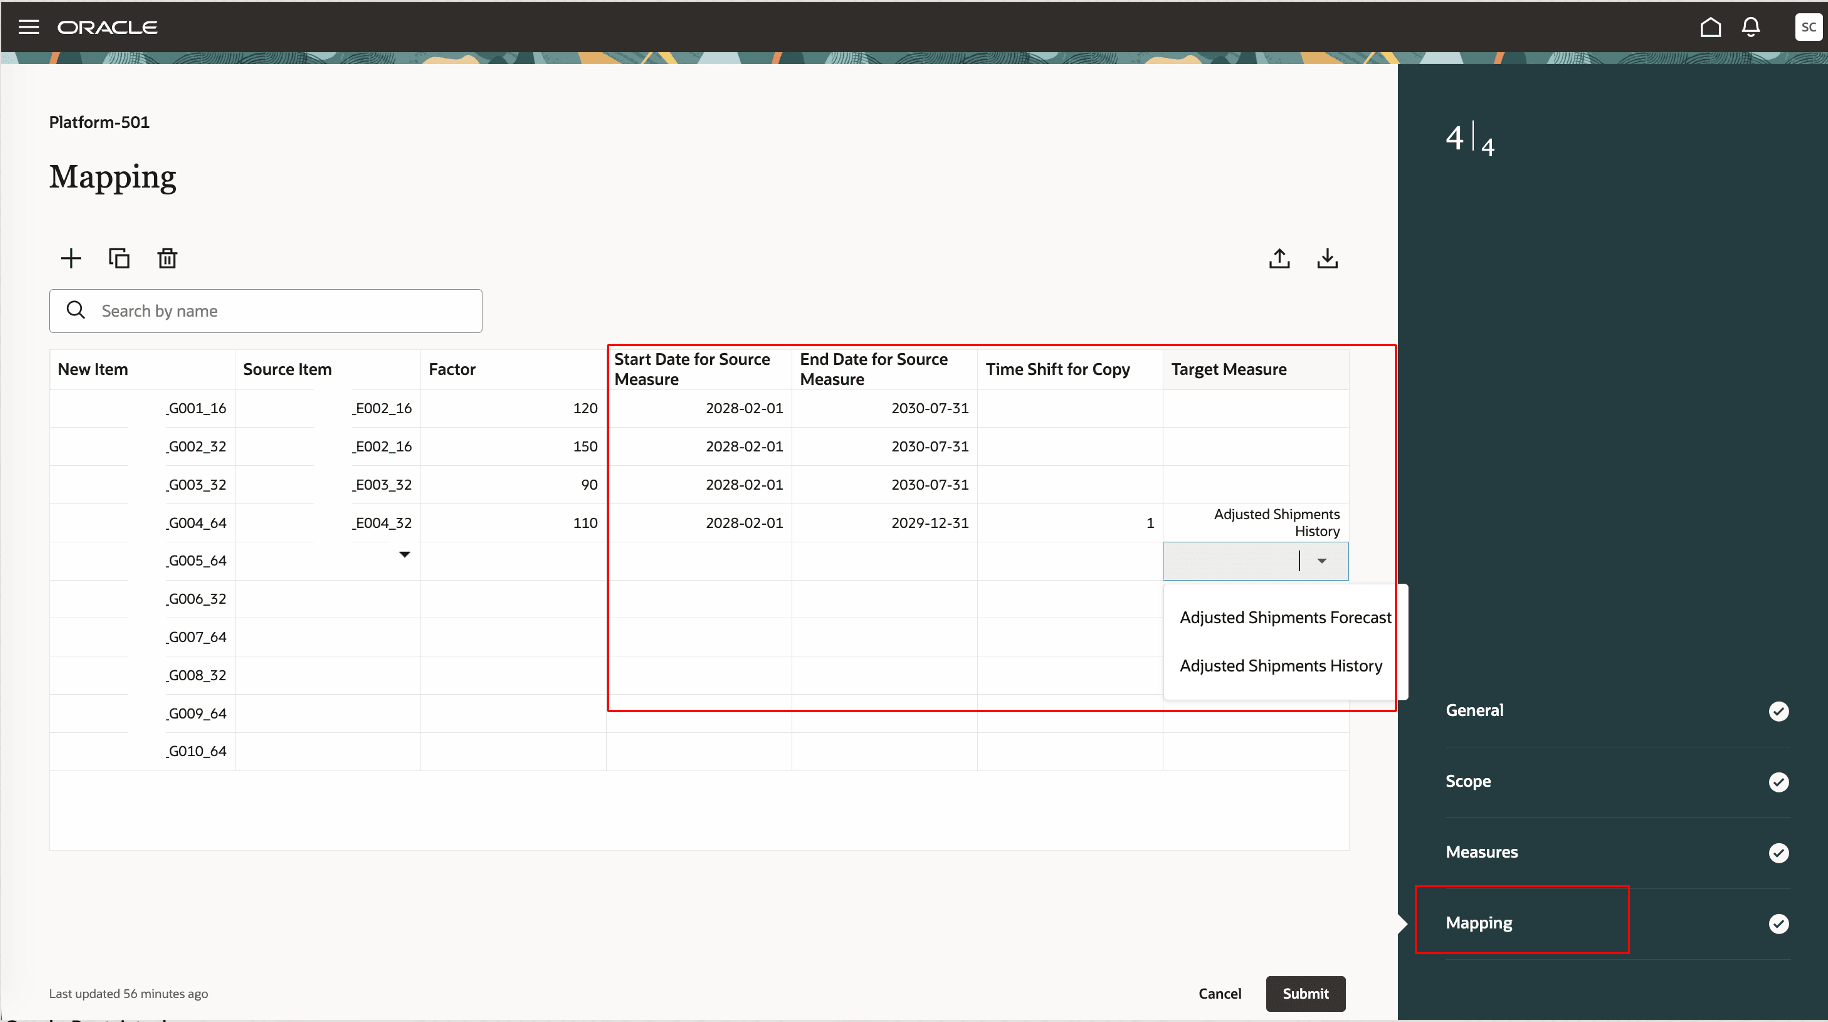
Target measures in Mapping step
- Select Submit.
The guided process will be closed, a confirmation message displayed, and the introduction created and displayed in the Draft status on the Introductions page.
If you have created the introduction in the Active status, you don’t need to perform this step, and you can go to Step 9.
In the following screenshot, introduction Platform-501 has been created in the Draft status.
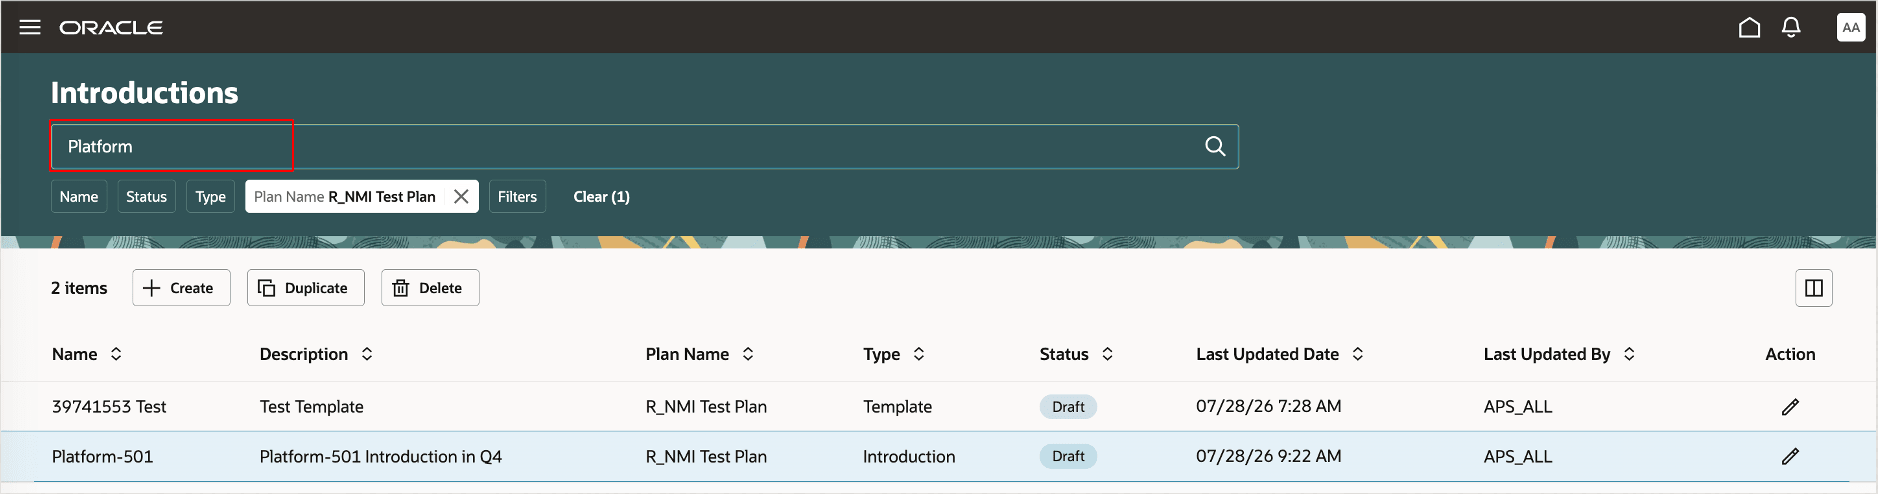
Introductions in Draft status on Introductions page
- Once you are satisfied with the introduction, open it in the guided process by selecting the Edit icon in the Action column on the Introductions page.
- In the General step of the guided process, change the status to Active.
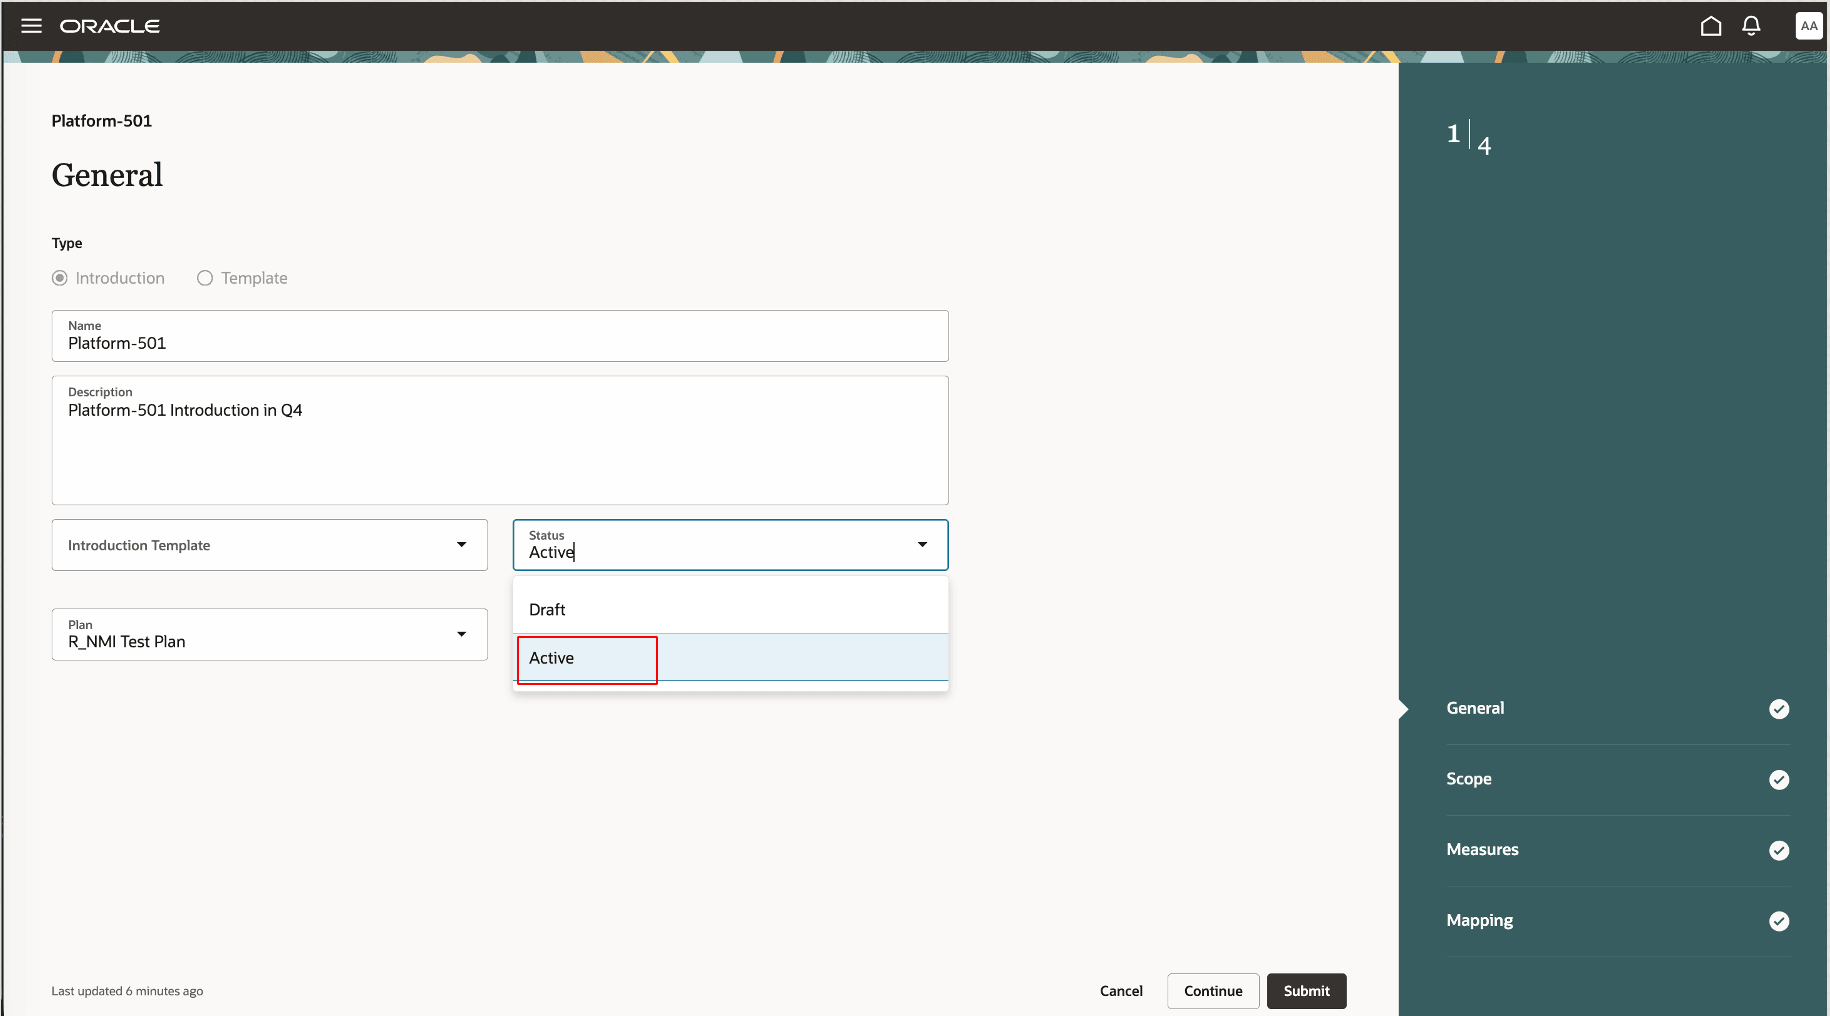
Active status for introduction
- Select Submit.
The guided process will be closed, and you’ll return to the Introductions page on which the status for the introduction will be Active. A confirmation message will be displayed with the ID of the scheduled process named Manage Data for Introducing New Members.
When a plan with associated introductions in the Active status is run, the scheduled process named Manage Data for Introducing New Members is run once for each active introduction. Once the introduction date is reached for an introduction, then its status is updated to Complete by this scheduled process. During the next plan run, the introduction won’t be considered for data processing.
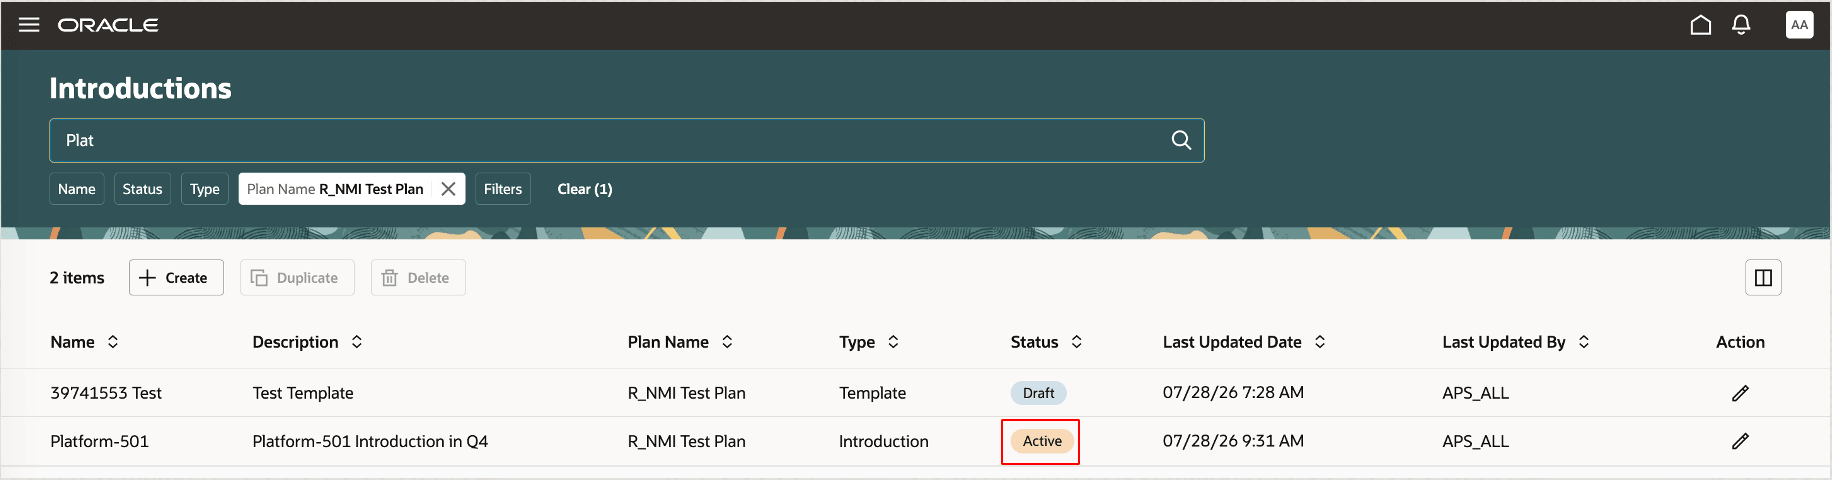
Introduction in Active status on Introductions page
- In the Scheduled Processes work area, track the status of the scheduled process.
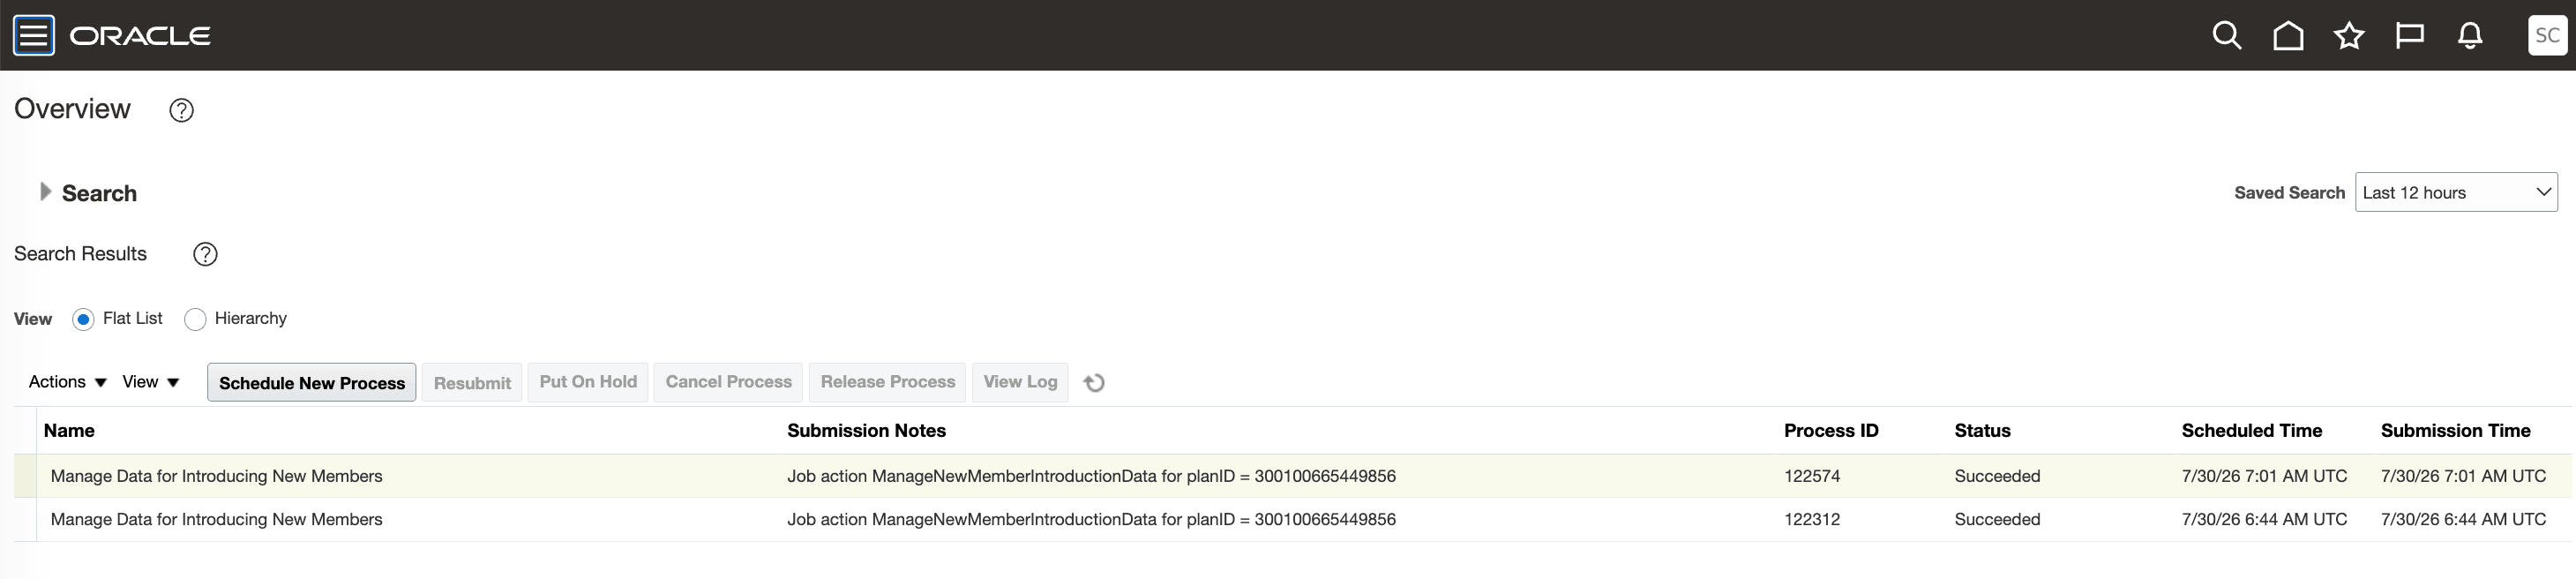
Status of scheduled process in Scheduled Processes work area
- Once the scheduled process has been run successfully, you can view the new members in your plan. You can refresh the visualizations to validate the changes.
In our example, introduction Platform-501 has been created for plan R_NMI Test Plan. According to the information in the Mapping step of the introduction, new members in product family LAPTOP_GAMING have been updated with measure data for customer region EAST_REGION. For new item _G001_16, source data from source item _E002_16 was copied with a factor of 120.
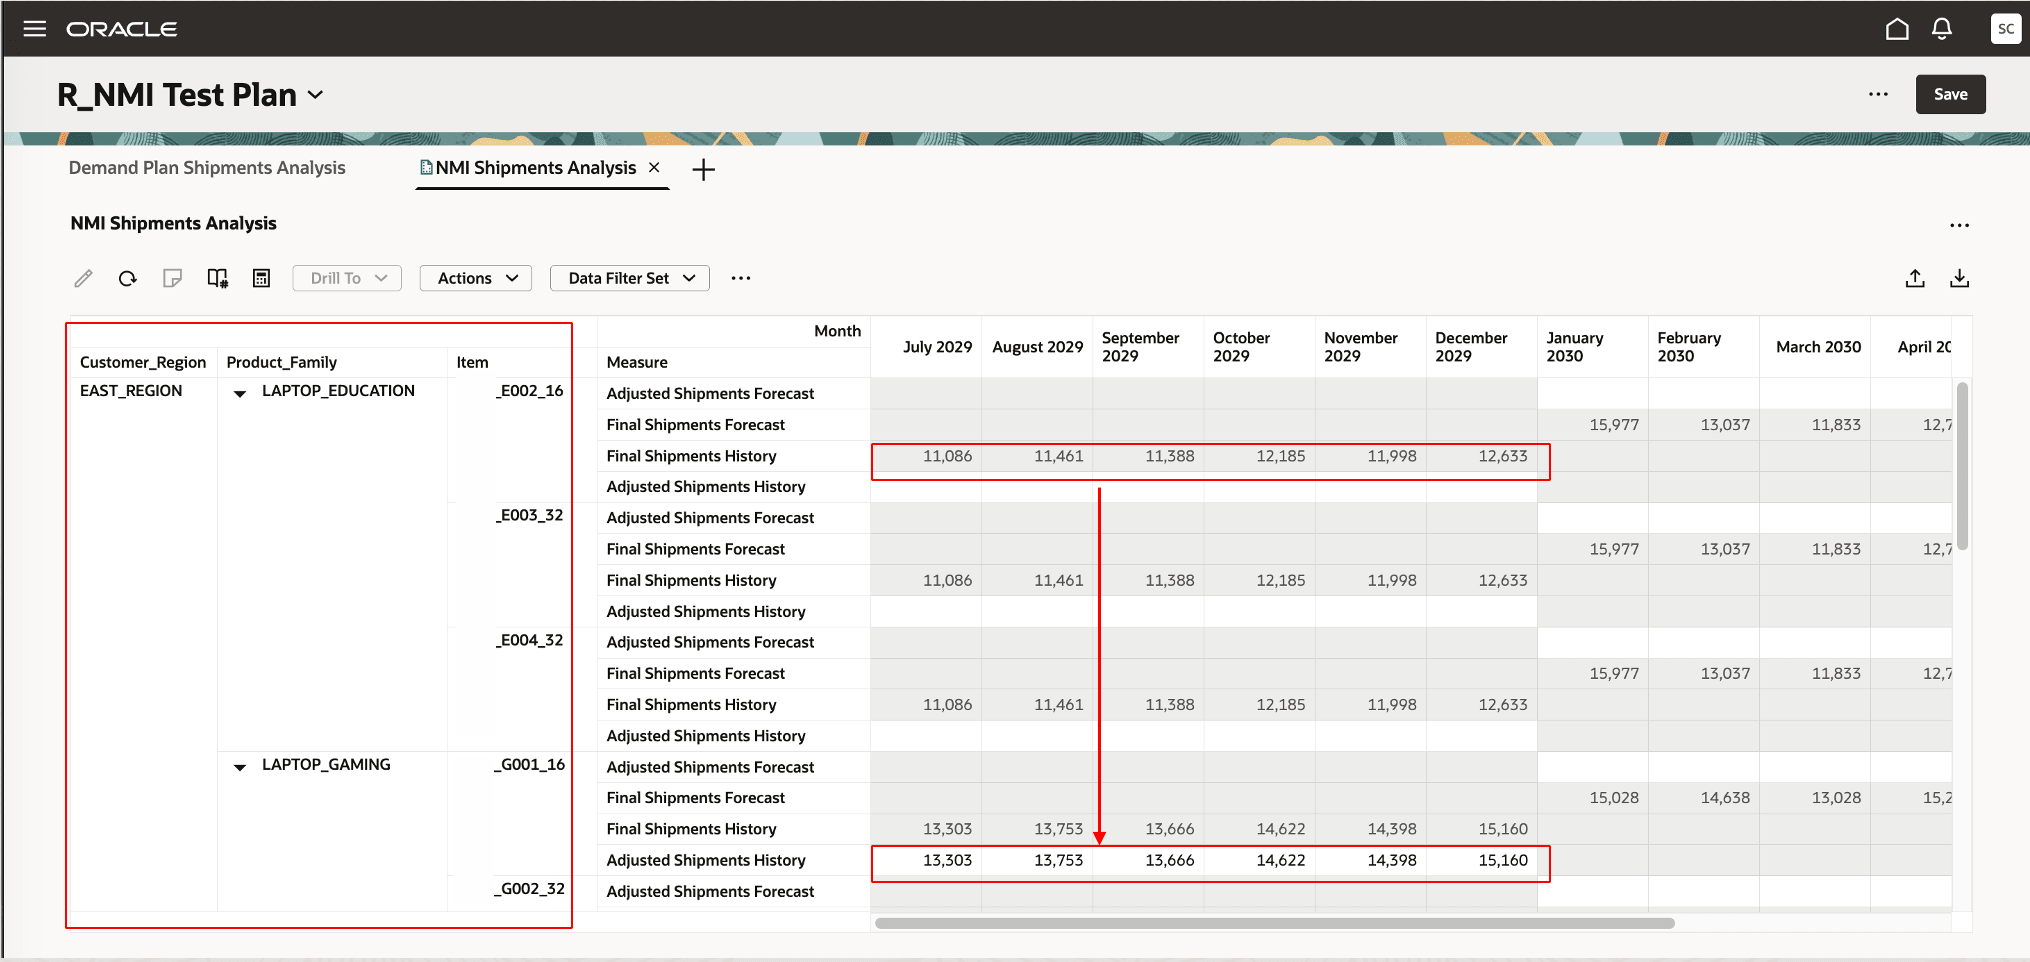
Changed information for plan members in plan visualization
There’s no change for the members in other customer regions or product families.
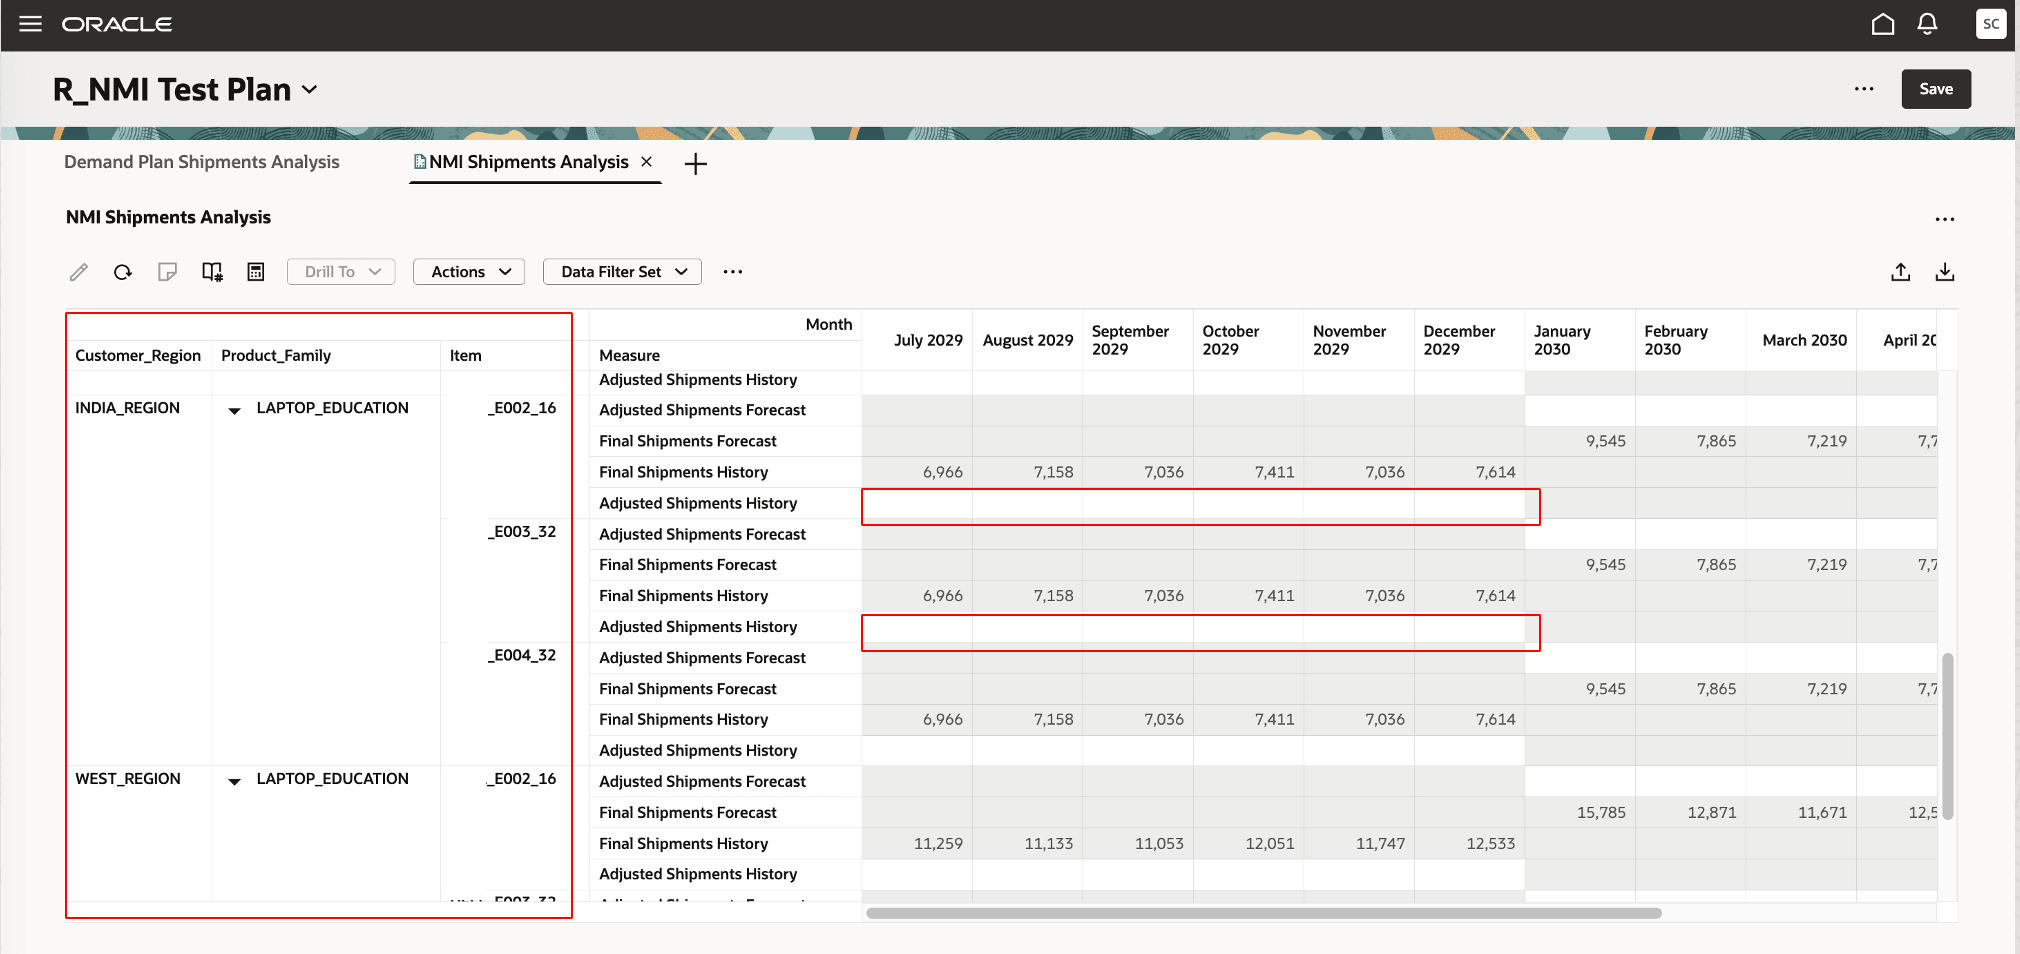
Unchanged information for plan members in plan visualization
Edit introductions
On the Introductions page, you can edit an introduction by selecting it and selecting the Edit icon in the Action column. The guided process will open on the same web browser tab.
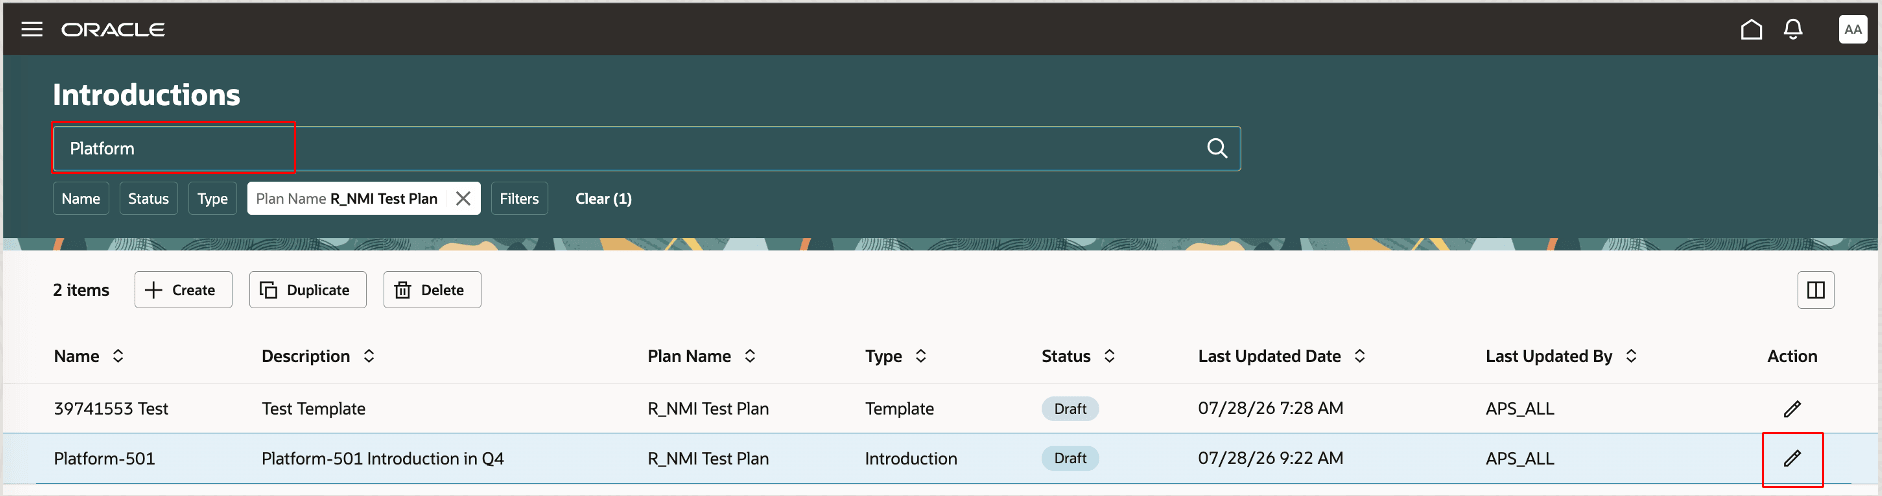
Edit icon on Introductions Page
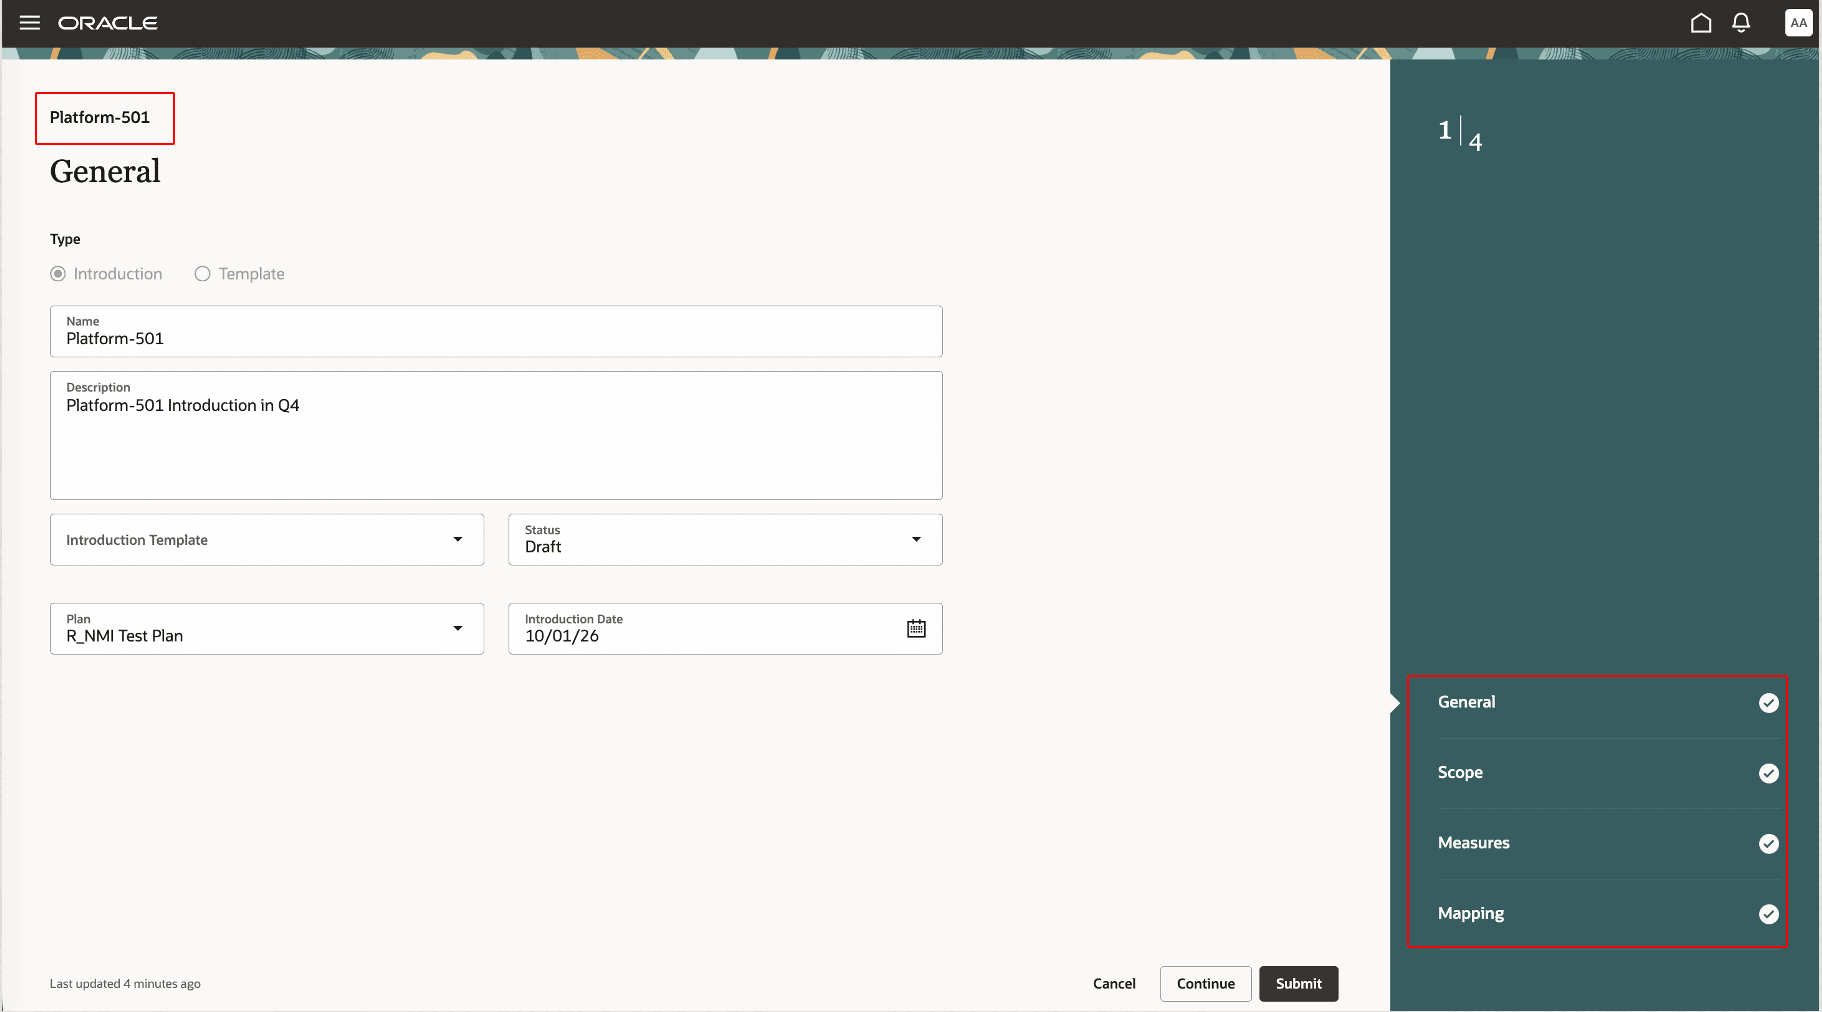
Guided process for editing introduction
You can review all four steps for the introduction and select Submit.
Duplicate introductions
You can create an introduction by duplicating a similar introduction.
On the Introductions page, select the existing introduction, and select Duplicate.
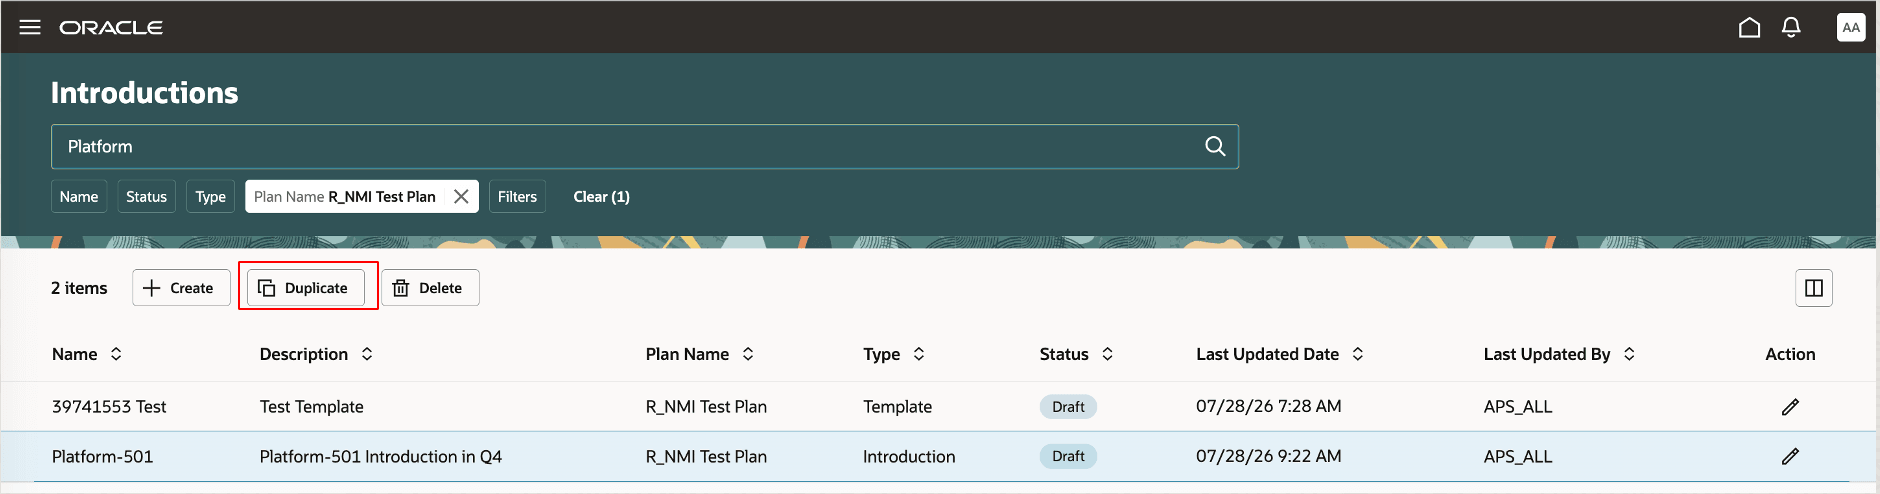
Duplicate button on Introductions page
The Duplicate introduction drawer will open.
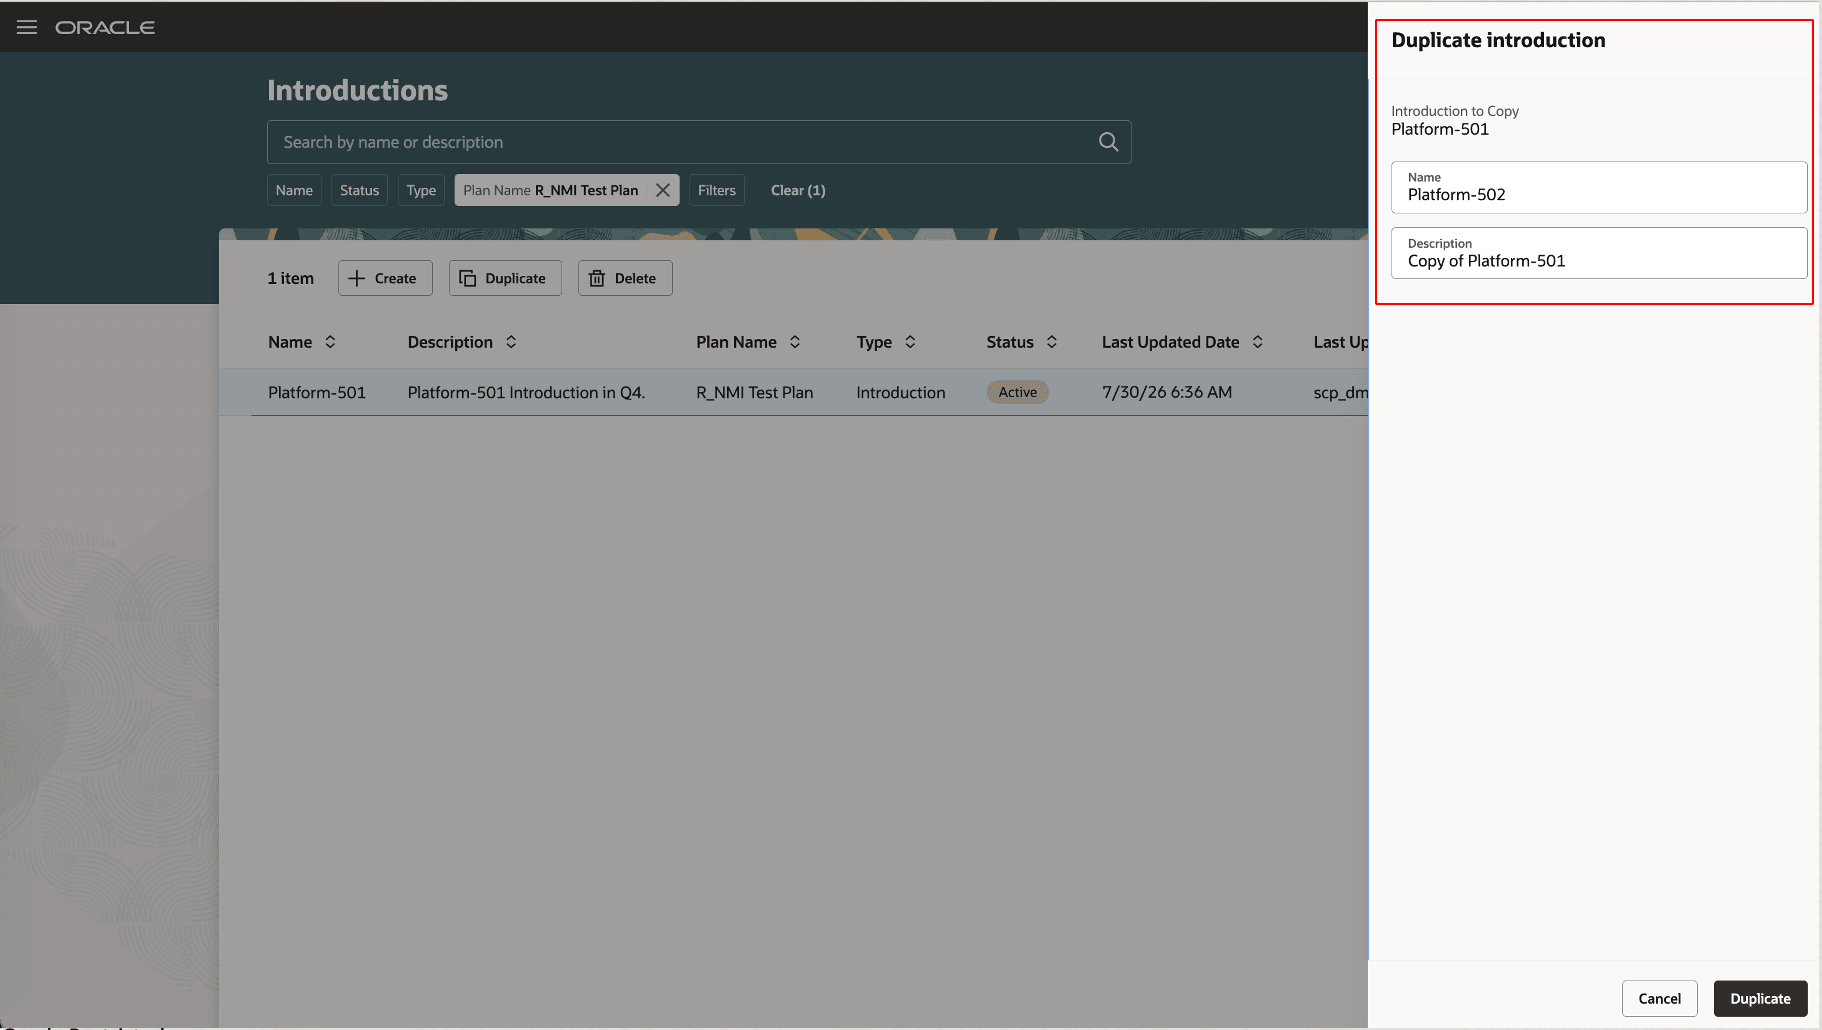
Duplicate introduction drawer
Enter information in the drawer’s fields.
When you select Duplicate, the drawer will close, and a confirmation message will be displayed. The duplicated introduction will be displayed in the Draft status on the Introductions page.
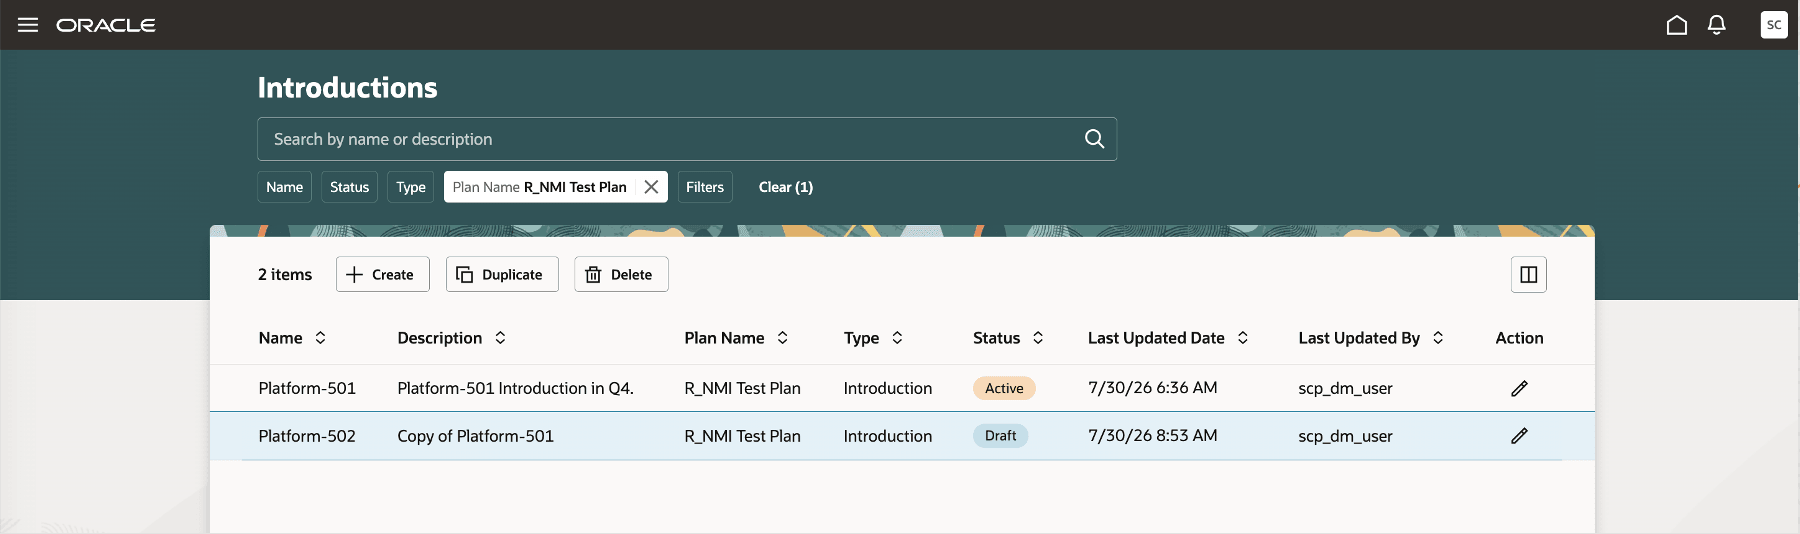
Duplicated introduction on Introductions page
Delete introductions
On the Introductions page, to delete an introduction in the Draft status, select the introduction, and select Delete.
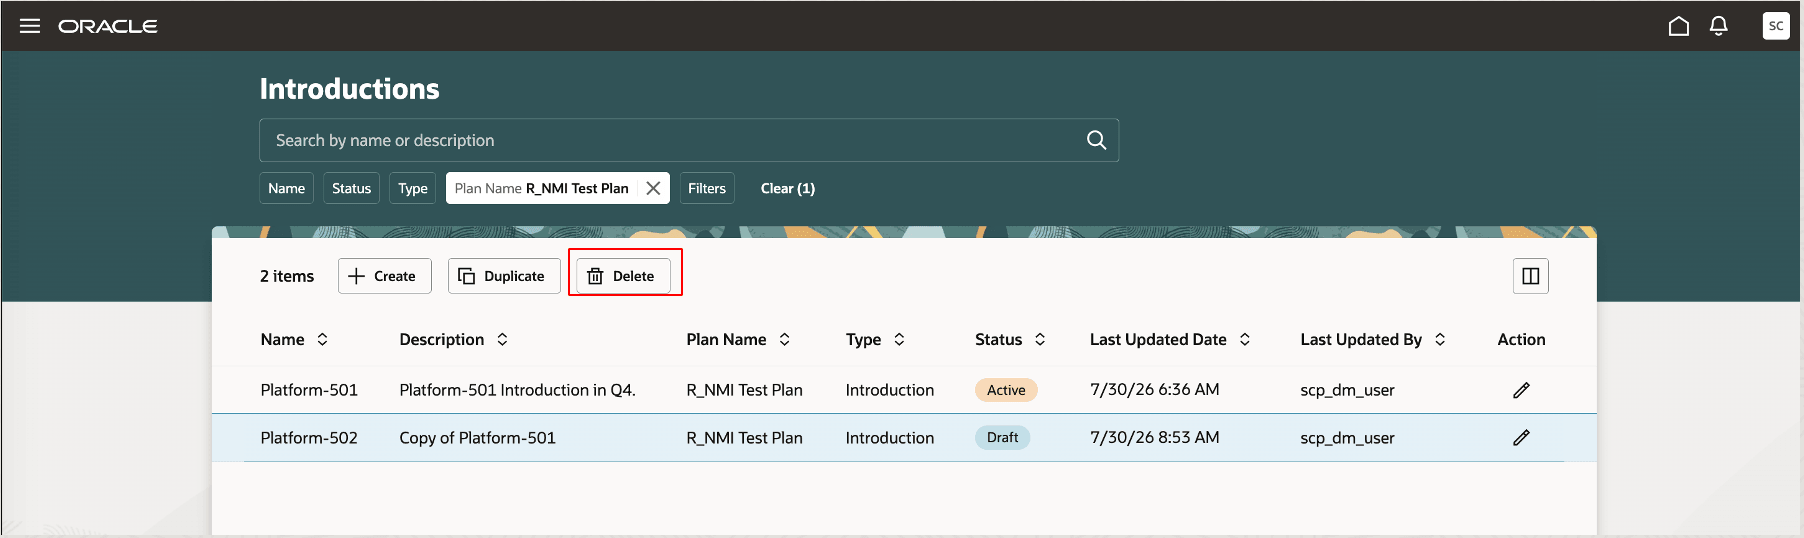
Delete button on Introductions page
In the warning dialog box, select Delete. The introduction will be deleted, and a confirmation message will be displayed.
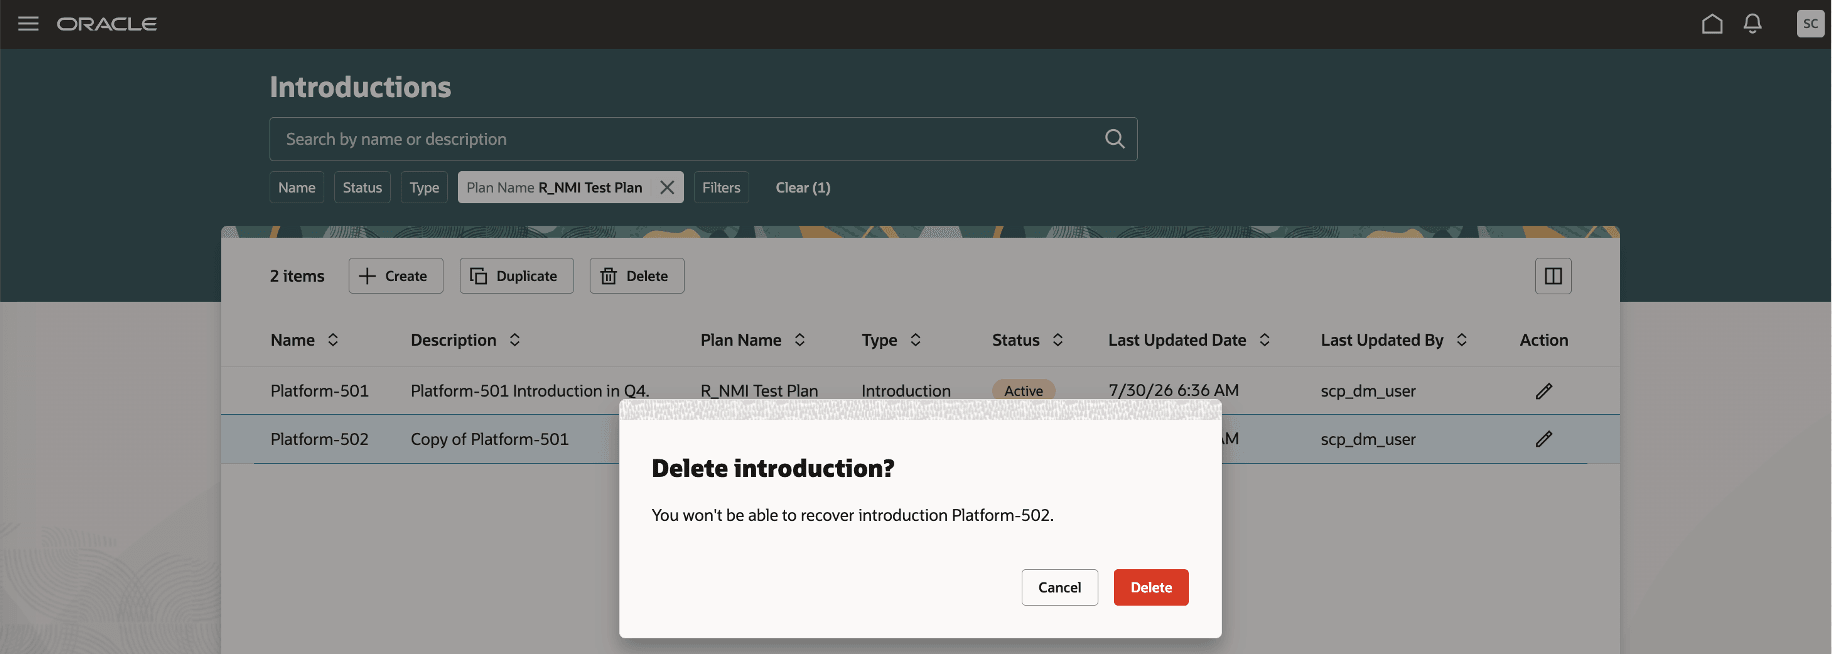
Warning dialog box for deleting introduction
You can’t delete an introduction in the Active or Complete status.
Steps to enable and configure
Ensure that your user-defined roles have the new privileges required by this feature.
Tips and considerations
- You can use introductions in only demand and demand and supply plans.
- In this update, introductions with the Active or Complete status can’t be deleted. Only introductions in the Draft status can be deleted.
Key resources
Visit https://redwood.oracle.com/ for more information about the Redwood experience.
Access requirements
If you’re using user-defined job roles, then you need to add the privileges identified as new in this update as well as validate that you have the existing privileges that are listed.
|
Privilege status |
Privilege name and code |
|
New |
Edit Introductions of Members MSC_EDIT_INTRODUCTIONS_OF_MEMBERS_PRIV |
|
New |
View Introductions of Members MSC_VIEW_INTRODUCTIONS_OF_MEMBERS_PRIV |