Add Enriched Fields to the Account and Contact Pages
Here's how to add enriched fields to the Profile tab in the Edit Account and Edit Contact pages in Classic Sales. You can use the same process to add the fields to other Classic Sales pages as well.
If you're adding the fields to the Sales for Redwood UIs, then you must use VB Studio instead of Application Composer and follow the example topic, "Add a Custom Field to the Edit Contact Page", in the Oracle Fusion Cloud Sales Automation Extending Sales for Redwood.
-
Create and activate a sandbox.
-
Navigate to .
-
With the Account or Contact object selected in Application Composer, click Pages.
-
Expose the field on the Profile tab on the Edit Account or Edit Account page.
Note:The "Edit" pages are called "Details" pages in Application Composer.
-
Scroll to locate the Details Page Layouts and open a custom layout or create one by duplicating the default layout.
-
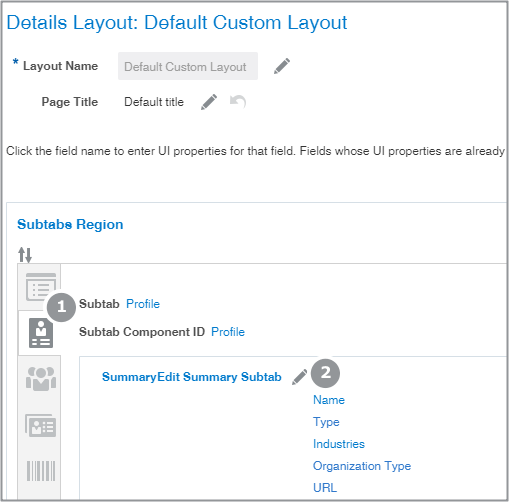
Click the Profile subtab (callout 1 in the screenshot).
-
In the Summary Subtab section, click Edit (callout 2).
-
Scroll down in the Available Fields column to locate the field and move it to the Selected Fields column.
-
Use the arrow buttons to move the field where you want it
-
Click Save and Close.
You are returned to the Layout page, which reflects your changes.
-
Click Done.
You are returned to the Application Composer page.
-
-
Review the pages where you added the fields:
-
With the sandbox still open, click Home.
-
Open the Account or Contact work area.
-
Review each of the pages to make sure the fields are where you want them.
-
-
Publish the sandbox.