Configure Custom Rollups Using the Formula Fields
Use the formula fields instead of a regular field to create a custom attribute for rollups. Unlike regular fields, formula fields let you build a script with rules related to calculations.
Another advantage with formula fields is that you can show multiple values on a single field, which is suitable for rollup attributes.
Below are the high-level steps for using formula fields to show custom rollups:
- Create custom formula fields.
- Add the formula fields to the object page.
- Create custom rollups to populate the data of the formula fields.
Let’s apply these steps and create a couple of example rollups for the Account and Contact object pages.
Example Account Rollups Created Using Formula Fields
- Total Open Opportunities
- Total Revenue from Open Opportunities of an account and the child accounts in its hierarchy
Step 1: Create Custom Formula Fields
Create two new formula fields for Total Open Opportunities and Total Revenue from Open Opportunities. Here’s how you do it:
- Enter an active sandbox. From the Navigator, go to .
- On the Fields page, click .
- Select Formula and click
OK.
To learn more about the formula fields, read the Formula Fields topic in the Configuring Applications Using Application Composer guide.
- Create a formula field for Total Open Opportunities:
- On the Create Formula Field page, enter
Total Open
                                    Opportunities
for Display Label, and enter the same name, but without spaces, in the Name field.
Here's a sample image of the Create Formula Field page:

- On the Create Formula Field page, enter
- Click Next.
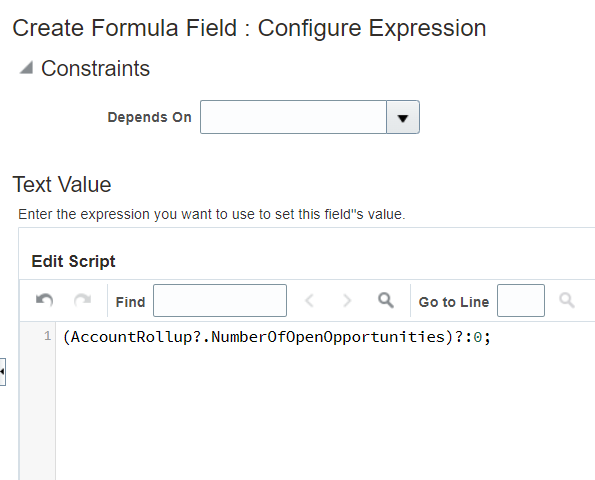
- On the Configure Expression page, enter an expression the engine should
consider when calculating the field value. For example, use this expression
to indicate that the engine must not calculate when the number of
opportunities for an account is
zero:
(AccountRollup?.NumberOfOpenOpportunities)?:0;Here's a sample image of the example expression:
- Click Submit.
- Create a formula field for the Total Open Opportunities Revenue rollup:
- Follow the procedures given in steps 2 and 3.
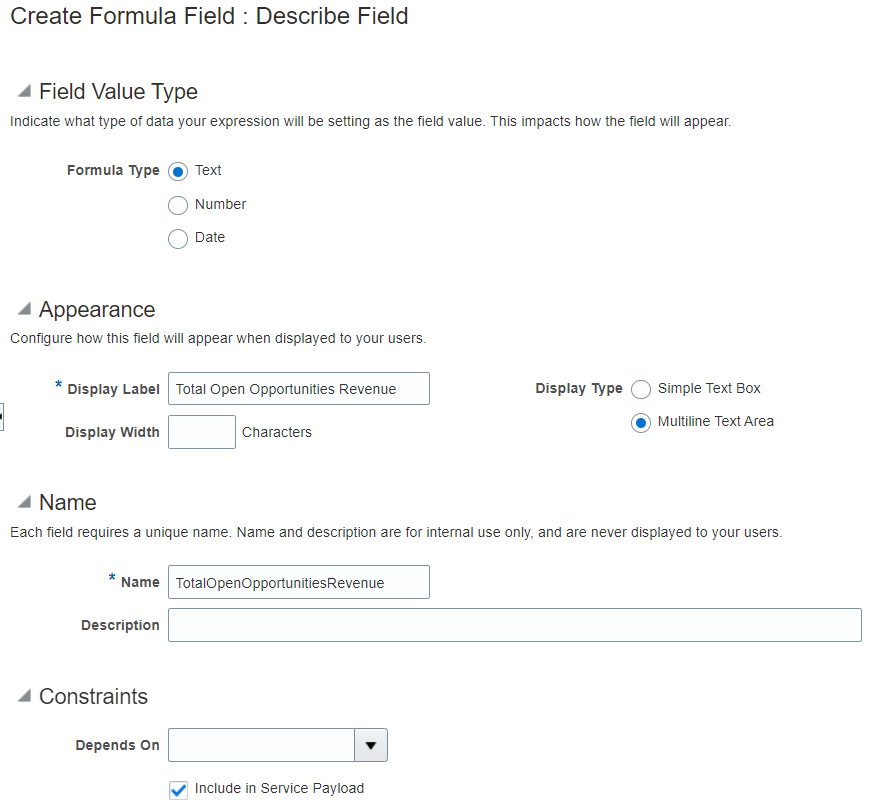
- On the Create Formula Field page, enter
Total Open
                                    Opportunities Revenue
for Display Label, and enter the same name, without spaces, in the Name field. - For Display Type, select Multiline Text
Area.
The formula field appears as a multiline text area to display two rollup fields. In this example, the two rollup fields are
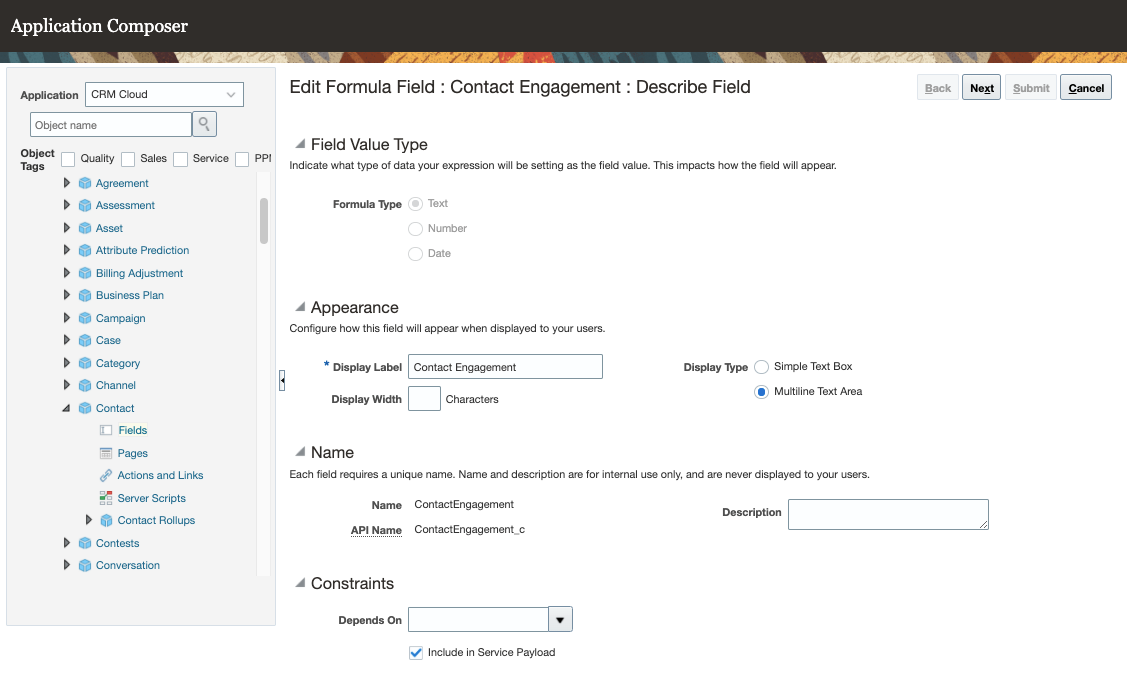
SumOfOpenOpportunitiesRevenueandHierSumOfOpenOpportunitiesRevenue-- one for the account and another for its hierarchy.Here's a sample image of the Create Formula Field: Describe Field page:
- Click Next.
- On the Configure Expression page, do this:
- In the expression for the formula field, create a variable to store
the sum of opportunity revenues for an account. Create another
variable to store the sum of opportunity revenues from an account
hierarchy. In this example, the variables are
thisAccountOptyRevnandhierAccountOptyRevn. - Ensure that the expression evaluates whether the value of the opportunity revenue is zero. If it is zero, set the variable to null. Also, evaluate whether the value of the opportunity revenue from an account hierarchy is zero. If it's zero, don’t display the account hierarchy rollup.
- To write the expression, select the field from the list
corresponding to the Rollup object. In this case, Account Rollups is
a child of Account, and it has a 1:1 relationship with the Account
object. Once you select the Account Rollup, the Rollup fields appear
on the list. You can reference the fields easily and insert them to
the script palette to write the expression. In this case, use the
fields
AccountRollup?.SumOfOpenOpportunitiesRevenueandAccountRollup?.HierSumOfOpenOpportunitiesRevenuein your expression. These are the custom rollups you created in the previous step.
- In the expression for the formula field, create a variable to store
the sum of opportunity revenues for an account. Create another
variable to store the sum of opportunity revenues from an account
hierarchy. In this example, the variables are
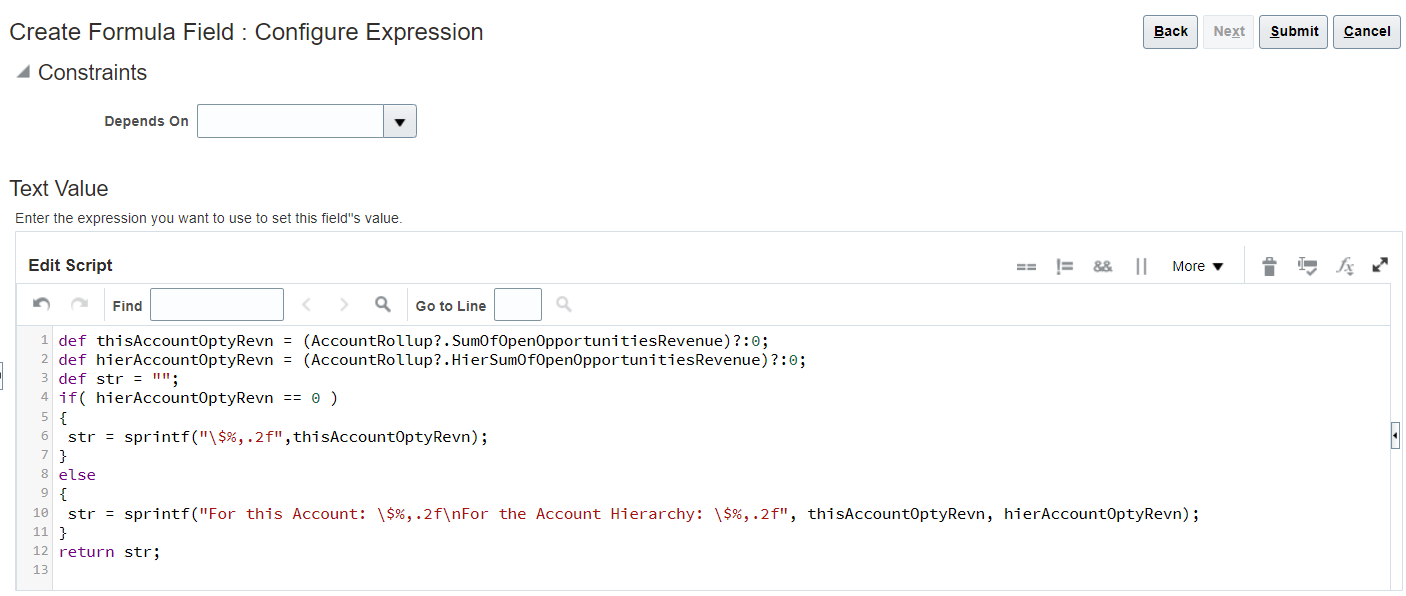
- Build an expression like the sample
here:
def thisAccountOptyRevn = (AccountRollup?.SumOfOpenOpportunitiesRevenue)?:0;
def hierAccountOptyRevn = (AccountRollup?.HierSumOfOpenOpportunitiesRevenue)?:0;
def str = "";
if( hierAccountOptyRevn == 0 )
{
 str = sprintf("\$%,.2f",thisAccountOptyRevn);
}
else
{
 str = sprintf("For this Account: \$%,.2f\nFor the Account Hierarchy: \$%,.2f", thisAccountOptyRevn, hierAccountOptyRevn);
}
return str;
Here's a sample image of the Create Formula Field: Configure Expression page:
- Click Submit.
Step 2: Add the Formula Fields to the Account Profile Page
- Enter an active sandbox.
- From the Navigator, go to .
- Create a copy of the Details Layout and add the two custom fields you
created in step 1:
Total Open OpportunitiesandHierarchy Total Open Opportunities Revenue. - Save your changes.
Step 3: Create Custom Rollups to Populate the Data of the Formula Fields
- Exit the sandbox and navigate to .
- Create rollups for Total Open Opportunities and Hierarchy Total Open Opportunity Revenue.
- When creating the rollups, assign the formula fields you created as a Rollup Attribute and a Hierarchy Rollup Attribute, respectively.
- Test your rollup.
- Run a full refresh on the rollup.
- Publish the rollup.
For detailed steps, see the What are the steps to set up rollups? topic.
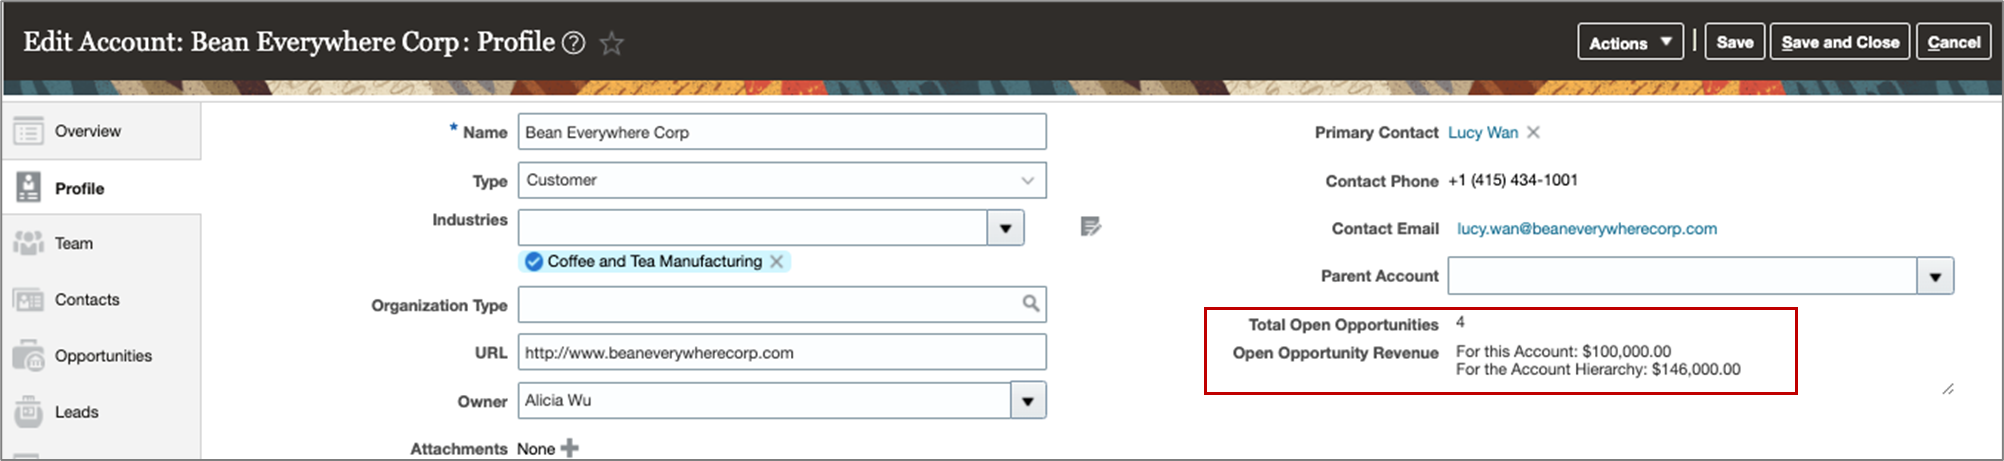
At the end of the configuration, the two rollups you created appear on the Edit Account: Profile page. Here's a sample image:
Example Contact Rollups Created Using the Formula Fields
- Total Touches with a Contact
- Last Touch with a Contact
- Number of Open Service Requests Created by a Contact
- Number of Critical Open Service Requests Created by a Contact
Step 1: Create Custom Formula Fields
- Enter an active sandbox. From the Navigator, go to .
- On the Fields page, click .
- Select Formula and click
OK.
To learn more about the formula fields, read the Formula Fields topic in the Configuring Applications Using Application Composer guide.
- On the Create Formula Field page, enter
Contact Engagementfor Display Label, and enter the same name, but without spaces, in the Name field. - For Display Type, select Multiline Text Area.
- Click Next.
- On the Configure Expression page, build an expression that can show the
following attributes in a single field:
- Number of touches.
- The last touch with the contact.
- The number or open service requests.
- Critical open service requests associated with the
contact.
Touches refer to the total Emails sent, or calls made to a contact. The expression evaluates the number of open or critical service requests. You can add a string to the expression to display a friendly message if there are no SRs associated with a contact. Here's a sample expression you can build for the field:
Display name: Contact Engagement (Custom field: ContactEngagement_c):
/*
Total Touches with Contact:
Last touch being: ?
Note that the contact has x Service request of which x are critical
No outstanding SRs
*/
def contactLastTouchDate = ContactRollup?.LastTouchDate
def contactNumTouches = (ContactRollup?.NumberOfTouches)?:0;
def contactCriticalSrs = (ContactRollup?.NumberOfOpenCriticalServiceRequests)?:0;
def contactSrs = (ContactRollup?.NumberOfOpenServiceRequests)?: 0;
def str = "";
if( contactNumTouches > (BigDecimal)0 )
 str = "Total touches with contact: " + contactNumTouches + "\n";
if( contactLastTouchDate )
 str = str + "Last touch being: " + contactLastTouchDate.format("M/d/yyyy") + "\n";
if( contactSrs )
{
 str = str + "This contact has " + contactSrs + " open service request";
 if( contactSrs > (BigDecimal) 1 ) // plural for service request?
   str = str+ "s";
 if( contactCriticalSrs )
 {
     str = str + ", " +contactCriticalSrs+ " critical!";
 }
}
else
{
 str = str + "There are no outstanding Service Requests for this contact";
}
return str;
- Click Submit.
Step 2: Add the Formula Field to the Contact Profile Page
- Enter an active sandbox. From the navigator, go to .
- Create a copy of the Details layout and add the Customer Engagement field you created in the step 1.
- Save your changes.
Step 3: Create a Custom Rollup to Populate the Data of the Formula Field
- Come out of the sandbox and navigate to .
- Create a custom rollup and assign the Contact Engagement formula field as a rollup attribute.
- Test your rollup.
- Run a full refresh on the rollup.
- Publish the rollup.
For detailed steps, see the What are the steps to set up rollups? topic.
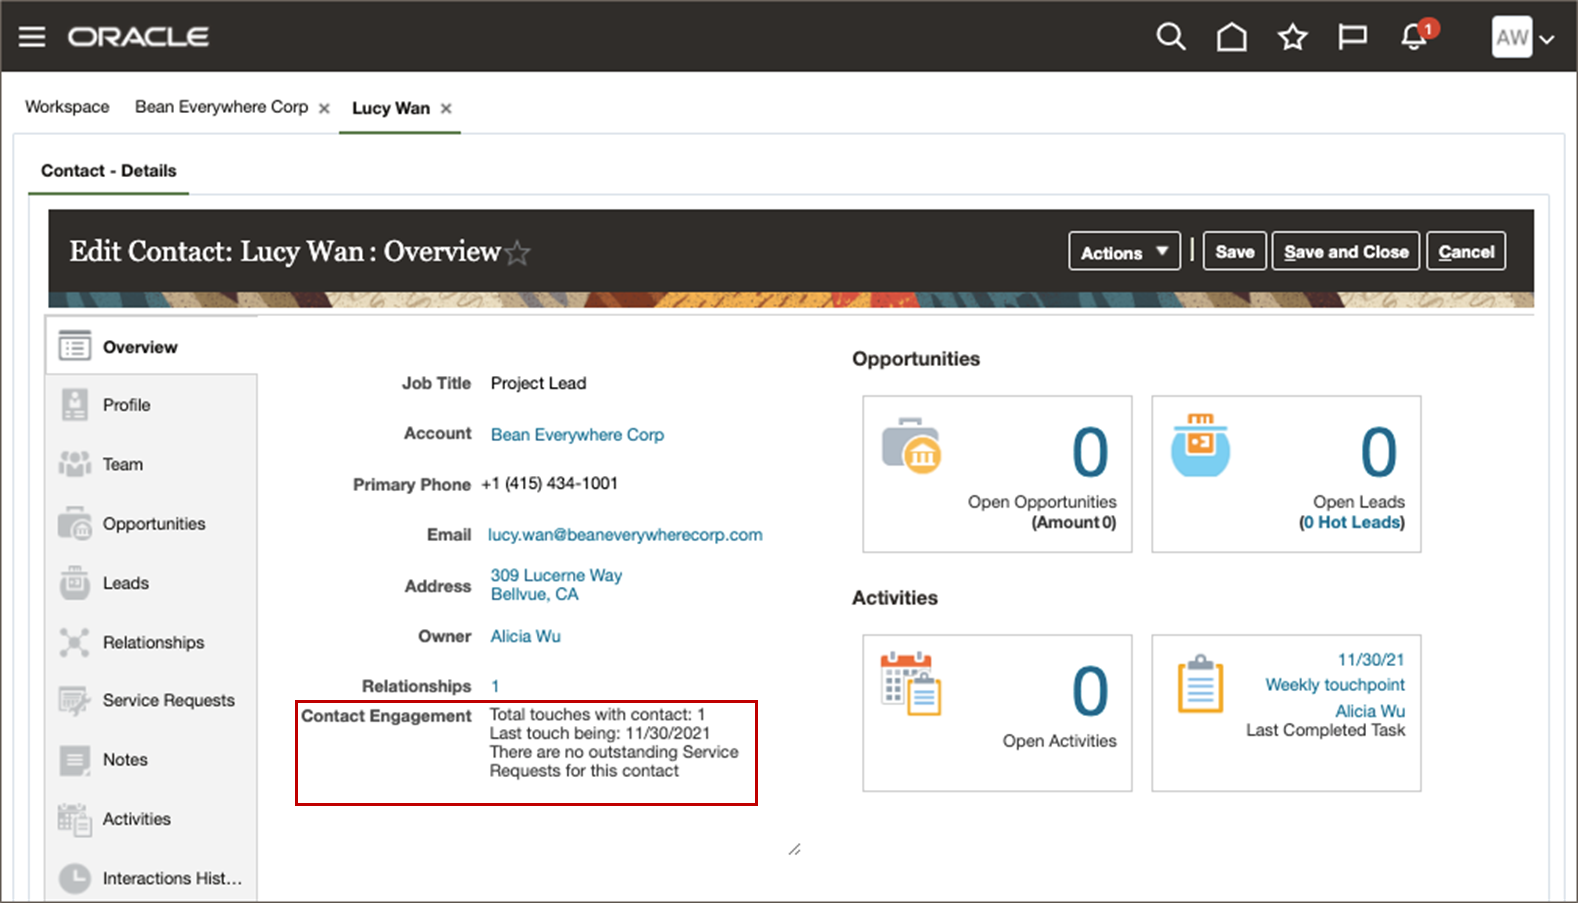
At the end of the configuration, you can see the rollup showing all four attributes in a single field on the Edit Contact: Profile page. Here's a sample image: