Create a Territory with No Coverage
Sometimes you need to create a territory to group other territories for forecasting or you want to forecast accounts that are included in a territory by name. In these cases, you don't want any accounts or opportunities assigned to the territory.
You can create territories that are skipped by the assignment process by deleting the coverage across all territory dimensions. You can only delete coverage while you're in a territory proposal and you must delete coverage across all the dimensions in a territory. You can't delete coverage for individual dimensions.
Here's how to create a territory with no coverage:
-
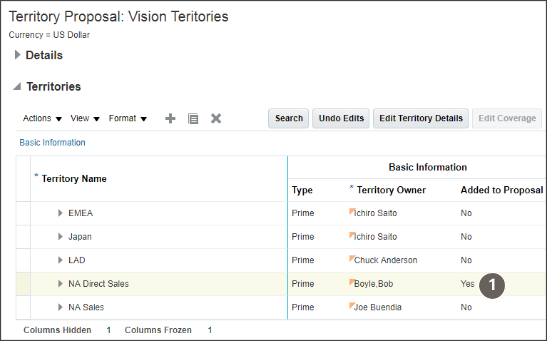
In the territory proposal, Territories region, select the territory you want to turn into a territory with no coverage. Make sure it's added to the proposal.
A Yes in the Added to Proposal column indicates that the territory is in the proposal. Here's a screenshot of the Territories region of a sample territory proposal highlighting the column.

-
In the Details region, select the Coverages tab.
-
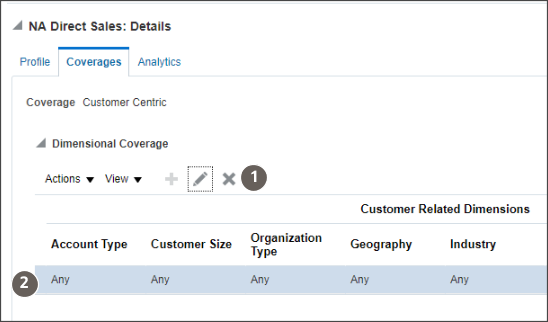
Select the row showing the coverage values in the Dimensional Coverage region on the tab.
Here's a screenshot of the Territory Proposal window with the Coverages tab. Callout 2 shows the location of the row of values you delete to create a territory with no coverage. Callout 1 indicates the location of the Delete icon.

-
Click Delete.
The application warns you that your action will remove all data in the table.
-
Click Yes in the warning.
The entire row is deleted.
-
Save.