Give Users the Permission to View All Scheduled Processes
Your application setup requires you to run numerous scheduled processes and ensure they complete successfully. By default, users can only see the scheduled processes they themselves submit. By creating a custom role in the Security Console and assigning all of the setup users to it, you ensure that everyone can see what processes are running and their status, no matter who submitted them.
-
Open the Security Console.
-
Click the Roles tab.
-
On the Roles tab, click Create Role.
The Create Role page displays a series of steps you can click directly or reach using the Next button.
-
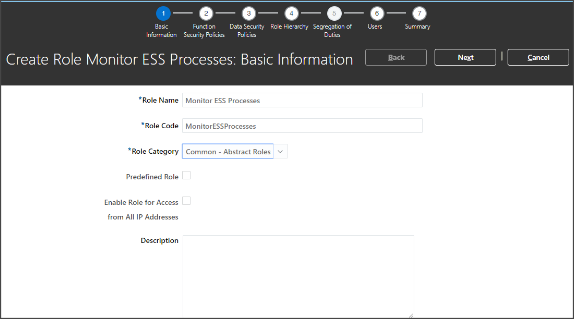
In the Create Role: Basic Information step, make the following entries:
Field
Suggested Entry
Role Name
Monitor ESS Processes
Role Code
MonitorESSProcesses
Role Category
Common -Abstract Roles
-
Click the Role Hierarchy step.

-
Click Add Role.
-
In the Add Role Membership window, search for ESS Monitor Role and click Add Role Membership.

-
Click Cancel to close the Add Role Membership window.
-
Click the Users step.
-
Click Add User and add all of the setup users by searching for each by name and clicking Add User to Role.
-
Click Cancel when you are done.
The Users step should list all of the users you added.
-
Click Next to get to the Summary and Impact Report step.
-
Click Save and Close.
The users you added to the role can now monitor all of the scheduled processes in the Schedule Processes work area.