Specify Which Workspace Infolets Display and In What Order
Use this procedure to specify which infolets salespeople see when they open the page and in which order.
-
With Page Composer and your sandbox open, scroll down to the Analytics section, Sales Infolets tab, where the Workspace infolets are located.
-
You must expose Workspace infolets one by one. Here's how:
-
Click Infolet Repository (the file icon on the top right side of the Analytics heading highlighted in the screenshot).

-
Select one of the 10 Workspace infolets. If the list includes two infolets with the same name, select the second one on the list. For example, the Infolet Repository list may include two entries for My Account, My Opportunities, and so on.
Note:Even though you set the profile to use the Workspace infolets, the older version of actionable infolets remains present when you configure the view for a site, for example. These older infolets are present on the list during configuration, but not displayed to users because of the value of the EL Expressions they contain.
-
Make sure the infolet that's displayed on the page is a Workspace infolet. Workspace infolets include the Workspace icon (callout 1) and the three dots for quick actions (Callout 2). Here's a screenshot of the My Accounts Workspace infolet.
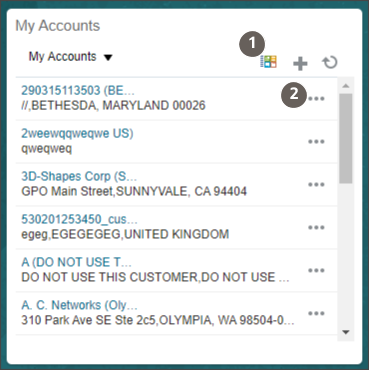
If you displayed the wrong infolet by mistake, just expose the second one.
-
-
Change the order of the infolets by dragging them around. Alternately, you can click the Infolet Repository icon, scroll down in the list and select Reorder Infolets.
-
If you are done with your configuration, be sure to click Close on the Page Composer toolbar to save your changes before publishing the sandbox.