Create a Lead
You can create a lead in multiple ways: from a contact, from an account, and from the sales dashboard. Here are some tips to save you time:
-
If you know the account and contact don't yet exist in your application, you can enter the account and contact names in the lead as text. As you type account and contact names, the application suggests any matching accounts and contacts. If you find right match, you can select it. If not, you can continue with typed values to create a net new lead.
-
If you know that both the contact and account exist in your application, then create the lead from the contact. When you do, the lead gets automatically populated with the account and contact information. When you start with the contact, you also get an overview of the existing leads associated with the contact and the history of past interactions with the contact.
-
If you know the contact is a new contact for an existing account, you can create the contact first and then create your lead. Or you can review the account information first and create the contact and lead from there.
Create a Net New Lead
Here's how to create a net new lead, which stores the account and contact information in the lead. You can have the application create the account and the contact automatically after you verify the lead information.
-
In the Leads work area or in the Sales Dashboard, place your cursor in the Ask Oracle bar and click Create Lead.
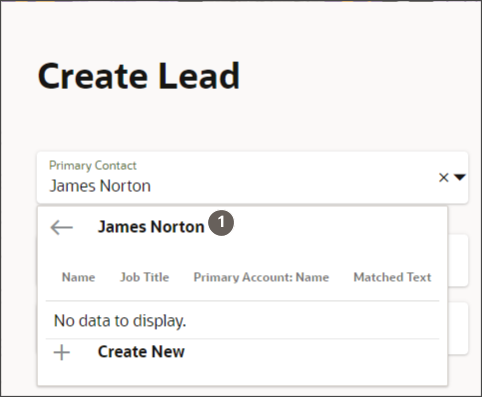
In the Create Lead page, enter the contact name in the Primary Contact field. The application searches and displays any existing matches. If there's no existing contact with that name, select the name from the list.
- Enter the lead name and other details.
-
Click Save.
-
You can now take any of the available actions on the lead. Just put your cursor in the Ask Oracle bar, enter the action, and press Return. Here are some examples:
-
To indicate product interest, for example, enter
addand select Product from the list. -
To send an email, enter
email. -
To call the contact in the lead, enter
Call.
-
Create a Lead from the Contact
-
On the home page, click Contacts to open the Contacts work area.
The page displays a list of contacts generated by the default saved search. Each saved search comes with predefined filters that restrict what contacts you can search. For example, the My Contacts list displays all the contacts where you're listed as the owner.
-
Click in the search bar and select the appropriate saved search.
-
Enter the contact's name in the search bar. Include both first and last name in your search for common names.
-
Press Return to initiate the search.
-
Click the contact's name in the search results.
-
In the contact page click in the Ask Oracle bar and enter:
create, and select Create Lead. -
In the Create Lead page, edit any of the defaulted information.
-
Click Save.
-
You can now take any of the available actions on the lead. Just put your cursor in the Ask Oracle bar, enter the action, and press Return. Here are some examples:
-
To indicate product interest, enter
addand select Product from the list. -
To send an email, enter
email. -
To call the primary contact in the lead, enter
Call. -
To qualify the lead, enter
Qualify.
-