Configure the Create and Edit Layouts
This topic illustrates how to add or remove a field, and how to reorder fields, on the Create and Edit Account pages.
What's the Scenario?
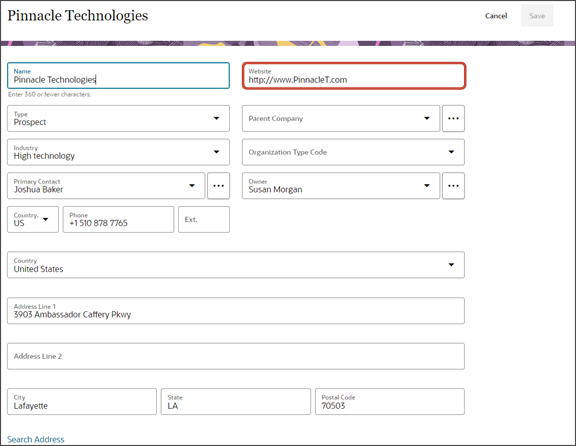
Here's a screenshot of the Edit Account page.
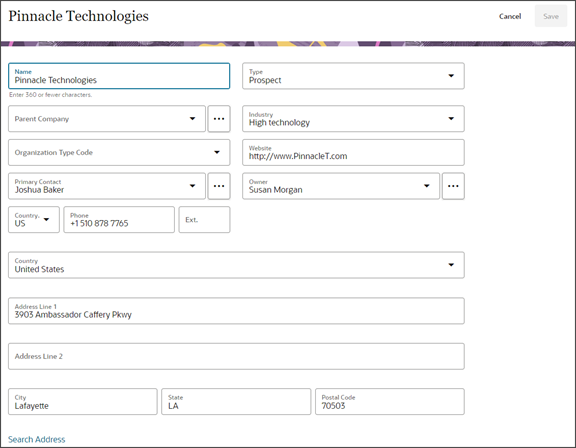
In this example, we'll move the Website field to display to the right of the Name field.
Modify the Edit Account Layout
-
Navigate to the page that displays the area you want to extend.
In this example, navigate to the My Team's Accounts page, click an account record, then click Account Details.
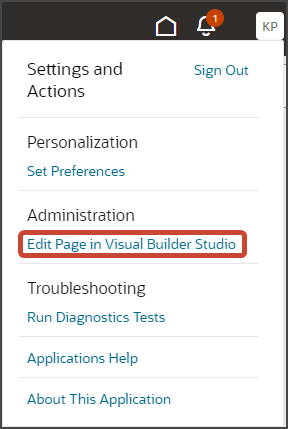
Under the Settings and Actions menu, select Edit Page in Visual Builder Studio.
-
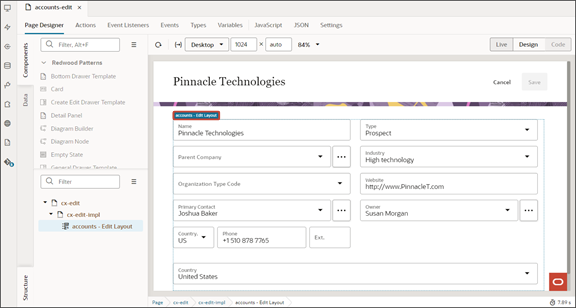
When Visual Builder Studio opens, the Edit Account page displays in the canvas.
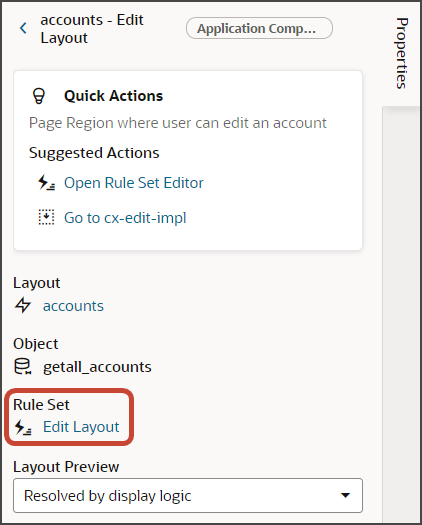
On the Structure panel, click the accounts - Edit Layout node.
The edit layout is highlighted in the canvas.
-
On the Properties pane, click the three dots Actions menu and select Edit Layout rule set.
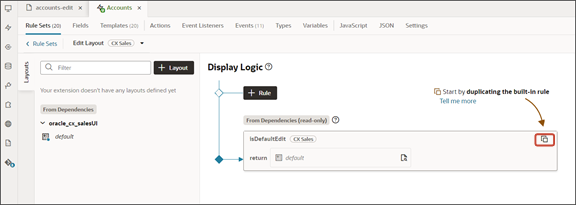
The Accounts layout tab, Rule Sets subtab displays. The Rule Sets subtab includes both a default layout as well as a default rule. Let's create a new rule.
-
Click the Duplicate Rule icon.
-
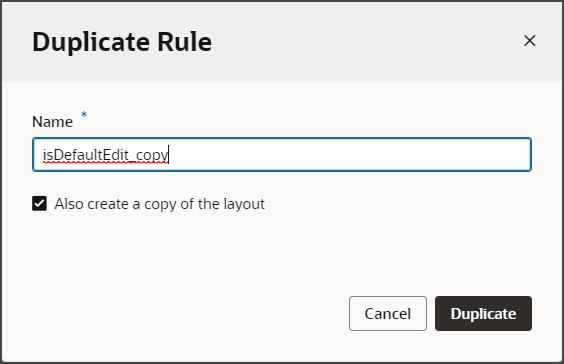
In the Duplicate Rule dialog, accept the default rule name or enter a new name. The name you enter here is both the rule name and also the layout name, so enter a layout name that makes sense for you.
Make sure that the Also create a copy of the layout checkbox is selected, and then click Duplicate.
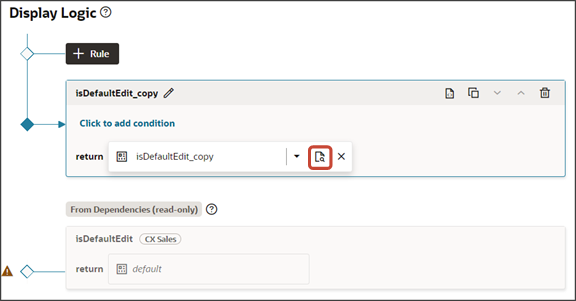
The new rule displays at the top of the list of existing rules, which means that this rule will be evaluated first at runtime. If the rule's conditions are met, then the associated layout is displayed to the user.
In this example, we're not adding any conditions which means that the associated layout will always be displayed.
-
Let's modify the rule's copied layout. Click the Open icon to edit the copied layout.
-
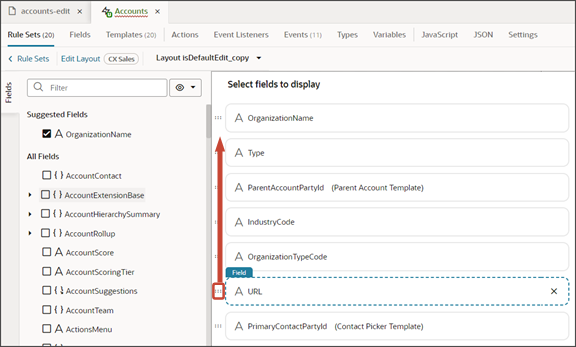
In this example, we want to move the position of the Website field. Locate the Website field and use the handle to reposition the field so that it displays after the Name field.
- Click the Preview button to see your changes in your runtime test environment.

This screenshot illustrates the new location of the Website field.