Add the CreatedBy and LastUpdatedBy Fields to Notes Panels and Subviews
Users can add notes to a record, and those notes will display on a Notes panel as well as on a Notes subview page. As an administrator, you can optionally display the CreatedBy and LastUpdatedBy fields for each note. If you add either of these fields to a Note layout, then you must use a specific field template so that the user names display correctly at runtime. This topic illustrates how to add the correct field template.
In this example, we'll add the LastUpdatedBy field to the Notes panel and subview that display on a Payment record. You can follow the same set of steps if you want to display the CreatedBy field, as well.
Update the Field Templates File
In the field templates file, add a new field template.
-
In Visual Builder Studio, click the Source side tab.
-
On the Source side tab, navigate to .
-
In the field-templates-overlay.html file, add this field template:
<template id="userNameTemplate">
<oj-vb-fragment name="oracle_cx_fragmentsUI:cx-profile" bridge="[[ vbBridge ]]">
<oj-vb-fragment-param name="user" value="[[ { 'userName' : $value() } ]]"></oj-vb-fragment-param>
</oj-vb-fragment>
</template>
Add the LastUpdatedBy Field to the Panel
Add the LastUpdatedBy field to the Notes panel that displays on a Payment record.
-
In Visual Builder Studio, click the Layouts side tab.
-
On the Layouts side tab, click the node.
-
Click the Rule Sets subtab.
-
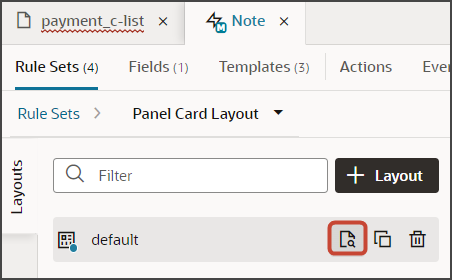
Click the Panel Card Layout rule set.
-
Click the Open icon to edit the default layout.
-
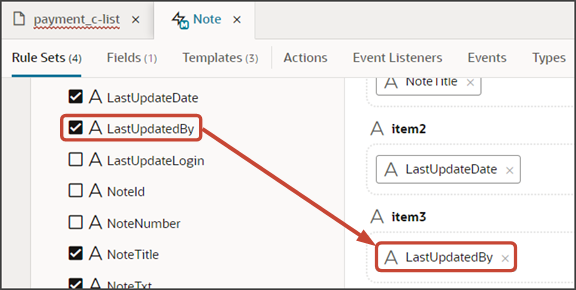
Select the field, LastUpdatedBy, from the field list and drag to the desired location on the panel layout.
-
Associate the LastedUpdatedBy field with the userNameTemplate field template:
-
On the Note tab, click the JSON subtab.
-
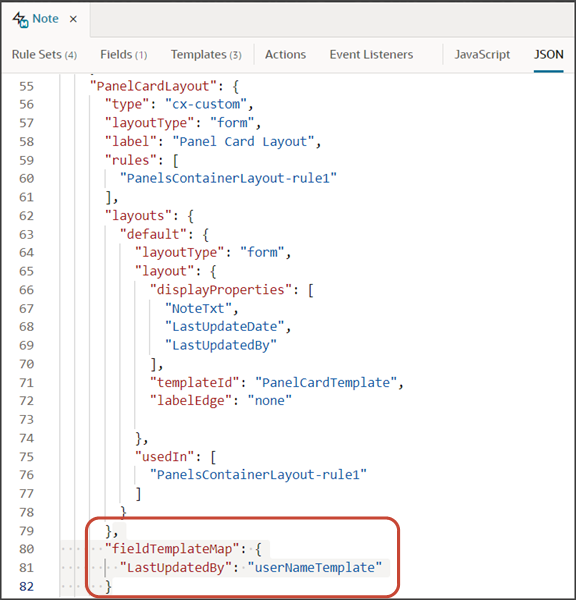
In the "PanelCardLayout" section, add a "fieldTemplateMap" section with a row for the LastedUpdatedBy field:
,
      "fieldTemplateMap": {
        "LastUpdatedBy": "userNameTemplate"
      }
The resulting JSON will look like this:
-
Add the LastUpdatedBy Field to the Subview
-
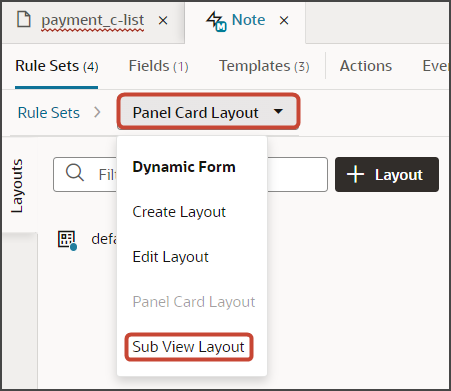
Switch to the Sub View Layout rule set.
-
Click the Open icon to edit the default layout.
-
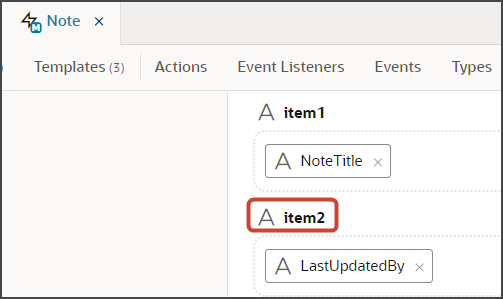
Select the field, LastUpdatedBy, from the field list, and drag to the desired location on the subview layout.
For example, drag the field to the item2 slot.
-
Associate the LastedUpdatedBy field with the userNameTemplate field template:
-
On the Note tab, click the JSON subtab.
-
In the "SubViewLayout" section, update the existing "fieldTemplateMap" section with a row for the LastedUpdatedBy field:
,
      "fieldTemplateMap": {
        "NoteTxt": "noteTemplate",
        "LastUpdatedBy": "userNameTemplate"
      }
-
Test the Flow
You can now test the Notes panel and subview to confirm that they both display the name of the person who last updated the note.
From the payment_c-list page, click the Preview button to see your changes in your runtime test environment.

-
The resulting preview link will be:
https://<servername>/fscmUI/redwood/cx-custom/payment_c/payment_c-list -
Change the preview link as follows:
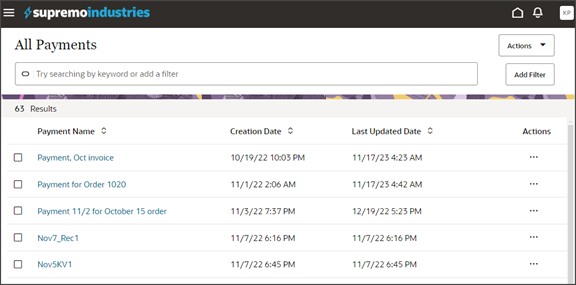
https://<servername>/fscmUI/redwood/cx-custom/application/container/payment_c/payment_c-listNote:You must add
/application/containerto the preview link.The screenshot below illustrates what the list page looks like with data.
-
Click any existing payment to view its detail page.
-
In the Action Bar, enter
Create Note. -
Click Create Note.
The Create Note drawer displays.
-
Create a note and then click Create.
-
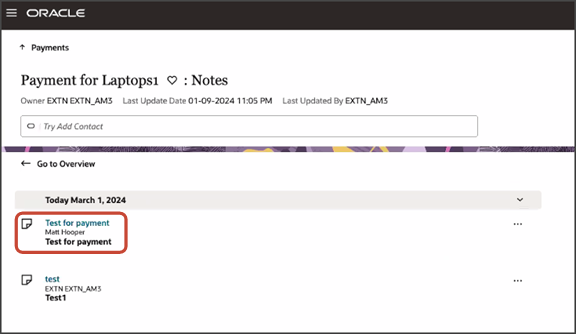
On the Notes panel, you should see the newly created note, along with the full user name, not the ID, of the person who last updated the note.
-
Click View All Notes to view the Notes subview.
The subview should also display the full user name, not the ID, of the person who last updated the note.
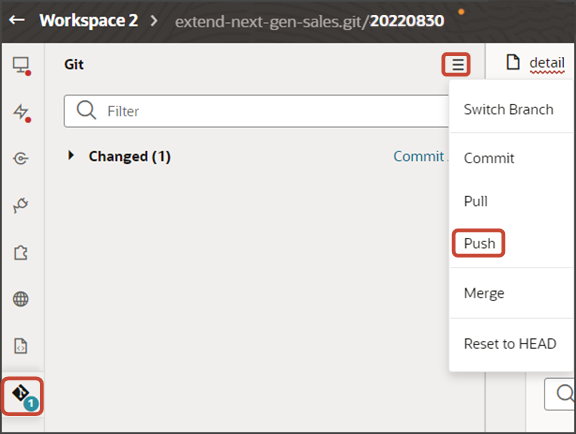
Save your work by using the Push Git command.
Navigate to the Git tab, review your changes, and do a Git push (which does both a commit and a push to the Git repository).