How can I enable recurring revenue schedules for Oracle Sales?
Salespeople can use recurring revenue schedules to account for revenue against opportunity products or product groups that are part of subscription business models. If you're using the Redwood fragments version of Sales, then you can enable recurring revenue schedules using these instructions.
This topic is applicable only if you're using the fragments version of Sales in the Redwood UX.
To enable recurring revenue schedules, you must complete these steps in Oracle Visual Builder Studio:
| Setup Step | Context |
|---|---|
|
1. Create a new event listener and action chain. |
When you create an event listener, an action chain is automatically created, as well. Update the action chain to turn on the ability to create recurring revenue schedules. |
|
2. Manually update the action chain name, if necessary. |
This step is required only if the action chain name doesn't look like the value documented below. |
|
3. If your extension is using a cloned layout for the Edit Layout rule set, then modify the path for the RevenueRecurrenceLayout section. |
This step is required only for cloned layouts. |
1. Create Event Listener and Action Chain
Add a new event listener for the opportunitiesChildRevenueOnEditEvent event.
-
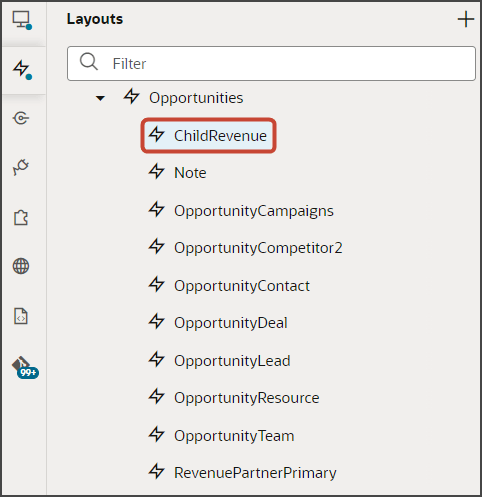
In Visual Builder Studio, click the Layouts side tab.
-
On the Layouts side tab, click the node.
-
On the ChildRevenue tab, click the Event Listeners subtab.
-
Click + Event Listener.
-
In the Create Event Listener dialog, click opportunitiesChildRevenueOnEditEvent.
-
Click Next.
-
Click the + icon next to Action Chains.
-
In the New Action Chain field, enter
opportunitiesChildRevenueOnEditEventChangeListener. -
Click Finish.
Next, update the action chain for the opportunitiesChildRevenueOnEditEventChangeListener event listener.
-
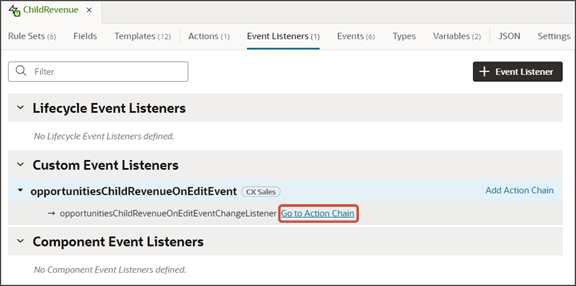
On the refreshed Event Listeners page, next to the new opportunitiesChildRevenueOnEditEventChangeListener event listener, click Go to Action Chain.
-
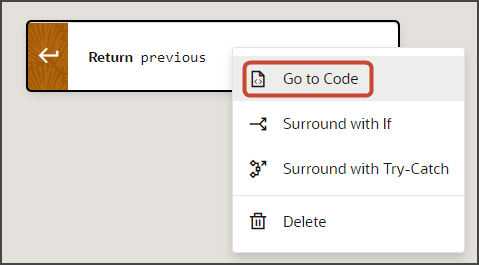
On the Actions subtab, right click the Return previous node and then click Go to Code.
-
In the code, the row for
return previous;is highlighted.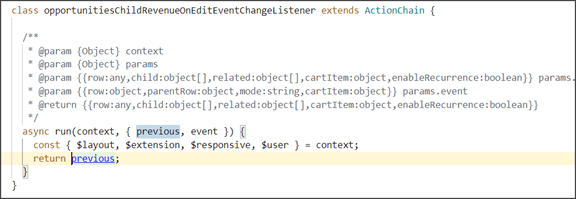
Place your cursor at the end of the previous row and add this code snippet:
 if (event.cartItem && Object.keys(event.cartItem).length === 0 && event?.row.SplitTypeCode != "PARENTSPLIT") {
        previous = {};
        previous.enableRecurrence = true;
      }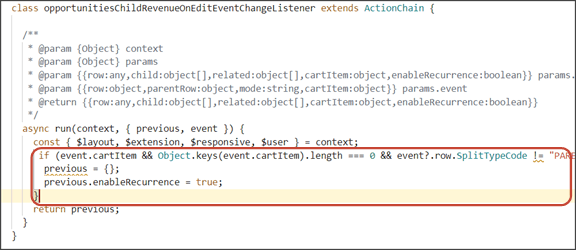
The previous code confirms the event that's called when the user edits an opportunity product, and also confirms that the revenue line being edited isn't already a parent split line. If those things are true, then the ability to create recurring revenue schedules is set to true.
2. Update the Action Chain Name
In some instances, you might need to update the action chain name. Here's how:
-
In Visual Builder Studio, click the Git side tab.
-
Navigate .
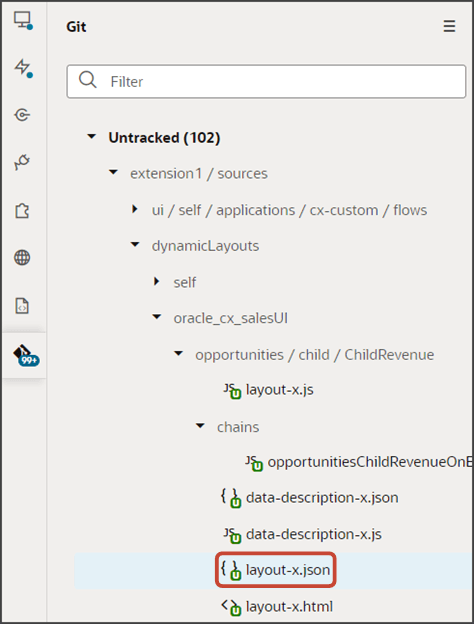
-
In the layout-x.json file, scroll down to the eventListeners section and confirm that the action chain name looks as follows:
"chain":
                            "opportunitiesChildRevenueOnEditEventChangeListener"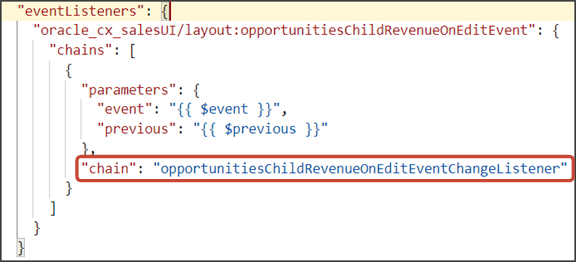
3. Modify the Path for the RevenueRecurrenceLayout Section (for Cloned Layouts Only)
If you're working with a cloned layout for the Edit Layout rule set, then review the JSON to confirm that the path for the recurring revenue schedule section is correct.
-
Still on the ChildRevenue tab, click the JSON subtab.
-
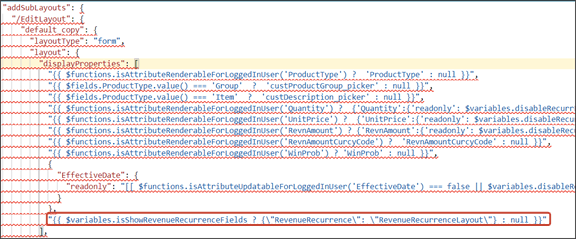
Scroll down to the displayProperties in the EditLayout section.
-
In the displayProperties section, review the RevenueRecurrenceLayout line.
-
Add a "/" just before
RevenueRecurrenceLayoutso that the code looks like this:"{{ $variables.isShowRevenueRecurrenceFields ? {"RevenueRecurrence": "/RevenueRecurrenceLayout"} : null }}"
Test the Flow
You can now test the flow to confirm that users can configure recurring revenue schedules for an opportunity.
-
In Visual Builder Studio, click the App UIs side tab.
-
Navigate .
From the opportunities-list page, click the Preview button to see your changes in your runtime test environment.

-
The resulting preview link will be:
https://<servername>/fscmUI/redwood/cx-sales/opportunities/opportunities-list -
Change the preview link as follows:
https://<servername>/fscmUI/redwood/cx-sales/application/container/opportunities/opportunities-listNote:You must add
/application/containerto the preview link. -
On the Opportunities list page, click any opportunity to edit.
-
On the Opportunity detail page, click the View All Products link that displays on the Products panel.
-
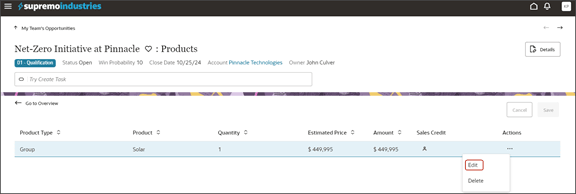
Click a product that you want to configure a recurring revenue schedule for, and then from the Actions menu, click Edit.
-
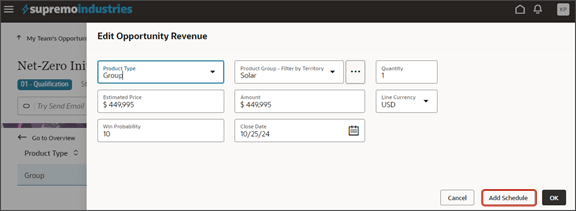
In the Edit Opportunity Revenue drawer, click the Add Schedule button.
-
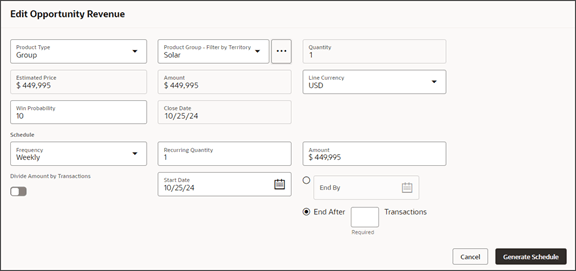
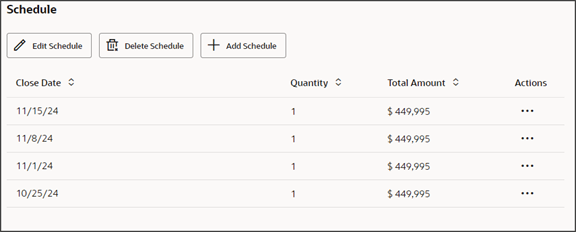
In the Schedule region that displays, you can now configure a recurring revenue schedule.
-
Add the schedule details.
For example, in the End After < > Transactions field, enter a number such as
4.
-
Click Generate Schedule.
Note the schedule is created.
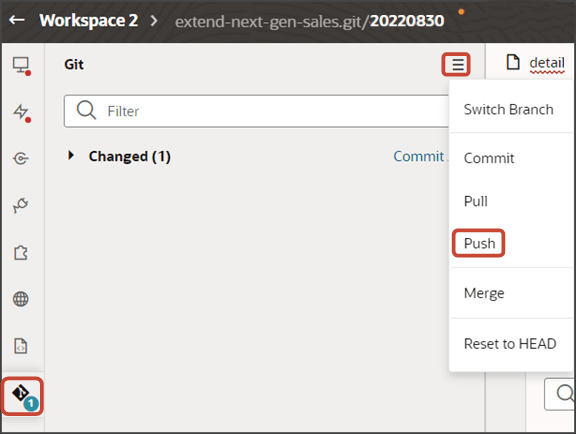
Save your work by using the Push Git command.
Navigate to the Git tab, review your changes, and do a Git push (which does both a commit and a push to the Git repository).
