Monitor Downstream Fulfillment
A configured item meets the needs of a specific sales order. So the make flow picks and moves it directly to a shipping lane from receiving instead of putting it into stock. The receiving agent can view the sales order.
The flow receives the configured item into inventory, picks, then ships it just like it does any other item in inventory. The configured item doesn't need a unique process or special treatment to transact it in your shipping application.
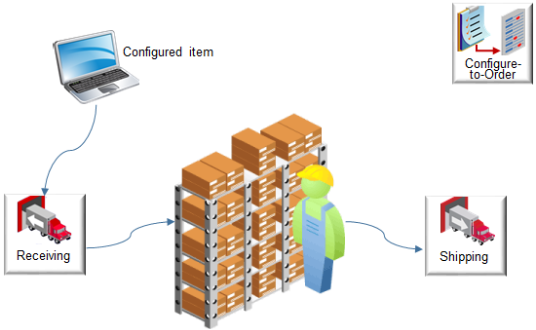
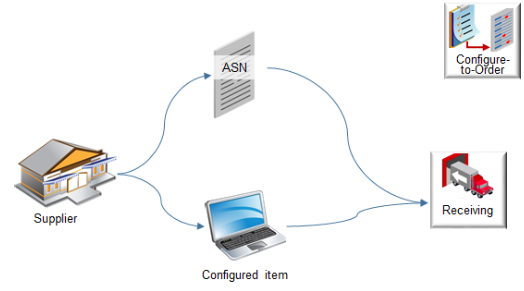
The flow also supports an advanced shipment notice (ASN) that it receives from your supplier or during an internal material transfer from a shipping organization.
Assume.
-
You finished creating your model. For details, see Create Your Configuration Model.
-
Manufacturing finished the work order. Inventory contains the configured item and Shipping contains shipment lines for the configured item.
-
You set up the pick release process for the organization so it automatically pick confirms and creates the shipment.
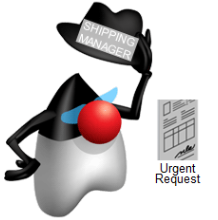
Next, put on your Shipping Manager hat (pretend you're the Shipping Manager). You receive an urgent request to fulfill a configured item, so you manually pick release and ship confirm it.
You will navigate to the Shipments work area and use it to search for shipments and shipment lines. You can also click graphs that display the outstanding and completed work for the current day. This is where you determine the work activities to do and drill into an activity.
Summary of the Setup
-
Release and confirm the shipment.
-
Examine and print reports.
-
Track sales order progress through the fulfillment lifecycle.
Release and Confirm the Shipment
-
Sign in with a user who has privileges to access the Warehouse Operations work area.
If you don't have the privileges, the work areas you use in this topic don't display.
-
Go to the Shipments work area.
-
Accept the All default value in the dialog, then click OK.
The Shipments work area displays. Get shipments or shipment lines according to status. Click a status on the Shipments or Shipment lines chart, or click a number link in one of the tables below the charts.
-
Click Tasks > Manage Shipment Lines.
-
In the Advanced Search area, enter the order number in the Order attribute, then click Search.
-
On the Edit Shipment Line page, verify that the shipment line status is Ready to Release.
-
Click Actions > Pick Release, click OK in the confirmation dialog, then click Save and Close.
-
On the Manage Shipment Lines page, click Save to refresh the page. Repeat until the flow creates the shipment and the line status displays Staged.
-
Click Shipment and note the shipment number on the Edit Shipment page.
-
Set the weight and volume, then click Ship Confirm.
-
Click Yes in the warning dialog.
The flow confirms the shipment.
Examine and Print Reports
You can use the Print Commercial Invoice Report scheduled process.
-
Go to the Scheduled Processes work area.
-
On the Overview page, in the Name column, notice the reports that ship confirm created.
-
Print Packing Slip Report
-
Manage Shipment Interface
-
Print Bill of Lading Report
-
-
Examine the Print Packing Slip Report.
-
Click Print Packing Slip Report.
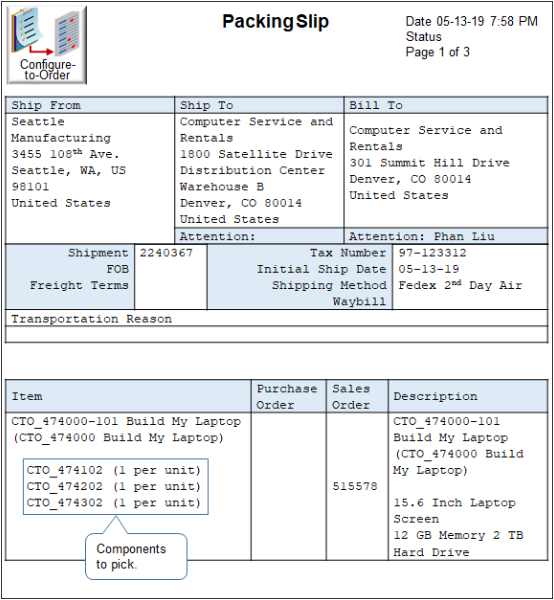
The Packing Slip Report displays the details of the configured item.
-
Click the output name in the Output area of the Print Packing slip report.
Ship confirm doesn't automatically submit the Commercial Invoice. You must manually submit it.
-
-
Go to the Scheduled Processes page, then click Schedule New Process.
-
On the Schedule New Process page, set the value.
Attribute
Value
Name
-
In the Process Details dialog, set the values, then click Submit.
-
Enter the ship-from organization, such as 002 Atlanta.
-
Enter the same shipment number you entered earlier in this procedure when you used the Parameters section of the dialog.
-
-
Wait for the status to change to Succeeded.
-
Examine the invoice.
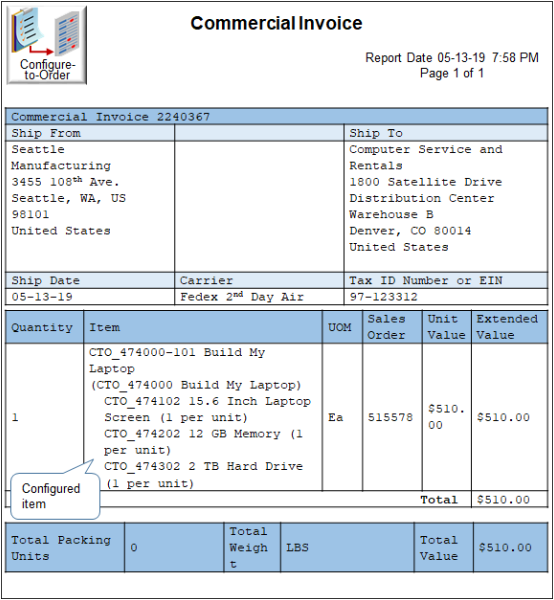
The invoice includes.
-
The configured item, CTO_474000-101 Build My Laptop
-
The model, CTO_474000 Build My Laptop
-
Each option your user chose, such as CTO_474102 15.6 Inch Laptop Screen (1 per unit)
-
Note
-
It isn't necessary to do any more set up to get and display the invoice.
-
A web service in Supply Chain Orchestration gets details for this sales view when you ship confirm the sales order.
-
You can view the model and options for the configured item on the commercial invoice and the packing slip.
-
The invoice displays the quantity for each component in the configured item assuming that the configured item quantity is one.
-
You don't have to do any special document setup for configured items.
Here's an example of the packing slip.
Track Sales Order Progress Through the Fulfillment Lifecycle
-
Go to the Order Management work area.
-
On the Overview page, enter the order number, then click Search.
Notice the order line status is Awaiting Billing.
-
Click Action > Switch to Fulfillment View.
-
Click Fulfillment Lines, then, in the Attributes section at the bottom of the page, click Supply Details.
-
Click Supply Order Number to view the supply order details.
-
Click the supply tracking line, then notice the value of the status.