Control Who Can Release Credit Check Hold
Set up a hold code to control who can release a hold on a credit check.
Oracle Order Management comes predefined to allow any user to release a credit check hold in the Order Management work area. In this example, assume you must allow only the Order Manager to release the hold.
Summary of the Setup
- Examine predefined behavior.
- Specify role that can release the hold.
- Test.
Examine Predefined Behavior
-
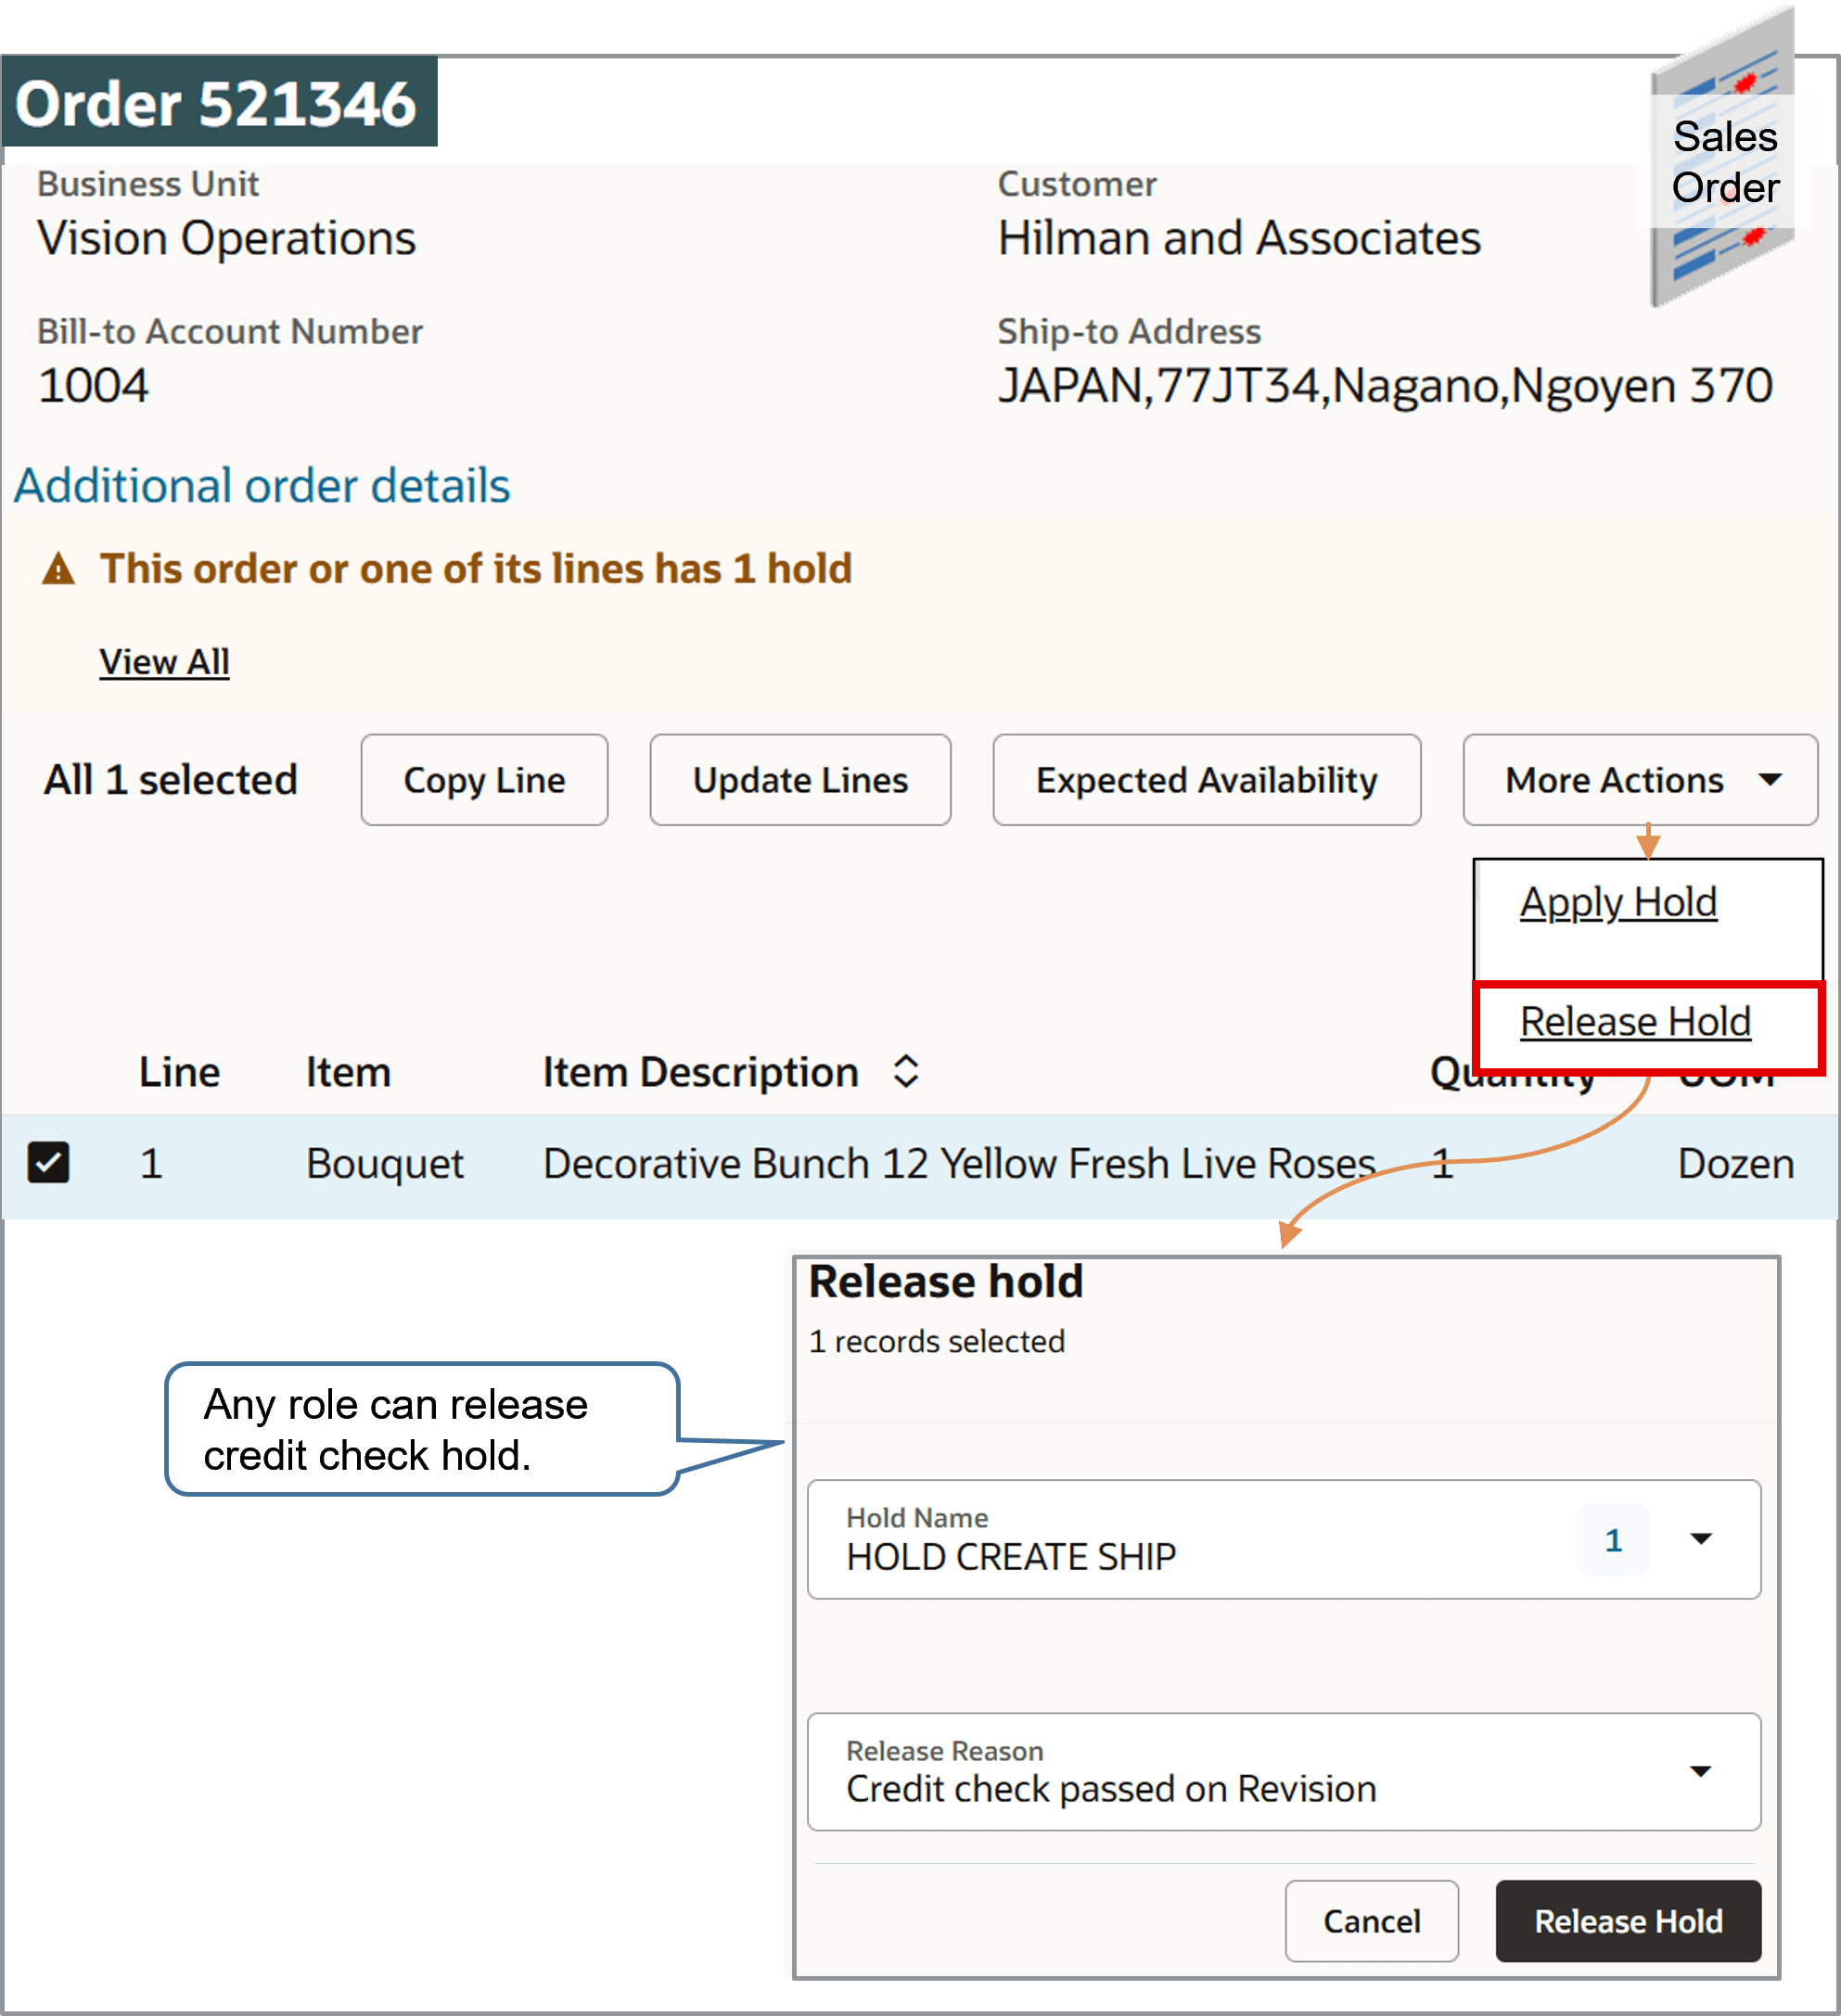
Open a sales order that's on hold.
-
select the order line, then click More Actions > Release Hold.
Notice that you can use the Release Hold dialog to set the values, release the hold, and any role can release the hold.
Specify Role That Can Release the Hold
-
Go to the Setup and Maintenance work area, then go to the task:
-
Offering: Order Management
-
Functional Area: Orders
-
Task: Manage Hold Codes
-
-
On the Manage Hold Definitions page, click Query by Example, enter the value, then press
Enteron your keyboard.Attribute
Value
Name
Credit Check Hold
-
In the Details area, click Applicable Roles > Selected Roles.
-
Click Actions > Select and Add.
-
In the Select and Add dialog, search for this value.
Attribute
Value
Role
Order Manager
-
In the search results, click the row that includes Order Manager, then click Apply > OK.
-
In the Details area, make sure the Release Hold attribute contains a check mark, then click Save and Close.
Test
-
Sign in with the Order Entry Specialist role.
Open the sales order, then click Apply Hold > Release Hold.
-
In the Release Hold dialog, verify that you can't set the Hold Name attribute, and can't release the hold.
-
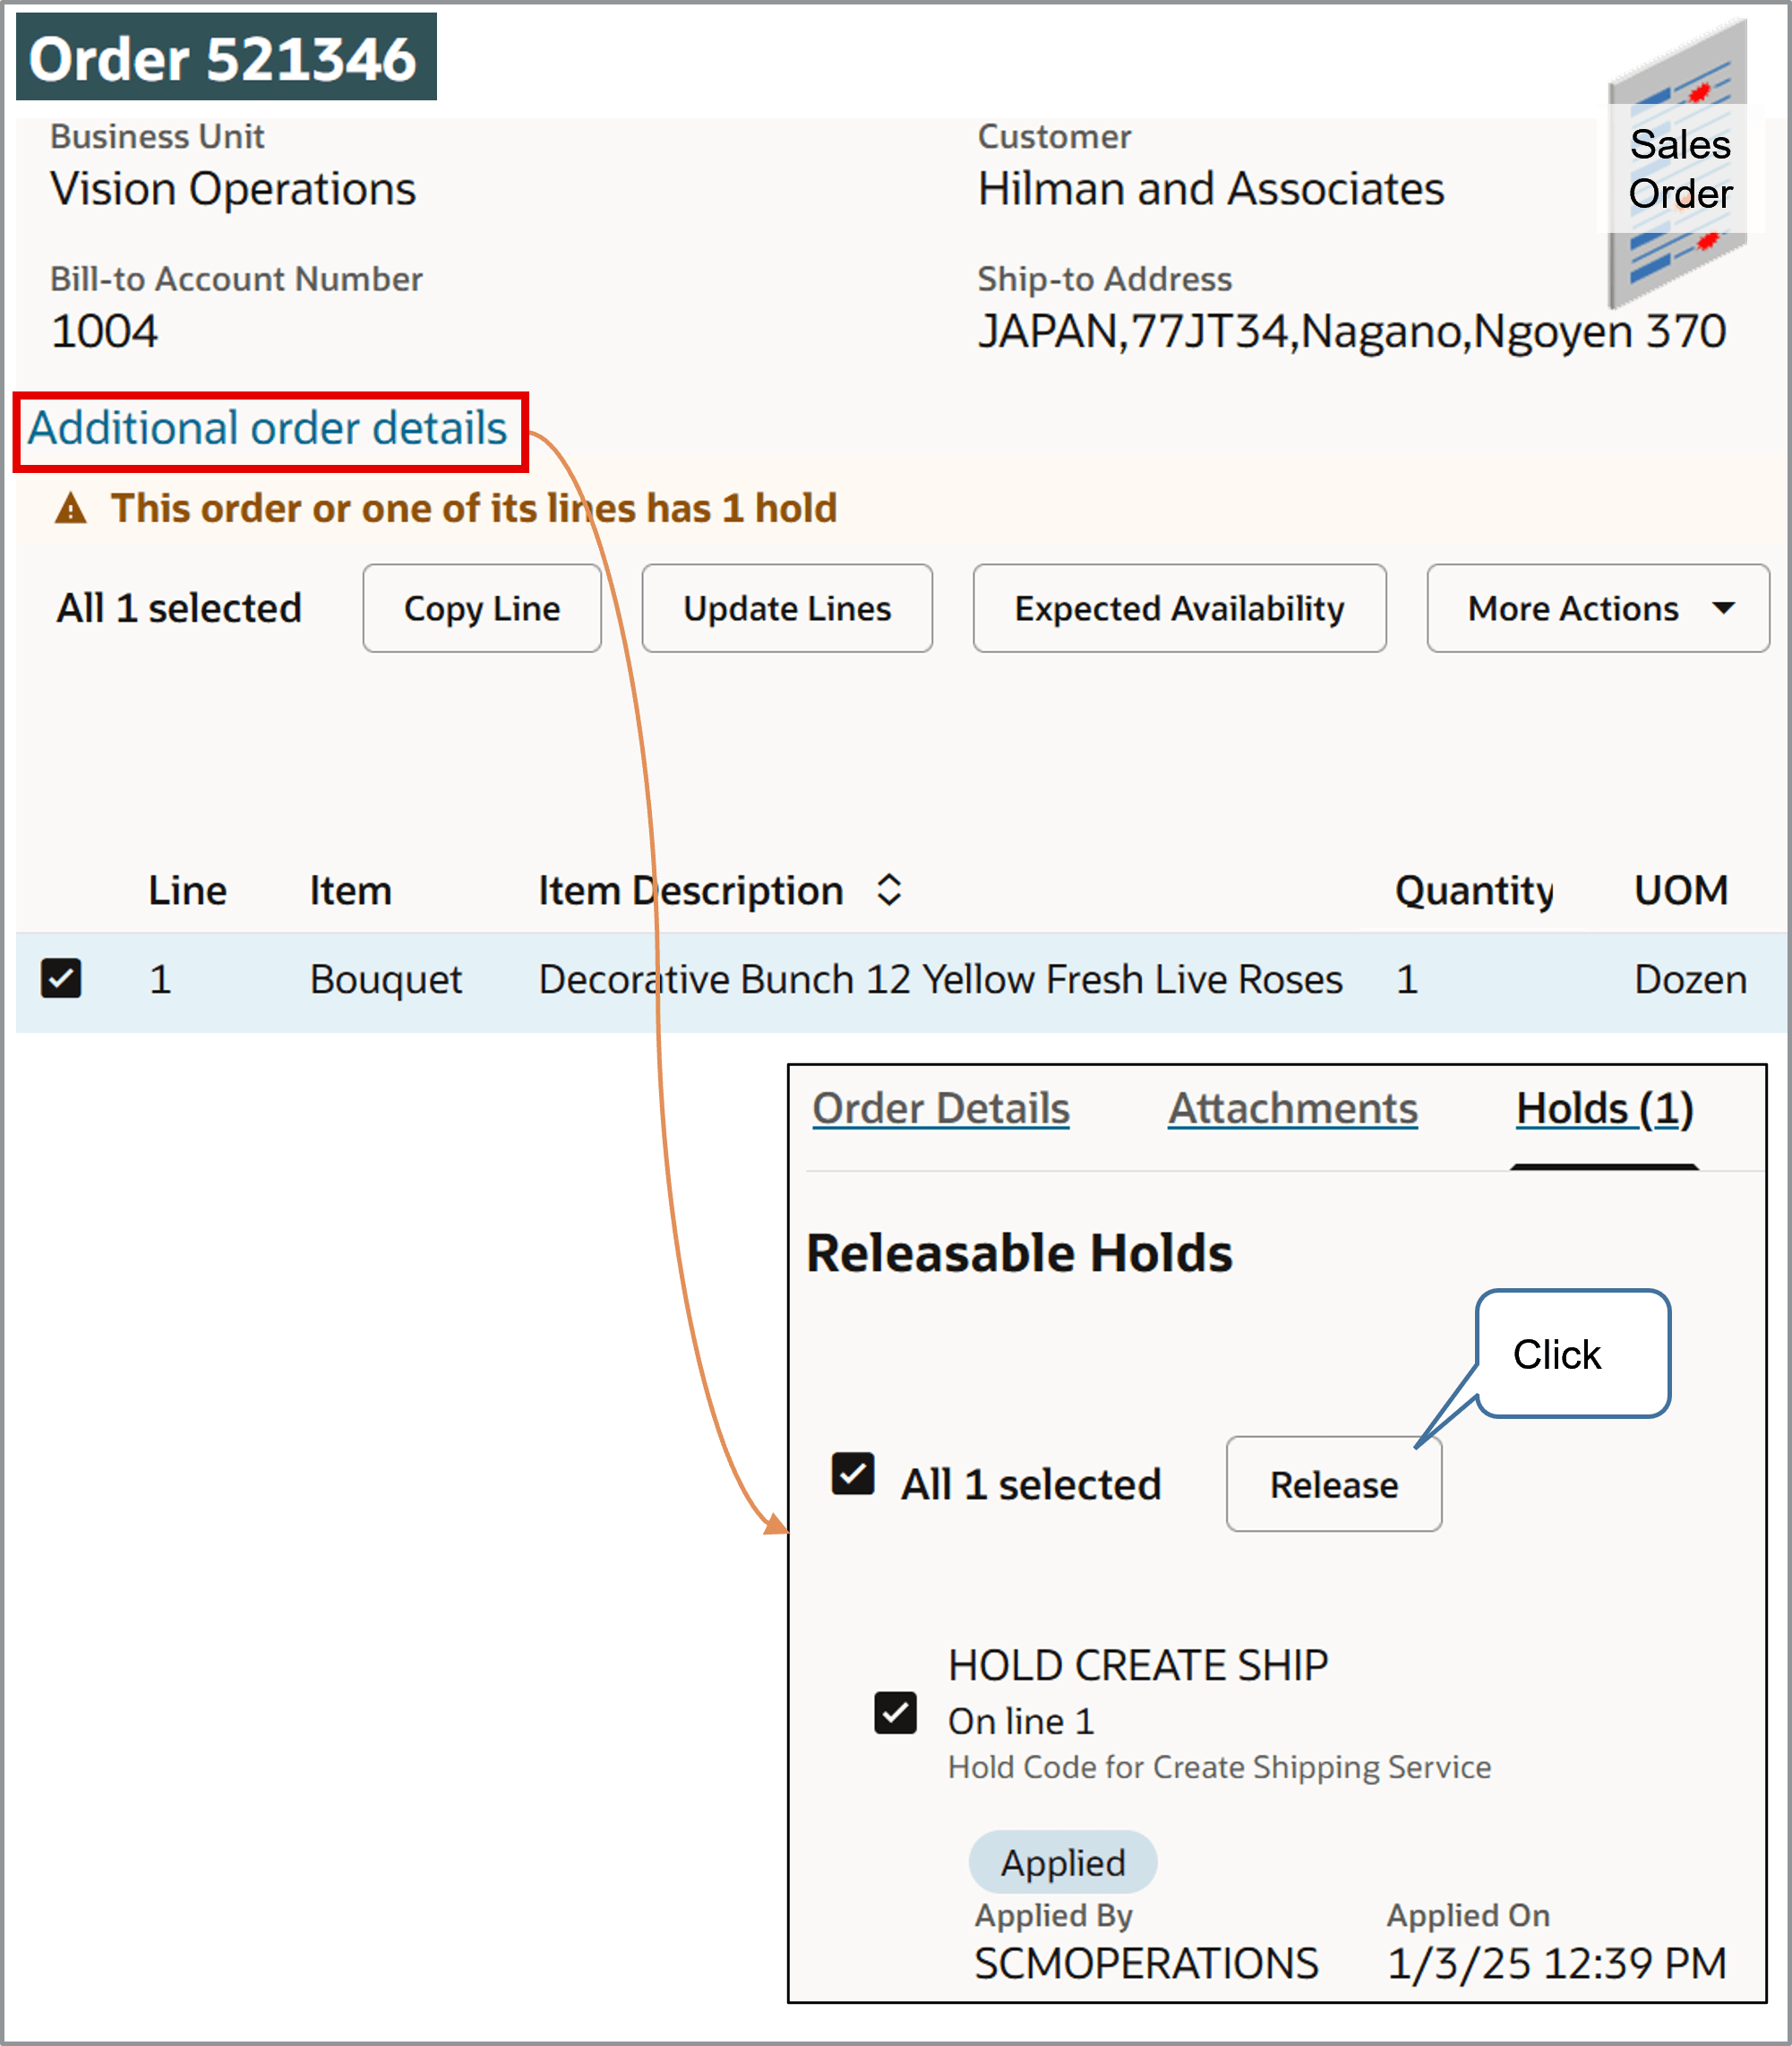
Sign out, then sign in with the Order Manager role.
-
Open the sales order, click Additional Order Details > Holds, examine the details in the Releasable Holds section, then verify that you can select and release the hold.
-
Click Update Lines.
Notice that Order Management changes the Status attribute on the order line from Not Started to Scheduled. If the status doesn't change, wait a moment, then try again.