Access Key Product Management Information and Tasks Using Product Management Landing Page
Using the Product Management Landing page, you can view a summary of issues that need your attention by reviewing the Key Performance Indicators (KPIs) and the corresponding visualizations that provide details for the KPIs. For example, if you’ve pinned 5 items in the Clipboard that need your attention and you launch the application the next day, you can see the pinned items in the KPI and the details in the visualizations show 5 items. By default, the predefined KPIs are displayed. You can add additional KPIs. Also, you can monitor KPIs related to your work, and navigate to the relevant pages.
The Product Management Landing page displays the following panels by default:
- Pinned items: Shows the count of items that are pinned on the Navigator Clipboard. This panel is displayed by default.
- Table: Displays the visualizations related to the pinned
items. In this table, you can:
- Perform a search related to the pinned items.
- Use suggested filters to filter the items based on item class and/or description.
- Export the displayed search results to an Excel file.
- View saved searches and create personalized search.
- Actions: Provides a list of quick links for navigating to additional pages based on your role. Your top tasks can be pinned and will display on the landing page. It contains up to 12 pinned links so that they're always available. All other tasks can be accessed using the View all actions link at the bottom. Clicking this link opens the Actions drawer where you can search for actions, pin actions, and click to navigate to the pages. Use the Pin icon to add the action to the Actions panel.
Edit Page Layout
You can edit the layout of the Product Management Landing page if you've the Manage Page Layout (EGP_LANDING_PAGE_LAYOUT) privilege.
- On the Product Management page, click Edit Page
Layout.
The Product Management page displays in edit mode.
- Hover on a panel to display a four-arrow icon
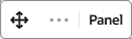 .You can move and reposition a panel by clicking and dragging this
icon.
.You can move and reposition a panel by clicking and dragging this
icon. - To add KPIs and visualizations, see Add KPIs and Visualizations to Landing Page.
Create and Manage KPIs and Visualizations
- Step 1: Create an analysis in OTBI and save the analysis in the Share/Custom folder.
- Step 2: Create KPI
- Access the Visualization Configurations tool using the following URL
by replacing <Server> with your local server name:
https://<Server>/fscmUI/redwood/cx-analytics/application/container/dvconfig
- Click Add to create a KPI or visualization.
The Create Configuration page is displayed.
- Click Create.
The KPI is created.
- Access the Visualization Configurations tool using the following URL
by replacing <Server> with your local server name:
- Step 3: Create a visualization
- In the same Visualization Configurations tool, click Add.
- On the Create Configuration page, select Bar Chart, Pie Chart,
Tabular Chart, and so on as the Visualization Type and then click
Create.
The KPIs and visualizations that are created is displayed on the Visualization Configurations page.
Add KPIs and Visualizations to Landing Page
You can add KPIs and up to four visualizations for each KPI. This lets you personalize the landing page based on your requirement. OTBI report data can be mapped to visualizations provided in the graphical library.
- Click Edit Page Layout.
The Product Management page displays in edit mode.
- To add KPIs and visualizations, use the Library drawer that’s displayed by
default. The Library lists all available KPIs and visualizations.
Search for the KPIs or visualizations that you want to add. Use the suggested filters to filter the list. You can drag-and-drop the required KPI or visualizations to the appropriate areas of the landing page.
A new panel is added for the selected KPI. In case you close the Library drawer, click Library to open it.
- To remove a panel, hover on the panel and click the
Remove icon.
You can’t remove the Pinned Items KPI and the Actions panels. When you edit the page layout, the changes are saved automatically.
- Click Exit Edit Mode.
The Product Management Landing page displays the updated page layout and the panels.