Creating a Sample Application
Tax Reporting offers you the option to create a sample application that provides pre-loaded metadata, data and related artifacts. By trying and testing this out-of-the-box environment, you can explore the capabilities and performance of Tax Reporting, and then use the sample application as a reference to more easily model your own business process using your metadata and data.
Note:
The Sample Application option is only available with the Enterprise Performance Management System Workspace.As part of the creation of the sample application, the following mandatory features are automatically applied:
- Track Multi-Source Data Input --Supplemental Data and Managed Data
- Intercompany --Intercompany Data and Track Intercompany Elimination
- Reporting Standard --Multi-GAAP Reporting
- IFRS reporting standard for the application, including the following features:
- Deferred Tax Not Recognized (DTNR)
- Consolidated Effective Tax Rate Reconciliation
- CbC (Country by Country Reporting) provides complete Tables 1, 2, and 3 to calculate analyses to assess risk as a result of transfer pricing strategies.
Note:
If you do not want to use IFRS or CbC for your application, you must create a new application without those features enabled, as outlined in Creating a New Application.If you want to use Interim Tax Provision in the application, see Enabling Application Features to enable the feature.
To create a Sample application:
- Using the URL provided for the instance, log on to Tax Reporting as a System Administrator.
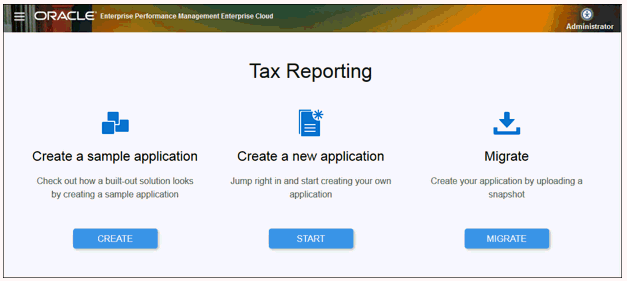
- On the Tax Reporting screen under Create a sample application, select Create.

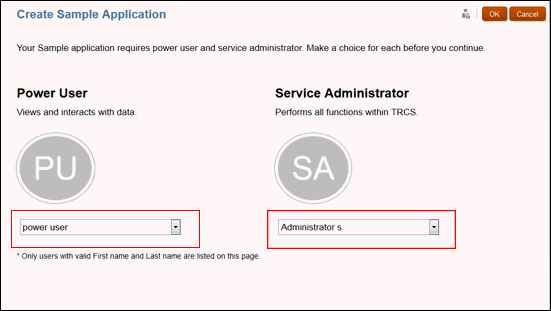
- On the Create Sample Application screen, select a user for each of the following roles:
- Power User --Select the user to be assigned as the Power User for the sample application. The selected Power User must be assigned an explicit Power User role. This role can grant read and write access, and has the ability to run tax automation for entities, and to import data into entities.
- Service Administrator --Select the user to be assigned as the System Administrator for the sample application. This role can grant read and write access, and has the ability to update business process data including metadata for all entities.
Note:
Do not use the same user for both the Power User and Service Administrator roles, even if that user has been assigned both a Service Administrator and Power user role. Each role must be assigned to a different user.
- Click OK to initiate the application creation process.
Note:
This will take several minutes, so do not close the browser window until the completion message is displayed. - Click OK on the completion message.
From the Home page, you can begin exploring and working with the sample application to create your own application.