Configure Oracle Warehouse Management Cloud
Configure Oracle Warehouse Management to send outbound messages about inventory history records to Intelligent Track and Trace.
You should have noted the Track and Trace instance endpoint URL that you obtained in the Configure a Document Integration task. View About Inventory History Transaction Codes to know the 18 inventory history transaction (IHT) codes of Oracle Warehouse Management that are accepted by the Track and Trace instance.
You can create one job for all the 18 inventory history transactions or create multiple jobs with each job scheduled for a group of operations or transactions. For example, activity codes generated during work order processing could be grouped together under one scheduled job and activity codes generated during QC process could be grouped under another scheduled job. Alternatively, you can create a single scheduled job for all the activity codes. Alerts are automatically sent when the scheduled jobs are invoked.
Sign in to Oracle Warehouse Management as an administrator and perform the following steps to schedule a job for all the IHT codes, configure the output interface, and set the output interface target.
-
To create a target for Inventory History Target, click
Add (
 ) and enter or select the following values:
-
URL: Enter Intelligent Track and Trace endpoint URL that
you obtained when you configured the integration in Intelligent Track and Trace.
For example:
https://<instance name>/oraclecloud.com/bca/api/tntIntegrations/v1/networks/local/transaction/wms/1 - Interface Protocol: Select REST Web Service
- User name: Enter the founder admin user name used in Intelligent Track and Trace.
-
Password: Enter the password of the founder adminNote: If the user credentials change in Intelligent Track and Trace, ensure that you update these fields.
-
URL: Enter Intelligent Track and Trace endpoint URL that
you obtained when you configured the integration in Intelligent Track and Trace.
For example:
Results:
When the scheduled job is executed, you can verify the outbound messages in the Output Interface page.
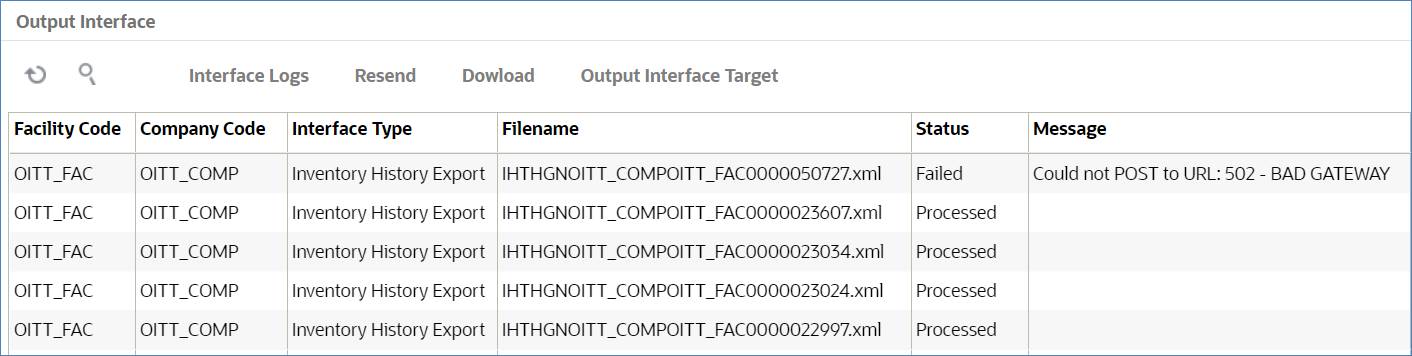
For a Failed status, to obtain the details about the transmission of that message and reason for failure, select the message and click Interface Logs.