Create a simulation to test out the business flows and identify any potential issues or errors.
When you define a business flow, all the flow steps have an associated document type. The document type specifies the document structure in which data will be received for that step. Each document type defined also contains a simulator template. This template is used to create data for the simulated transaction documents.
-
Click Menu (
 ) and then click Monitoring.
-
Under Monitoring : Simulations dashboard, click
Create New Simulations (
 ).
).
-
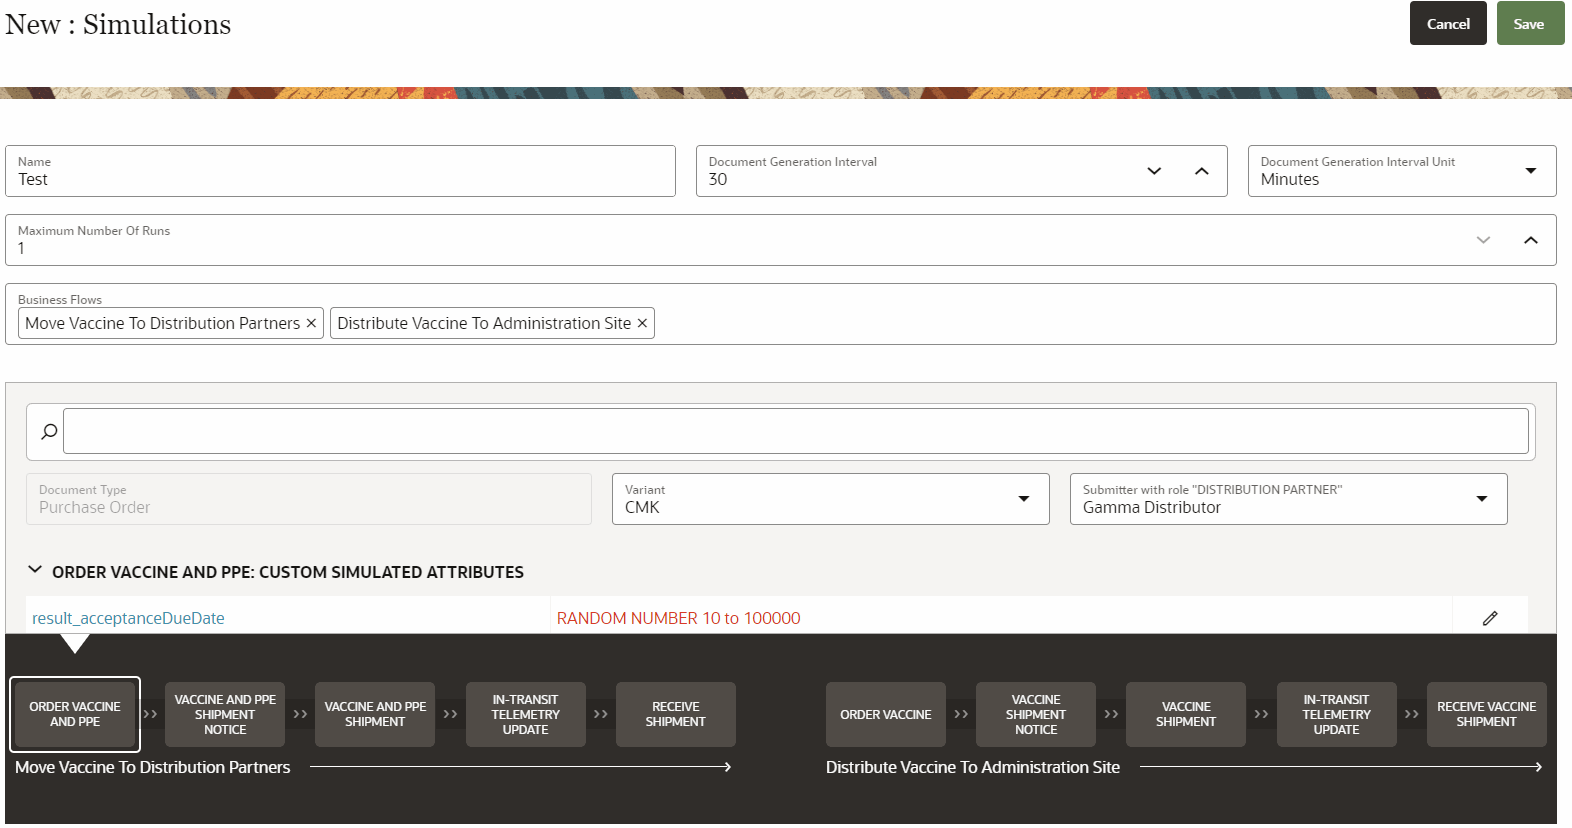
In the New : Simulations page, specify the value of
these fields:
-
Name: Enter the name of the
simulation.
-
Document Generation Interval: Enter
the frequency at which the document is generated.
-
Document Generation Interval Unit: Enter the unit
of frequency at which the document is generated. For example, if the
frequency is specified as 30 and the unit is specified in minutes, then a
document is generated every 30 minutes.
-
Maximum Number of Runs: Enter a
value between 1 and 10.
If the value for
Maximum Number of
Runs is higher than 1, then specify the following:
-
Repetition Interval: Enter the frequency
at which the simulation should run.
-
Repetition Interval Unit: Enter the unit
of frequency at which the simulation should run.
-
Business Flows: Select the business
flows that you want to simulate as part of this simulation. For each flow
selected, application displays:
- All the steps of the business flow(s).
- Simulation template for each business step.
- The simulation template attributes of the first
step in the business flow.
-
Select the Business Step from the business flow chart in the bottom pane, to modify the simulation template attributes. All the attributes are populated with the default values defined in the template.
-
Click the text box next to the Search (
 ) icon and select the attributes from the list, which you need to
modify.
-
To modify an attribute, click Edit (
 ) next to the attribute.
-
On the Choose Simulation dialog box, click the
Simulation Type drop-down and select one of the
following:
-
Constant Value: Select this option to
generate constant values.
-
Random from list: Select this option
to provide a list from which random values need to be generated.
-
Random String: Select this option to
provide random string values that follow a pattern.
-
Trading Partner: Select this option
to provide a specific trading partner name.
-
Trading Partner's Location: Select
this option to provide a specific location.
-
Index Based Template String: Select
this option if the attribute is part of a repeating element. You can use
either the index as a string value for the attribute or the index in a
template string.
-
Sequence From List: Select this
option to generate a sequence of a specific type from a list that you need
to provide.
-
Make the required changes to the other relevant field values, and click OK. Repeat Steps 6 through 8 for all the attributes that you want to modify for the selected Business Step.
-
Repeat Steps 4 through 9 for all the business steps of the selected business flow.
-
Click Save and wait until the Save
successful message is displayed.
-
Click Cancel to return to the Monitoring :
Simulations dashboard. You should see the new simulation that
you have added in the simulation list.
-
Click Stop All if you wish to stop all the simulations
in running state.
Results:
You can also create simulation for an end-to-end workflow involving multiple business flows. Apart from customizing the business step attributes for all the business flows, you can define the relationships between the various business flows including their dependencies. Ensure that the relationships between the business flows that you define in the simulator should be same as the ones you have defined when creating the document types.
