Create Document Integration

As an admin, you configure an integration between Intelligent Track and Trace and an Oracle Fusion Cloud application such as Oracle Manufacturing, Oracle Procurement, or Oracle Inventory Management. This enables Track and Trace instance to receive data from an Oracle Fusion Cloud application. You need to enter the setup details separately for the test instances and the production instances.
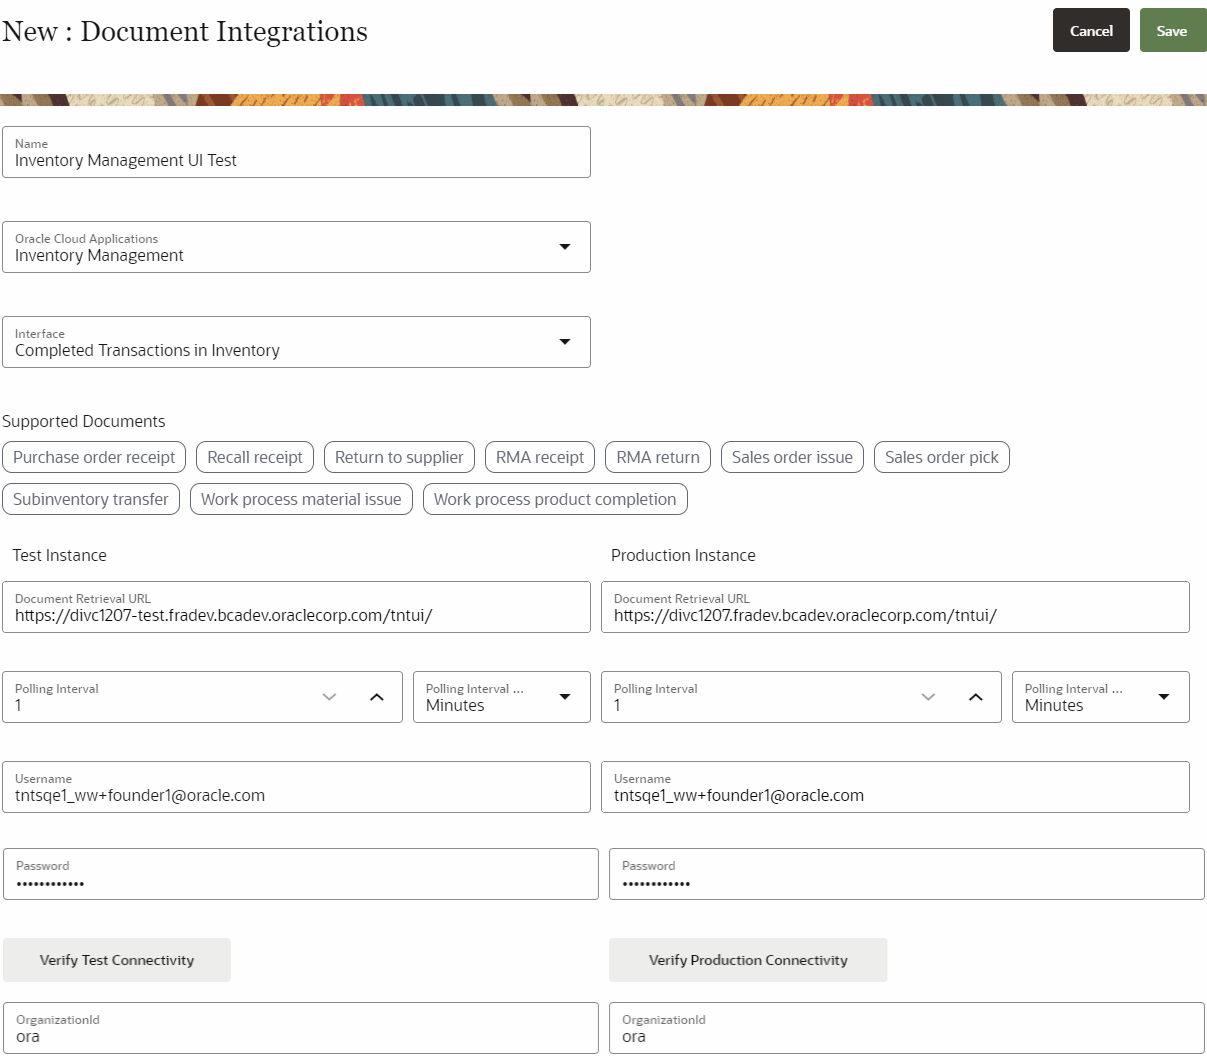
The integration supports the concerned documents and you need to create a document integration for each type of document that you submit for one or more business flow steps.
  1. Click Menu () and then click Configurations.
  2. Click Integrations ().
  3. Under Configurations : Integrations dashboard, select Document Integrations tab and then click Create New Document Integration ().
  4. Enter the following values:
    • Name: Specifies the integration name.
    • Oracle Cloud Applications: Select the cloud application for which you are configuring the integration.
    • Interface: For Oracle Manufacturing, select the appropriate type of work order used in your business flows.

    Notice that the associated document types are displayed under Supported Documents.

  5. Enter the following in the Test Instance and Production Instance sections:
    • Document Retrieval URL: Specifies the endpoint that will be used by the application for periodic polling and retrieval of relevant documents from the specific Oracle Fusion Cloud application.
    • Username: Specifies the particular Oracle Cloud application's username to be used for authenticating requests.
    • Password: Specifies the password for authentication.

  6. Click Verify Test Connectivity to test the connection between Track and Trace test instance and the specific Oracle Fusion Cloud application's test instance.
  7. Click Verify Production Connectivity to test the connection between Track and Trace production instance and the specific Oracle Fusion Cloud application's production instance.
  8. Enter the OrganizationId of the test and production instance.
  9. Click Save and wait until the Save successful message is displayed.
  10. Click Cancel to return to the Configurations : Integrations dashboard. You can see the document integration configuration displayed on the dashboard.
  11. To edit the configuration, click Edit (), modify the values, click Save, and then click Close.
  12. To delete the configuration, click Delete () and confirm.