Installing and Running Oracle GoldenGate Veridata
This article describes all the steps to install, configure, and uninstall Oracle GoldenGate Veridata.
Prerequisites
-
If your system does not have graphical desktop, then ensure that you setup VNC and connect to it using a VNC client for graphical desktop:
vncserver - Ensure to install the JDK software .
-
Go to http://www.oracle.com/technetwork/java/javase/downloads/index.html.
-
Select JDK version 25 or higher and click Download. You can change the default installation location.
-
Set
JAVA_HOME.Korn and bash shells:
export JAVA_HOME=jdk-install-dir
export PATH=$JAVA_HOME/bin:$PATH
Bourne shell:
JAVA_HOME=jdk-install-dir
export JAVA_HOME
PATH=$JAVA_HOME/bin:$PATH
export PATH
C shell:
setenv JAVA_HOME jdk-install-dir
setenv PATH $JAVA_HOME/bin:$PATH
-
- Ensure not to run additional application on the same host as it may have a strong impact on the performance of Oracle GoldenGate Veridata. Note that Veridata is a Java application designed to run on dedicated host with optimal heap and JVM settings.
Installing Oracle GoldenGate Veridata
To install Oracle GoldenGate Veridata
-
Download the installer. See Downloading Oracle GoldenGate Veridata.
-
Run the following command to launch the installer UI:
unzip fbo_oggvdt_linux_services_shiphome.zip cd fbo_oggvdt_linux_services_shiphome/Disk1/ ./runInstaller -
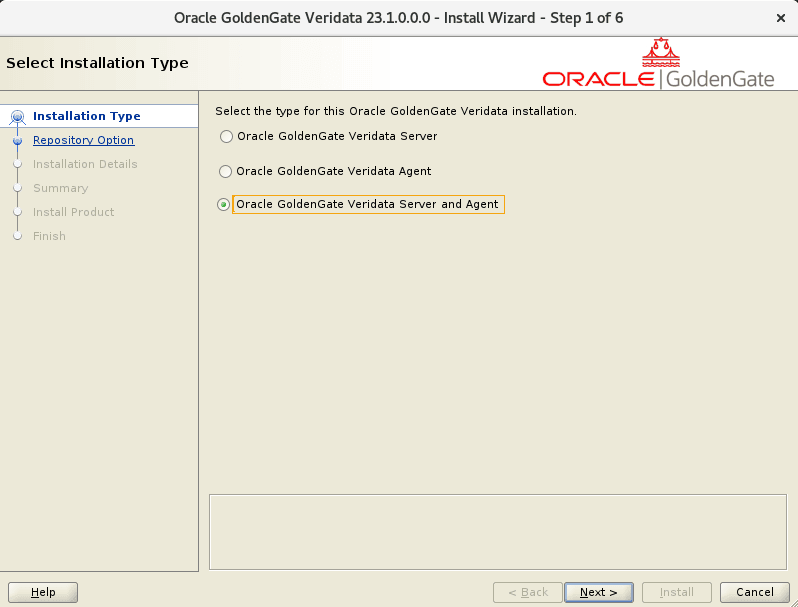
In the Select Installation Type page, select one of the following 3 options to set the type for the Oracle GoldenGate Veridata installation and click Next:
- Oracle GoldenGate Veridata Server
- Oracle GoldenGate Veridata Agent
- Oracle GoldenGate Veridata Server and Agent
Figure 1: Select the Installation Type
-
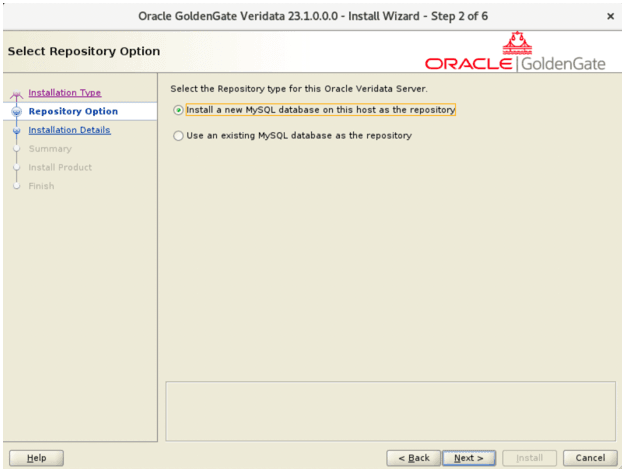
If the Installation Type is chosen as Oracle GoldenGate Veridata Server or Oracle GoldenGate Veridata Server and Agent in step 3, then the Repository Option page is displayed.
Note: Veridata supports only MySQL as repository database.
Select one of the following 2 options to set the Repository type for the Oracle GoldenGate Veridata Server and click Next:
- Install a new MySQL database on this host as the repository
- Using an existing MySQL database as the repository
Note: If the Using an existing MySQL database as the repository option is selected, then ensure that the existing MySQL database is a commercial version 8.4.8 and above. It can be a user installed or system preinstalled MySQL database. However, ensure that it is not an embedded MySQL database from a prior Oracle Veridata installation.
Figure 2: Select Repository Option
-
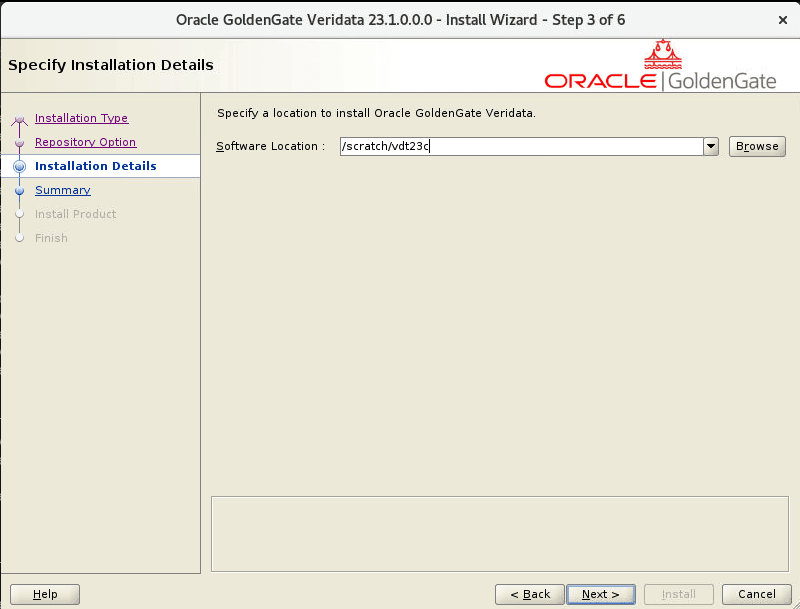
In the Specify Installation Details page, specify the Software Location to install Oracle GoldenGate Veridata. For example, /scratch/vdtInstall
Figure 3: Specify Installation Details
-
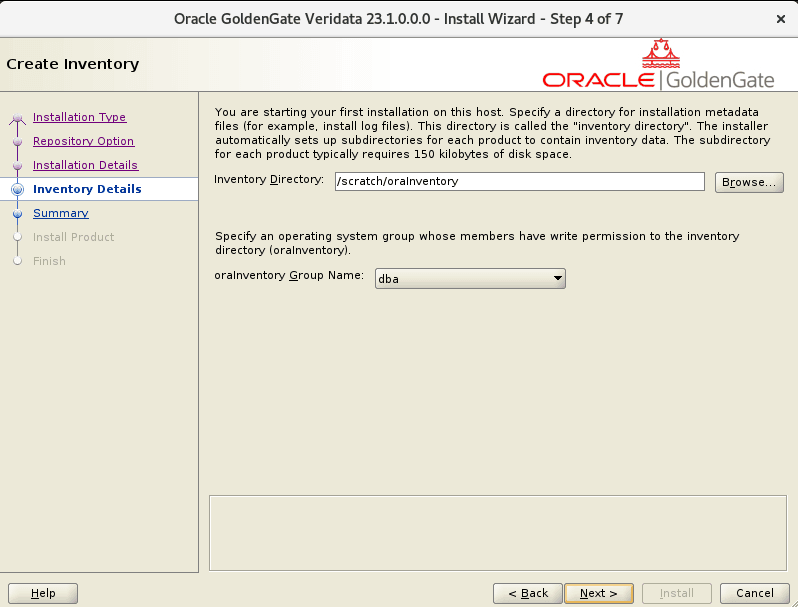
In the Create Inventory page, you can either retain the defaults or provide or enter a new directory for the inventory and click Next.
Figure 4: Inventory Details
-
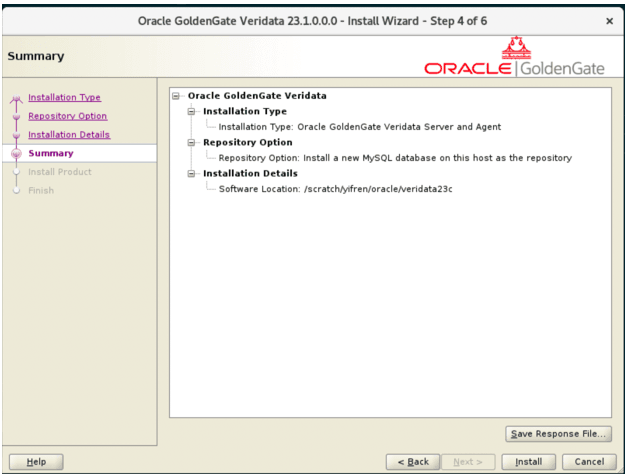
Review the content in the Summary page, click Install.
Figure 5: Installation Summary
-
If you want to save the response file, then click Save Response File before you begin with installation.
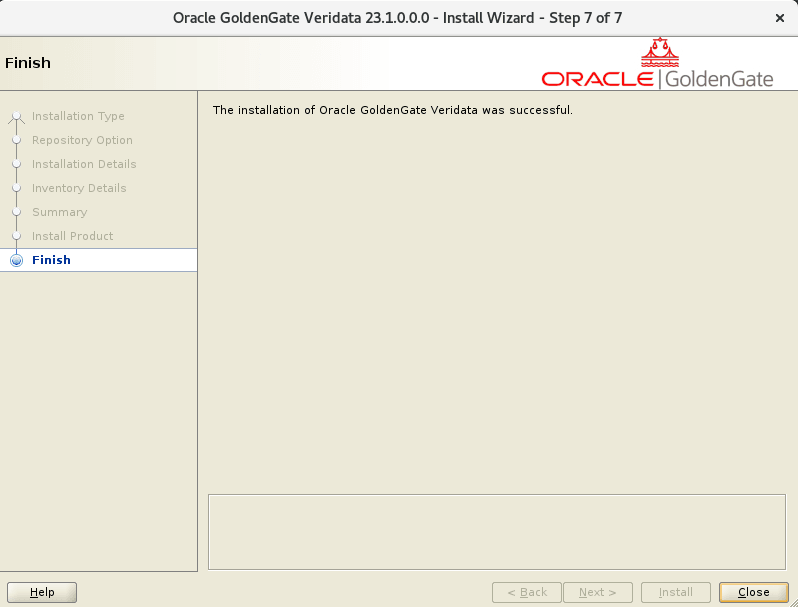
At the end of the installation process, if the Oracle GoldenGate Veridata installation is complete, then the Installation Complete page is shown as follows:
Figure 6: Installation complete