8.8.4 Creating Master Detail from an Existing Interactive Grid

Create a single page master detail which includes two editable interactive grids based on two related tables or views.

You can define any number of master detail relationships on a single page by simply adding a related interactive grid to the page. If you have an existing interactive grid, you can add another related interactive grid by doing the following:

  • Create the parent interactive grid.

  • Define the primary key (if needed).

  • Create the child interactive grid.

  • For the child interactive grid, specify the Master Region and Master Column.

The following example demonstrates how to create an interactive grid on the departments table, OEHR_DEPARTMENTS by running the Create Page Wizard. This wizard creates the parent interactive grid and enables you to define the primary key. Then, you create a child interactive grid on the employees table, OEHR_EMPLOYEES. The OEHR_DEPARTMENTS and OEHR_EMPLOYEES tables are available in the sample data set, HR Data.

To add a related interactive grid below an existing grid:

  1. Create an application.
  2. Create the first interactive grid on the OEHR_DEPARTMENTS table:
    1. On the Application home page, click Create Page
    2. Under Component, select Interactive Grid.
    3. Name - Specify a text name for this page (for example, Departments).

      Tip:

      This text is also used for report region Title. After page creation, you can modify the Title in Page Designer.
    4. Page Mode - Accept the default, Normal.
    5. Include Form Page - Disable this flag.
    6. Data Source - Select Local Database.
    7. Source Type - Select Table.
    8. Table /View Name - Select OEHR_DEPARTMENTS (table).
    9. Editing Enabled - Enable this flag to make this interactive grid editable.
    10. Navigation - Expand the region and enable or disable navigation. If either flag is enabled, additional attributes appear. To learn more about an attribute, see field-level Help.
    11. Click Next.
  3. Primary Key Column 1 - Accept the default.
  4. Click Create Page.
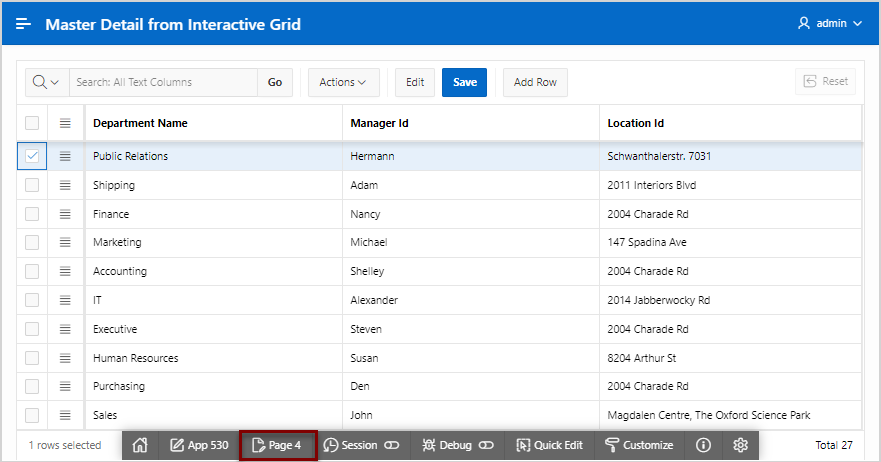
  5. Click Save and Run Page to view a rendered version of the parent interactive grid.

    This following image shows an editable interactive grid created on the OEHR_DEPARTMENTS table.

    Description of master_detail_parent.png follows
    Description of the illustration master_detail_parent.png
  6. Return to Page Designer. Click Page X on the Runtime Developer toolbar, where X is the page number.
  7. Create the child interactive grid on the OEHR_EMPLOYEES table:
    1. In the Gallery, locate the Regions tab.
    2. Under Regions, find and then right-click Interactive Grid.
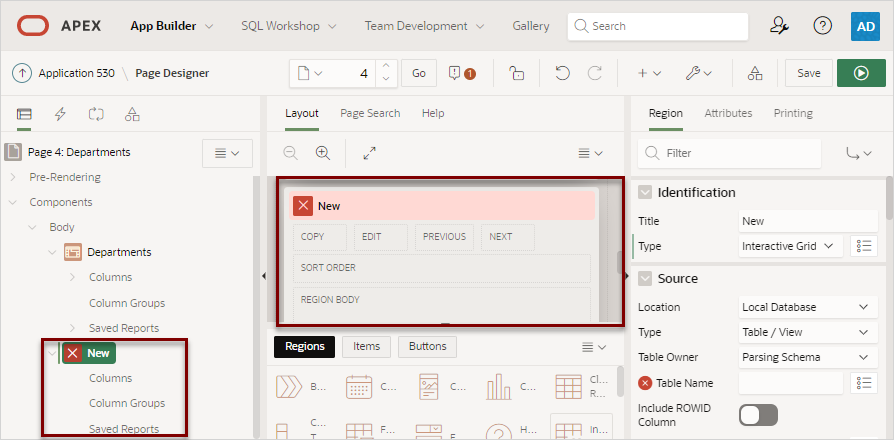
    3. Select Add To, Body, the region, Departments, and then After.

    The Rendering tab and Layout tab both display the new region.

  8. Edit the New child region:
    1. In the Rendering tab, select the New region (if not already selected).
    2. In the Property Editor, edit the region attributes:

      Note:

      To find a group or attribute, enter keywords in the Filter field. The Property Editor displays the group or attributes. To return to the default display, delete the keywords.

      • Identification, Title - Enter Employees.

      • Source, Type - Select SQL Query.

      • Source, SQL Query - Enter the query:

        select OEHR_EMPLOYEES.EMPLOYEE_ID as EMPLOYEE_ID,
            OEHR_EMPLOYEES.FIRST_NAME as FIRST_NAME,
            OEHR_EMPLOYEES.LAST_NAME as LAST_NAME,
            OEHR_EMPLOYEES.HIRE_DATE as HIRE_DATE,
            OEHR_EMPLOYEES.EMAIL as EMAIL,
            OEHR_EMPLOYEES.PHONE_NUMBER as PHONE_NUMBER,
            OEHR_EMPLOYEES.JOB_ID as JOB_ID,
            OEHR_EMPLOYEES.SALARY as SALARY,
            OEHR_EMPLOYEES.DEPARTMENT_ID as DEPARTMENT_ID 
         from OEHR_EMPLOYEES
      • Layout, Start New Row - Select On.

      • Appearance, Template - Select Standard

      • Master Detail, Master Region - Select the region, Departments.

  9. For the child interactive grid, Employees, define DEPARTMENTS as the Master Column:
    1. In the Rendering tab, under the child interactive grid, Employees, expand the Columns node and select DEPARTMENT_ID.
    2. In Property Editor, edit the following:
      • Find Master Detail.

      • For Master Column, select DEPARTMENT_ID.

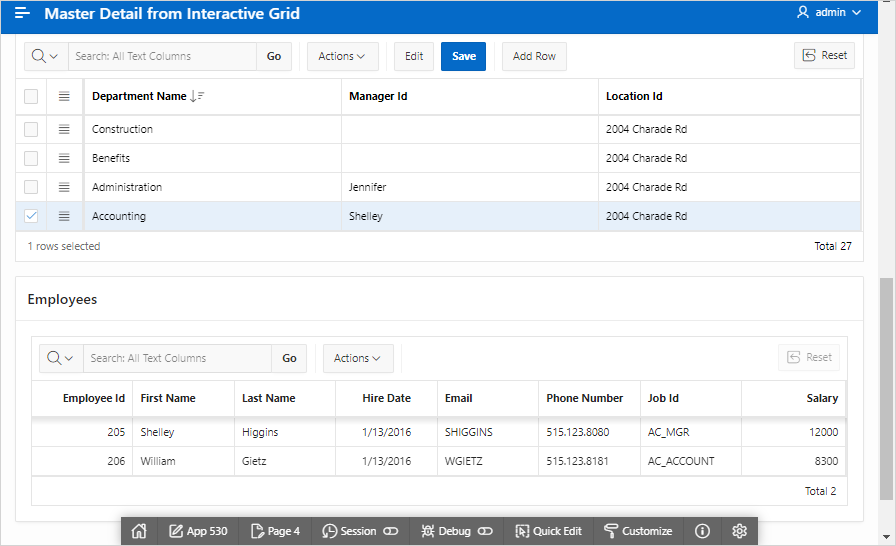
  10. Click Save. To run the page, click Save and Run Page.

    Note that parent the parent report, Department, filters the results in Employees, the child report.

    Next, make the child report, Employees, editable.

  11. Make Employees report editable:
    1. Access Page Designer. Click Page X on the Runtime Developer toolbar, where X is the page number.
    2. In the Rendering tab, select the Employees region.
    3. In the Property Editor, click the Attributes tab.
    4. In the Property Editor, edit the following:
      • Edit, Enabled - Select On.

      • Allowed Operations - Verify the following operations are enabled: Add Row, Update Row, and Delete Row.

  12. Define the EMPLOYEE_ID column as the Primary Key Column:
    1. In the Rendering tab, under Employees, expand Columns and select EMPLOYEE_ID.
    2. In the Property Editor, find Source, and turn Primary Key to On.
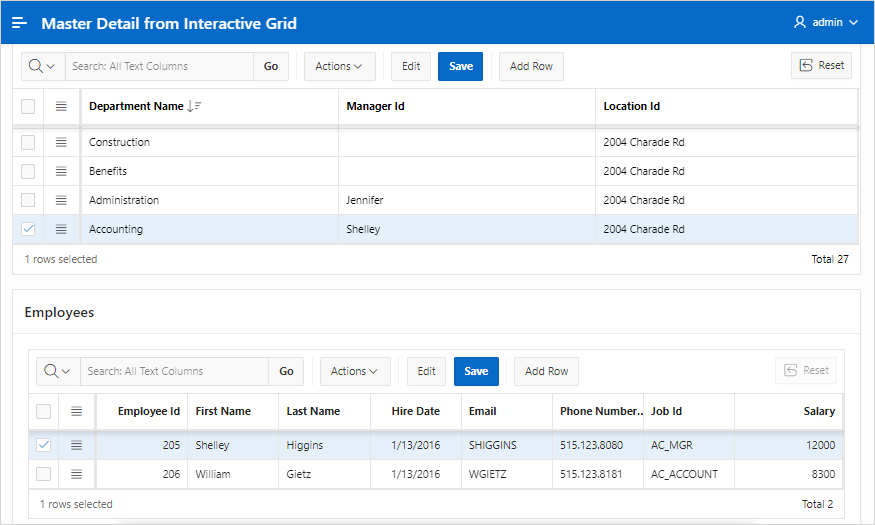
  13. Click Save. To run the page, click Save and Run Page.

    The child interactive grid, Employees, is now editable