Creating a Control Break from the Actions Menu in an Interactive Grid
Apply a hierarchy based on a specific column to an interactive grid by selecting Control Break in the Actions, Format submenu.
Creating a break group pulls the columns out of the interactive grid and displays them as a master record.
To create a control break:
-
Click the Actions menu and select Format then Control Break.
The Control Break dialog displays.
-
In the Control Break dialog:
-
Column - Select the name of the column.
-
Direction - Select the sort direction (Ascending or Descending).
-
Nulls - Select the null sorting behavior (First or Last).
-
-
Click Save.
The interactive grid reloads with the control break applied for the selected column, and a control break filter appears above the grid near the toolbar.
In the following example, a control break has been applied to the interactive grid for the Project column.
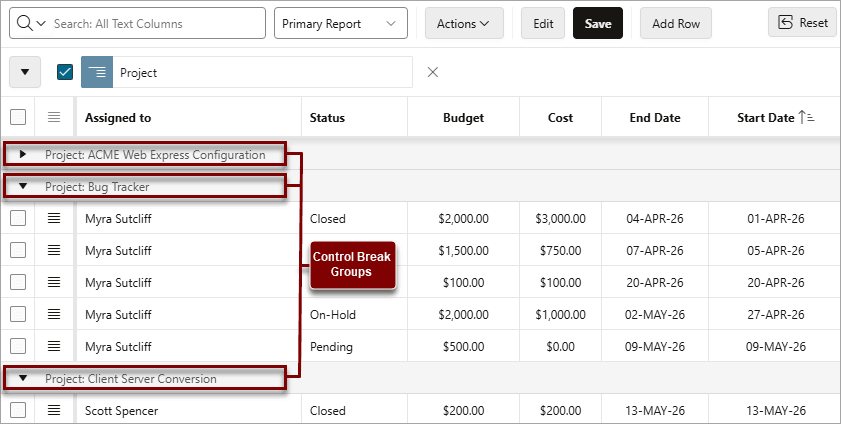
Description of the illustration ig_control_break_after.png
To edit a control break, click the name to display the Control Break dialog. You can also add, edit, and delete other control breaks in the Control Break dialog.
To remove a control break, click the Remove Control Break icon (X) on the control break filter.
See Also: About Filters in Interactive Grids