Understanding Object Browser
Use Object Browser to create, browse, and edit database objects in your workspace.
About Object Tree and Object Detail View
Learn about the Object Tree and Object Detail View.
Object Browser is divided into two panes:
-
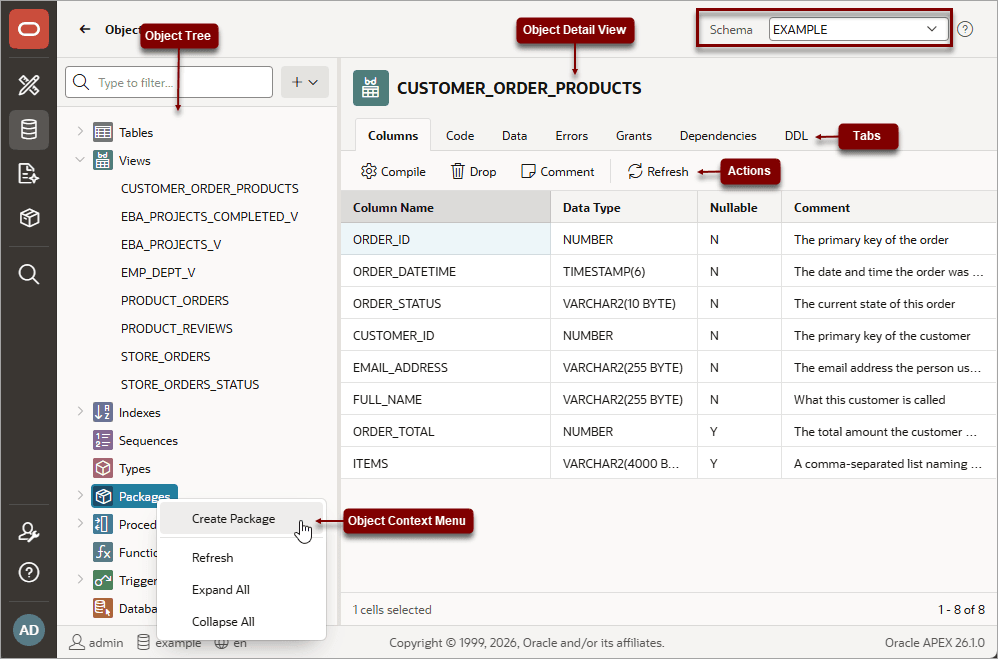
Object Tree - The Object Tree displays database objects of a selected type within the current schema. To view specific objects, expand the object type and select the object in the tree.
To change the current schema, select a new schema from the Schema list.
-
Object Detail View - Selecting an object type in the Object Tree populates the Object Detail View. The Object Detail View displays tabs specific to the object type. Each tab displays actions appropriate for the object.
In the following example, Views is expanded and displays eight views.
Description of the illustration obj_b_pane.png
About the Object Tree Context Menus
Right-clicking an object type, displays a context menu with the following controls:
-
Create object - Launches the appropriate Create Object dialog.
-
Refresh - Refreshes the current view.
-
Expand All - Expands all nodes in the Object Tree.
-
Collapse All - Collapses all nodes in the Object Tree.
Common Object Browser Behaviors
Other common Object Browser behaviors include:
-
Invalid objects display in red in the Object Tree and an Invalid flag appears in the Object Detail View.
-
Object Browser remembers the last viewed object. If you exit Object Browser and return later, the last viewed object and the line position displays.
-
When modifying objects, such as adding a column to a table, the Create dialog displays the SQL it creates in the dialog. Developers can use this as a learning tool or copy and paste it for later use.
Selecting Objects and Viewing Object Details
You can view the details of an object by selecting it from the Object Tree and then clicking the different object detail tabs.
Object Detail View
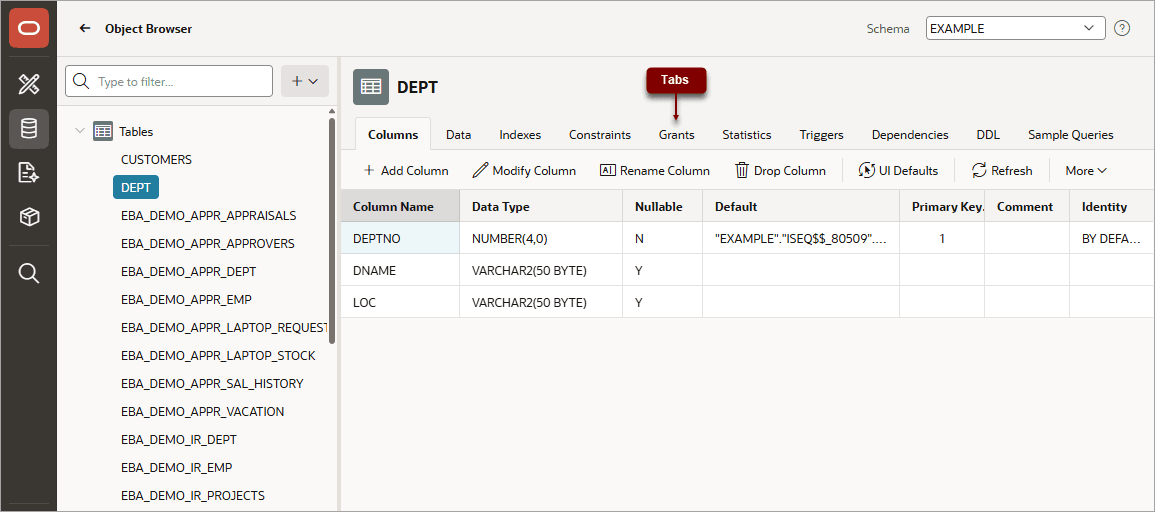
In Object Browser, expand an object type in the Object Tree and select an object. The object details (also called the Object Detail View) appears.
Description of the illustration obj_b_column_tab.png
Note the various tabs available for the object. The specific tabs available varies depending upon the object type. In the previous example, the DEPT table is selected and includes the following tabs: Columns, Data, Indexes, Constraints, Grants, Statistics, Triggers, Dependencies, DDL, and Sample Queries. In this example, the Columns tab is selected.
Object Tabs and Actions
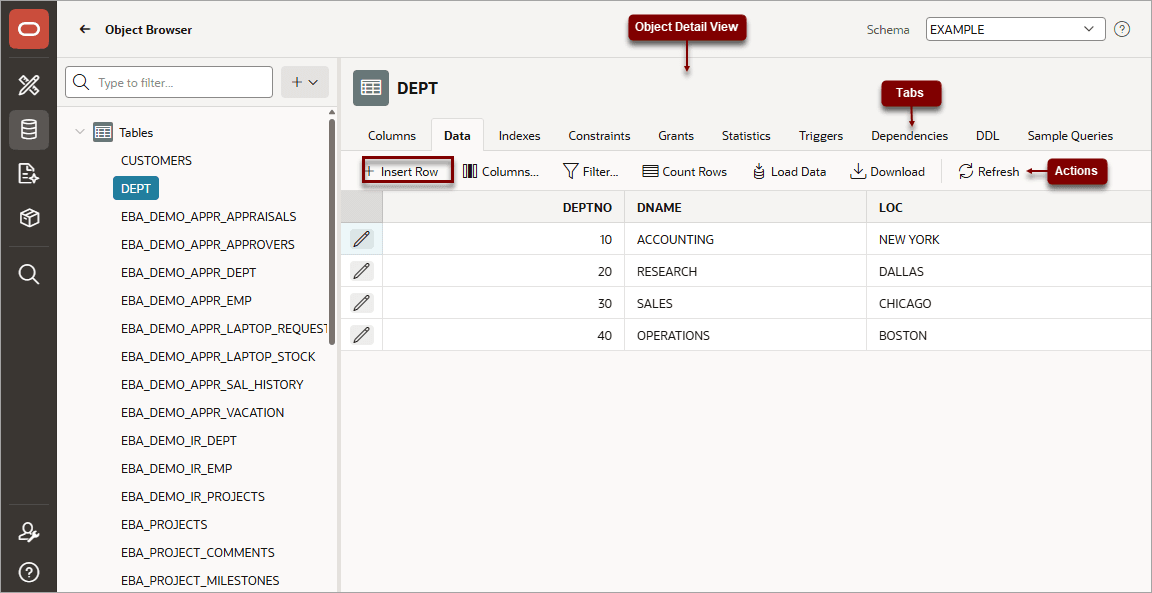
The next example shows Object Browser with the DEPT table and Data tab selected. You can view and edit the table data using the Data tab. The Data tab includes the following Actions: Insert Row, Columns, Filter, Count Rows, Load Data, Download, and Refresh.
Description of the illustration obj_b_data_tab.png
You can view and edit the table data from the Data tab. For example, to add a table row:
-
Click the Data tab.
-
Click the Insert Row action.
Clicking an action displays a dialog box.
-
Edit the row details and click Create.
Note: To learn more about editing table data see Editing Table Data.
Filtering Objects in the Object Tree
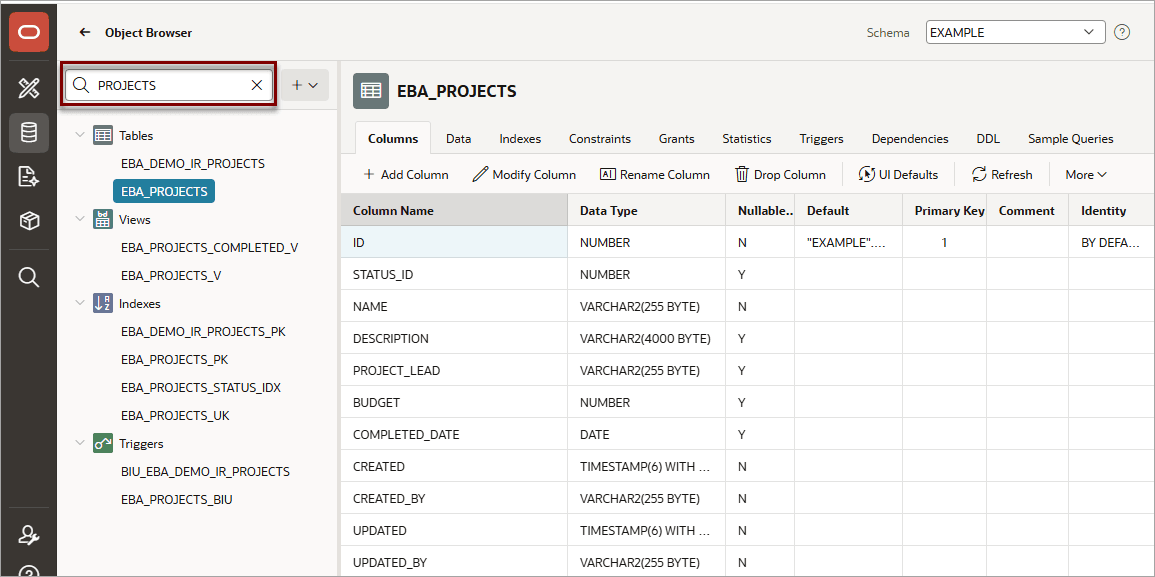
Filter objects by entering a search term in the filter above the Object Tree.
In the example that follows, the search term PROJECTS displays in the filter. Within the Object Tree only objects that include that search term appear. Filters created in Object Browser are persistent and are preserved within the APEX session.
Description of the illustration obj_b_filter_data.png
Hiding or Resizing the Object Tree
Hide or restore the Object Tree clicking the Collapse and Restore controls.
If the Object Tree displays, clicking the Left Splitter control hides it. Similarly, if the Object Tree is hidden, selecting Left Splitter again causes the Object Tree to reappear. You can also adjust the size of the panes manually by selecting and dragging the horizontal splitter.
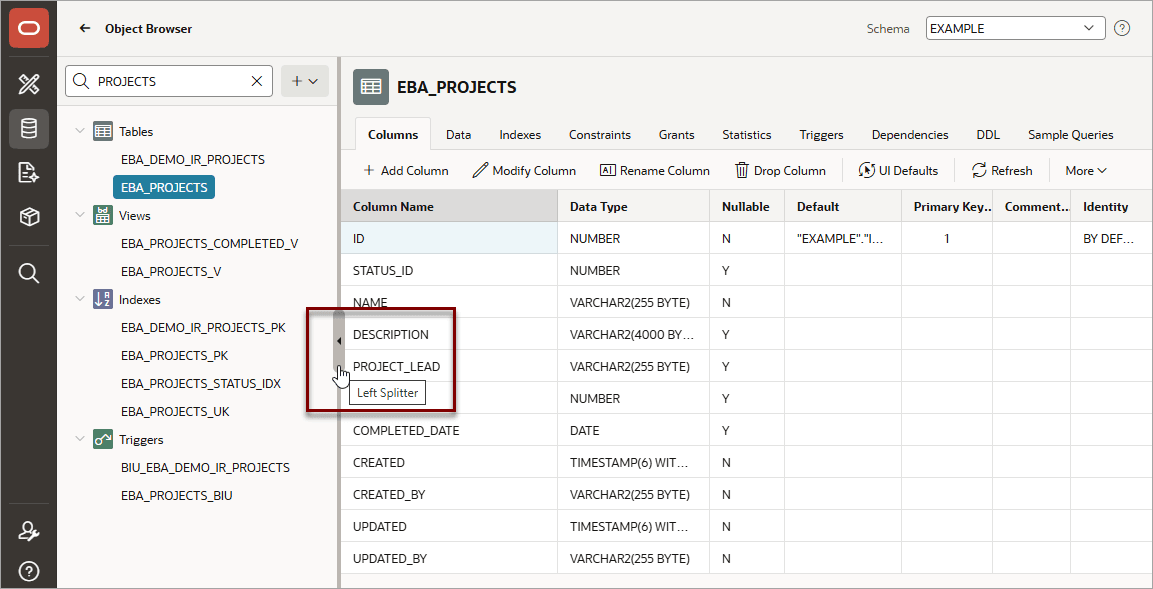
Description of the illustration obj_b_hide.png
Code Editor in Object Browser
Learn about the Code Editor available Object Browser.
Many tabs in Object Detail View feature a fully functional Code Editor. The following example shows the DDL tab for the DEPT table.
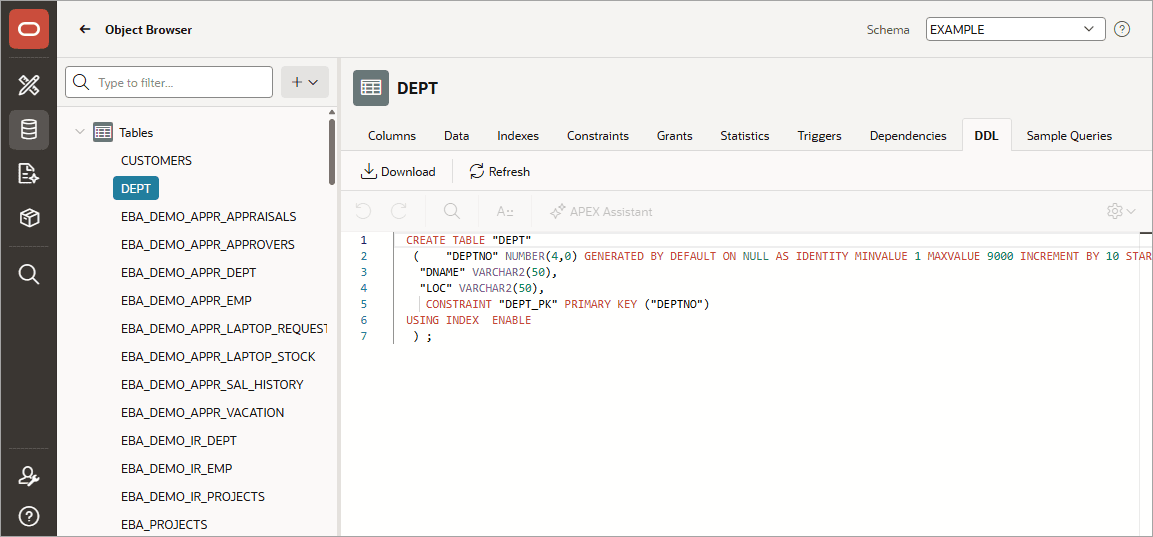
Description of the illustration code_editor_ddl_tab.png
Tip: If you have configured Generative AI for your workspace, Oracle APEX includes integrated AI Chat capability (called APEX Assistant) in all all Code Editors. To learn more, see Managing Generative AI in APEX in Oracle APEX App Builder User’s Guide.
Code Editor controls include:
-

Undo - Ctrl+Z
-

Redo - Ctrl+Shift+Z
-

Find - Ctrl+F
-

Auto Complete - Ctrl+Space
-
Context Menu - Right-click and select one of the following:
-
Change All Occurrences (Ctrl+F2) - Right-click and select Change All Occurrences from the context menu.
-
Cut
-
Copy
-
Paste
-
Command Palette (F1) - Displays the Command Palette.
-
Command Palette
Right click to display a context menu and select Command Palette. The Command Palette includes over 80 commands including:
-
Replace (Ctrl+H)
-
Replace with Next Value (Ctrl+Shift+.)
-
Replace with Previous Value (Ctrl+Shift+,)
See Also: Code Editor Keyboard Shortcuts in Oracle APEX Accessibility Guide
Settings Menu

The Settings menu displays on the right side and includes the following options:
-
Indentation - Options include: Tab Inserts Spaces, Tab Size, and Indent Size
-
Themes - Options include: Automatic, Light, Dark, and High Contrast Dark
-
Minimap - Options include: On, Off, Only when >100 lines.
-
Accessibility Mode
-
Show Line Numbers
-
Show Ruler
-
Show Suggestions
-
Show Whitespace
-
Bracket Pair Colorization
See Also: Managing Generative AI in APEX in Oracle APEX App Builder User’s Guide
Creating Database Objects
Use the Create dialog to create database objects in Object Browser.
The following options enable you to quickly create objects in Object Browser:
-
Create Database Objects menu ( + )
-
Context menu of a tree node (right-click)
-
Object Browser cards landing page containing shortcuts to the Create dialog for each object type
Each method opens a Create dialog for the specified object type.
To create an object in Object Browser with the Create Database Objects menu:
-
Click the Create Database Objects menu (
 ) and select an object type.
Tip: To create new objects from the Object Tree, right-click the object and select the Create option.
The appropriate Create Object dialog appears.
-
Follow the on-screen instructions.
APEX automatically converts the names of objects to uppercase and replaces spaces with underscores. To name objects in mixed case, use SQL Commands to create the objects manually.