Editing APEXlang in Visual Studio Code
Using the SQL Developer extension for Visual Studio Code, you can export, validate, import, and edit APEXlang applications with context-sensitive assistance and proactive highlighting of errors.
Exporting APEXlang with SQL Developer
In VS Code, SQL Developer shows APEX apps in a connection’s APEX folder. As an alternative to exporting from App Builder, choose Export… on an app’s context menu under the connection. Then pick a parent folder for the app’s APEXlang artifacts and click Apply. If necessary, for our example here, SQL Developer creates the employees subdirectory in that parent folder and exports the app in APEXlang format into it.
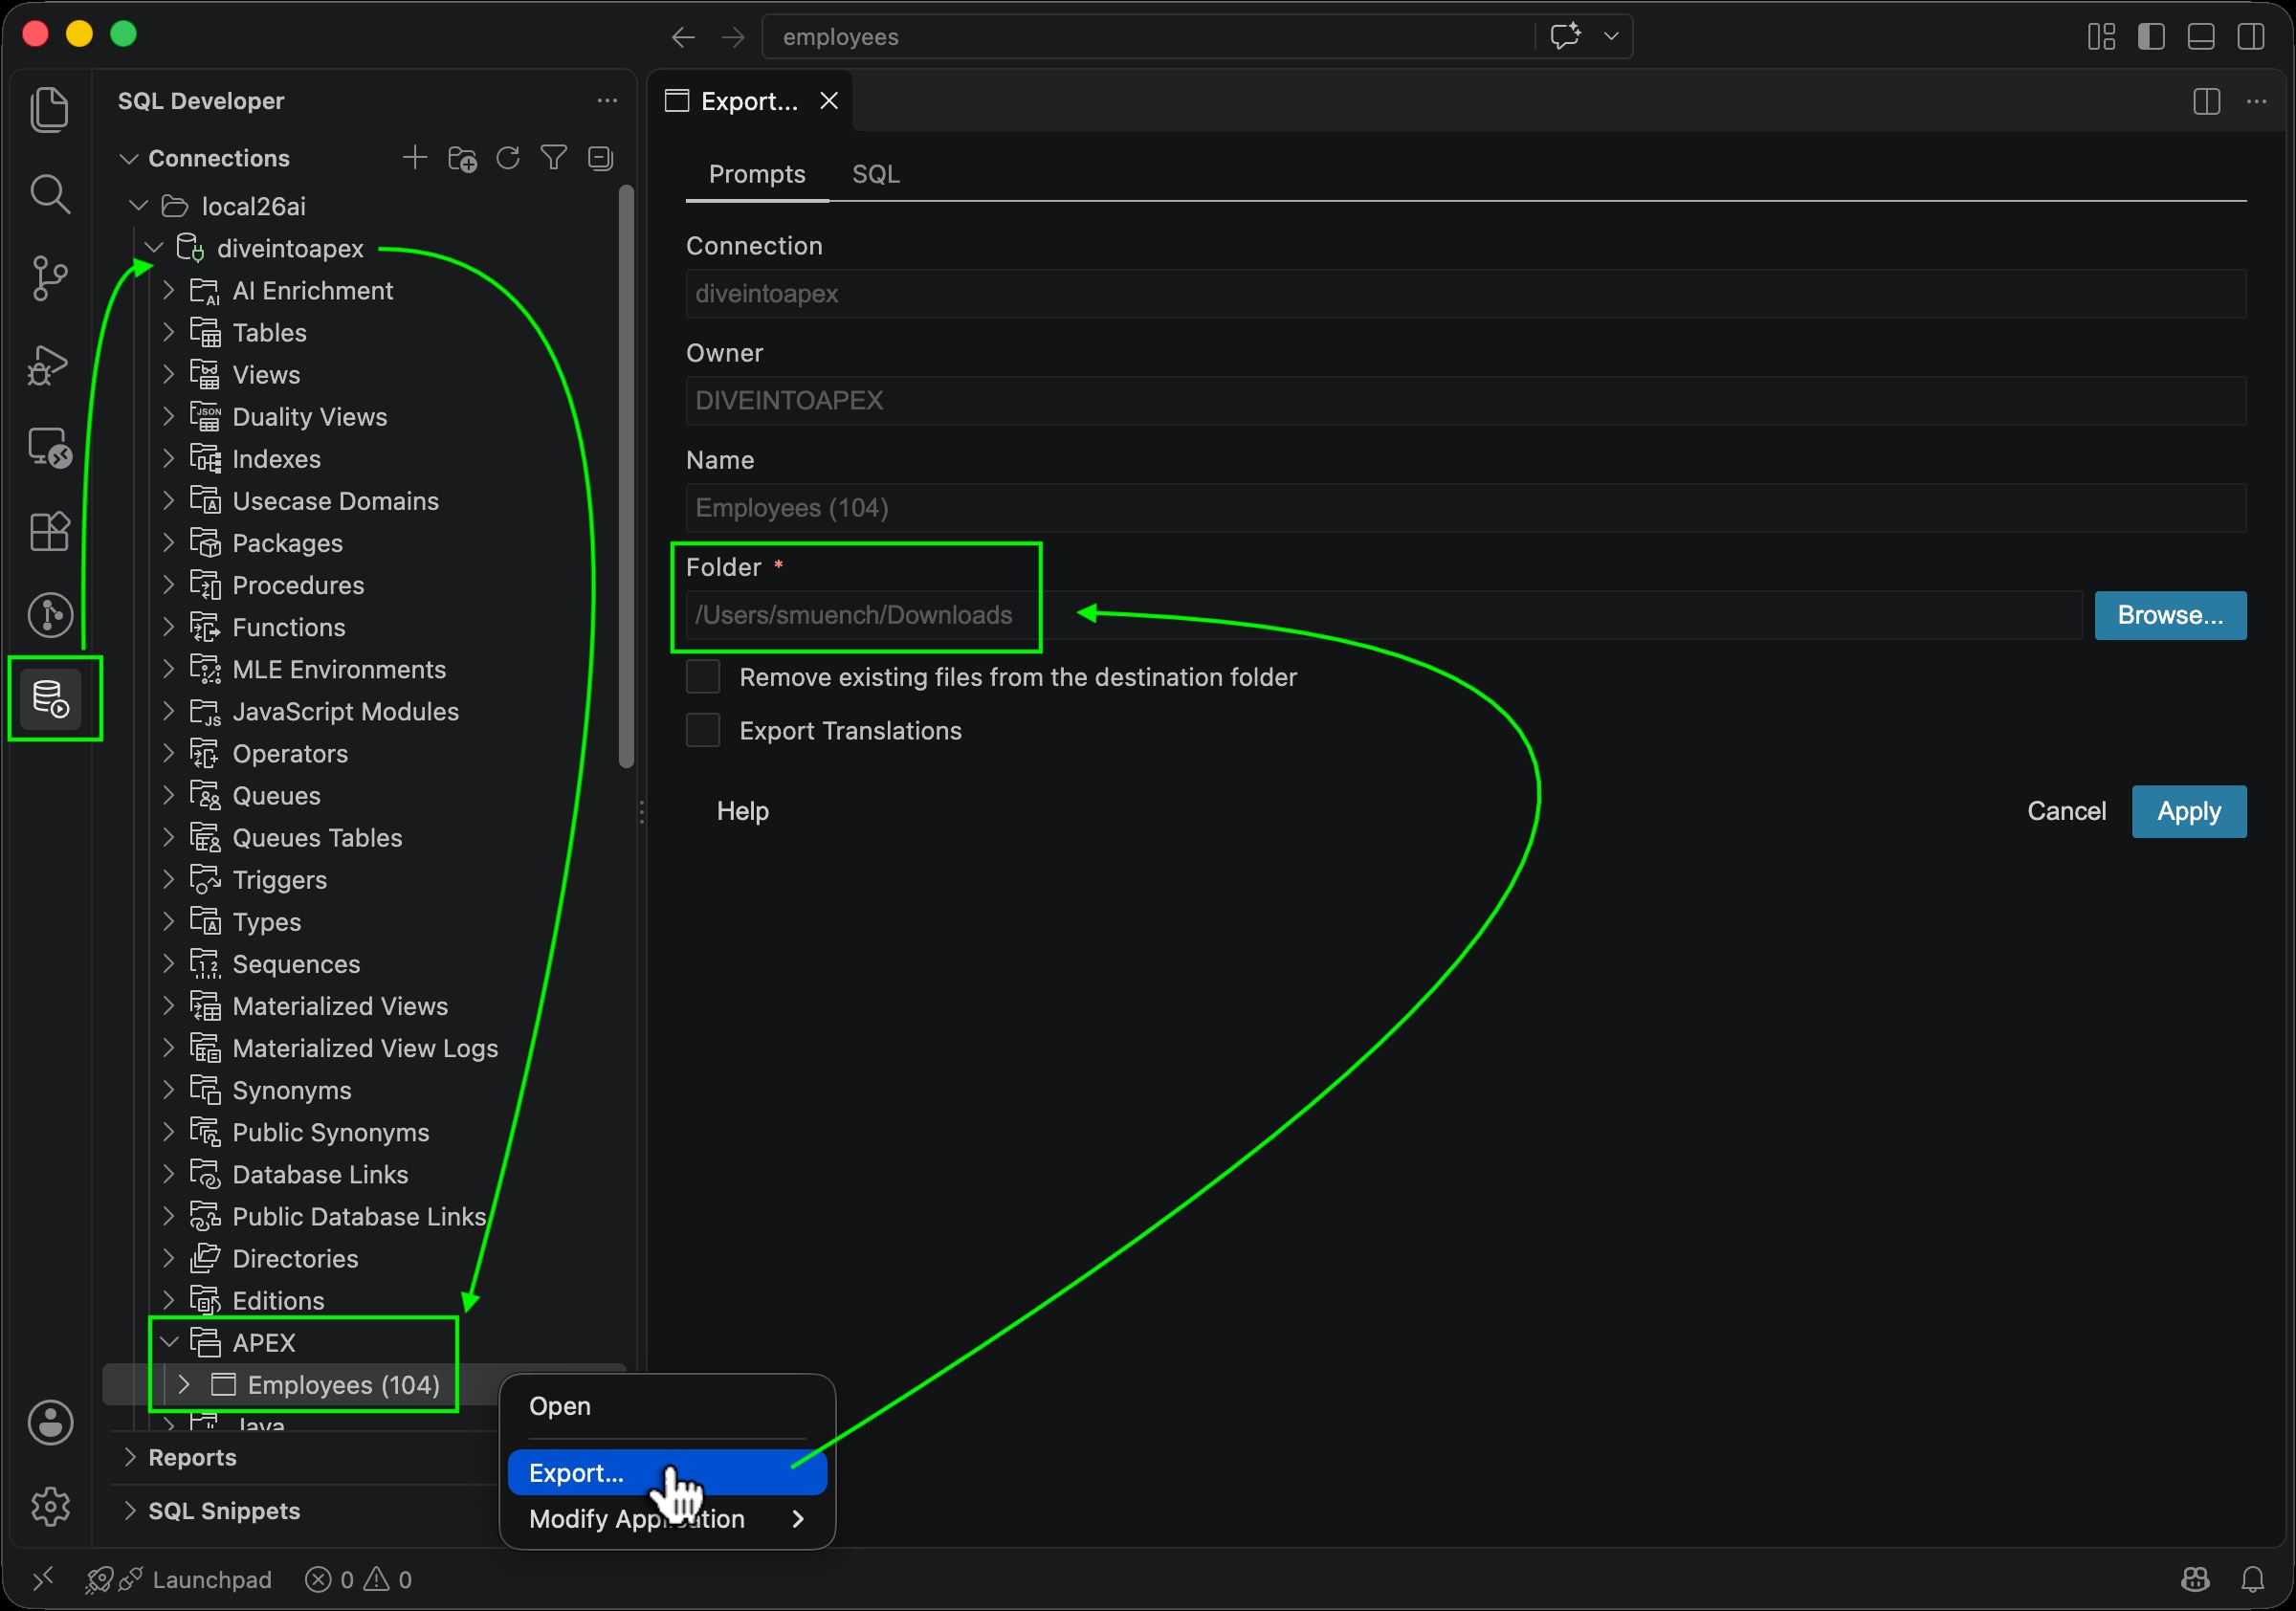
Description of the illustration apexlang005_1.jpg
If you’re curious, the SQL tab in the Export… panel shows the SQLcl command to do this APEXlang app export. The -dir parameter is optional in practice. If omitted, SQLcl exports the app into a folder named after the app alias to the current directory.
apex export -applicationid 104
            -dir '/Users/smuench/Downloads'
            -exptype APEXLANG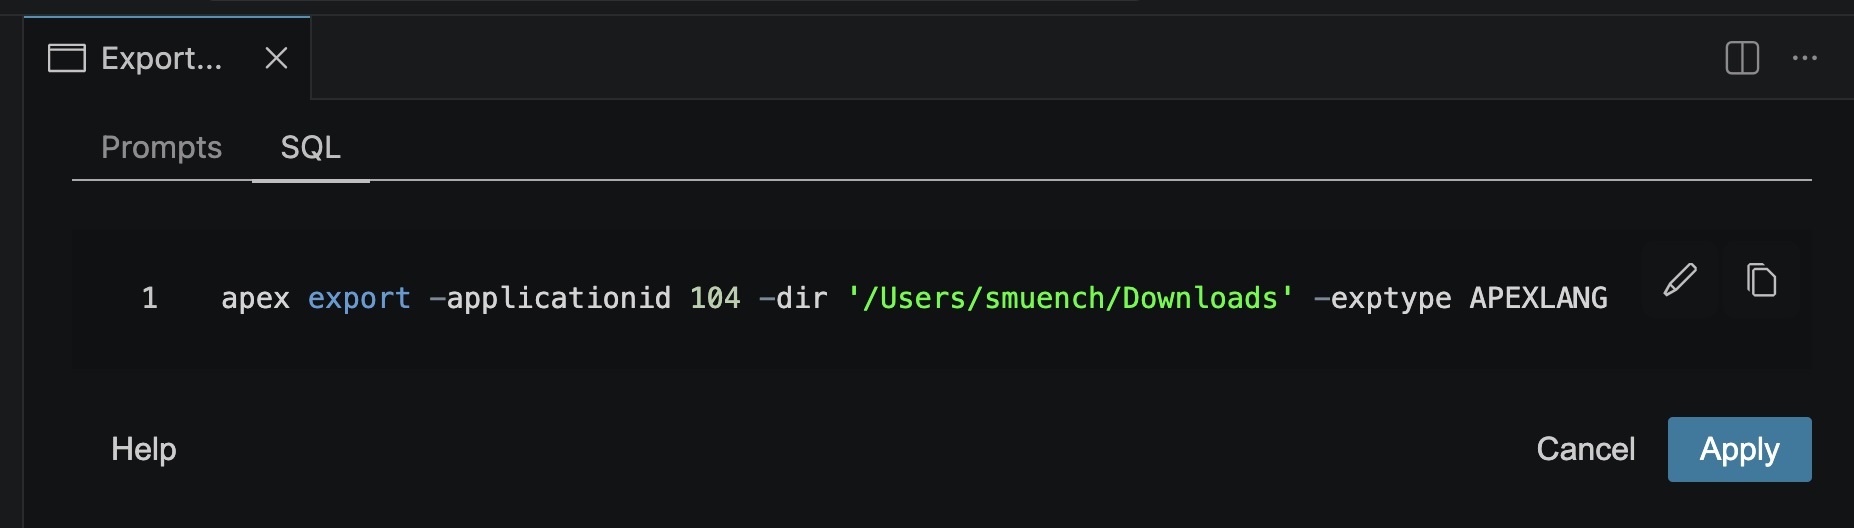
Description of the illustration apexlang005_2.jpg
Editing APEXlang in Visual Studio Code
The SQL Developer extension adds APEXlang assistance for .apx files. For example, in the figure below when the cursor is in the value of the appearance.dialogTemplate property of page 3, pressing (Ctrl) + (Space) shows the valid templates available for this page whose pageMode is modalDialog. You can switch the page from a drawer template to a modal dialog one by choosing @/modal-dialog from this list.
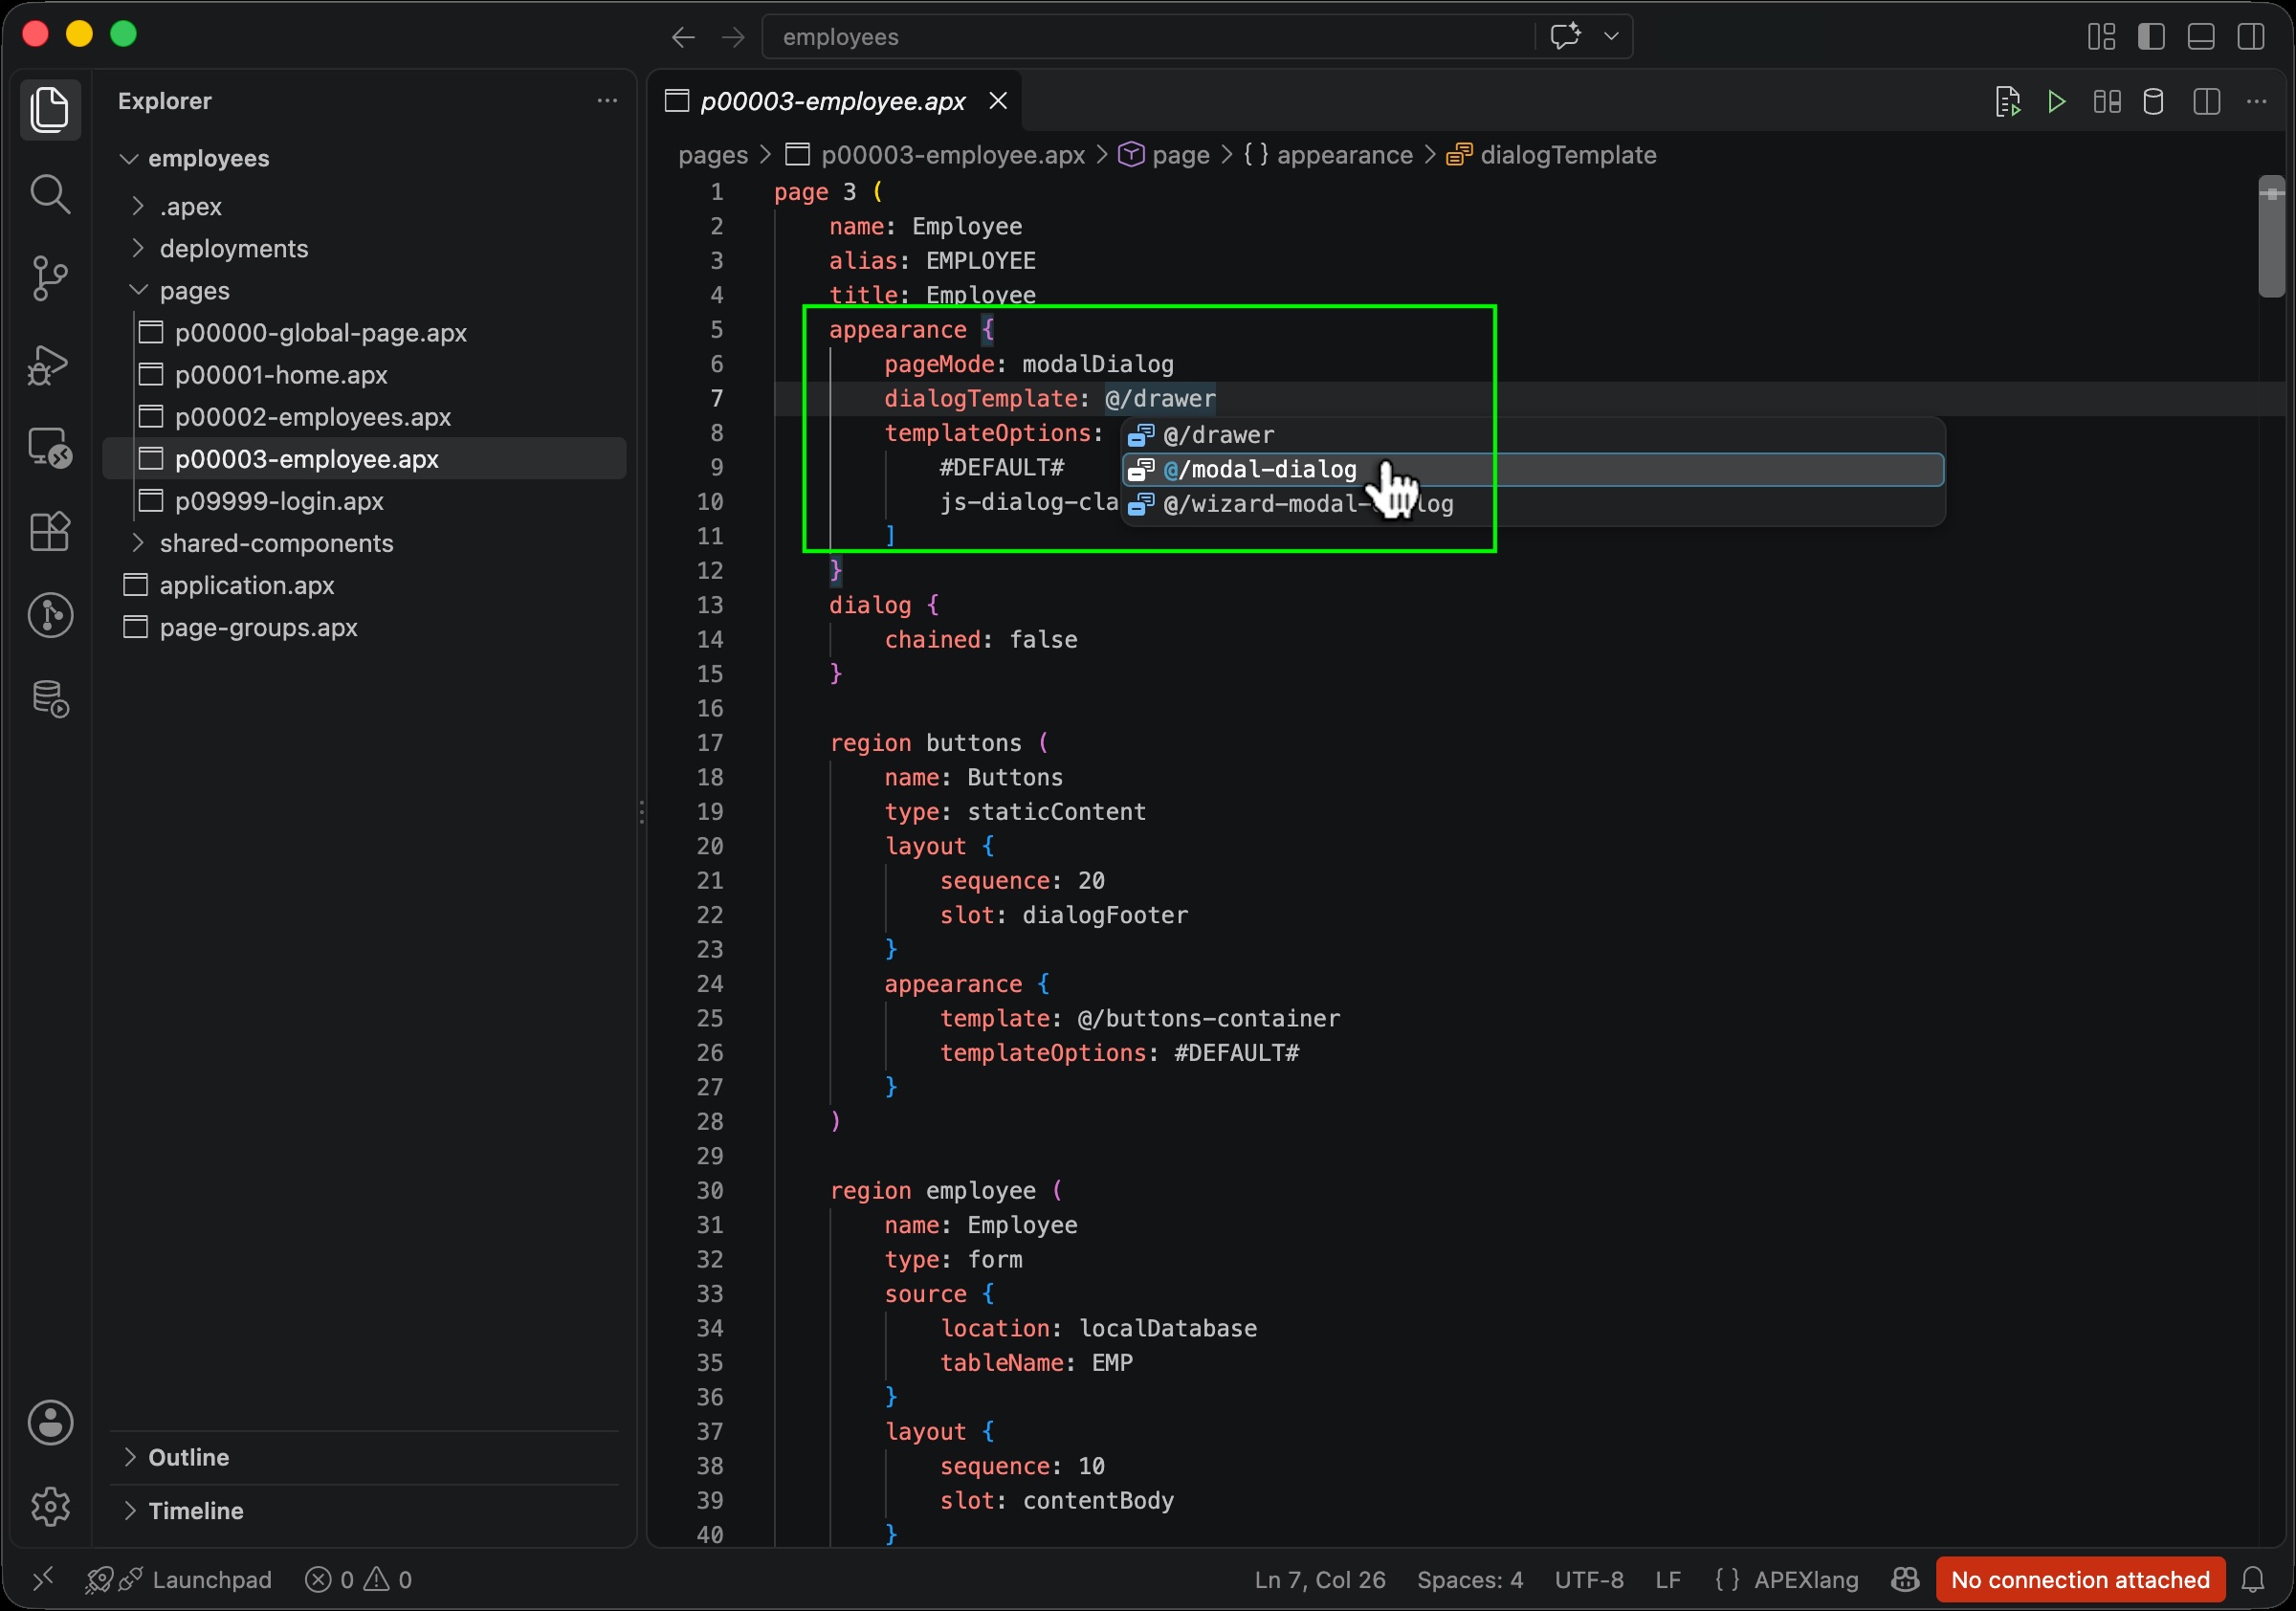
Description of the illustration apexlang006.jpg
Problems Panel Proactively Presents Errors
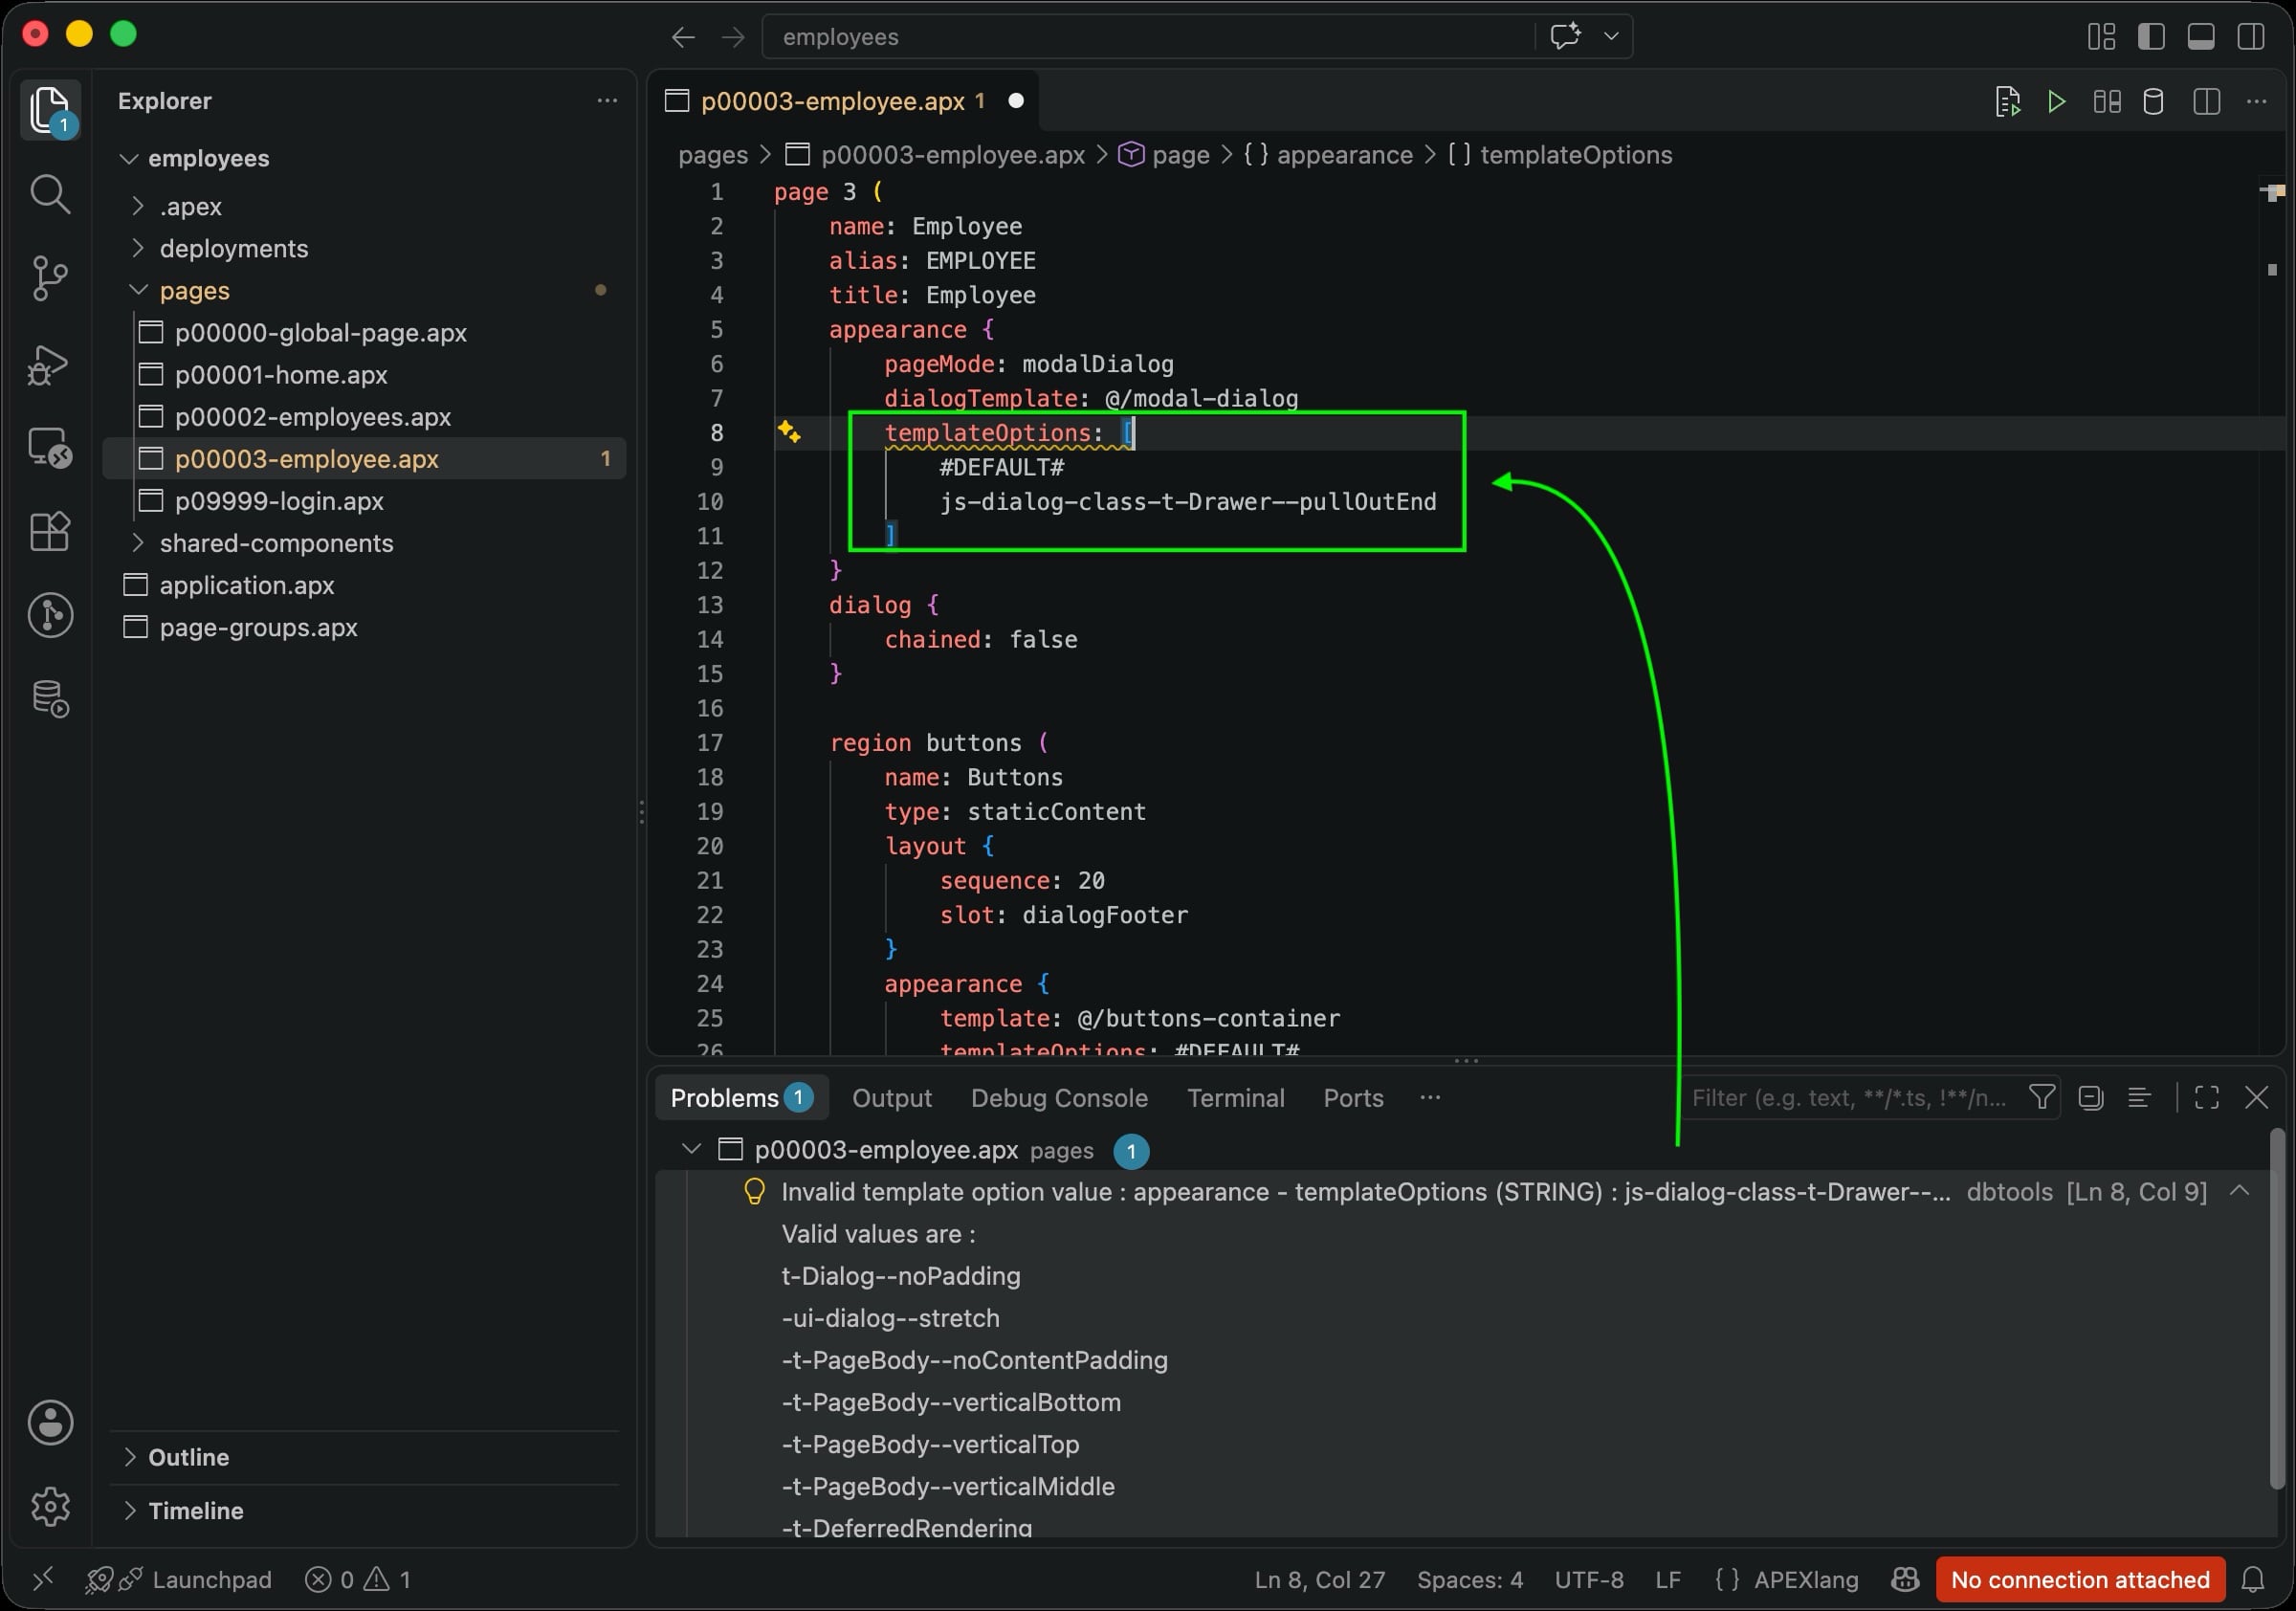
After changing the page to use the modal-dialog template, templateOptions gets a squiggly underline and the Problems panel shows “Invalid template option value…” This validation error indicates one of the existing values is no longer applicable to a modal dialog.
Description of the illustration apexlang007.jpg
Importing APEXlang App from VS Code into App Builder
After correcting the templateOptions value, optionally removing the square brackets for a one-element array, we’re ready to import the changed application into App Builder. As shown below, just click the “play” button in toolbar in the upper right of the editor. Since importing an APEX app requires a connection to your APEX workspace’s parsing schema, SQL Developer prompts you to choose one if needed.
As always, importing an app overwrites the current version in App Builder so ensure all App Builder changes are already reflected in the APEXlang you’re about to import.
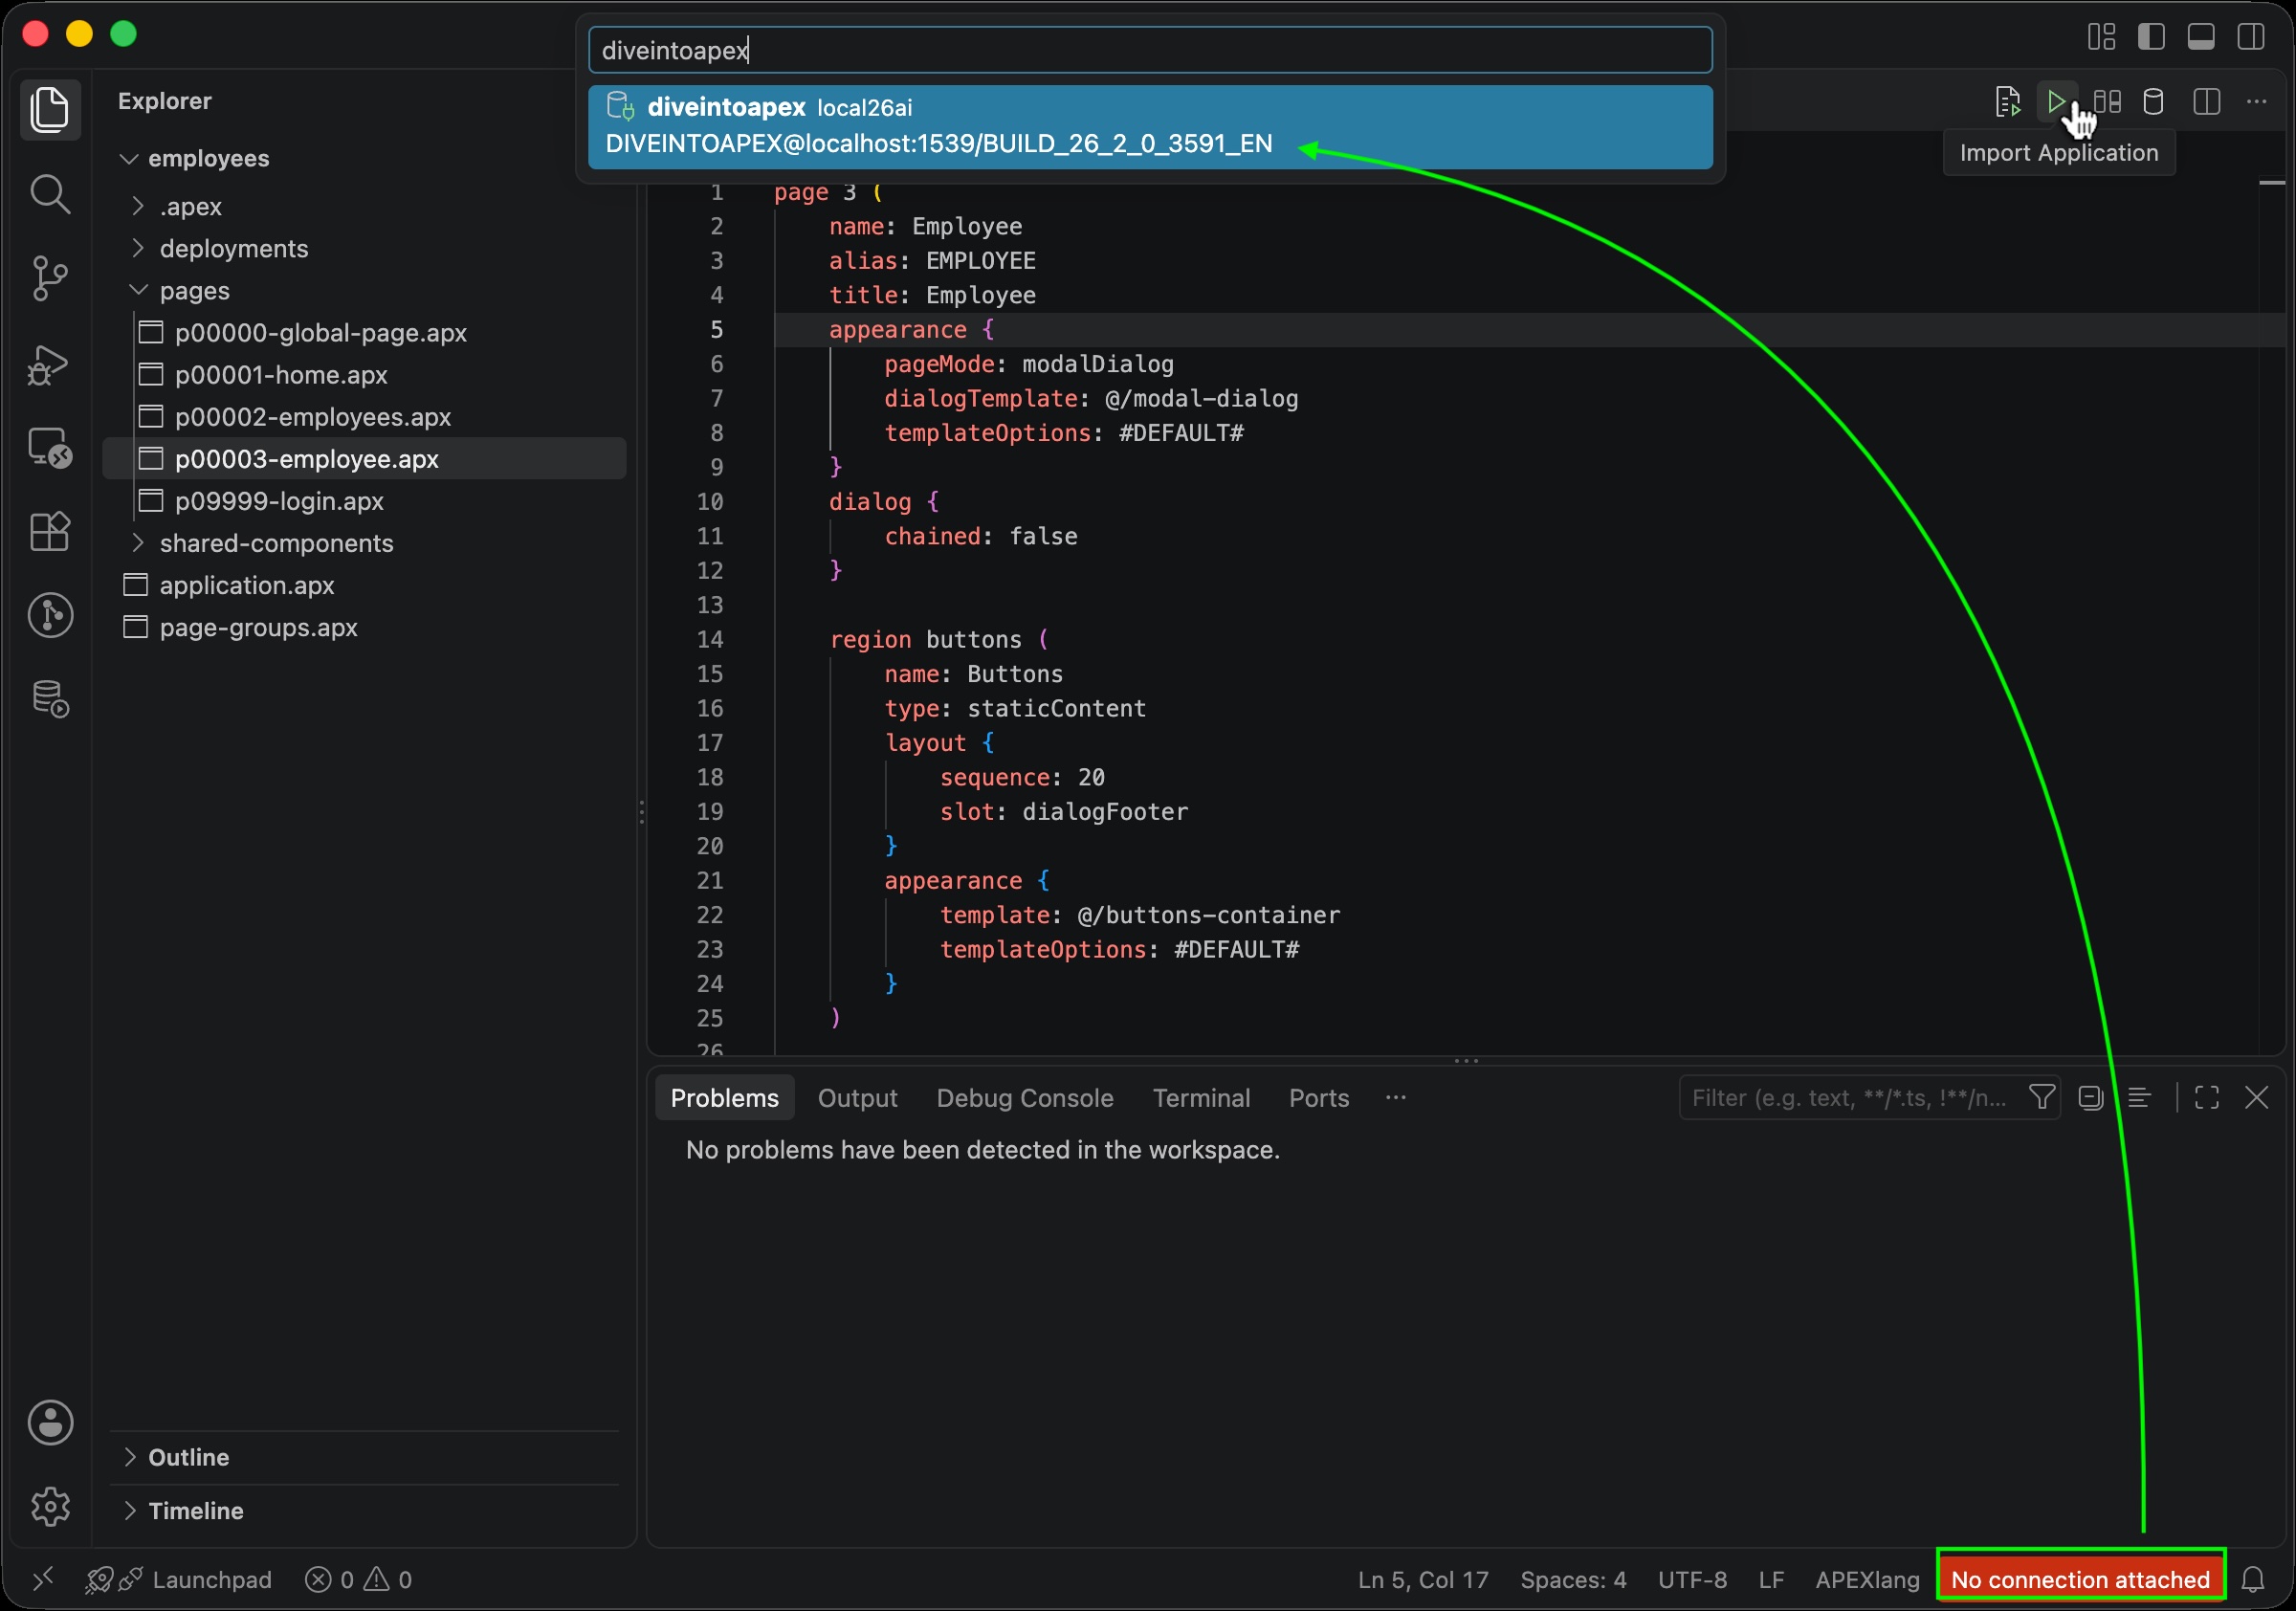
Description of the illustration apexlang008.jpg
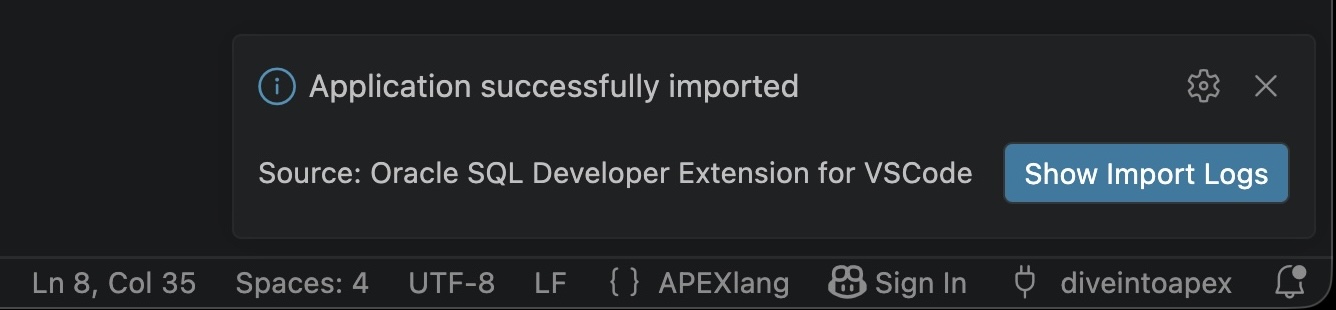
If the app validates successfully, then the import succeeds and a confirmation appears.
Description of the illustration apexlang009.jpg
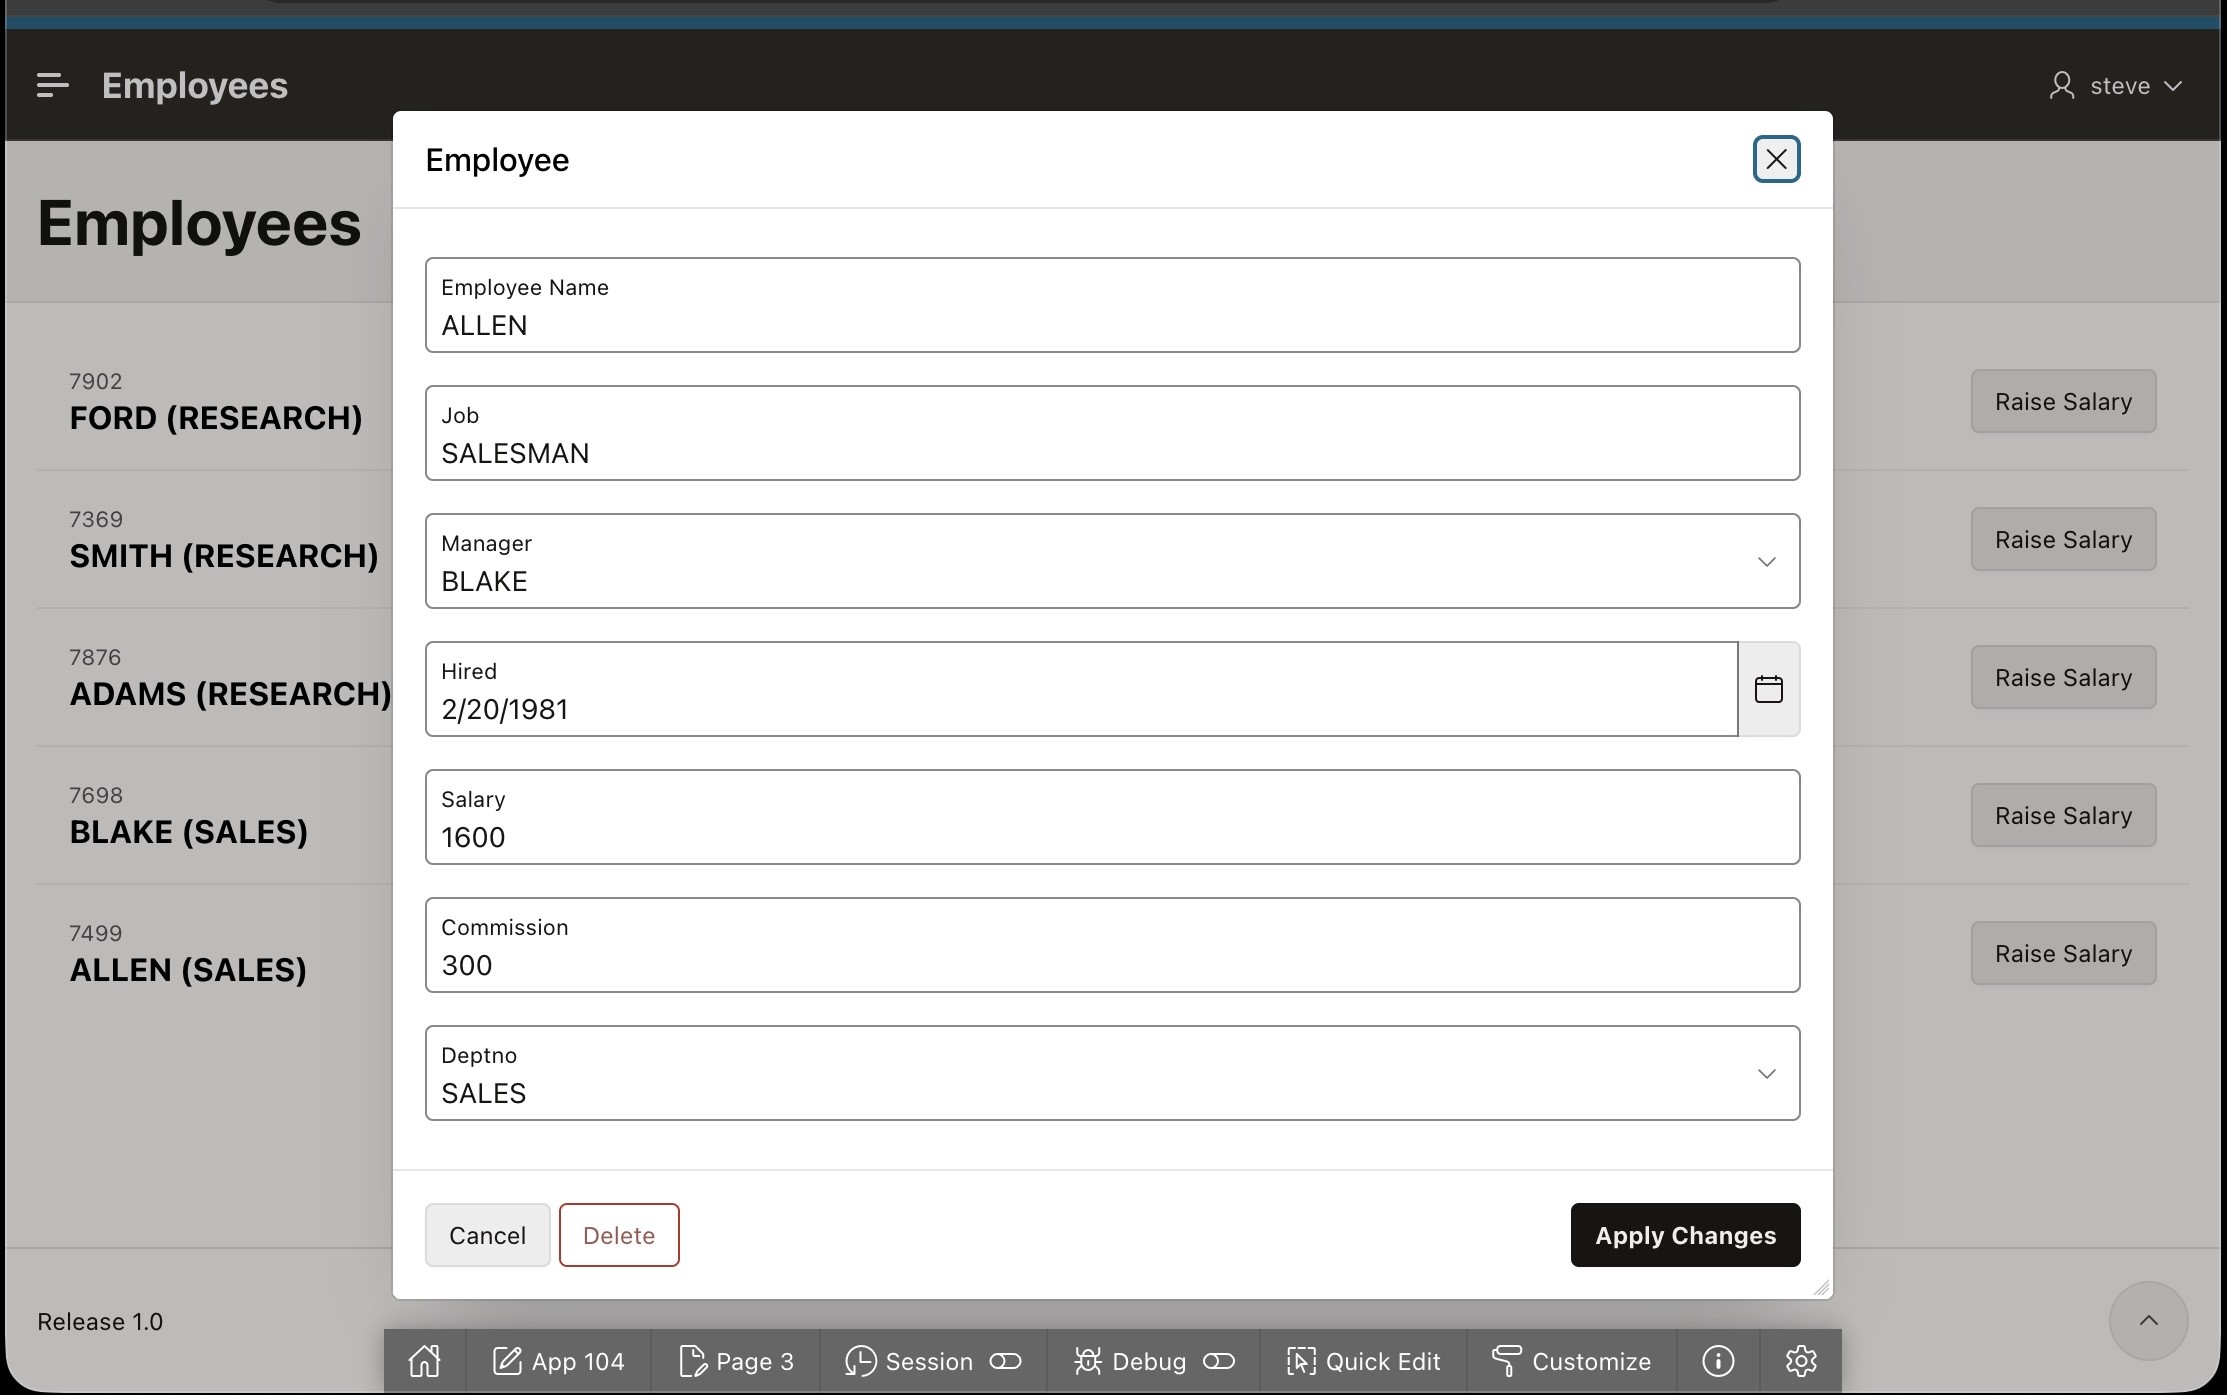
Refreshing the application page in the browser, you see the Employee page has changed from a modal drawer to a modal dialog.
Description of the illustration apexlang010.jpg
Comparing Local APEXlang Against APEX App Builder
If you are working in VS Code on an APEXlang application that you or another colleague may have modified in APEX App Builder, it’s useful to compare your local version with the one currently in APEX App Builder. For example, while you edit page 3 in VS Code, a colleague may save a change to the same page using App Builder. Use the Compare with APEX Application toolbar button in the VS Code editor toolbar to display any changes that exist between your local working directory and the current app definition in the builder.
An APEXlang Differences tab opens to display all application components and pages that are different between your local copy and the “remote” version in App Builder. The Change column shows if the file is modified, only present in the local copy, or only present in the remote copy in APEX App Builder.
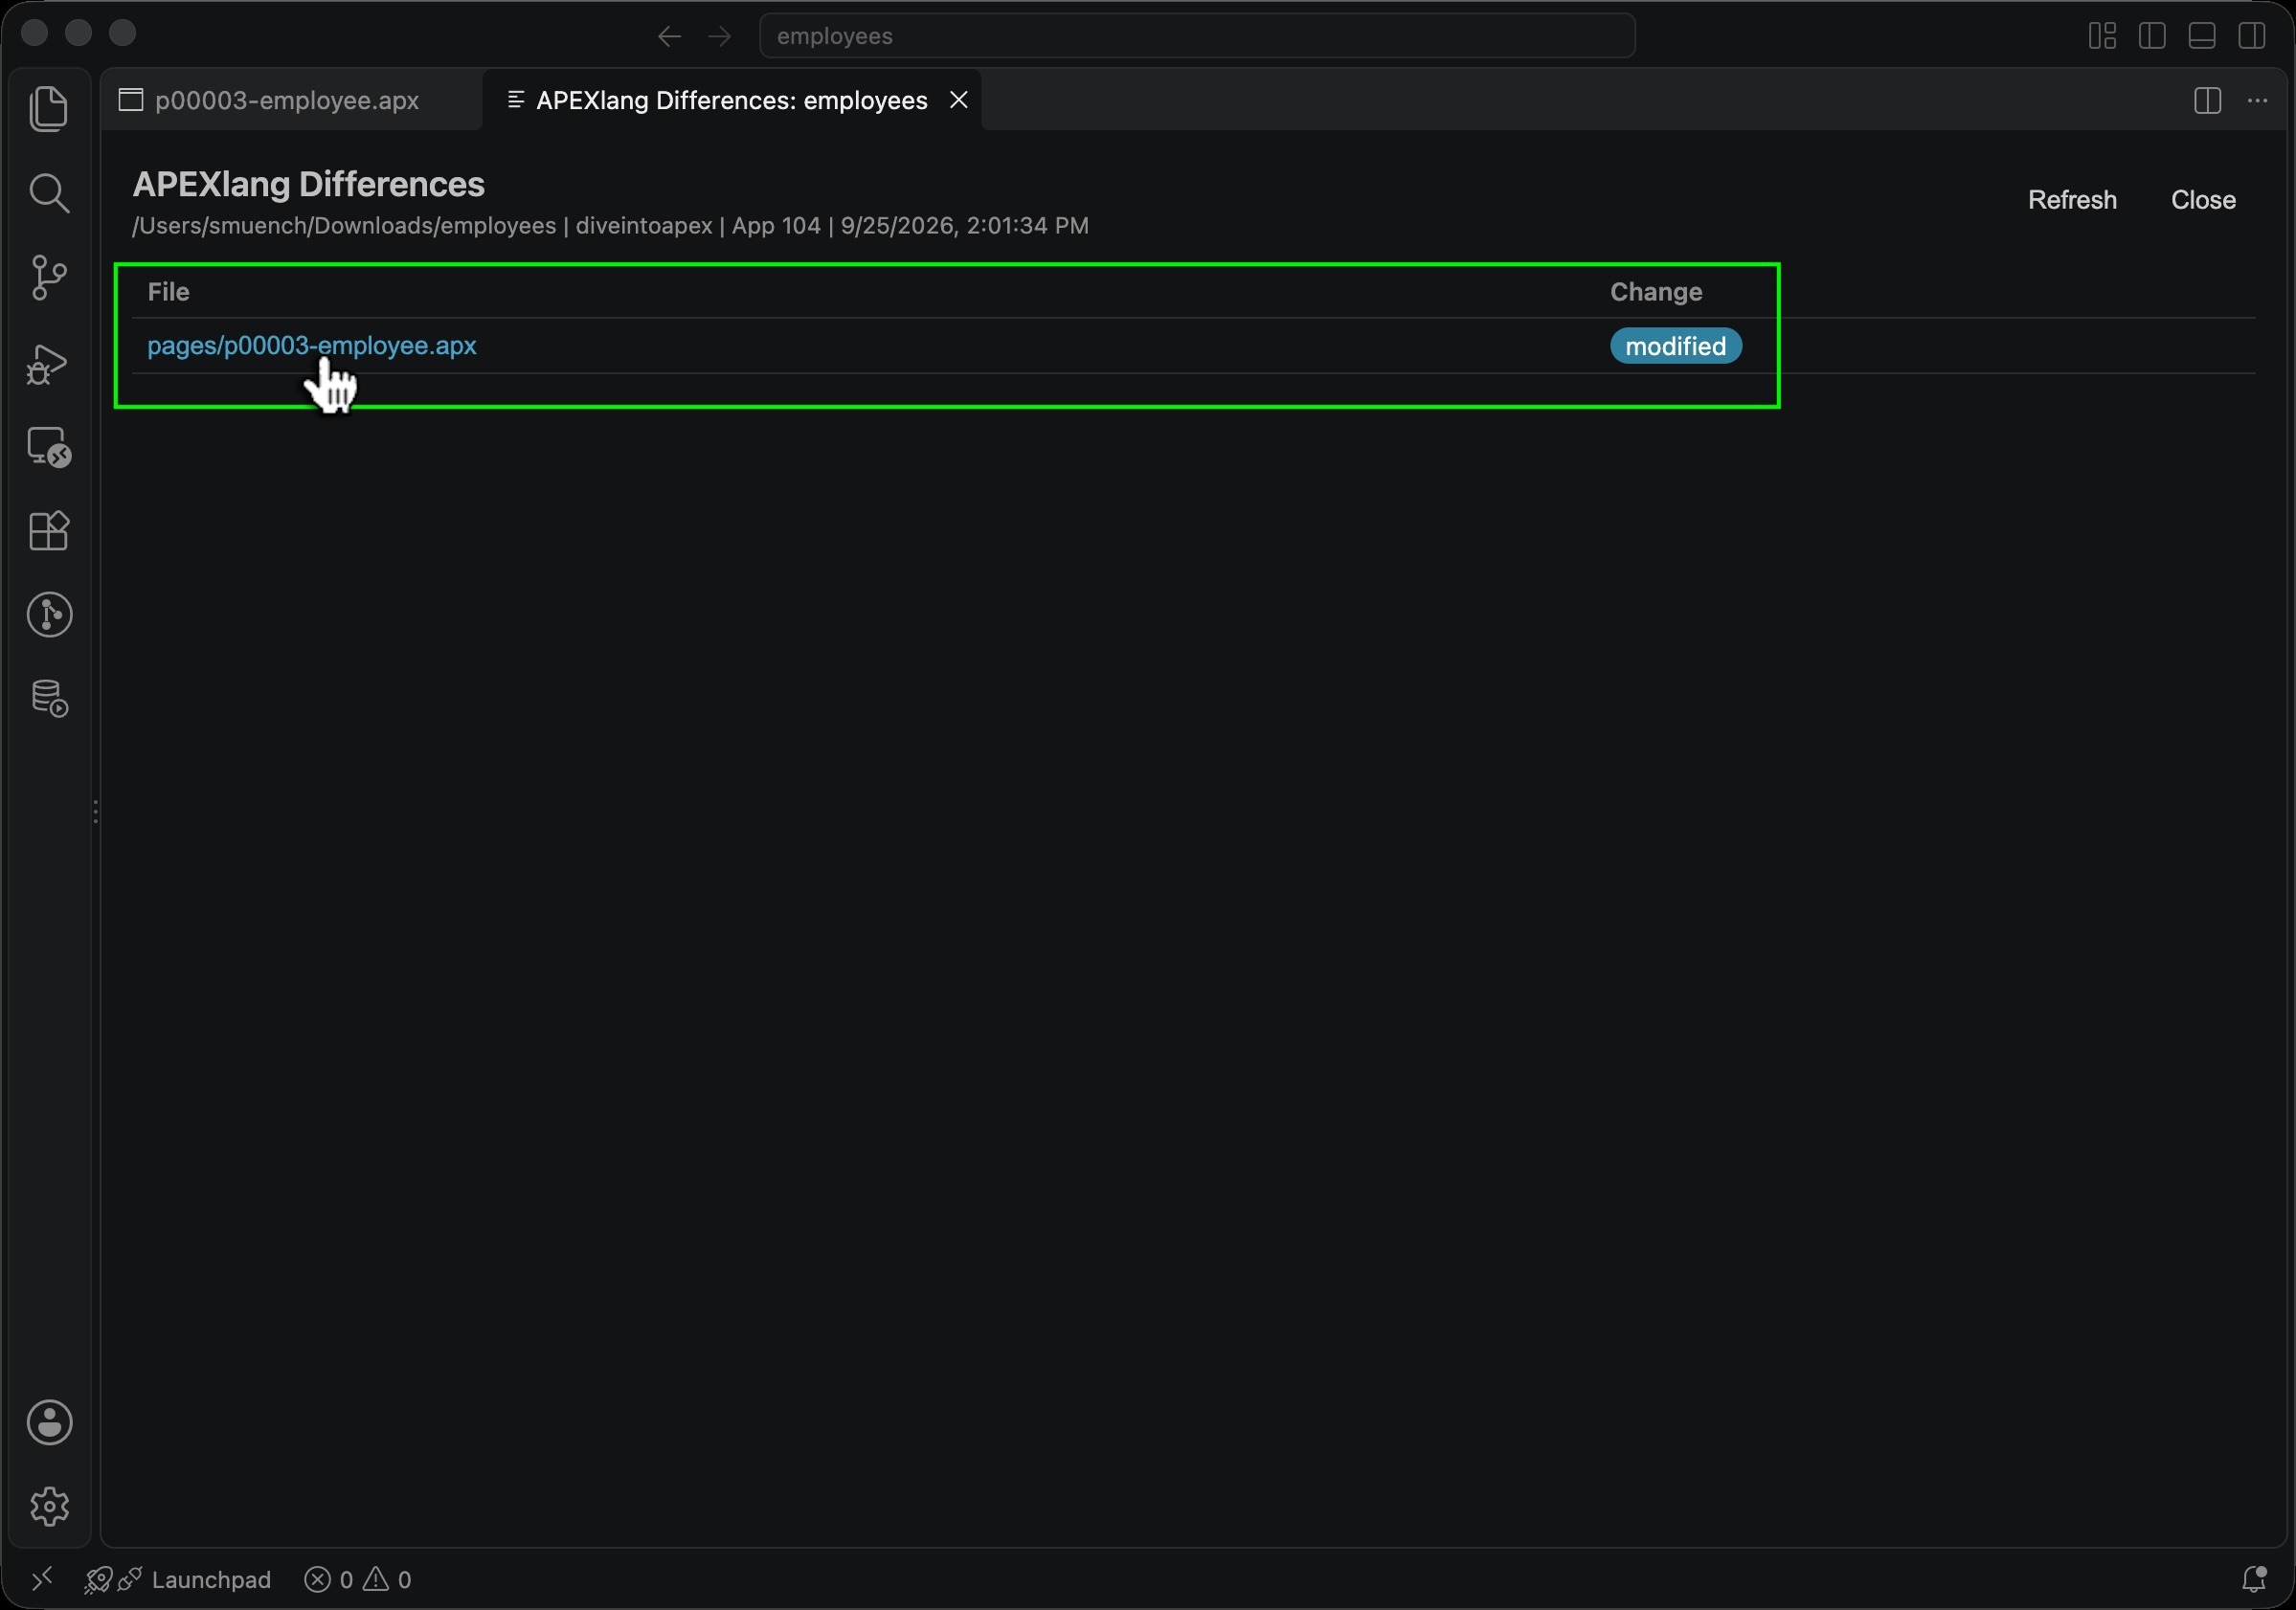
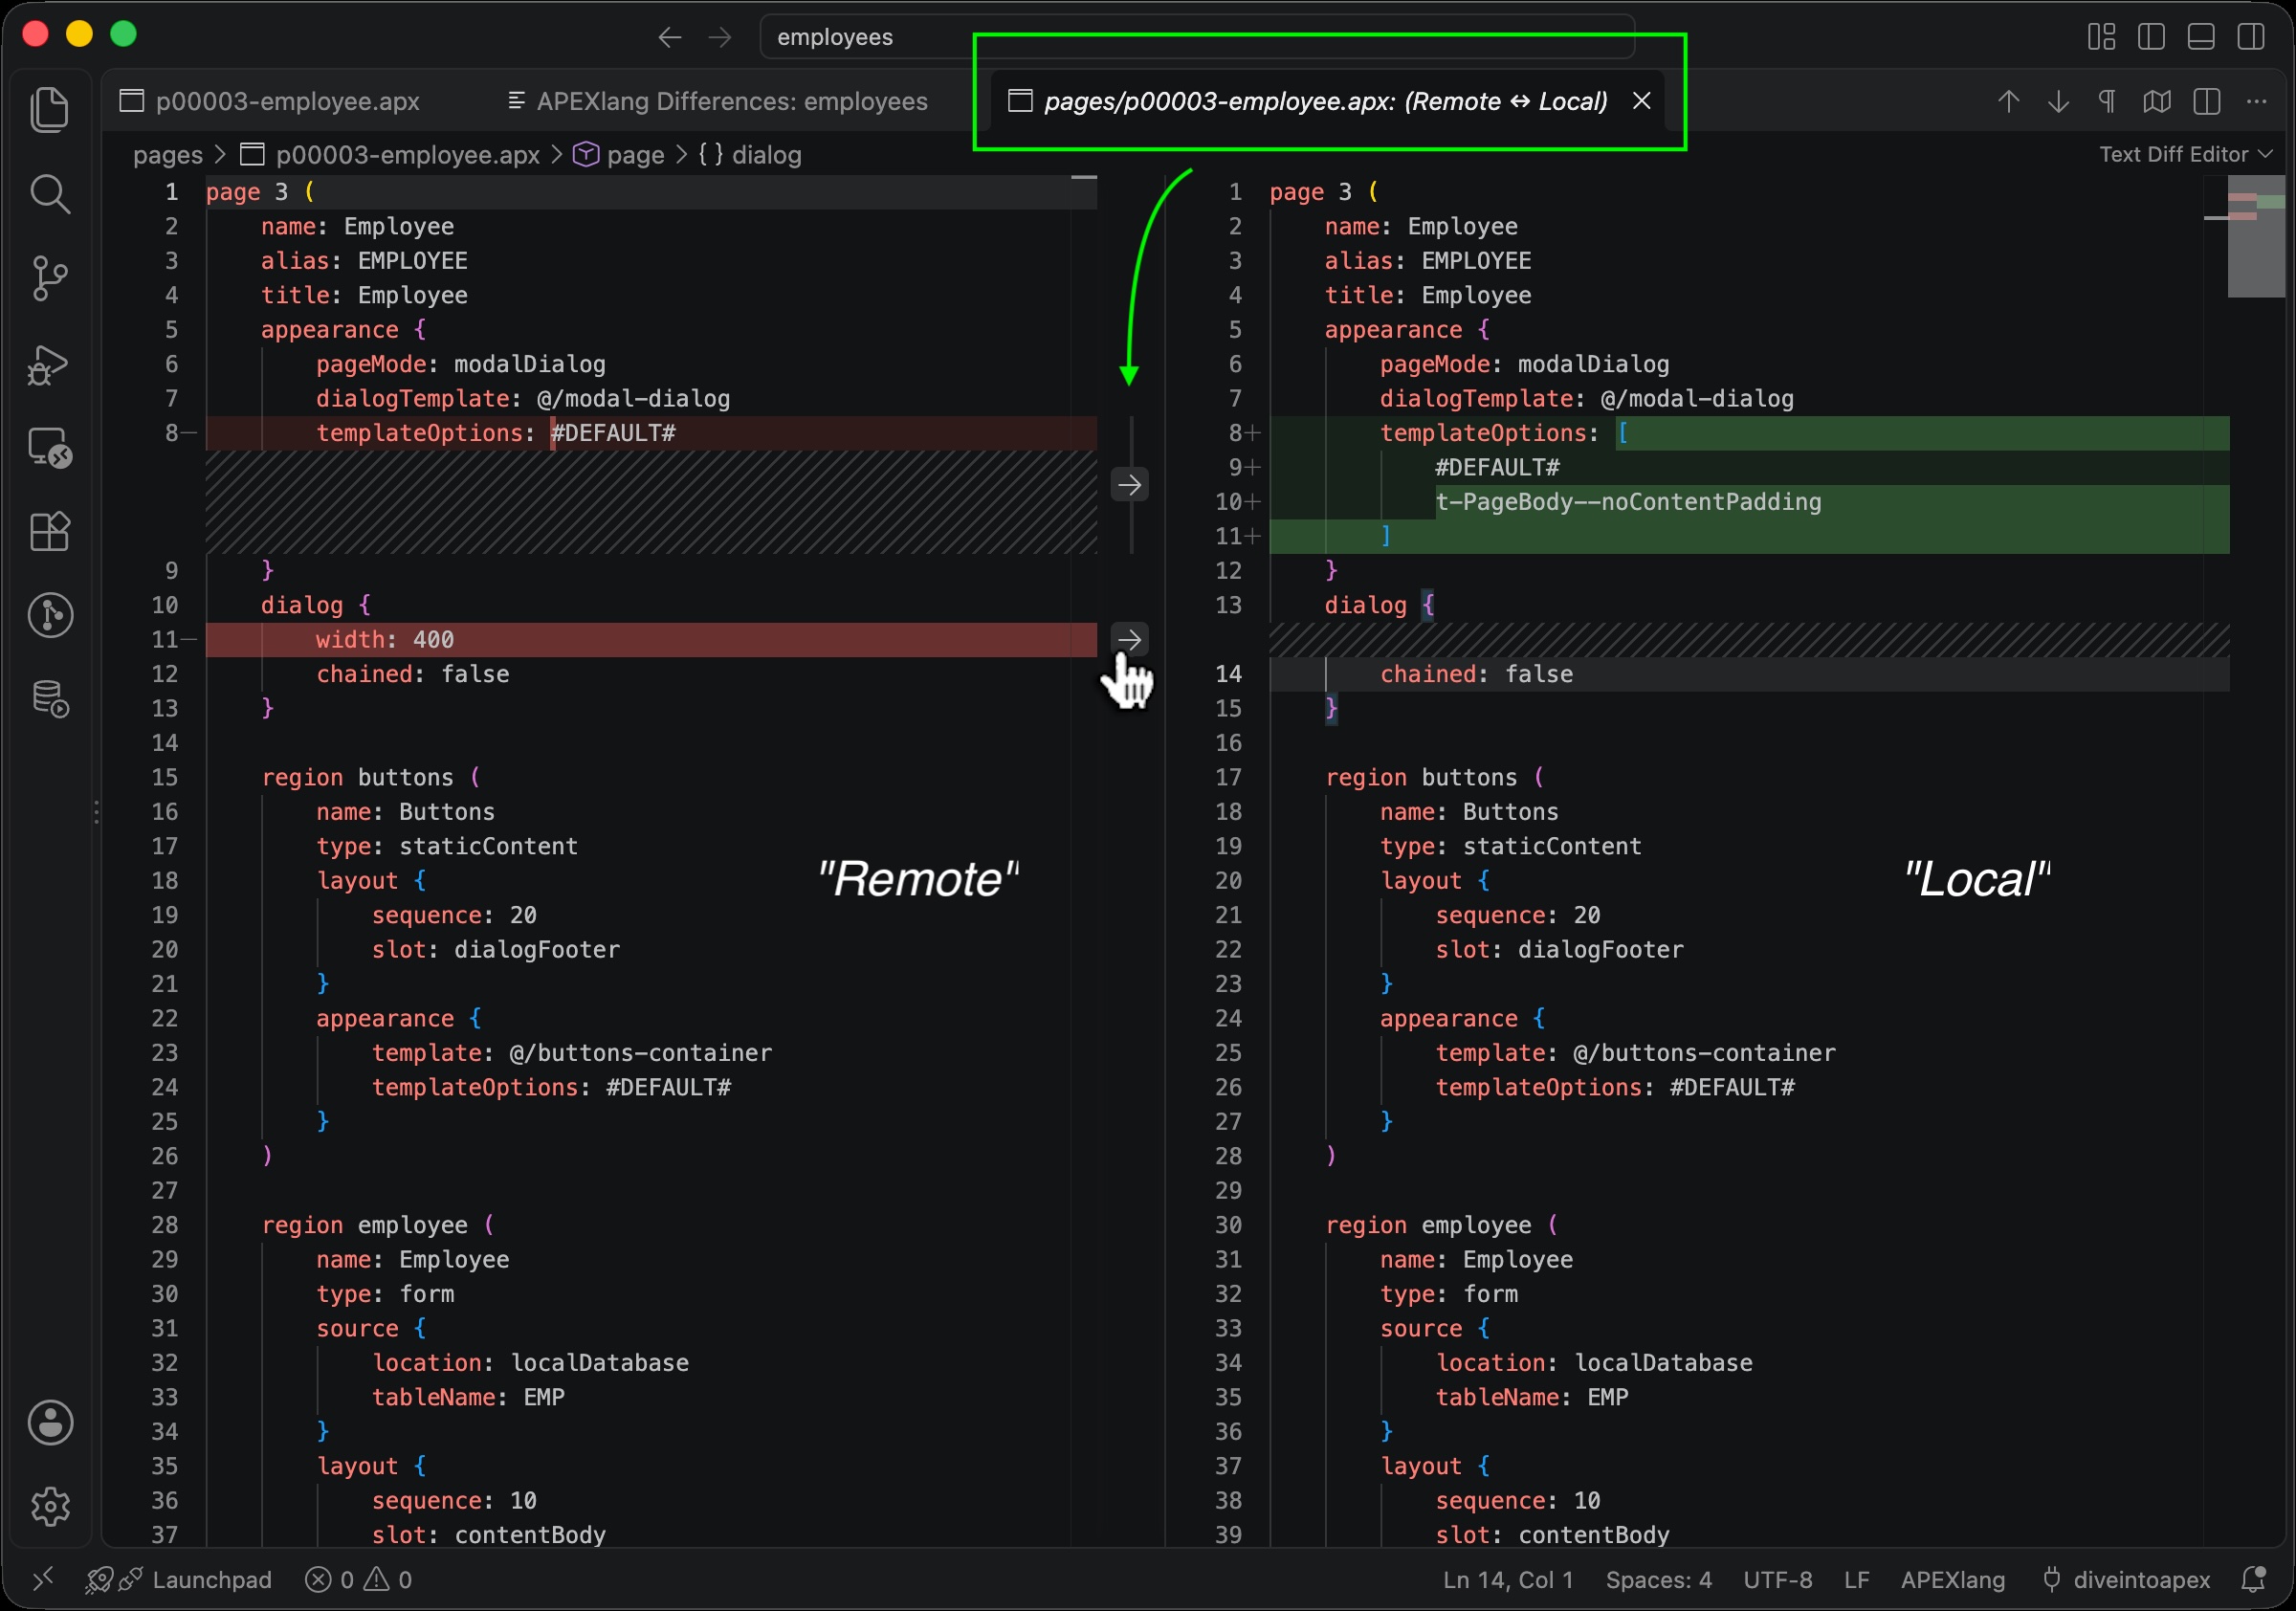
Clicking on any filename in the APEXlang Differences tab opens a diff viewer for the selected file. As shown below, the APEX App Builder “remote” version shows on the left, and your local version of the file is on the right. Using the up and down arrows in the diff viewer toolbar, you can inspect each difference between the remote version in App Builder and your local one.
For example, below you can see that you’ve added a t-PageBody-noContentPadding template option to the dialog page in your local copy. A colleague has set the width of the dialog page to 400 pixels.
For each difference, you can click on its corresponding arrow in the margin to pull the remote change into your local copy. This ensures that when you import your own changes, that you won’t inadvertently overwrite changes from a colleague.
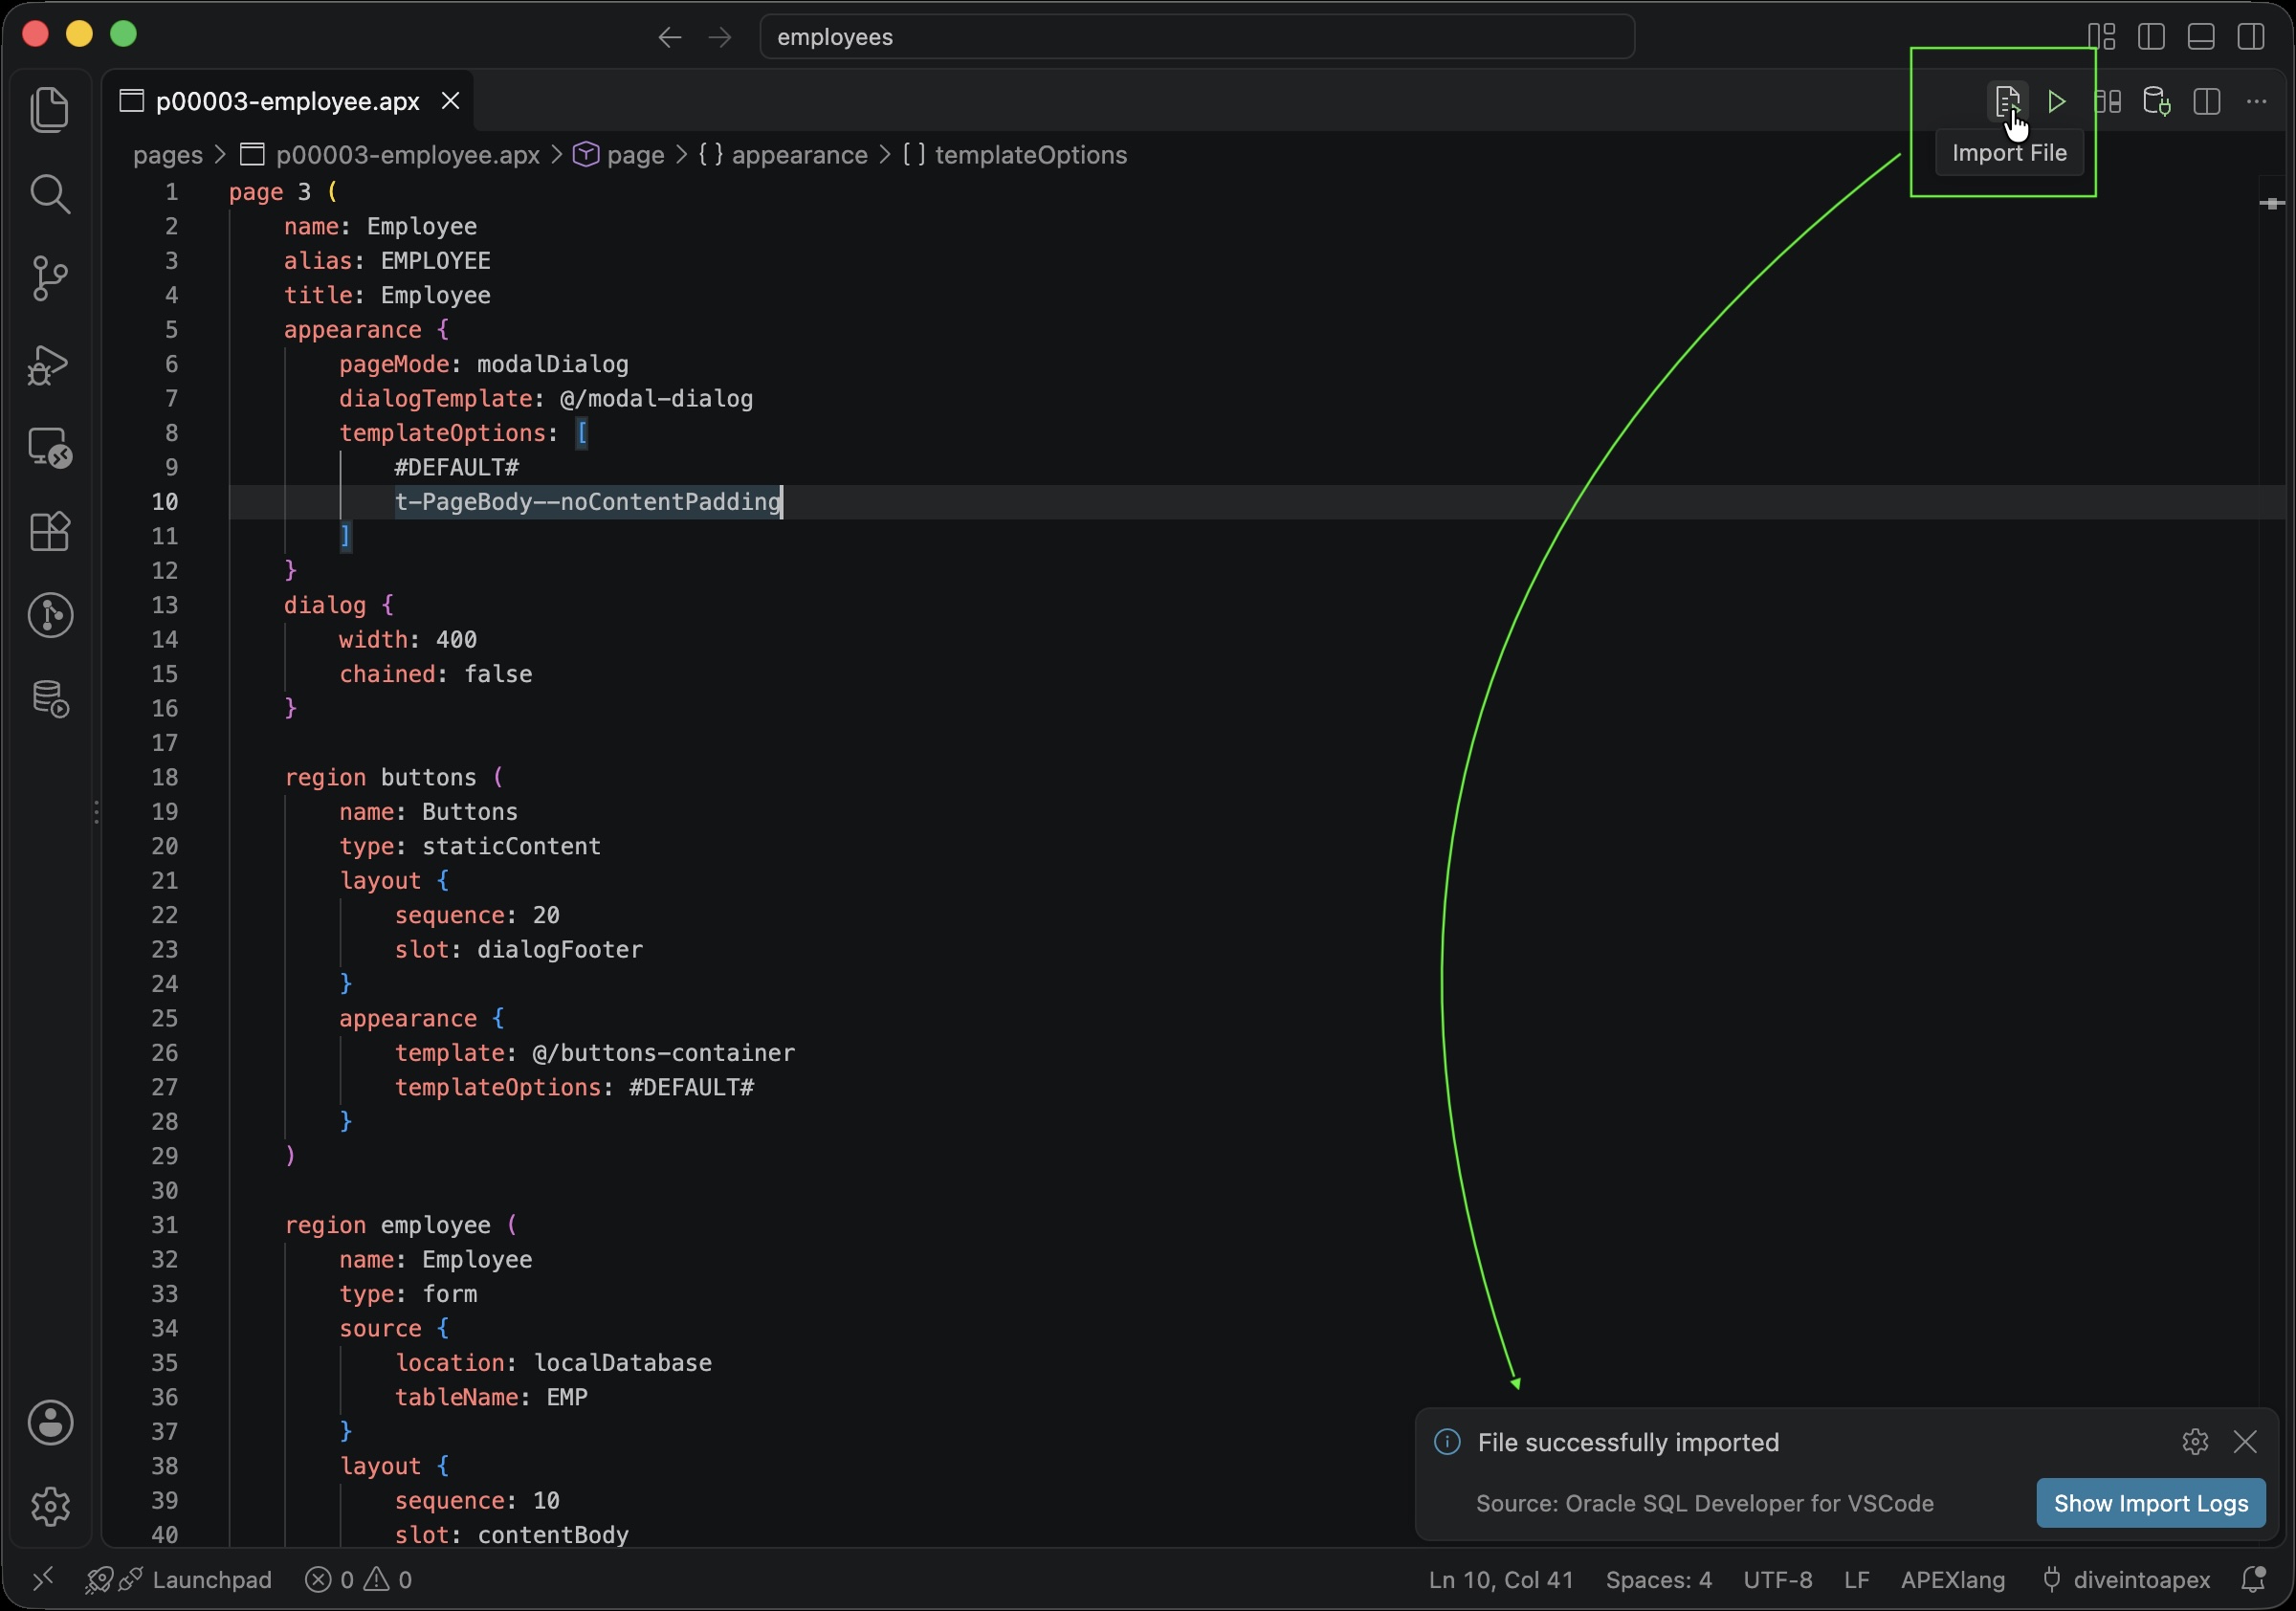
Importing Selected File from VS Code into App Builder
If your app already exists in APEX App Builder, in addition to deploying the full APEXlang application, you can also deploy just a selected file. Use the Import File toolbar button in the editor of the file to import just that one artifact. If the file you changed depends on other files, deploy the dependent ones first.