Creating Master Detail from an Existing Interactive Grid
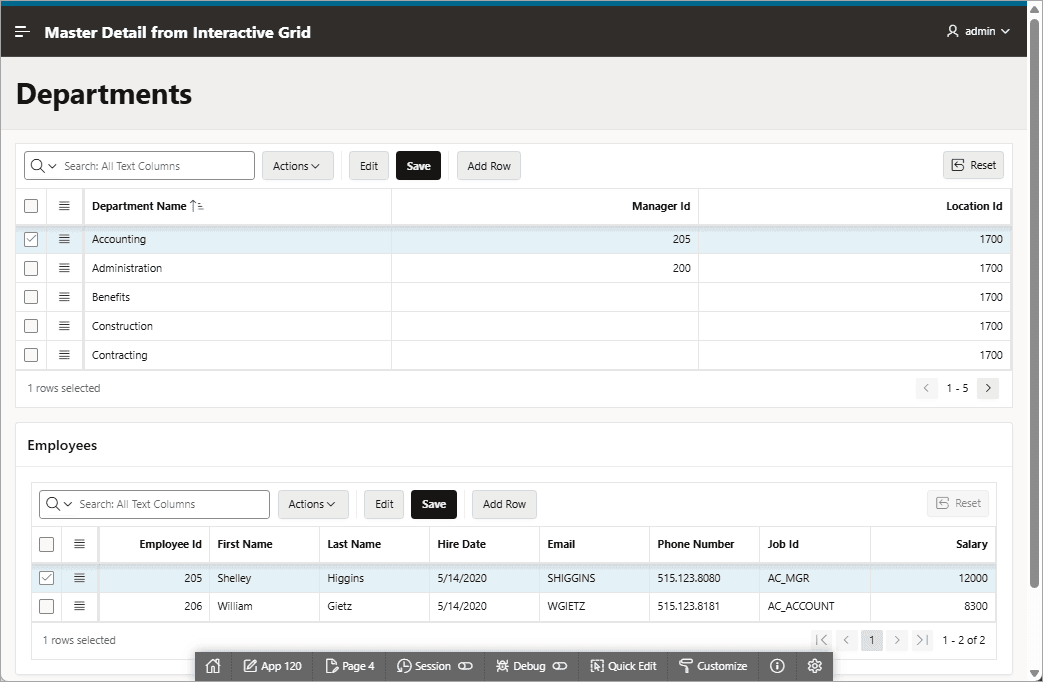
Create a single page master detail which includes two editable interactive grids based on two related tables or views.
You can define any number of master detail relationships on a single page by simply adding a related interactive grid to the page. If you have an existing interactive grid, you can add another related interactive grid by doing the following:
-
Create the parent interactive grid.
-
Define the primary key (if needed).
-
Create the child interactive grid.
-
For the child interactive grid, specify the Master Region and Master Column.
The following example demonstrates how to create an interactive grid on the departments table, OEHR_DEPARTMENTS by running the Create Page Wizard. This wizard creates the parent interactive grid and enables you to define the primary key. Then, you create a child interactive grid on the employees table, OEHR_EMPLOYEES. The OEHR_DEPARTMENTS and OEHR_EMPLOYEES tables are available in the sample data set, HR Data.
To add a related interactive grid below an existing grid:
-
Create an application.
-
Create the first interactive grid on the
OEHR_DEPARTMENTStable:-
On the Application home page, click Create Page
-
Under Component, select Interactive Grid.
-
Name - Specify a text name for this page (for example, Departments).
Tip: This text is also used for report region Title. After page creation, you can modify the Title in Page Designer.
-
Page Mode - Select Normal.
-
Include Form Page - Disable this flag.
-
Data Source - Select Local Database.
-
Source Type - Select Table.
-
Table /View Name - Select OEHR_DEPARTMENTS (table).
-
Editing Enabled - Enable this flag to make this interactive grid editable.
-
Navigation - Expand the region and enable or disable navigation. If either flag is enabled, additional attributes appear. To learn more about an attribute, see field-level Help.
-
Click Next.
-
-
Primary Key Column 1 - Accept the default.
-
Click Create Page.
-
Click Save and Run Page to view a rendered version of the parent interactive grid.
This following image shows an editable interactive grid created on the
OEHR_DEPARTMENTStable. Note that all 27 rows in the report display.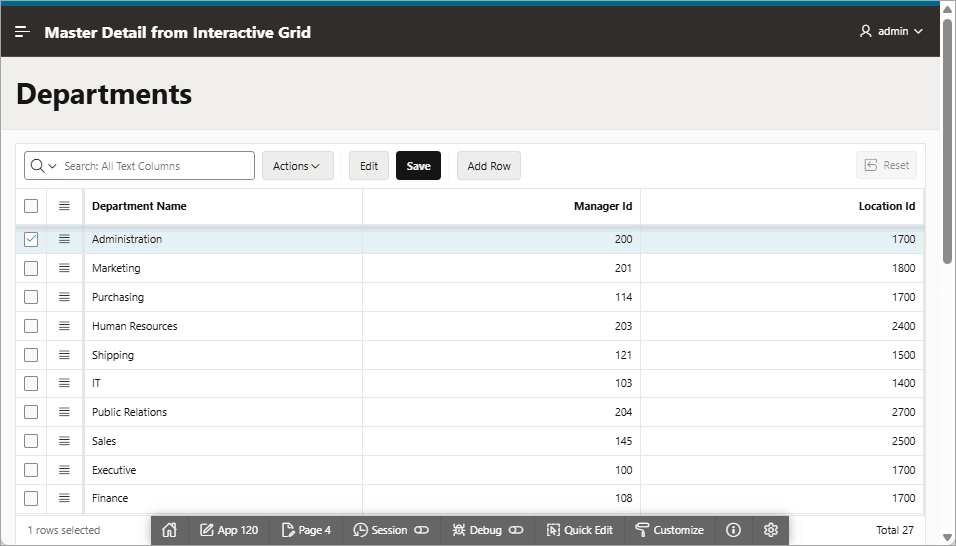
-
Change the number of rows that display to five.
-
Return to Page Designer. Click Page X on the Developer toolbar, where X is the page number.
-
Select the Departments region (if not already selected).
-
In the Property Editor, select the Attributes tab.
-
Pagination, Type - Select Page.
-
Click Save and Run Page to view a rendered version of the parent interactive grid.
-
From the Actions menu, select Format, Rows Per Page and select 5.
-
-
Return to Page Designer. Click Page X on the Developer toolbar, where X is the page number.
-
Create the child interactive grid on the
OEHR_EMPLOYEEStable.In Rendering tab, right-click Departments and select Create Region Below.
The new region is selected in the Rendering tab.
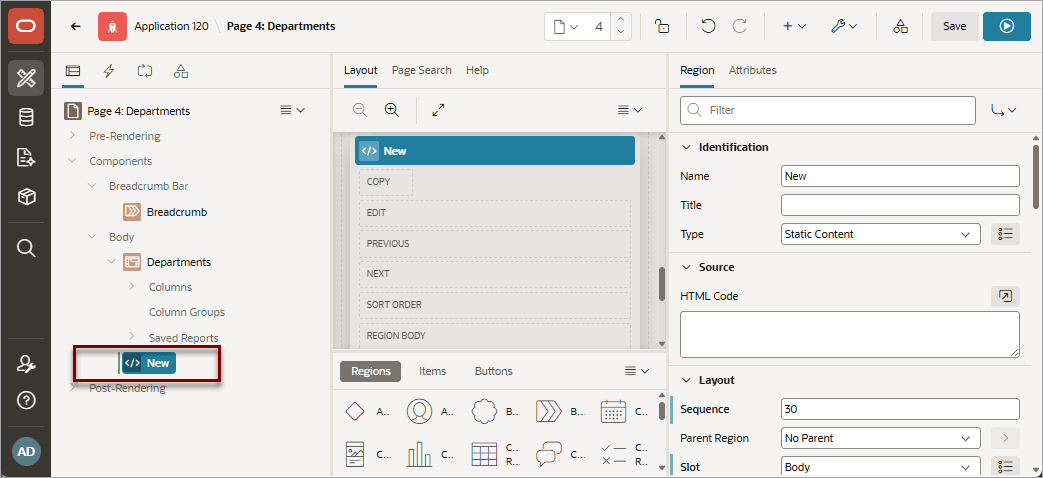
Description of the illustration master_detail_new_child_region.png
The Rendering tab and Layout tab both display the new region.
-
Edit the new child region:
-
In the Rendering tab, select the new region (if not already selected).
Note: To find a group or attribute, enter keywords in the Filter field. The Property Editor displays the group or attributes. To return to the default display, delete the keywords.
-
Identification, Name - Enter Employees.
-
Identification, Type - Enter Interactive Grid.
-
Source, Location - Select Local Database.
-
Source, Type - Select SQL Query.
-
Source, SQL Query - Enter the query:
select OEHR_EMPLOYEES.EMPLOYEE_ID as EMPLOYEE_ID, OEHR_EMPLOYEES.FIRST_NAME as FIRST_NAME, OEHR_EMPLOYEES.LAST_NAME as LAST_NAME, OEHR_EMPLOYEES.HIRE_DATE as HIRE_DATE, OEHR_EMPLOYEES.EMAIL as EMAIL, OEHR_EMPLOYEES.PHONE_NUMBER as PHONE_NUMBER, OEHR_EMPLOYEES.JOB_ID as JOB_ID, OEHR_EMPLOYEES.SALARY as SALARY, OEHR_EMPLOYEES.DEPARTMENT_ID as DEPARTMENT_ID from OEHR_EMPLOYEES -
Layout, Start New Row - Select On.
-
Appearance, Template - Select Standard.
-
Master Detail, Master Region - Select the region, Departments.
-
-
For the child interactive grid, Employees, define
DEPARTMENTSas the Master Column:-
In the Rendering tab, under the child interactive grid, Employees, expand the Columns node and select DEPARTMENT_ID.
-
Master Detail, Master Column - Select DEPARTMENT_ID.
-
Click Save. To run the page, click Save and Run Page.
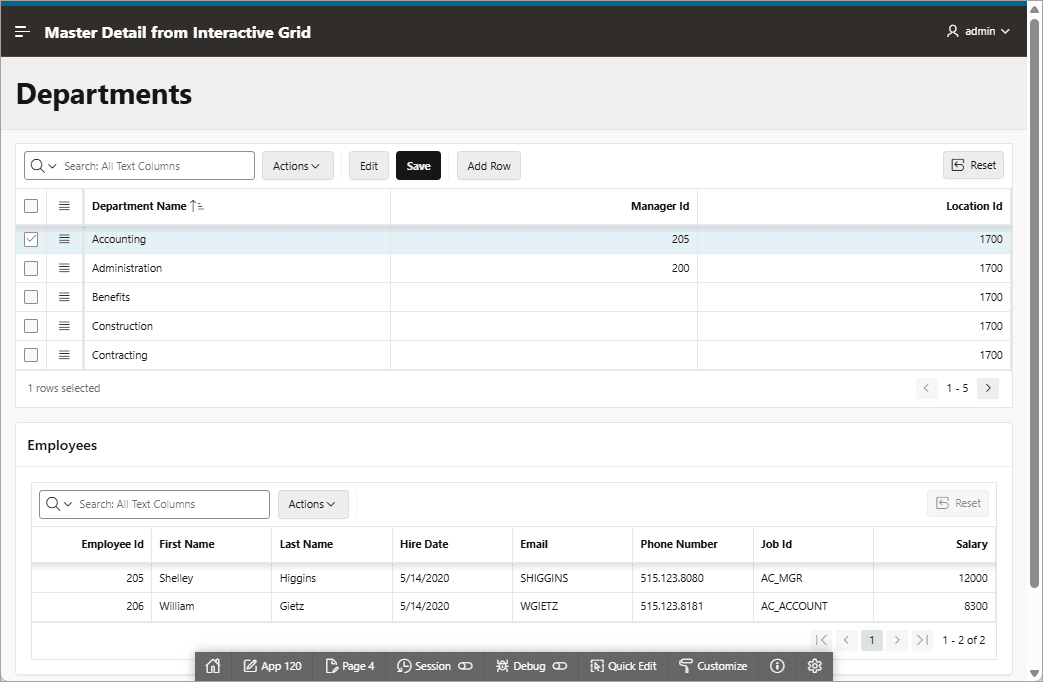
Description of the illustration master_detail_run.png
Note that the parent report, Department, filters the results in Employees, the child report.
-
-
Make Employees report editable:
-
Access Page Designer. Click Page X on the Developer toolbar, where X is the page number.
-
In the Rendering tab, select the Employees region.
-
In the Property Editor, click the Attributes tab.
-
In the Property Editor, edit the following:
-
Edit, Enabled - Select On.
-
Allowed Operations - Verify the following operations are enabled: Add Row, Update Row, and Delete Row.
-
-
-
Define the
EMPLOYEE_IDcolumn as the Primary Key Column:-
In the Rendering tab, under Employees, expand Columns and select EMPLOYEE_ID.
-
In the Property Editor, find Source, and turn Primary Key to On.
-
-
Click Save. To run the page, click Save and Run Page.
The child interactive grid, Employees, is now editable