Configuring a Database Firewall with Oracle RAC for Monitoring and Blocking
Learn how to configure a database firewall with Oracle Real Application Clusters (Oracle RAC) Database for monitoring and blocking.
About Configuring Database Firewall with Oracle RAC for Monitoring and Blocking
Oracle Database Firewall has monitoring and blocking features that you can use with Oracle RAC.
To use blocking, you must use the Monitoring / Blocking (Proxy) mode.
The Database Firewall when configured in Monitoring / Blocking (Proxy) mode, the following takes place:
-
SQL client connects to Database Firewall.
-
Database Firewall connects to SCAN Listener.
-
SCAN Listener redirects the connection to a RAC node.
-
Database Firewall handles the redirection, makes a outbound connection to the re-directed RAC node.
-
The response from Oracle RAC node is passed to the client.
Caution:
If you set up an Oracle RAC protected database to be a scan listener, you also need to select the RAC Instance/Autonomous DB checkbox when registering the database as a target. If you don’t identify the target as a RAC database, the scan listener could redirect the client to a different IP address, bypassing the Database Firewall entirely.
See Registering Targets for instructions.
Configure a Proxy Using the Oracle Database Security Central Console
You can use the Oracle Database Security Central console to configure a proxy.
-
Log in to the Oracle Database Security Central console as an administrator.
-
Complete the steps for Configuring the Database Firewall As a Traffic Proxy.
-
Complete the steps for Creating and Configuring a Database Firewall Monitoring Point.
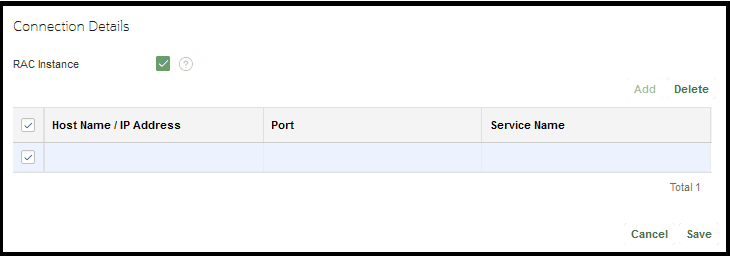
Be sure to select the RAC Instance/Autonomous DB checkbox in the Connection Details section.
-
Ensure Network Interface Card and Proxy Ports fields are selected. After selecting them, the RAC Instance/Autonomous DB checkbox is enabled.
-
After selecting the RAC Instance/Autonomous DB checkbox and adding the SCAN fully qualified domain name (FQDN) in the Host Name / IP Address field, the following message is displayed:
Configure SCAN Listener Domain Name as target. For more details refer: Real Application Clusters Installation GuideFigure 1: Connection Details
-
Ensure that the SCAN FQDN is entered in the Host Name / IP Address.
-
Enter the Port number of SCAN Listener.
-
Enter the Service Name or SID (optional).
-
Select Add.
-
Select Save on the dialog.
-
Select Save on the main page. The target is created and shows up under the Database Firewall Monitoring sub on the main page.
-
Select newly created RAC target to verify the details.