4.3.1 Work with Notebook Versions in the Notebook Editor

By creating versions of your notebook, you can archive your work in a notebook.

You can create versions of notebooks in the Notebooks editor, as well as on the Notebooks page. In this example:
  • The original notebook Notebook Versioning Demo, is edited to add a script to build a machine learning model.
  • The Notebook Versioning Demo notebook is then versioned as Version 2 to archive the code to build the machine learning model.
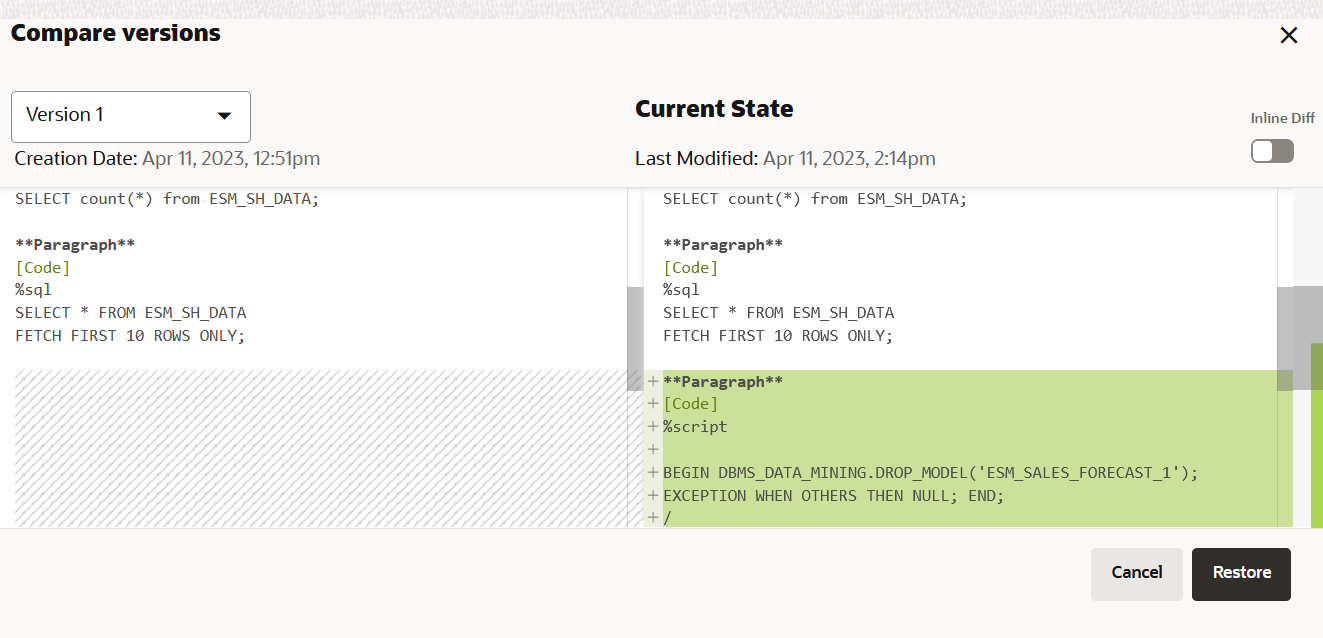
  • The Version 2 and Version 1 of the Notebook Versioning Demo notebook are compared using the Compare Versions feature.

Note:

A versioned notebook is non-editable. If you want to make any changes to a particular version of a notebook, you must restore that version to edit it.
To create a new notebook version and view version history:
  1. On the Notebooks EA page, click on the Notebook Versioning Demo notebook to open it in the notebook editor.

    Note:

    Version 1 of this notebook is already created as part of the example in Work with Notebook Versions on the Notebooks Page. It contains the archived code to create the view ESM_SH_DATA, count the record, and view the data. Clicking on the notebook opens the original version which is editable.
  2. Now, edit the notebook to add a script to build a machine learning model. On the notebook, hover your cursor over the lower border of the third paragraph, and click the + icon to add a new paragraph.
    Add Paragraph
  3. Copy and paste the following script to the new paragraph. This script builds a machine learning model using the ESM algorithm.
    %script
    
    BEGIN DBMS_DATA_MINING.DROP_MODEL('ESM_SALES_FORECAST_1');
    EXCEPTION WHEN OTHERS THEN NULL; END;
    /
    DECLARE
        v_setlst DBMS_DATA_MINING.SETTING_LIST;
    BEGIN
        
        v_setlst('ALGO_NAME')            := 'ALGO_EXPONENTIAL_SMOOTHING';
        v_setlst('EXSM_INTERVAL')        := 'EXSM_INTERVAL_QTR'; -- accumulation int'l = quarter
        v_setlst('EXSM_PREDICTION_STEP') := '4';                 -- prediction step = 4 quarters
        v_setlst('EXSM_MODEL')           := 'EXSM_WINTERS';      -- ESM model = Holt-Winters
        v_setlst('EXSM_SEASONALITY')     := '4';                 -- seasonal cycle = 4 quarters    
    
        DBMS_DATA_MINING.CREATE_MODEL2(
            MODEL_NAME          => 'ESM_SALES_FORECAST_1',
            MINING_FUNCTION     => 'TIME_SERIES',
            DATA_QUERY          => 'select * from ESM_SH_DATA',
            SET_LIST            => v_setlst,
            CASE_ID_COLUMN_NAME => 'TIME_ID',
            TARGET_COLUMN_NAME  =>'AMOUNT_SOLD');
    END;
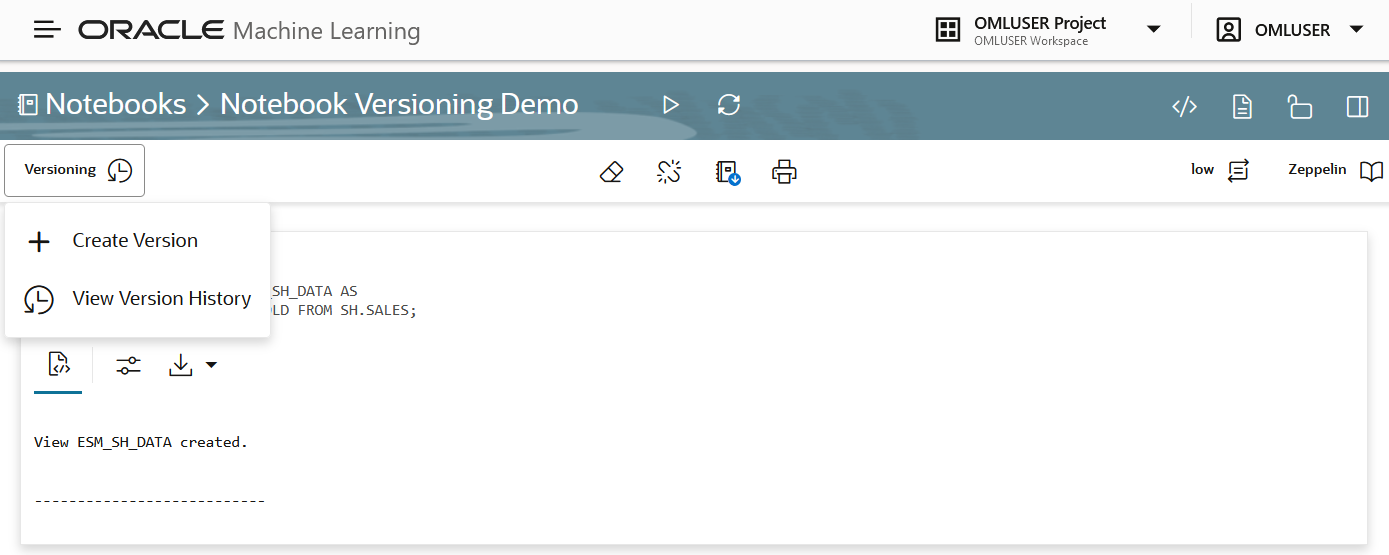
  4. Now, archive this notebook along with the code to build the machine learning model by versioning it. On the top left corner of the notebook editor, click Versioning Versioning icon
  5. The options to Create Version and View Version History opens.
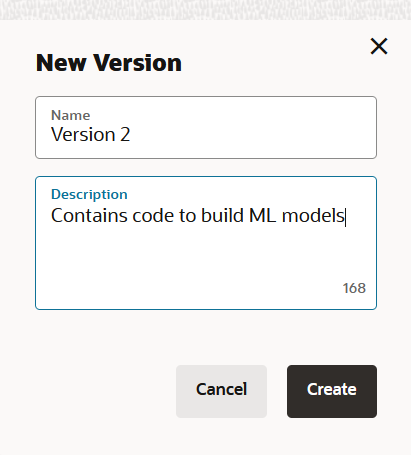
  6. Click Create Version. The New Version dialog opens.
  7. In the New Version dialog:
    1. Name: Here, the name Version 2 is taken by default. Let's retain this name.
    2. Comments: Enter comments, if any.
    3. Click Create. A message is displayed confirming the creation of the new version.
    Version 2 of this notebook now contains the archived code to create the machine learning model.
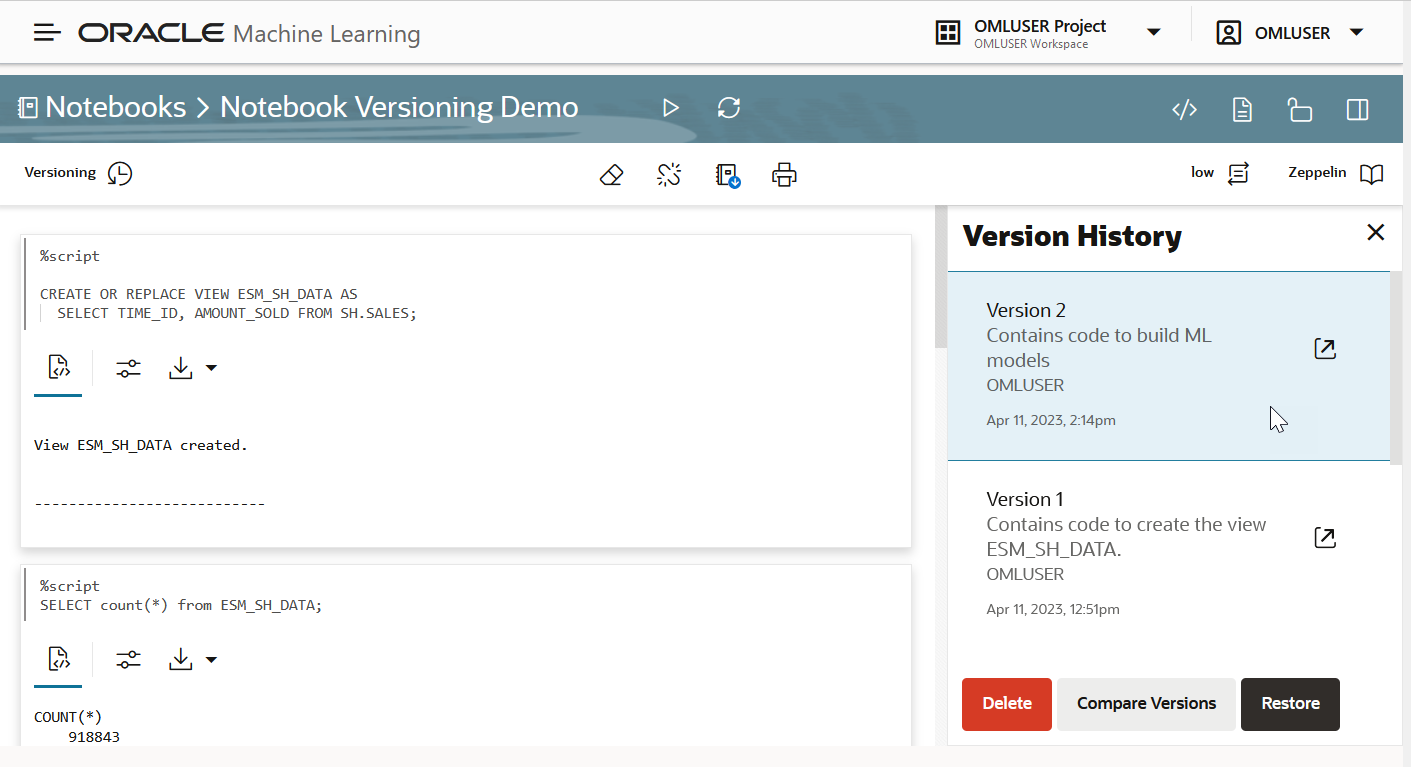
  8. To view the version that you just created, click Versioning versioning, and then click View Version History.
  9. On the right pane of the notebook editor, the Version History pane opens. Hover your cursor over any notebook version and click on it to enable the available options.
  10. You can perform the following tasks in the Version History pane:
    • Click open-version to open the selected version.

      Note:

      Clicking on any versioned notebook opens the notebook in read-only mode, as versioned notebooks are non-editable. To view the current editable version, click View current version of the notebook.

    • Click Delete to delete the selected version.
    • Click Compare Versions to compare the selected and current version of the notebook. You can select other available versions from the drop-down list. In this example, Version 2 of the notebook (under Current State) is compared with Version 1. New additions are highlighted in green, as shown in the screenshot here, and deletions are highlighted in red.

    • Click Restore to restore the selected version.

      Note:

      Restoring a selected version of the notebook will discard all the unversioned changes, if any.