4.1 Oracle Machine Learning Notebooks
Oracle Machine Learning Notebooks is an enhanced web-based notebook platform for data engineers, data analyst, R and Python users, and data scientists. You can write code, text, create visualizations, and perform data analytics including machine learning. Notebooks work with interpreters in the back-end.
Note:
There is a single namespace for both the original notebooks and the new notebooks. You cannot have a notebook with the same name in both notebook lists. A notebook copied from the original interface to the new will have_new appended to it.
- Faster notebook loading time.
- The Oracle look and feel as it based on the Oracle Redwood theme.
- Enriched visualization in its Line chart, Area chart, Bar chart, Pyramid chart, Pie chart, Donut chart, Funnel chart, Tag Cloud, Treemap Diagram, Sunburst Diagram, Scatter Plot, Box Plot.
- Option to enter comments in notebook paragraphs.
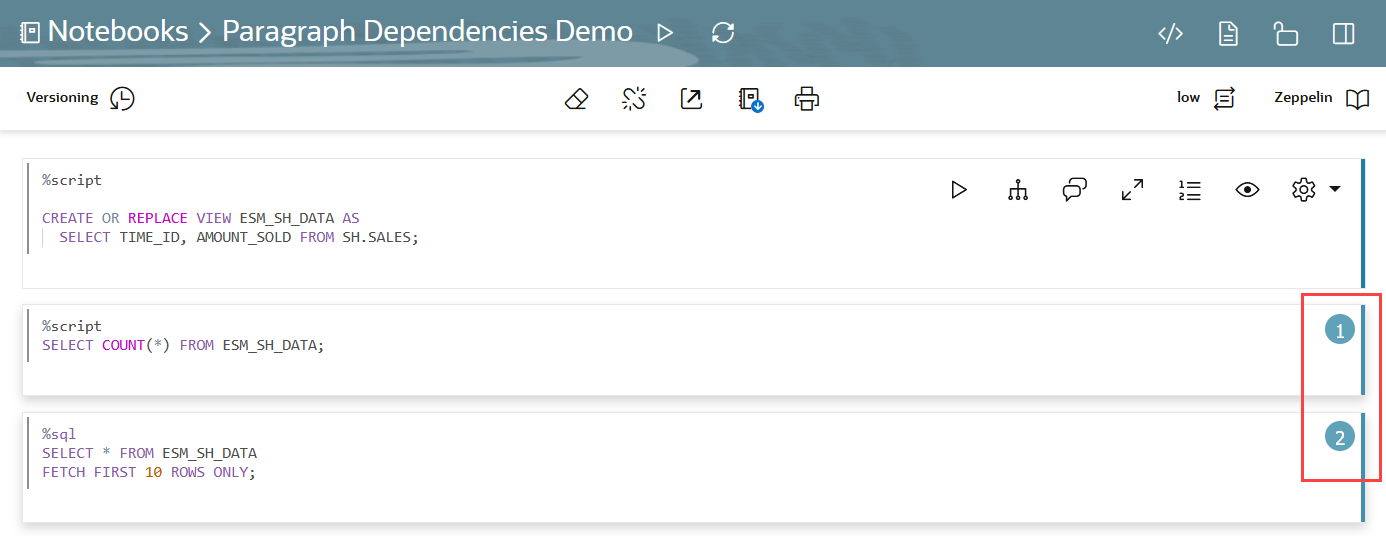
- Option to create Paragraph Dependencies. The Paragraph Dependencies feature allows you to add dependencies between paragraphs. The dependents of a paragraph automatically run after the original paragraph is run.
- Simplified service level selection of High, Medium, Low, and GPU through drop-down menu.
- Layout of Zeppelin and Jupyter notebook.
- On-page versioning, viewing of version history, and version comparison.
- Access your Oracle Machine Learning Notebooks
You can access the OML Notebooks page from the Oracle Machine Learning UI home page and the left navigation pane. You can access the GitHub Notebooks page from the Oracle Machine Learning UI home page and from the user profile drop-down menu. - Edit your Oracle Machine Learning Notebook
Upon creating a notebook, it opens automatically, presenting you with a single paragraph using the default %sql interpreter. You can change the interpreter by explicitly specifying one of%script,%python,%sql,%r,%md, or%conda. - Manage Oracle Machine Learning Notebooks
The Notebooks page lists all the notebooks—both Oracle Machine Learning notebooks and GitHub notebooks.
Parent topic: OML Notebooks
4.1.1 Access your Oracle Machine Learning Notebooks
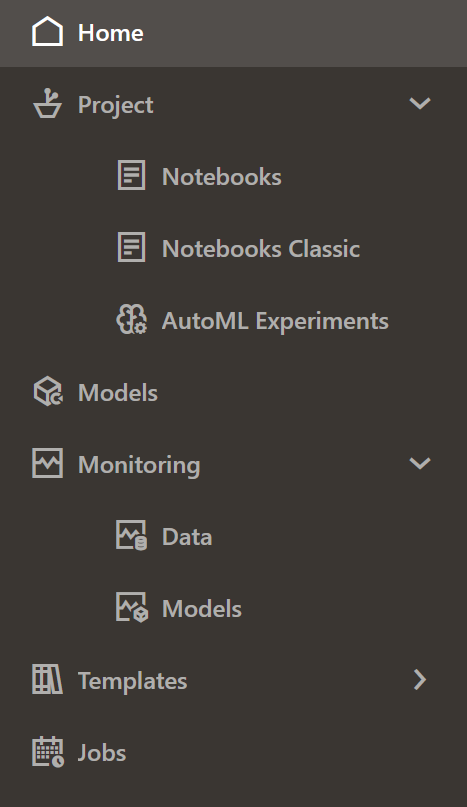
You can access the OML Notebooks page from the Oracle Machine Learning UI home page and the left navigation pane. You can access the GitHub Notebooks page from the Oracle Machine Learning UI home page and from the user profile drop-down menu.
Accessing the Oracle Machine Learning Notebooks page
- Go to the Oracle Machine Learning left navigation pane, expand
Projects and then click
Notebooks. Alternatively, you can click
Notebooks under Quick Link on the home page to
open the Notebooks page.
Figure 4-2 Notebooks option on OML UI left navigation menu and OML UI home page
Parent topic: Oracle Machine Learning Notebooks
4.1.2 Edit your Oracle Machine Learning Notebook
Upon creating a notebook, it opens automatically, presenting you with a single paragraph using the default %sql interpreter. You can change the interpreter by explicitly specifying one of %script, %python, %sql , %r , %md, or %conda.
- Work with Notebook Versions in the Notebook Editor
By creating versions of your notebook, you can archive your work in a notebook. - Create Paragraph Dependencies
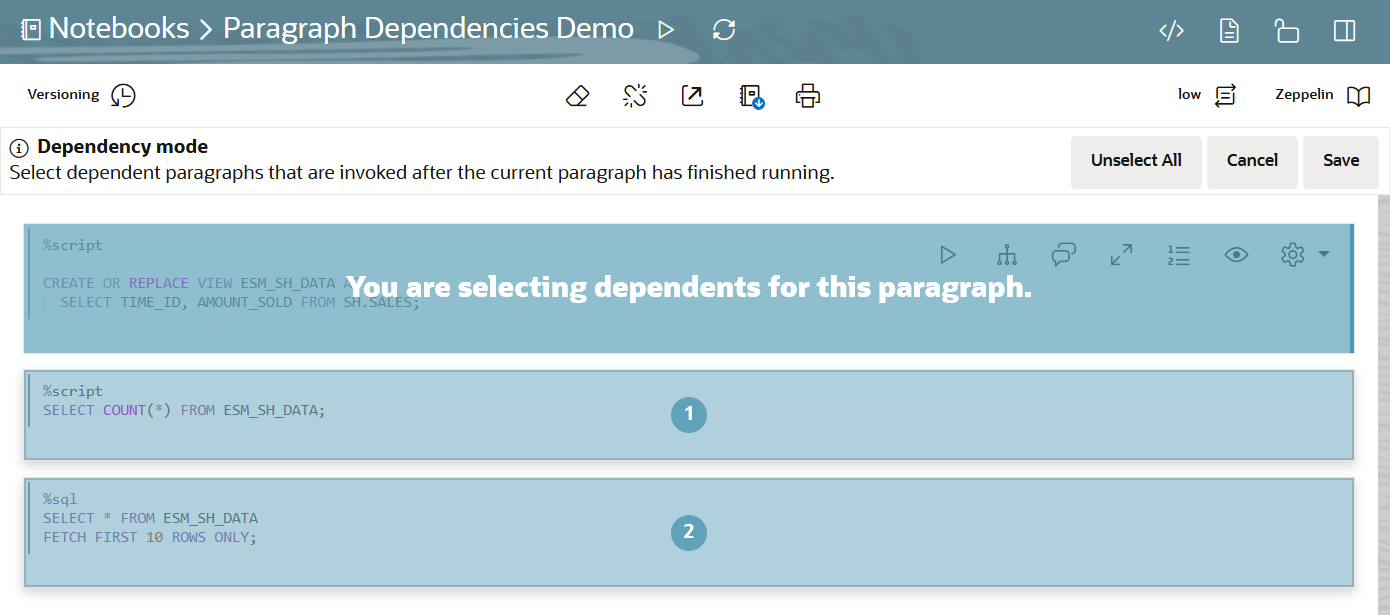
Paragraph Dependencies allow you to add dependencies between paragraphs. The dependent paragraphs automatically run after the original paragraph is run, according to the order of dependency.
Parent topic: Oracle Machine Learning Notebooks
4.1.2.1 Work with Notebook Versions in the Notebook Editor
By creating versions of your notebook, you can archive your work in a notebook.
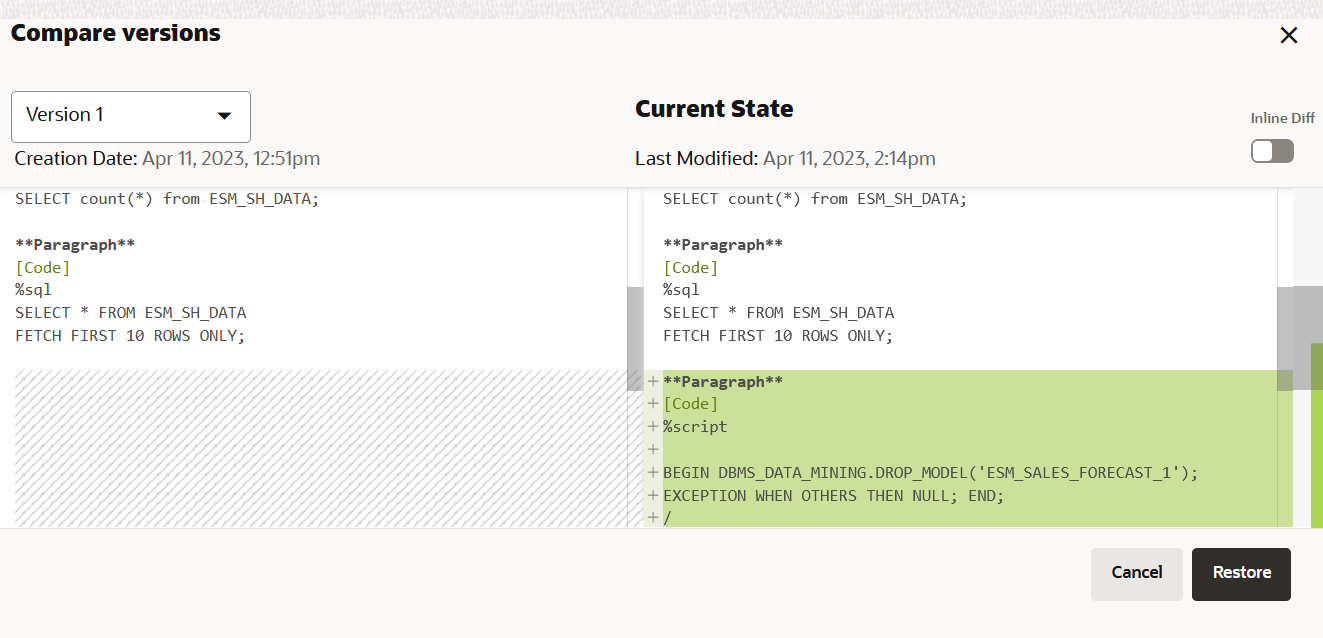
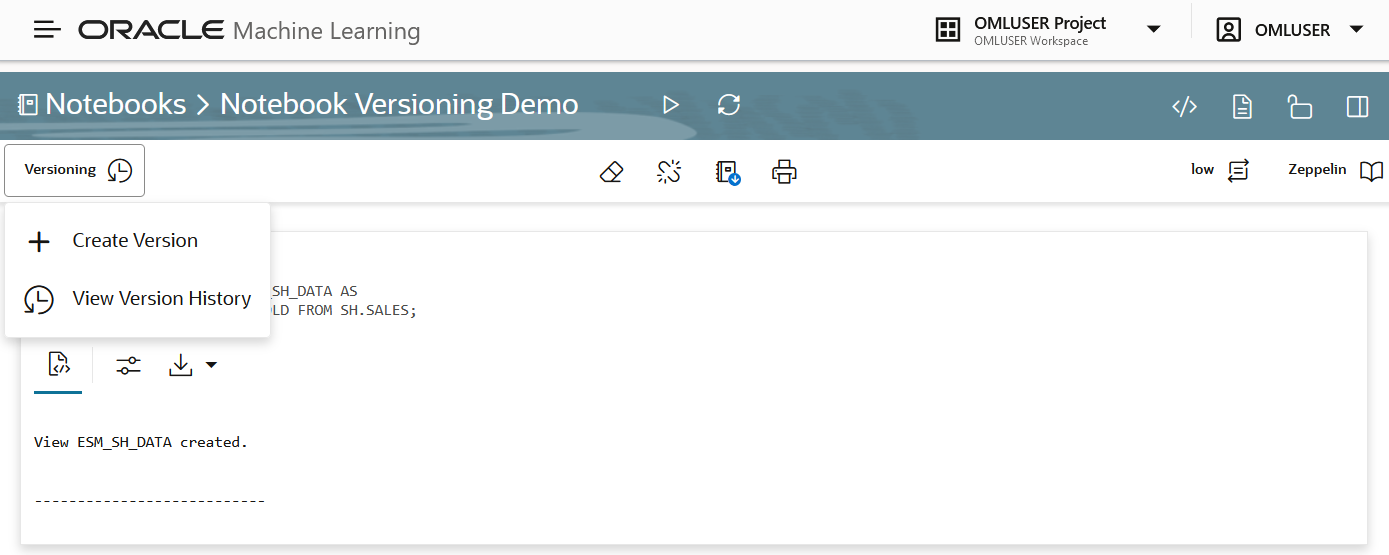
- The original notebook Notebook Versioning Demo, is edited to add a script to build a machine learning model.
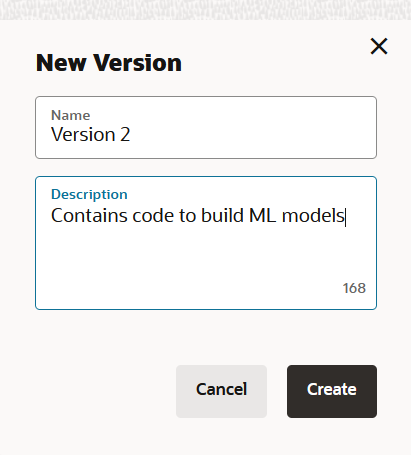
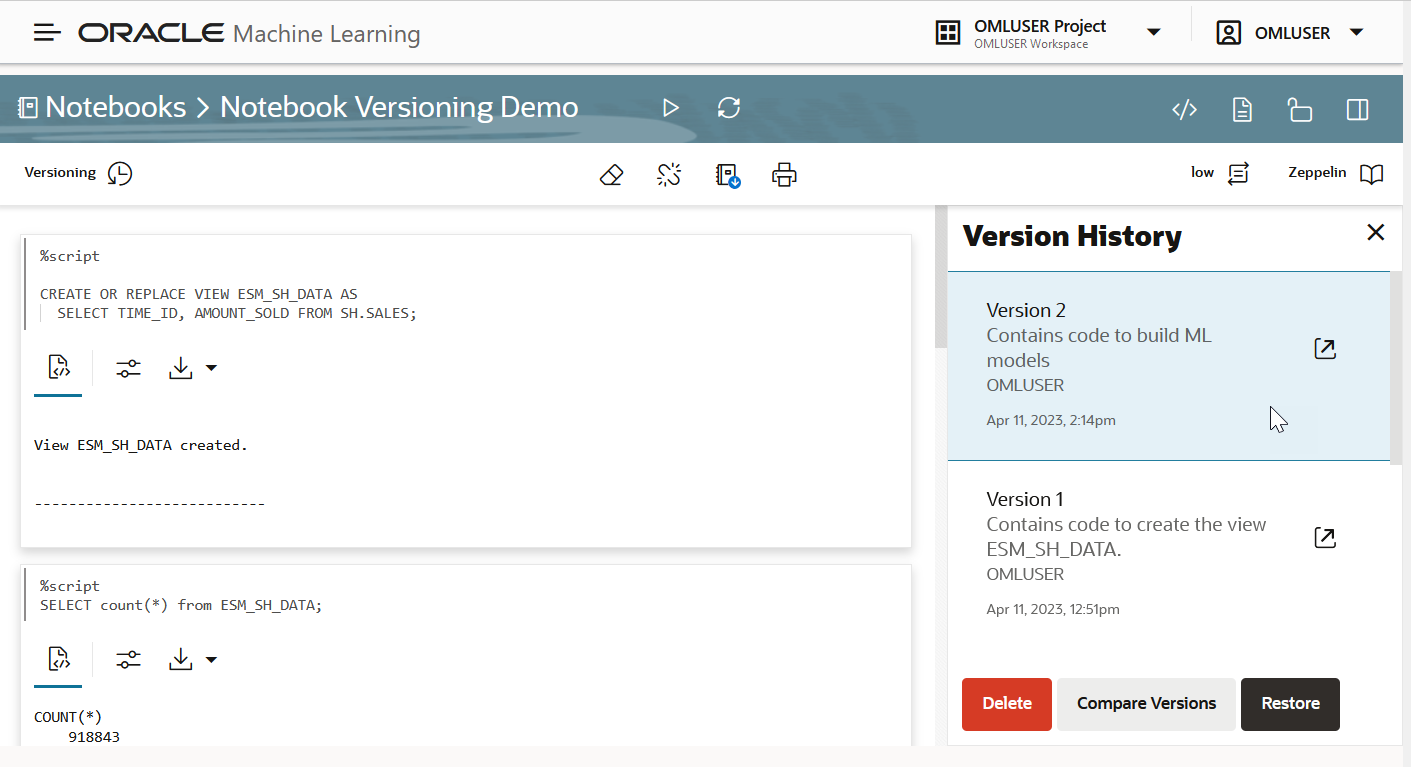
- The Notebook Versioning Demo notebook is then versioned as Version 2 to archive the code to build the machine learning model.
- The Version 2 and Version 1 of the Notebook Versioning Demo notebook are compared using the Compare Versions feature.
Note:
A versioned notebook is non-editable. If you want to make any changes to a particular version of a notebook, you must restore that version to edit it.Parent topic: Edit your Oracle Machine Learning Notebook
4.1.2.2 Create Paragraph Dependencies
Paragraph Dependencies allow you to add dependencies between paragraphs. The dependent paragraphs automatically run after the original paragraph is run, according to the order of dependency.
Parent topic: Edit your Oracle Machine Learning Notebook
4.1.3 Manage Oracle Machine Learning Notebooks
The Notebooks page lists all the notebooks—both Oracle Machine Learning notebooks and GitHub notebooks.
Note:
The Version and Edit options are not enabled for GitHub notebooks. For GitHub notebooks, open and edit the notebook in the editor, and use the Version Control option to commit the changes to the GitHub repository.- The icon
 indicates that the notebook is imported from a GitHub repository.
- The icon
 indicates that the notebook has a job associated with it.
Note:
A GitHub notebook can also have a job associated with it.- Create: Click Create to create a new notebook.
- Edit: Click on a notebook row to select
it and click Edit. You can edit the notebook name,
and add comments in the Edit Notebook dialog box.
Note:
The Edit option is not enabled for GitHub notebooks. - Delete: Click on a notebook row to select it and click Delete.
- Duplicate: Click on a notebook row to select it , and
click Duplicate. This creates a copy of a notebook,
and the duplicate copy of the is listed on the Notebooks page with the
suffix
_1in the notebook name. - Move: To move notebooks from one project to another project in the same or different workspace.
- Copy: To copy notebooks to another project in the same or different workspace. When you copy notebooks, the a copy of the notebook remains in the original project.
- Save as Template: To save a notebook as a template, select the notebook and click Save as Template. In the Save as Template dialog, you can define the location of the template to save it in Personal or Shared under Templates.
- Import: To import a notebook, click
Import. one of the following options:
- File: To import a notebook as a
.jsonfile - Git: To import a notebook from a remote GitHub repository. This clones the notebook.
- File: To import a notebook as a
- Export: To export a notebook, click
Export. You can export Notebooks in the
.dsnbformat, Zeppelin format(.json )file and in Jupyter format (.ipynb), and later import them in to the same or a different environment. - Version: To create versions of a
notebook, select it and click Version. The Versions
page for that particular notebook opens. Here, you can create a new version
of the notebook by clicking +Version. The Create
Version dialog opens. Enter a name of the notebook version, a description,
and click OK. The new version of the notebook gets
created by the same name with a suffix
_2for the second version. For subsequent versions, suffix (number) increments by one. To revert to an older version by clicking Revert Version. You also have the option to delete any version of the notebook. Click Back to Notebooks to go to the OML Notebooks page.Note:
The Version option is not enabled for GitHub notebooks.Note:
You can also version a notebook by opening it, and then clicking on the option. By using this option, you can create new versions, view
version history, restore older versions, and delete any older versions
of the notebook that you have opened.
- Name: This is the name of the notebook.
- Comment: This is the comment you entered when creating the notebook.
- Created on: This is the date on which the notebook was first created.
- Created by: This is the name of the user who created the notebook.
- Last Update: This is the date on which the notebook was last updated.
- Last Updated By: This is the name of the user who last updated the notebook.
- Status: The following statuses are available for any
notebook:
- Created—Indicates that the notebook has been created but not yet run
- Running—Indicates that the notebook is currently running
- Succeeded—Indicates that the notebook has run successfully without any errors
- Stopped—Indicates that the notebook run has been canceled while it was running
- Failed—Indicates that the notebook run has failed or has being rejected
- Work with Notebook Versions on the Notebooks Page
By creating versions of your notebook, you can archive your work in a notebook.
Parent topic: Oracle Machine Learning Notebooks
4.1.3.1 Work with Notebook Versions on the Notebooks Page
By creating versions of your notebook, you can archive your work in a notebook.
Note:
A versioned notebook is non-editable. If you want to make any changes to a particular version of a notebook, you must restore that version to edit it.Parent topic: Manage Oracle Machine Learning Notebooks
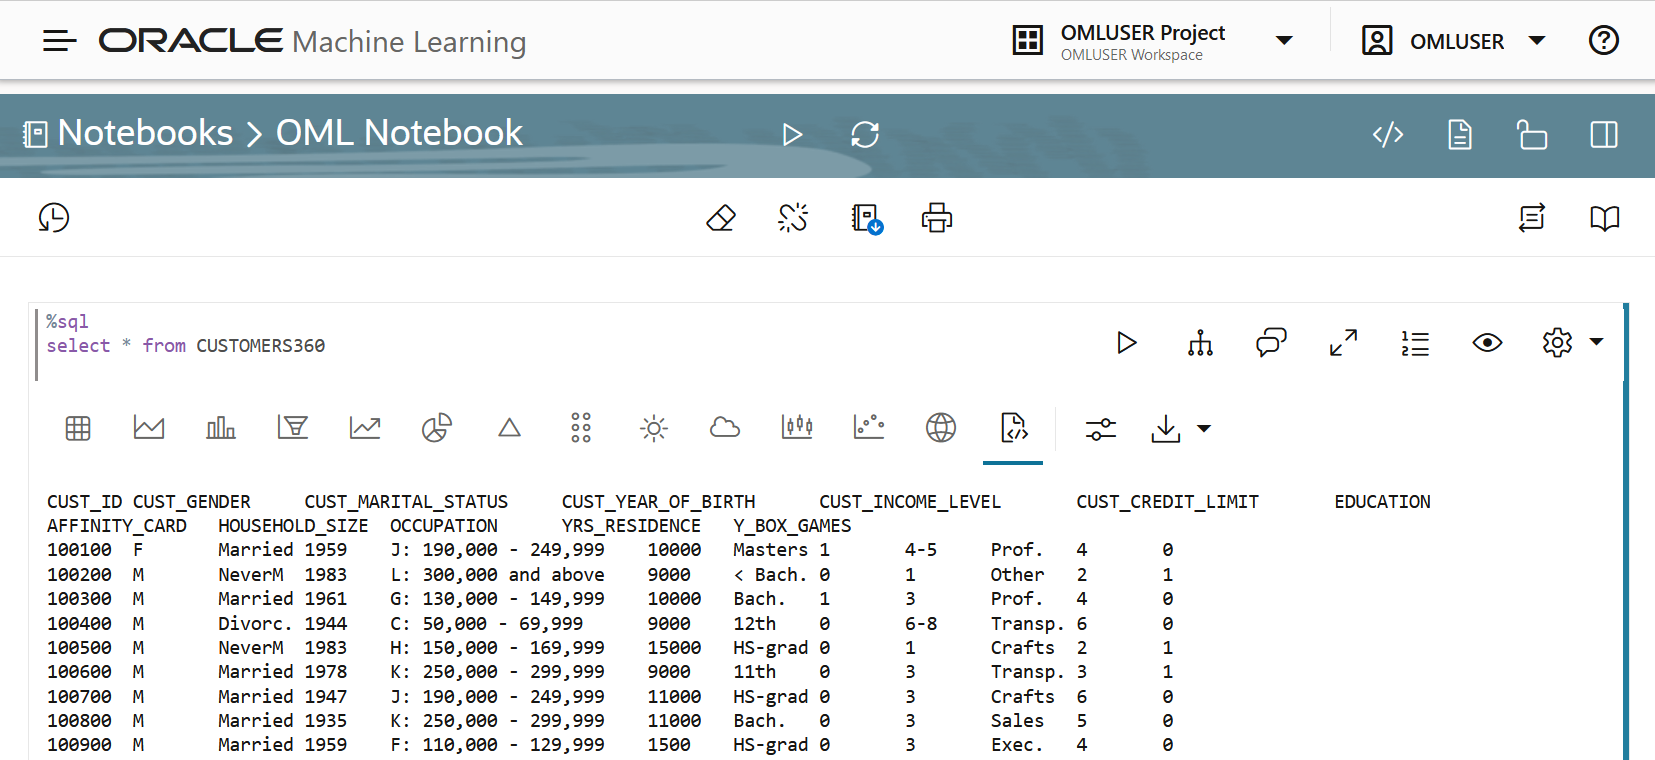
 to run all paragraphs in the notebook
 to invalidate and reset the notebook session.
 option on the Notebooks page.
 to clear paragraph results.
 to clear paragraph dependencies.
 to export the notebook. You can export the notebook as a
 to print the notebook
 to hide the code of all paragraphs in the notebook
 to hide the results of all the paragraph in the notebook
 to enable read-only mode for this notebook.
 to show the edit panel. The edit options in the panel are the same
edit options available for the paragraph. Clicking the panel icon opens the
edit pane on the right, and the edit tool bar in the paragraph is hidden.
 to change the notebook service level to either low, medium, high,
or GPU.
 to switch the OML notebook to either Zeppelin or Jupyter
notebook
 to run the selected paragraph
 to enter into Dependency Mode. In Dependency Mode, you must select
and deselect paragraphs in order to add or remove them as dependents.
 to open the Comments dialog. Type in your comments here, and press

 to view the notebook paragraph in full screen mode. To view the
paragraph in the normal mode, click the collapse icon.
 to show line numbers in the notebook paragraph.
 to view the paragraph title, code, results, and the paragraph
settings.
 to :
to :
 to view the paragraph in HTML format
 to view the paragraph in text format
 to adjust settings of the notebook paragraph output. This setting
is specifically applicable to visualizations in graphs, charts etc.
 to download the paragraph as a text file, or as .png or .svg files,
as applicable, for paragraphs that contains graphs or charts as
output.
 to open the selected version.

