This 10-minute tutorial shows you how to use Enterprise Manager
Express to create and manage roles.
Select the Oracle Database release:
Background
In most systems, it is time-consuming and error-prone to grant
necessary privileges to each user individually. Oracle software
provides for easy and controlled privilege management through
roles. Roles are named groups of related privileges that are
granted to users or to other roles. Roles are designed to ease
the administration of privileges in the database and, therefore,
improve security.
What Do You Need?
Oracle Database 18c19c
Note:Starting with Oracle Database 19c,
Oracle EM Express, the default management option for Oracle
Database, is based on Java JET technology. Currently, only the Performance menu is available in the 19c JET version. Therefore, we
are using the 18c Flash Oracle EM Express in our tutorials. Use the following
command to revert to Flash Oracle EM Express:
SQL> @?/rdbms/admin/execemx emx
To return to 19c JET Oracle EM Express, use the following
command:
SQL> @?/rdbms/admin/execemx omx
View
Roles
Enter the URL for the Enterprise Manager Database Express
for PDB in your browser and log in as the SYSTEM user.
Description of the
illustration a1
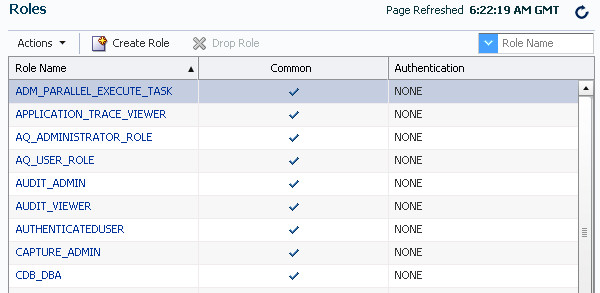
Select Roles in the
Security menu.
Description of the
illustration a2
Note: If you log in as the Enterprise Manager Database Express
for CDB, you will not see Profiles in the Security menu.
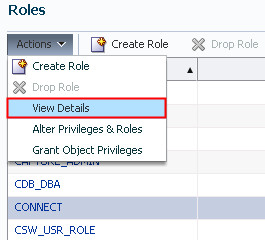
To view the privileges granted to a role, select a role of
interest. The CONNECT role is selected in this example. Click
View Details in the
Actions menu.
Description of the
illustration a4
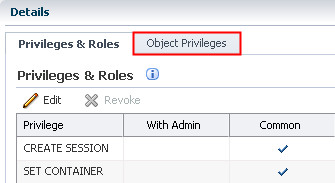
The Privileges & Roles tab shows the system privileges
and roles granted to the CONNECT role. Click the Object
Privileges tab.
Description of the
illustration a5
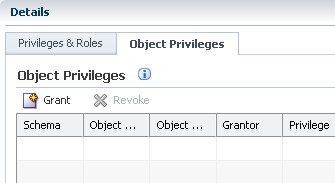
The Object Privileges tab shows the object privileges
granted to the role. There are no object privileges granted to
the CONNECT role.
Description of the
illustration a6
Click ORCL / ORCLPDB
to return to the Database Home page.
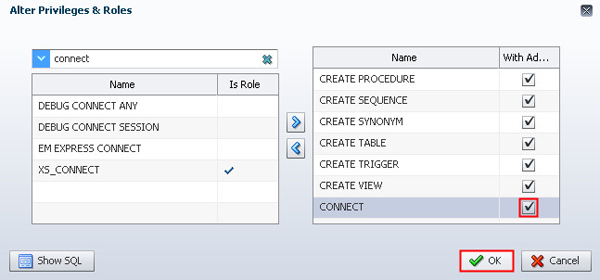
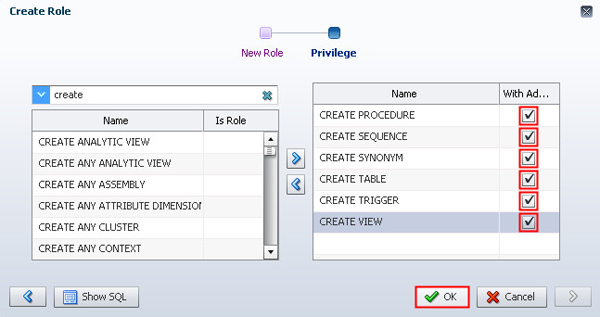
Select the privileges to grant to the role by selecting the
privilege name and clicking the right arrow. Select CREATE
PROCEDURE, CREATE
SEQUENCE, CREATE
SYNONYM, CREATE
TABLE, CREATE
TRIGGER, and CREATE
VIEW.
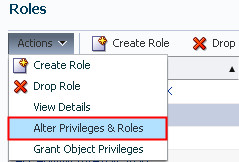
Select the role to modify. In this example, the APPDEV role
is modified. Select "Alter
Privileges & Roles" in the Actions menu.
Description of the
illustration c2
 Administer
Roles Using EM Express
Administer
Roles Using EM Express Before You Begin
 View
Roles
View
Roles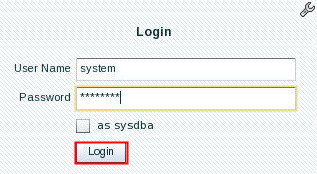

 Create
a Role
Create
a Role 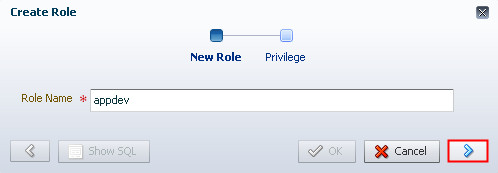

 Modify
a Role
Modify
a Role