 Perform
Advanced Installation for Container Database
Perform
Advanced Installation for Container Database Before You Begin
This tutorial shows you how to perform the advanced installation of container database using the Oracle Universal Installer (OUI).
Select the Oracle Database release:
Background
The Oracle Universal Installer (OUI) is
a graphical user interface utility that enables you to install
new Oracle Database software on your machine. During
the installation process, you are given the opportunity to
create a database. If you
select database creation, OUI does installation of software
first followed by automatic invocation of Oracle Database
Configuration Assistant (DBCA) to guide you through
the process of creating and configuring a database. If you
choose to only install the database software using OUI, then you
must run DBCA manually after the installation to create and
configure the database.
In Oracle Database 12c Release 2 the concept of multitenant environment has been introduced. The multitenant architecture enables an Oracle database to function as a multitenant container database (CDB) that includes zero, one, or many customer-created Pluggable Databases (PDBs). A PDB is a portable collection of schemas, schema objects, and nonschema objects that appears to an Oracle Net client as a non-CDB. All Oracle databases before Oracle Database 12 were non-CDBs.
A CDB includes the following components:
- Root: The root, named CDB$ROOT, stores Oracle-supplied metadata and common users. An example of metadata is the source code for Oracle-supplied PL/SQL packages. A common user is a database user known in every container. A CDB has exactly one root.
- Seed: The seed, named PDB$SEED, is a template that you can use to create new PDBs. You cannot add objects to or modify objects in the seed. A CDB has exactly one seed.
- PDBs: A PDB appears to users and applications as if it were a non-CDB. For example, a PDB can contain the data and code required to support a specific application. A PDB is fully backward compatible with Oracle Database releases before Oracle Database 12c.
Each of these components is called a container. Therefore, the root is a container, the seed is a container, and each PDB is a container. Each container has a unique container ID and name within a CDB.
What Do You Need?
Before installing the software, OUI performs several automated checks to ensure that your computer fulfills the basic hardware and software requirements for an Oracle Database installation. If your computer does not meet a requirement, then an error message is displayed. The requirements may vary depending upon the type of computer and operating system you are using, but include the following:
- Minimum of 1 GB of physical memory
- Sufficient paging space
- Installation of appropriate service packages and/or patches
- Use of appropriate file system format
- Access to the Oracle Database 18c19c
- General knowledge of product installation
 Install
Container Database
Install
Container Database
- Log on to your computer as a member of the administrative group that is authorized to install Oracle Database software and create a database.
- If you are installing from distribution media, insert the distribution media for Oracle Database into your computer. The Auto-run feature opens the Select a Product to Install window automatically. If you have downloaded the installation software from the Oracle Web site, follow the instructions on the site to invoke the Oracle Universal Installer.
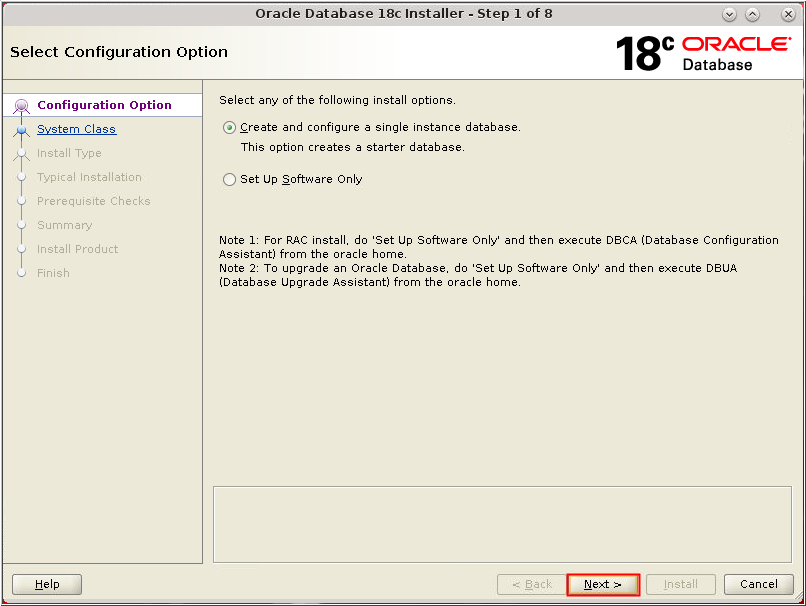
- The Select Configuration
Option window appears. Select "Create and configure
a single instance database." Click Next.
Description of the illustration db_3 - The Select Configuration
Option window appears. Select "Create and configure
a single instance database." Click Next.

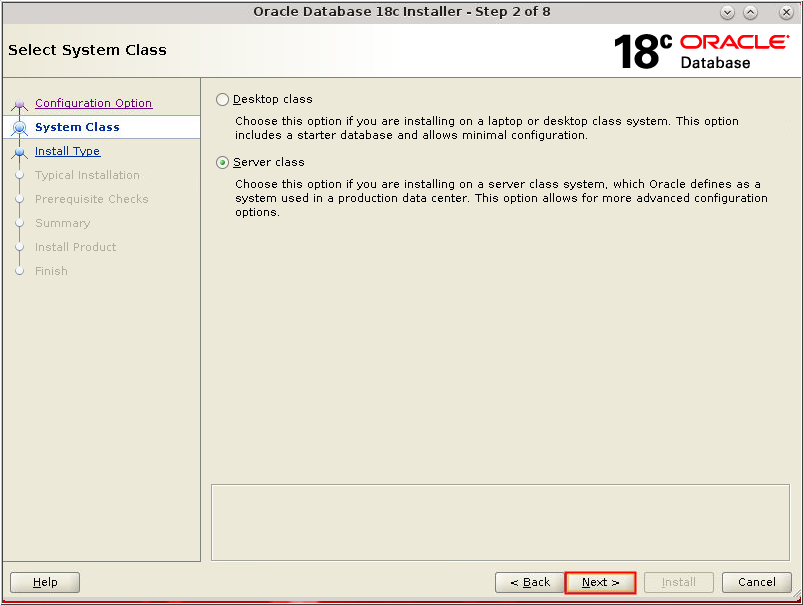
Description of the illustration db_3 - The System Class window
appears. Select Desktop Class or Server Class depending on
the type of system you are using. In this scenario, we have
chosen Server Class.
Click Next.
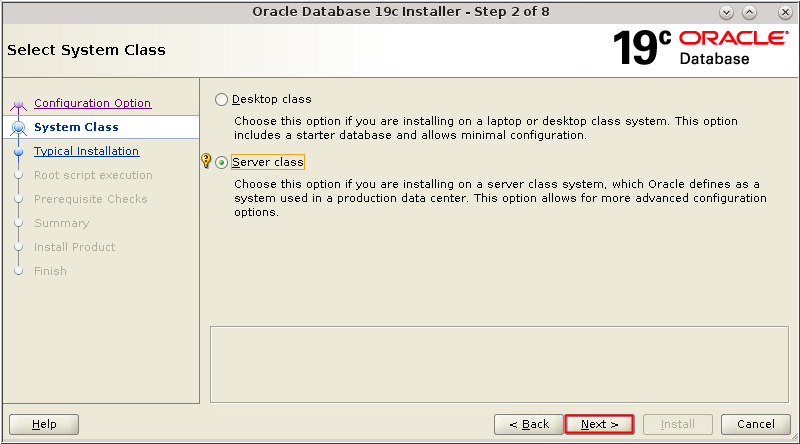
Description of the illustration db_4 - The System Class window
appears. Select Server Class and click Next.
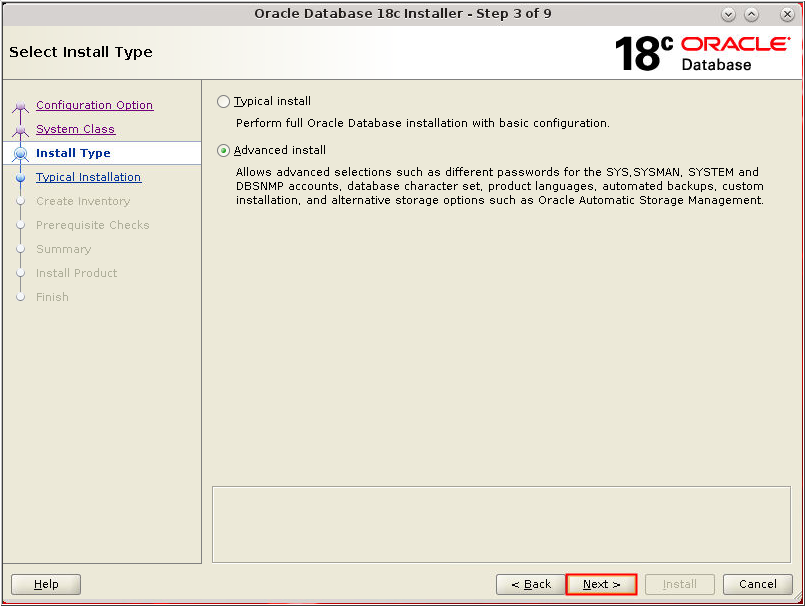
Description of the illustration db_4 - The Select Install Type window
appears. Select "Advanced install." Click Next.
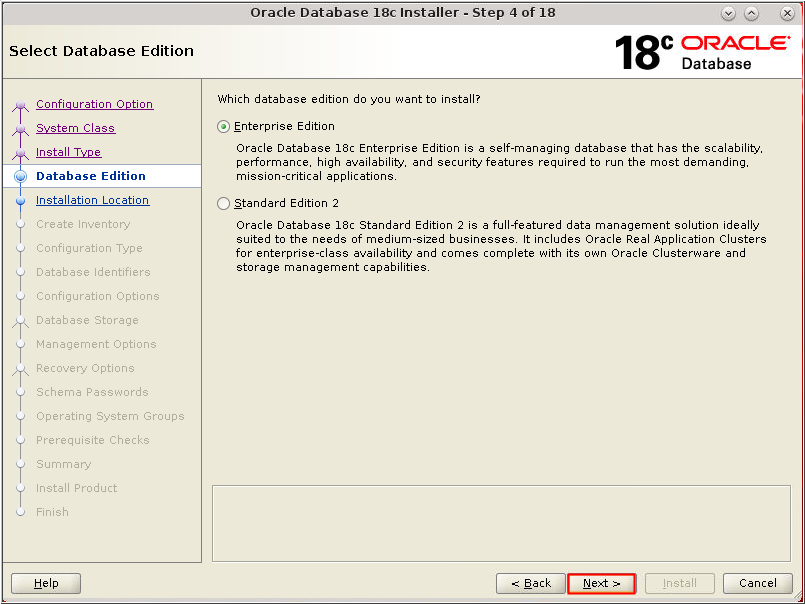
Description of the illustration db_5 - The Select Database Edition
window appears. Select Enterprise Edition.
Click Next.
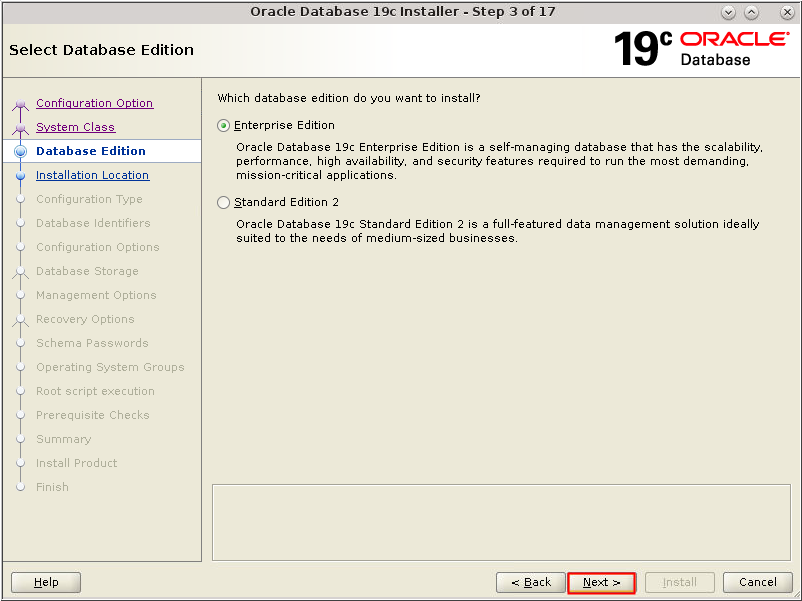
Description of the illustration db_6 - The Select Database Edition
window appears. Select Enterprise Edition.
Click Next.
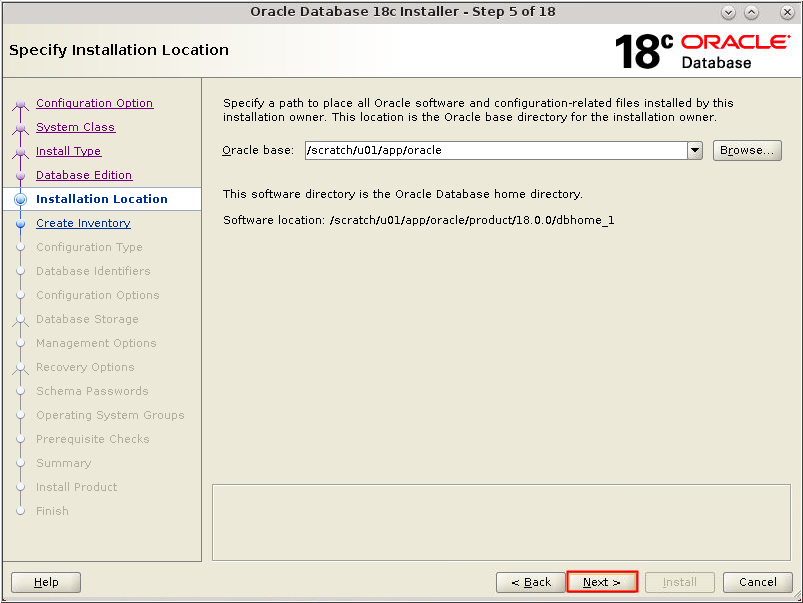
Description of the illustration db_6 - The Specify Installation
Location window appears. Accept the default values or change
as appropriate to your installation. Click Next.
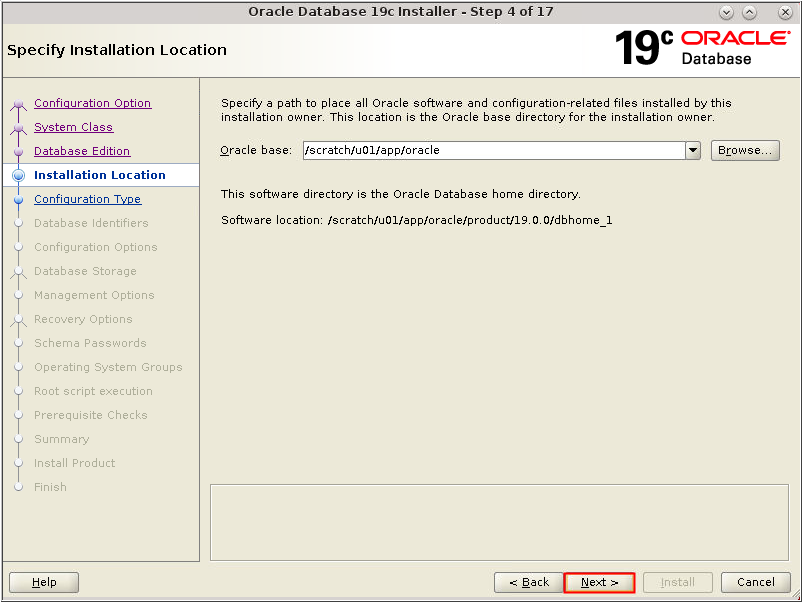
Description of the illustration db_7 - The Specify Installation
Location window appears. Accept the default values or change
as appropriate to your installation. Click Next.
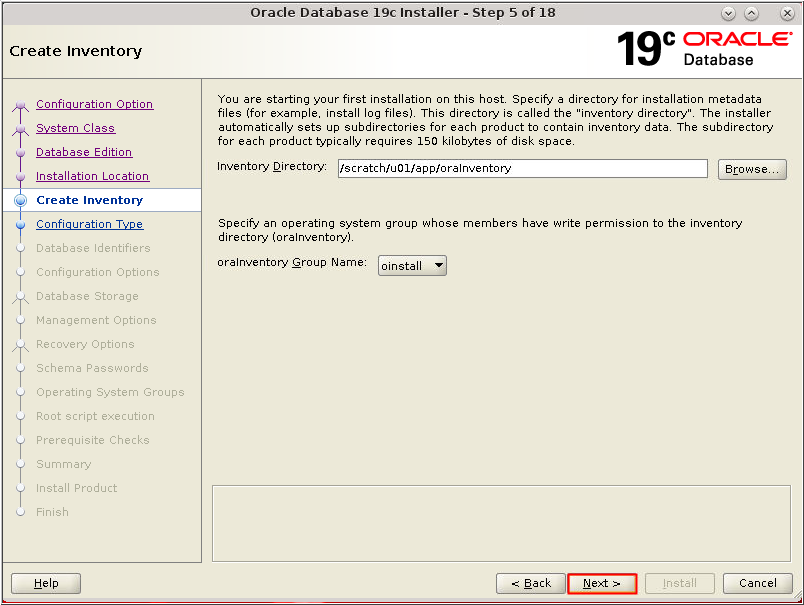
Description of the illustration db_7 - The Create Inventory window
appears. Accept the defaults and click Next.
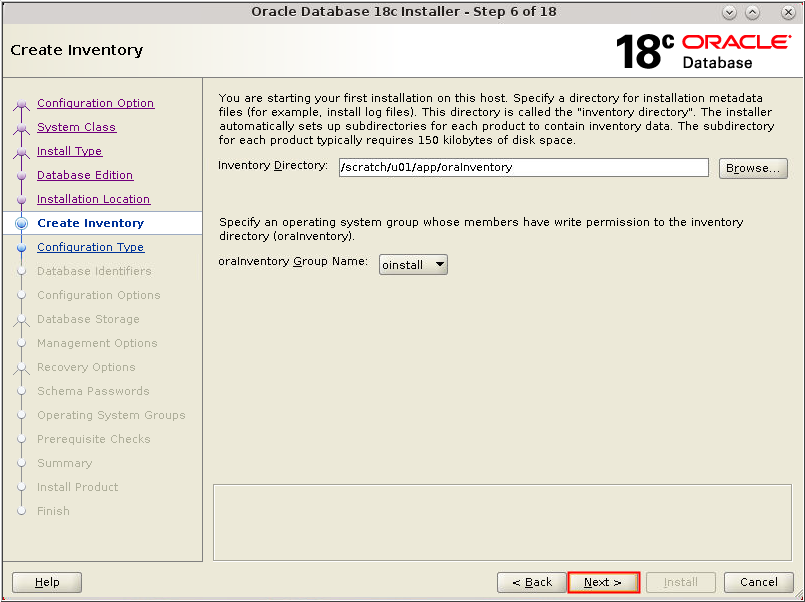
Description of the illustration db_8 - The Create Inventory window
appears. Accept the defaults and click Next.
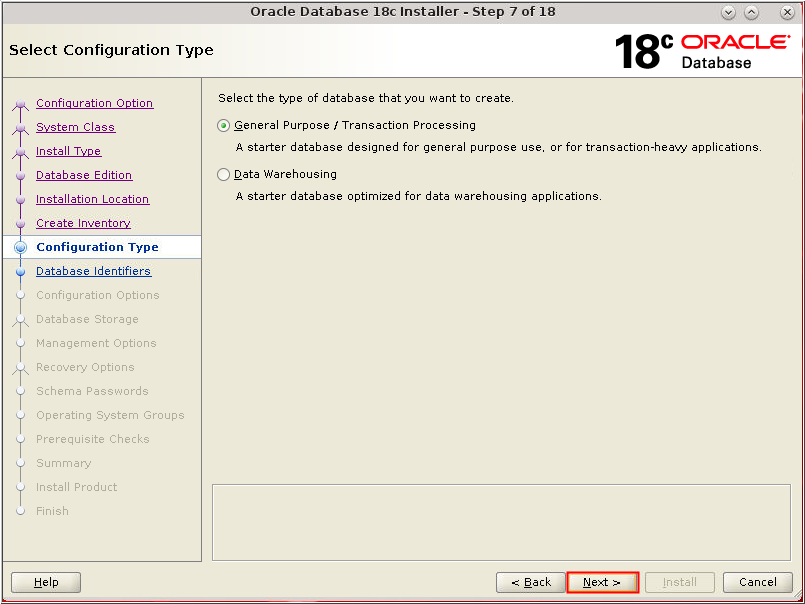
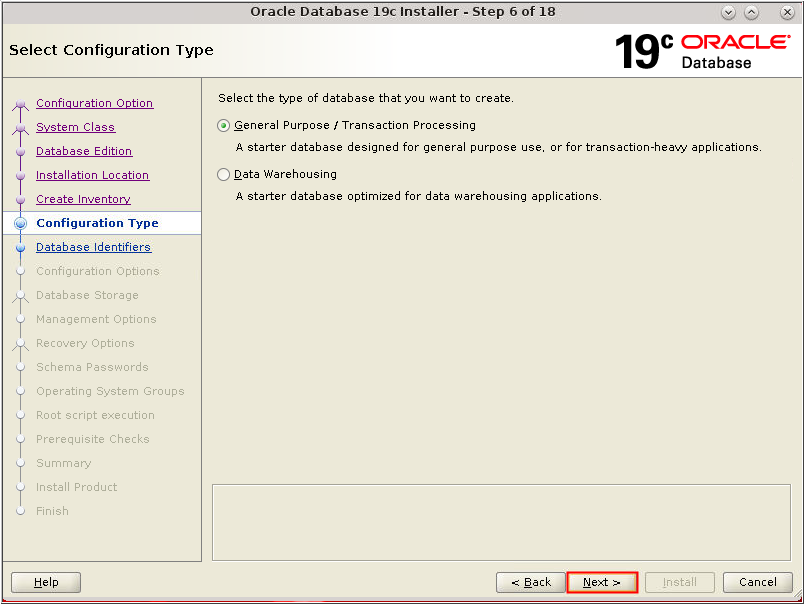
Description of the illustration db_8 - The Select Configuration Type
window appears. Select "General Purpose/Transaction
Processing." Click Next.
Description of the illustration db_9 - The Select Configuration Type
window appears. Select "General Purpose/Transaction
Processing." Click Next.
Description of the illustration db_9 - The Specify Database
Identifiers window appears. Accept the default values or
change as necessary for your installation. Make sure that the Create
as Container database option is selected as part
of default install settings and click Next.
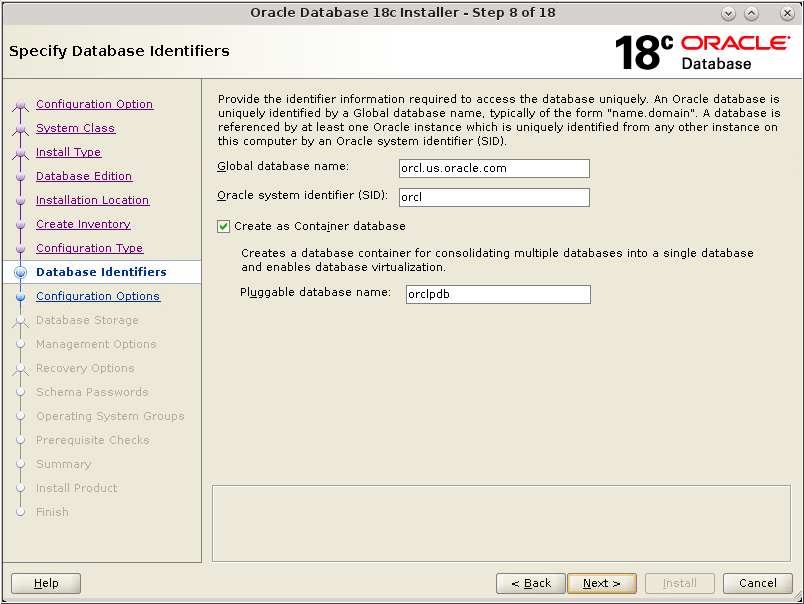
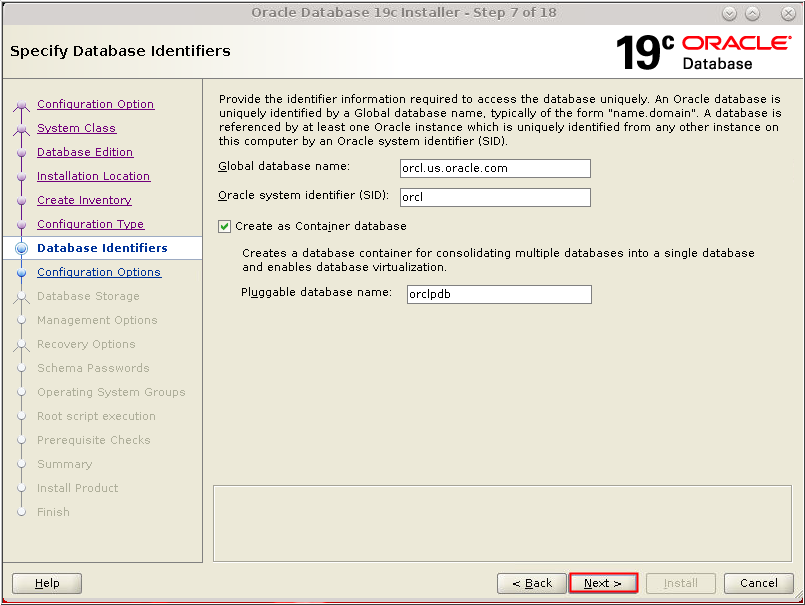
Description of the illustration db_10 - The Specify Database
Identifiers window appears. Accept the default values or
change as necessary for your installation. Make sure that the Create
as Container database option is selected as part
of default install settings and click Next.
Description of the illustration db_10 - The Specify Configuration Options
window appears. Select the amount of memory you wish to
allocated and click the "Character
sets" tab.
Note: In this tutorial, 5760 MB is allocated for memory. You may choose a different value based on your requirement.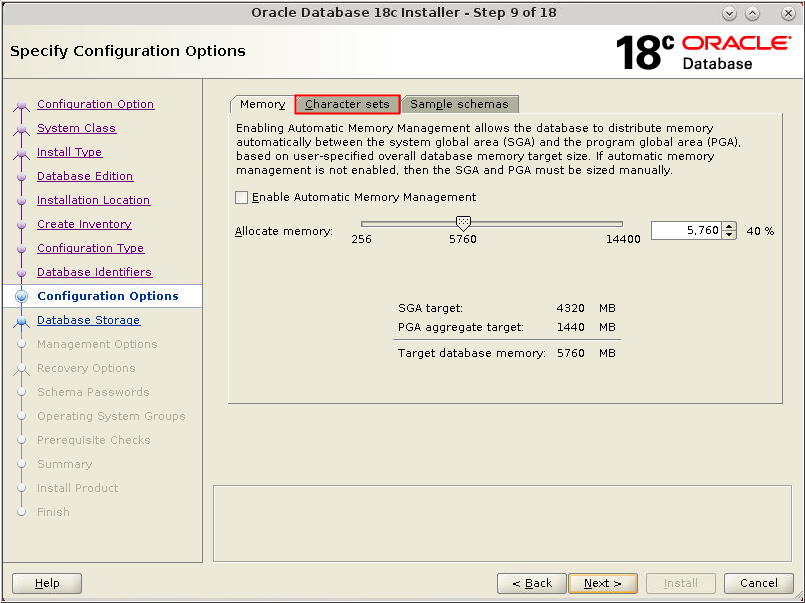
Description of the illustration db_11 - The Specify Configuration Options
window appears. Select the amount of memory you wish to
allocated and click the "Character
sets" tab.
Note: In this tutorial, 5760 MB is allocated for memory. You may choose a different value based on your requirement.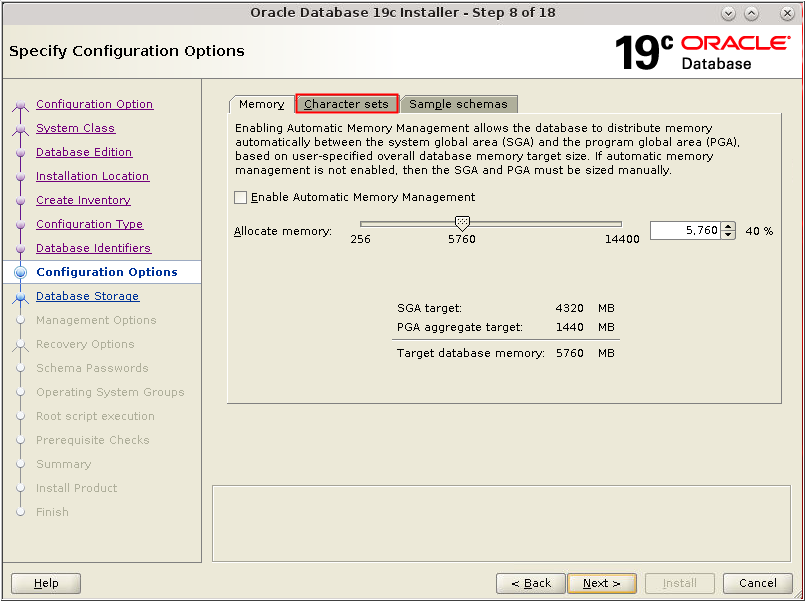
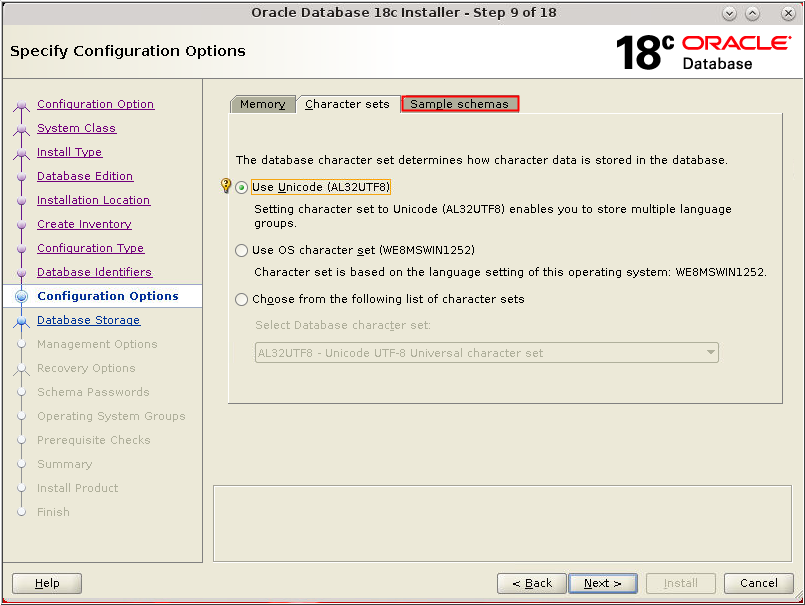
Description of the illustration db_11 - On the "Character sets" tab
ensure that "Use Unicode (AL32UTF8)" is
selected or select as appropriate to your installation.
Click the Sample Schemas tab.
Description of the illustration db_12 - On the "Character sets" tab
ensure that "Use Unicode (AL32UTF8)" is
selected or select as appropriate to your installation.
Click the Sample Schemas tab.

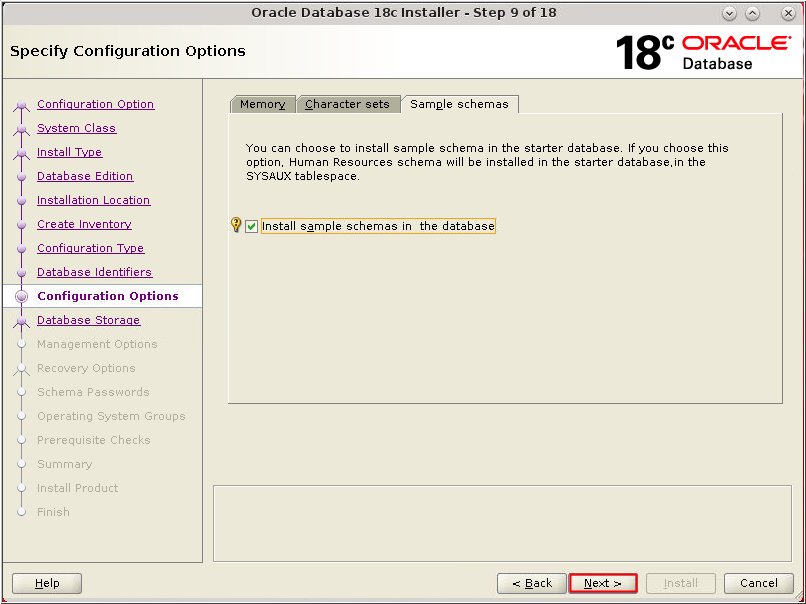
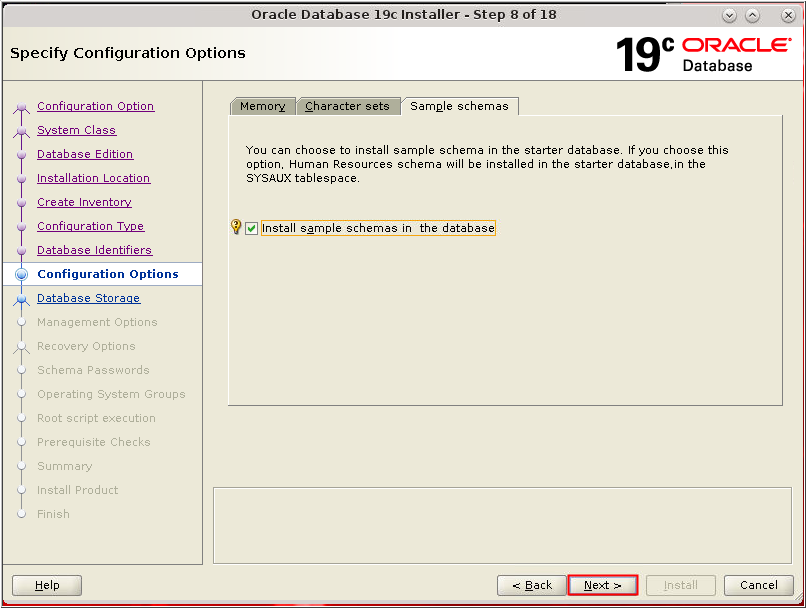
Description of the illustration db_12 - On the Sample Schemas tab,
select "Install sample
schemas in the database." Click Next.
Description of the illustration db_13 - On the Sample Schemas tab,
select "Install sample
schemas in the database." Click Next.
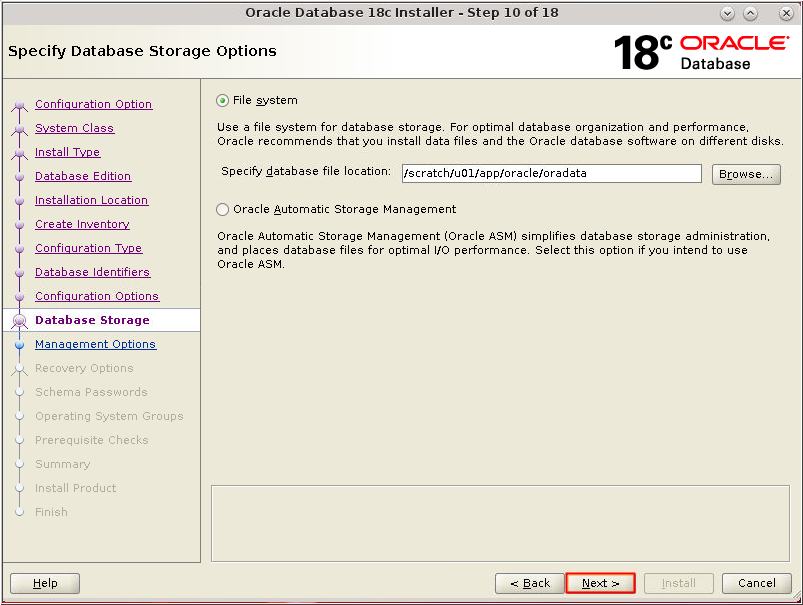
Description of the illustration db_13 - The Specify Database Storage
Options window appears. Accept the default value for
File System and click Next.
Description of the illustration db_14 - The Specify Database Storage
Options window appears. Accept the default value for
File System and click Next.

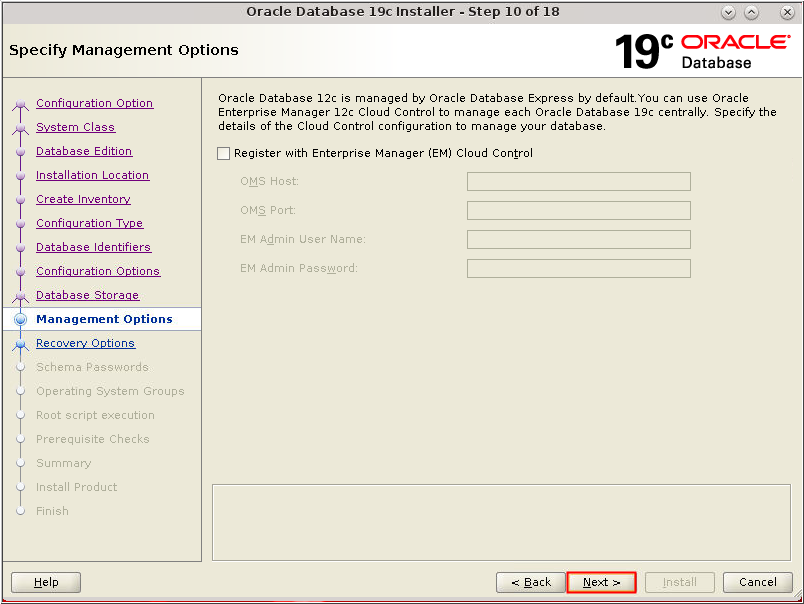
Description of the illustration db_14 - The Specify Management Options
window appears. Click Next.
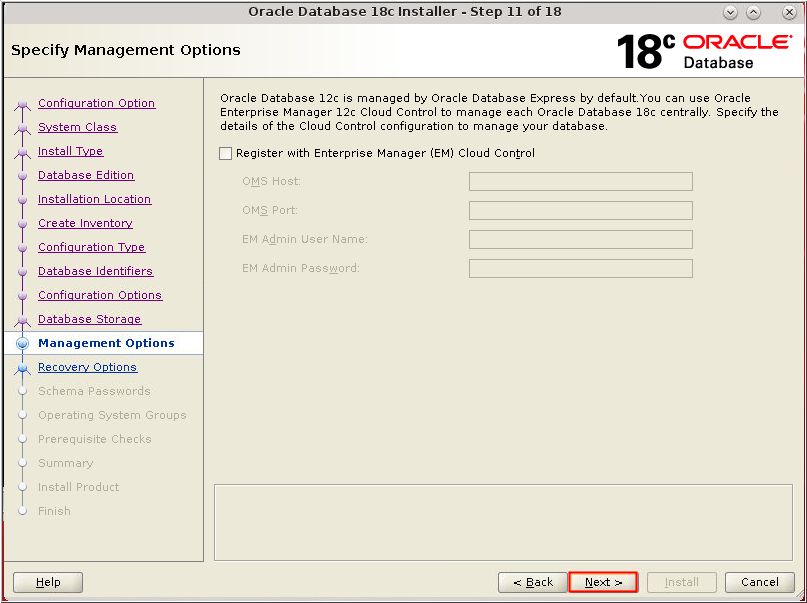
Description of the illustration db_15 - The Specify Management Options
window appears. Click Next.
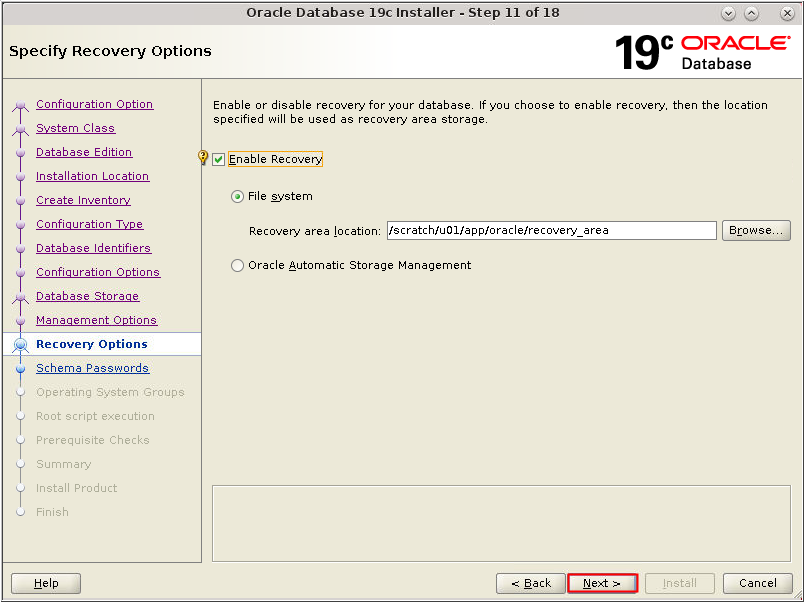
Description of the illustration db_15 - The Specify Recovery Options
window appears. Select "Enable Recovery."
Click Next.
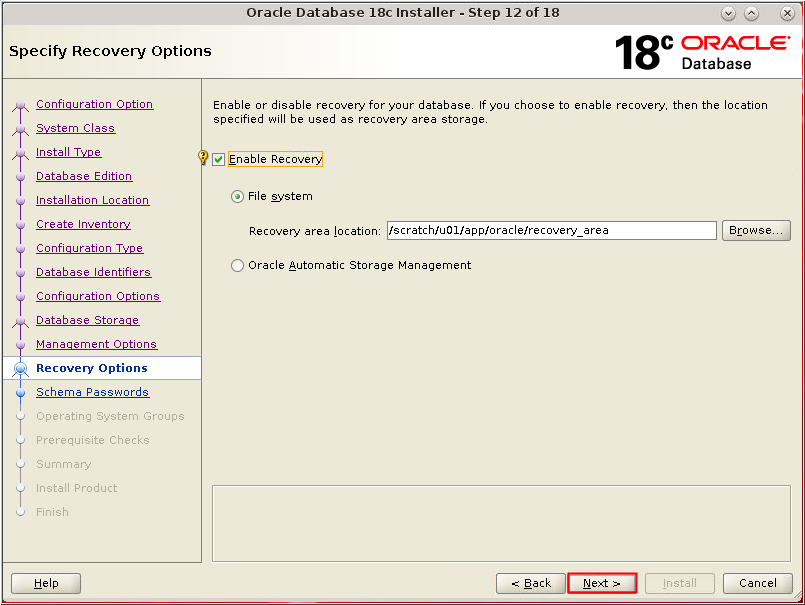
Description of the illustration db_16 - The Specify Recovery Options
window appears. Select "Enable Recovery."
Click Next.
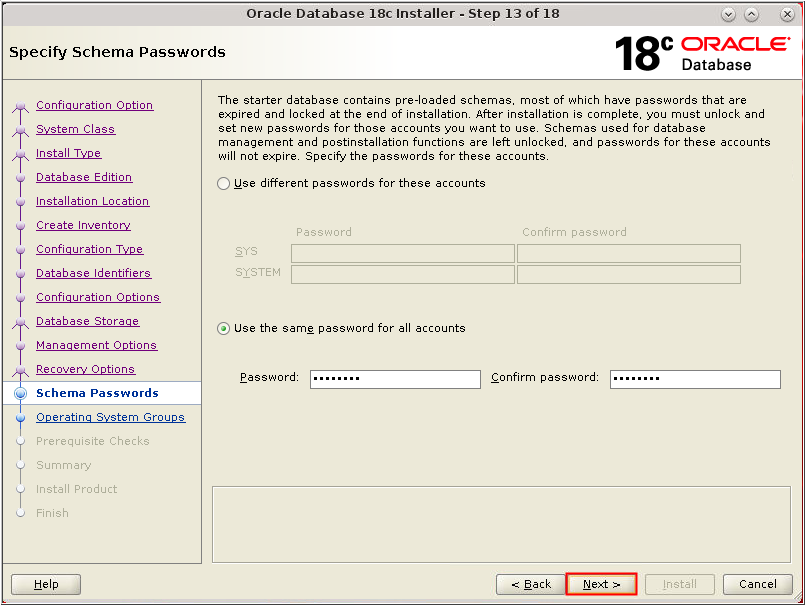
Description of the illustration db_16 - The Specify Schema Passwords
window appears. Specify separate passwords for the SYS
and SYSTEM users or select "Use the same
password for all accounts." Enter the password(s) in the
Password and "Confirm password" fields. Click Next.
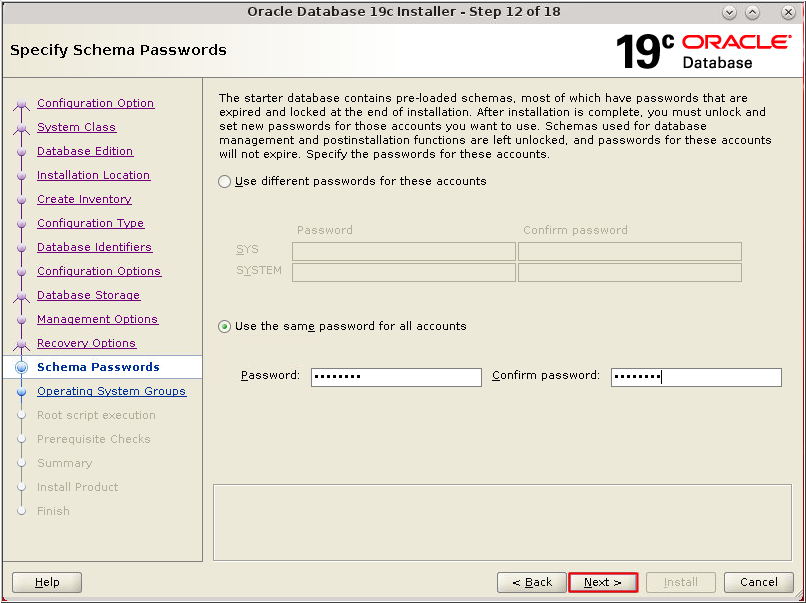
Description of the illustration db_17 - The Specify Schema Passwords
window appears. Specify separate passwords for the SYS
and SYSTEM users or select "Use the same
password for all accounts." Enter the password(s) in the
Password and "Confirm password" fields. Click Next.
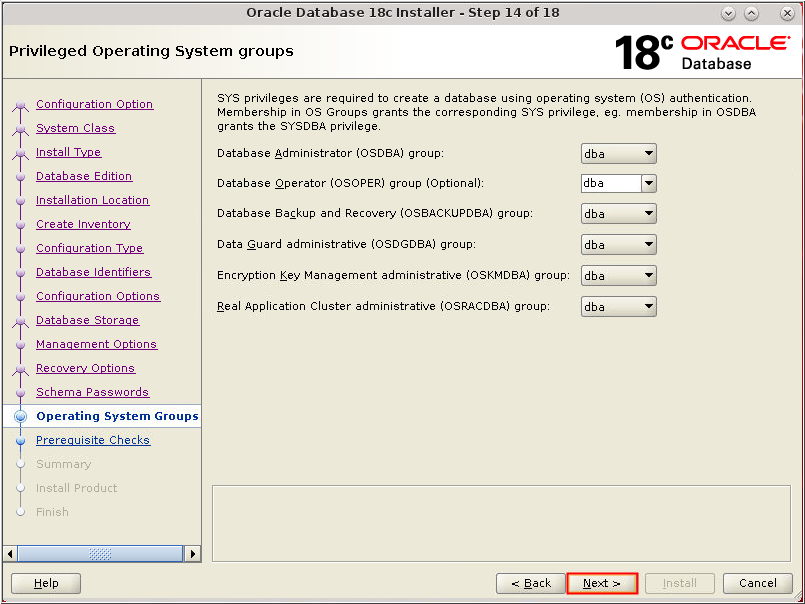
Description of the illustration db_17 - The Privileged Operating
System Groups window appears. Select the appropriate
operating system groups for each group. Click Next.
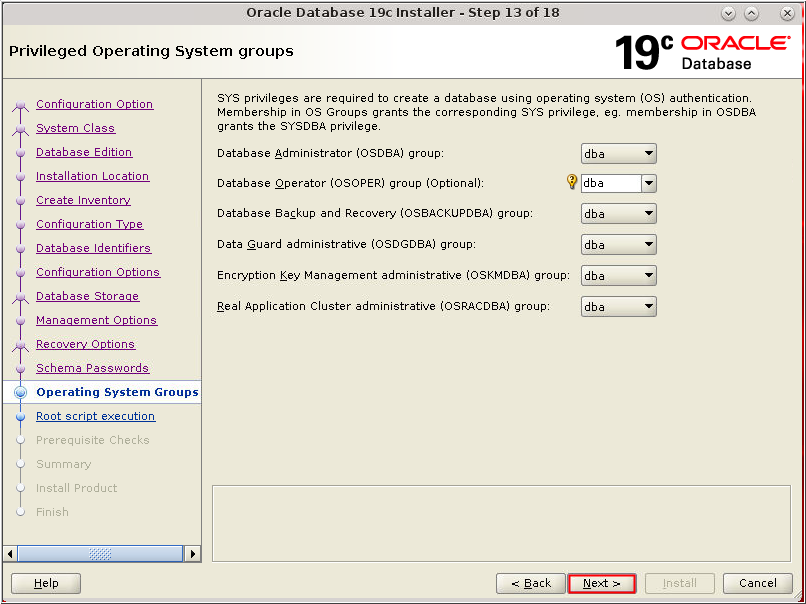
Description of the illustration db_18 - The Privileged Operating
System Groups window appears. Select the appropriate
operating system groups for each group. Click Next.
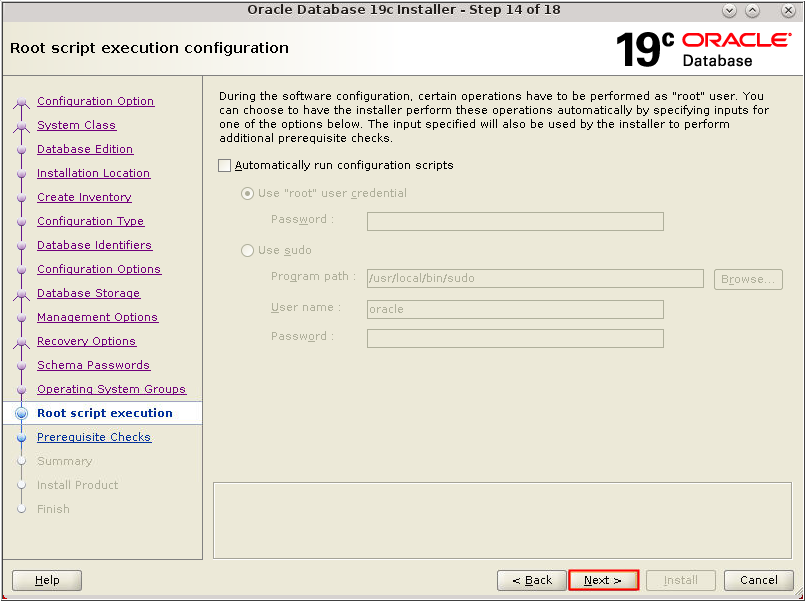
Description of the illustration db_18 - The Root script execute window
appears. For Linux and UNIX operating systems only, you are
prompted to run configuration scripts. To run root scripts
automatically, select Automatically run configuration scripts.
Alternatively, you can run the configuration scripts manually
as the root user. In this scenario, we have chosen to run the
configuration scripts manually. Click Next.
Description of the illustration db_18 - The Perform Prerequisite Checks window appears. After the prerequisite checks complete, the Installer advances to the next window.
- The Perform Prerequisite Checks window appears. After the prerequisite checks complete, the Installer advances to the next window.
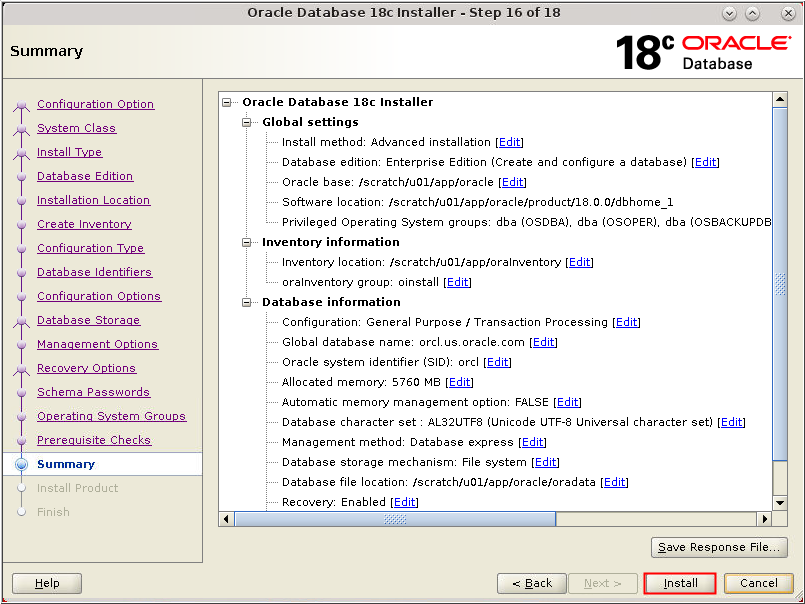
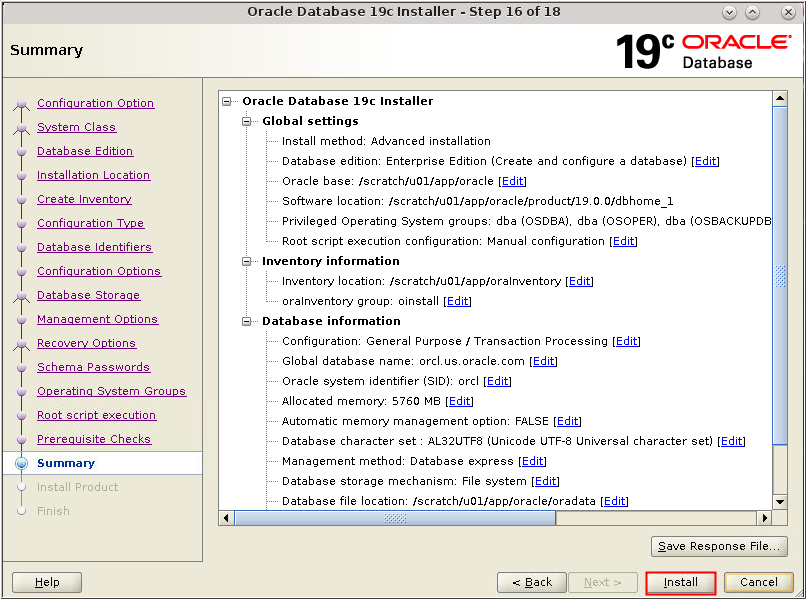
- The Summary window appears.
Review the settings. Click Install to
install the Oracle Database software and create the
database.
Description of the illustration db_20 - The Summary window appears.
Review the settings. Click Install to
install the Oracle Database software and create the
database.
Description of the illustration db_20 - The Install Product window appears.
- The Install Product window appears.
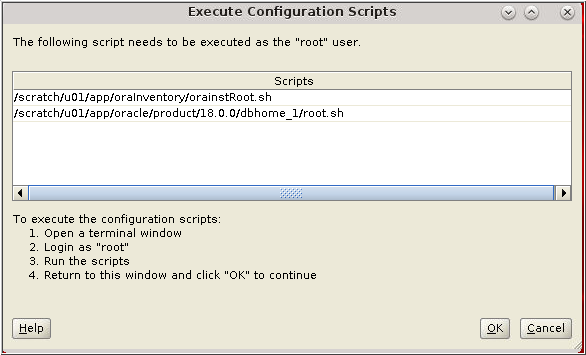
- The "Execute Configuration
scripts" window appears.
Description of the illustration db_22 - The "Execute Configuration
scripts" window appears.
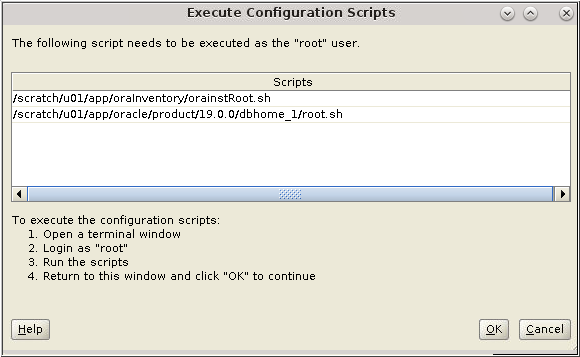
Description of the illustration db_22 - Open a terminal window and log in as the root
user. Execute the scripts as instructed. Close your terminal
window.
$ su - root Password: Enter password for root user $ /scratch/u01/app/oraInventory/orainstRoot.sh Changing permissions of /scratch/u01/app/oraInventory. Adding read,write permissions for group. Removing read,write,execute permissions for world. Changing groupname of /scratch/u01/app/oraInventory to oinstall. The execution of the script is complete. $ /scratch/u01/app/oracle/product/18.0.0/dbhome_1/root.sh/scratch/u01/app/oracle/product/19.0.0/dbhome_1/root.sh Performing root user operation. The following environment variables are set as: ORACLE_OWNER= oracle ORACLE_HOME= /scratch/u01/app/oracle/product/18.0.0/dbhome_1/scratch/u01/app/oracle/product/19.0.0/dbhome_1 Enter the full pathname of the local bin directory: [/usr/local/bin]: Enter Copying dbhome to /usr/local/bin ... Copying oraenv to /usr/local/bin ... Copying coraenv to /usr/local/bin ... Creating /etc/oratab file... Entries will be added to the /etc/oratab file as needed by Database Configuration Assistant when a database is created Finished running generic part of root script. Now product-specific root actions will be performed. Do you want to setup Trace File Analyzer(TFA) now ? yes|[no] : Enter Oracle Trace File Analyzer (TFA - User Mode) is available at : /scratch/u01/app/oracle/product/18.0.0/dbhome_1/suptools/tfa/release
/tfa_home/bin/tfactl/scratch/u01/app/oracle/product/19.0.0/dbhome_1/suptools/tfa/release
/tfa_home/bin/tfactl OR Oracle Trace File Analyzer (TFA - Daemon Mode) can be installed by
running this script : /scratch/u01/app/oracle/product/18.0.0/dbhome_1/suptools/tfa/release/tfa_home/install/roottfa.sh/scratch/u01/app/oracle/product/19.0.0/dbhome_1/suptools/tfa/release/tfa_home/install/roottfa.sh - After executing the scripts in your terminal window, return to the Execute Configuration scripts window and click OK.
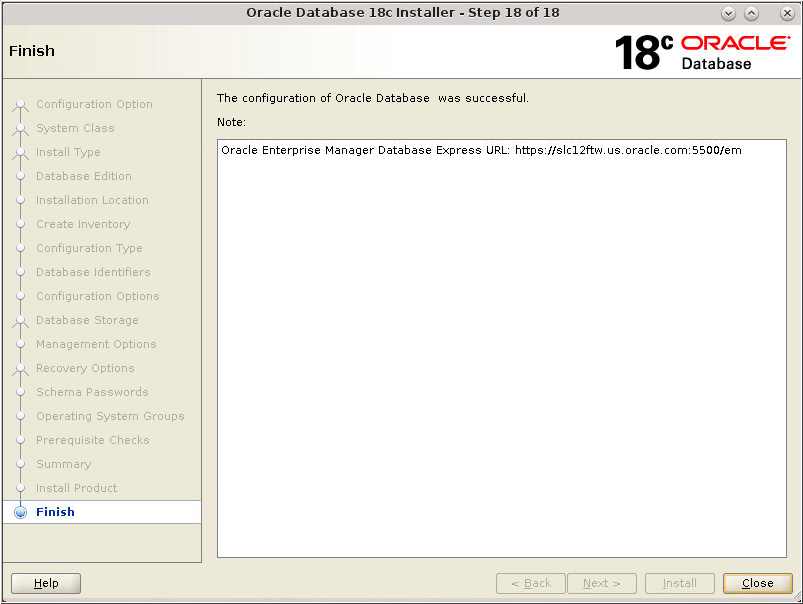
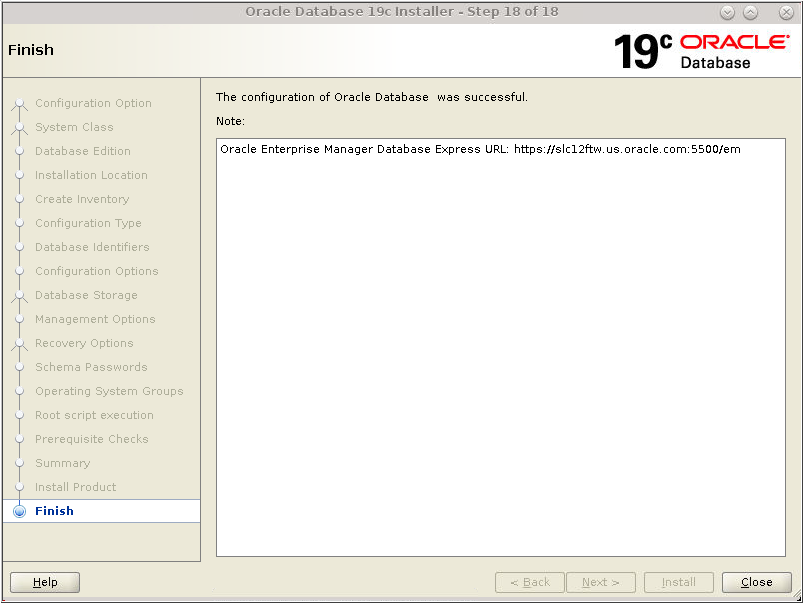
- After the Database
Configuration Assistant creates the database, the Finish
window appears indicating the installation of Oracle
Database software and creation of the database was
successful. Click Close to exit the Oracle
Universal Installer.
Description of the illustration db_25 - After the Database
Configuration Assistant creates the database, the Finish
window appears indicating the installation of Oracle
Database software and creation of the database was
successful. Click Close to exit the Oracle
Universal Installer.
Description of the illustration db_25