 Create
a Container Database Using DBCA (Advanced Mode)
Create
a Container Database Using DBCA (Advanced Mode) Before You Begin
This tutorial shows you how to use the Database Configuration Assistant (DBCA) to create a container database with advanced configuration.
Select the Oracle Database release:
Background
Oracle Database Configuration Assistant (DBCA) is a tool for creating and configuring an Oracle database. DBCA can be launched by the Oracle Universal Installer (OUI), depending upon the type of install that you select. If you choose to create and configure a database, then Oracle Universal Installer (OUI) will start DBCA at the end of the installation to configure the database. If you choose to only install the database software using OUI, then you must manually run DBCA after the installation to create and configure the database. You can also use DBCA to create additional databases.
DBCA offers two modes: typical and advanced. If you choose Advanced Mode, you can customize storage locations, initialization parameters, management options, database options, and different passwords for administrator user accounts. If you choose Typical mode, you make fewer choices in the options for your database, which allows you to create your database sooner.
In Oracle Database 12c Release 2 the concept of multitenant environment has been introduced. The multitenant architecture enables an Oracle database to function as a multitenant container database (CDB) that includes zero, one, or many customer-created Pluggable Databases (PDBs). A PDB is a portable collection of schemas, schema objects, and nonschema objects that appears to an Oracle Net client as a non-CDB. All Oracle databases before Oracle Database 12 were non-CDBs.
A CDB includes the following components:
- Root: The root, named CDB$ROOT, stores Oracle-supplied metadata and common users. An example of metadata is the source code for Oracle-supplied PL/SQL packages. A common user is a database user known in every container. A CDB has exactly one root.
- Seed: The seed, named PDB$SEED, is a template that you can use to create new PDBs. You cannot add objects to or modify objects in the seed. A CDB has exactly one seed.
- PDBs: A PDB appears to users and applications as if it were a non-CDB. For example, a PDB can contain the data and code required to support a specific application. A PDB is fully backward compatible with Oracle Database releases before Oracle Database 12c.
Each of these components is called a container. Therefore, the root is a container, the seed is a container, and each PDB is a container. Each container has a unique container ID and name within a CDB.
What Do You Need?
Before installing the software, OUI performs several automated checks to ensure that your computer fulfills the basic hardware and software requirements for an Oracle Database installation. If your computer does not meet a requirement, then an error message is displayed. The requirements may vary depending upon the type of computer and operating system you are using, but include the following:
- Minimum of 1 GB of physical memory
- Sufficient paging space
- Installation of appropriate service packs and/or patches
- Use of appropriate file system format
- Access to the Oracle Database 18c19c
- General knowledge of product installation
 Create
a Container Database
Create
a Container Database
- Log on to your computer as a member of the administrative group that is authorized to install Oracle Database software and create a database.
- Invoke DBCA as appropriate to your operating system.
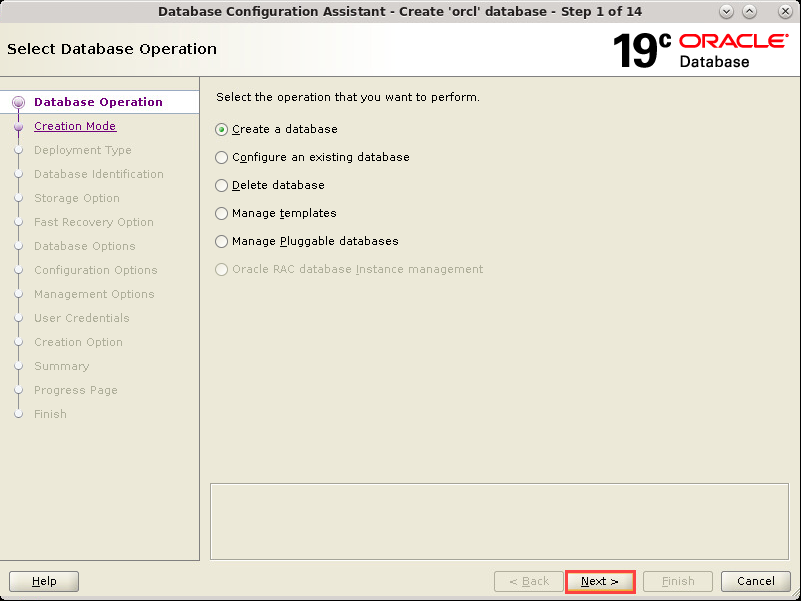
- The Database Operation window
appears. Select Create a
Database. Click Next.

Description of the illustration db_3 - The Database Operation window
appears. Select Create a
Database. Click Next.
Description of the illustration db_3a - The Creation Mode window
appears. Select Advanced
configuration and click Next.

Description of the illustration db_4 - The Creation Mode window
appears. Select Advanced
configuration and click Next.

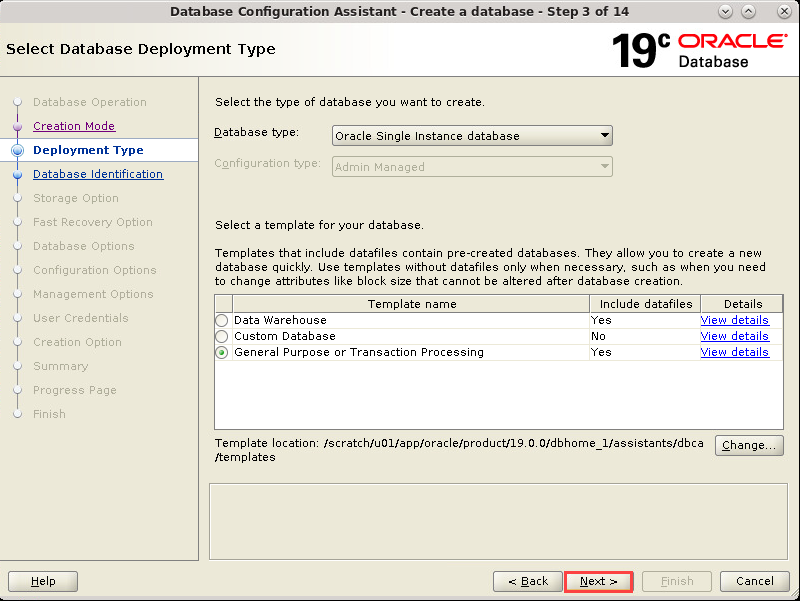
Description of the illustration db_4a - The Deployment Type window appears.
Select the template suited to the type of workload your
database will support. If you are not sure which to choose,
then select the default General
Purpose or Transaction Processing template and click
Next.

Description of the illustration db_5 - The Deployment Type window appears.
Select the template suited to the type of workload your
database will support. If you are not sure which to choose,
then select the default General
Purpose or Transaction Processing template and click
Next.
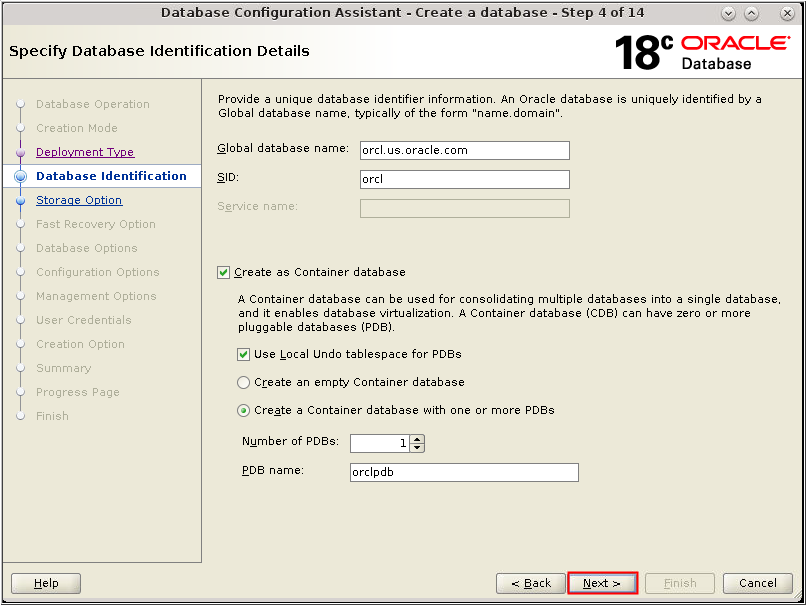
Description of the illustration db_5a - The Database Identification window
appears. Enter a value in the Global Database Name field.
Check "Create as Container
database" and click Next.
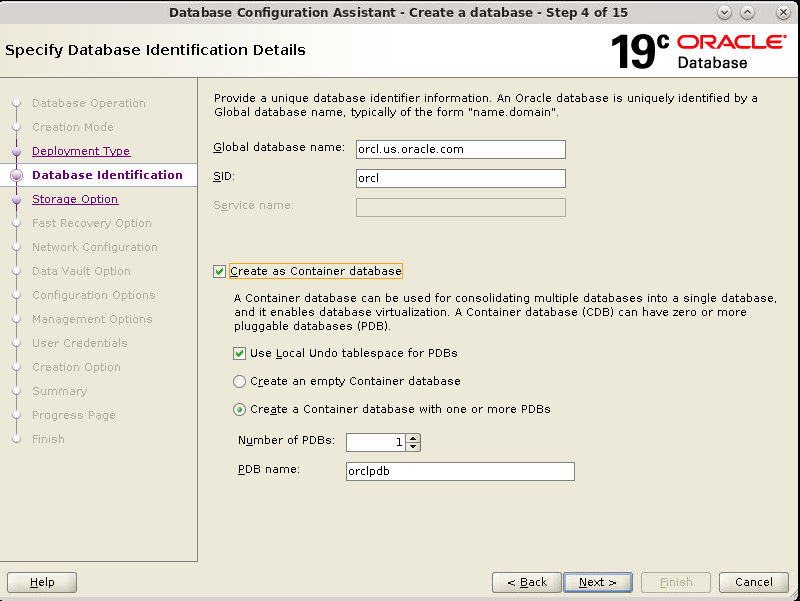
Description of the illustration db_6 - The Database Identification window
appears. Enter a value in the Global Database Name field.
Check "Create as Container
database" and click Next.
Description of the illustration db_6a - The Storage Option window appears.
Ensure that "Use template
file for database storage attributes" is selected and
click Next. If
you want to specify your own location to store database
files select "Use following
for the database storage attributes" option.

Description of the illustration db_7 - The Storage Option window appears.
Ensure that "Use template
file for database storage attributes" is selected and
click Next. If
you want to specify your own location to store database
files select "Use following
for the database storage attributes" option.

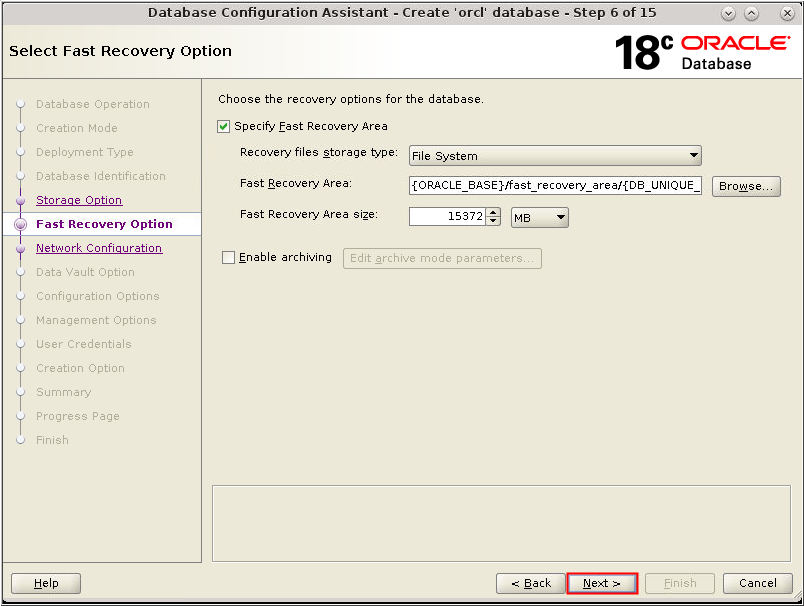
Description of the illustration db_7a - In the Fast Recovery Option window,
select Specify Fast Recovery Area. Accept
the default value for the Specify Fast Recovery Area region
and click Next.
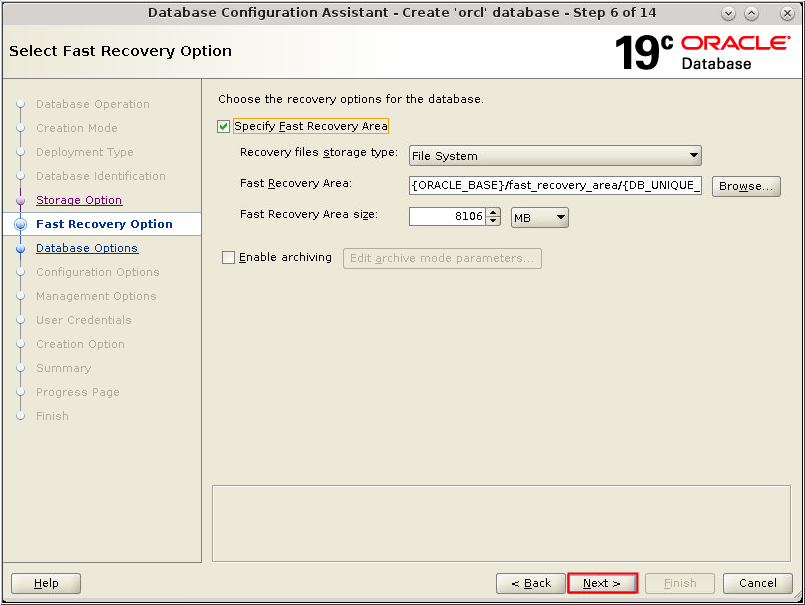
Description of the illustration db_8 - In the Fast Recovery Option window,
select Specify Fast Recovery Area. Accept
the default value for the Specify Fast Recovery Area region
and click Next.
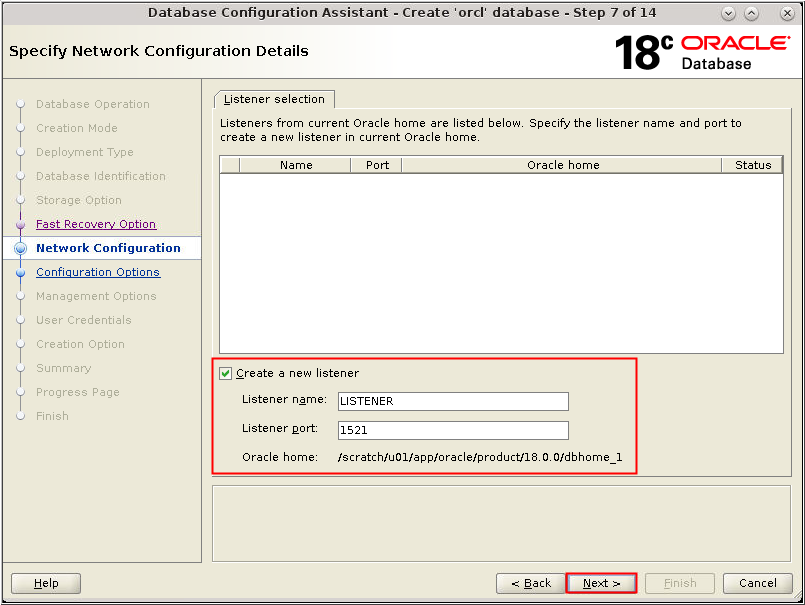
Description of the illustration db_8a - The Network Configuration window
appears. This page displays the listeners in the current home.
Select the listener from the list and click Next.
If no listeners are listed, create a new listener by selecting
the Create a new listener checkbox, provide
a Listener name and port, and click Next.
Description of the illustration db_9 - The Network Configuration window
appears. This page displays the listeners in the current home.
Select the listener from the list and click Next.
If no listeners are listed, create a new listener by selecting
the Create a new listener checkbox, provide
a Listener name and port, and click Next.

Description of the illustration db_9a - The Data Vault Option window
appears. Select Configure Database Vault and/or Configure
Label Security if appropriate for your installation. Click Next.

Description of the illustration db_10 - The Data Vault Option window
appears. Select Configure Database Vault and/or Configure
Label Security if appropriate for your installation. Click Next.

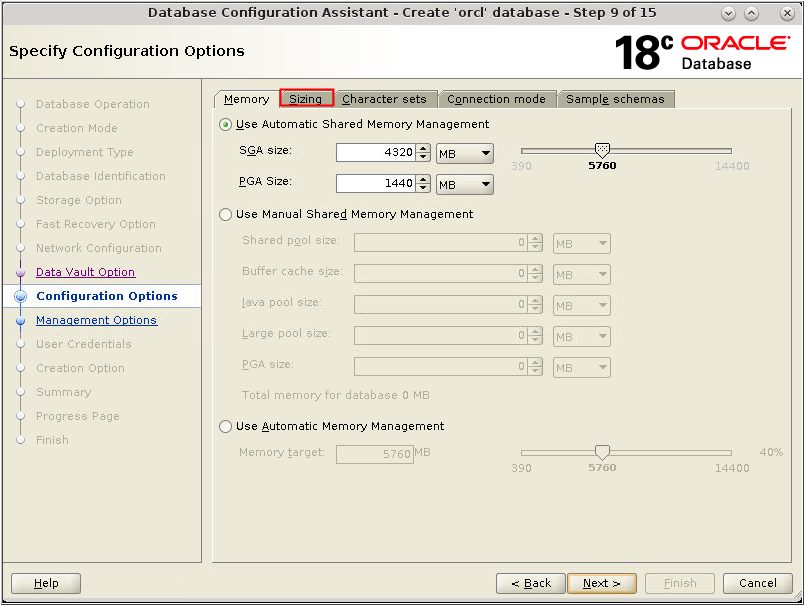
Description of the illustration db_10a - The Configuration Options window
appears. Select the Use Automatic Shared Memory Management
option. Modify the value for SGA size and PGA size if
necessary for your installation and click the Sizing
tab.
Description of the illustration db_11 - The Configuration Options window
appears. Select the Use Automatic Shared Memory Management
option. Modify the value for SGA size and PGA size if
necessary for your installation and click the Sizing
tab.

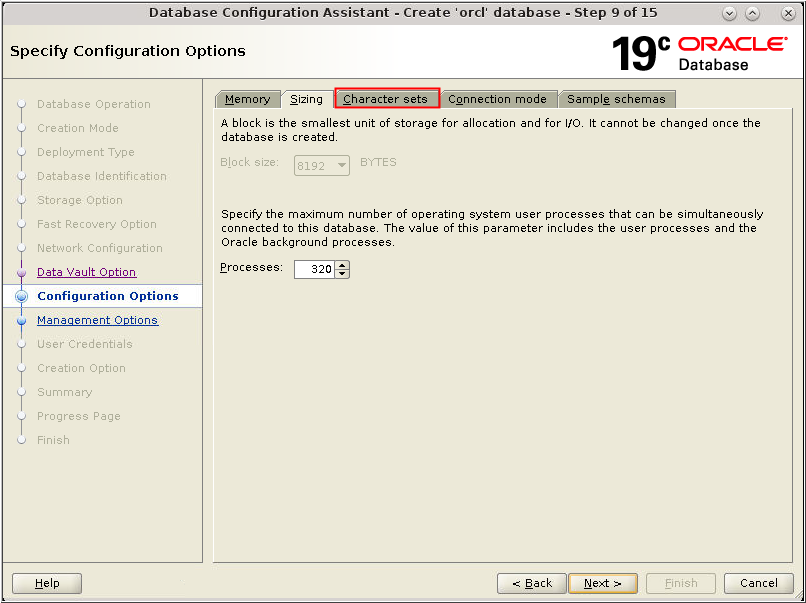
Description of the illustration db_11a - On the Sizing tab accept the default
value in the Processes field or change it as appropriate for
your installation. Click the Character sets
tab.

Description of the illustration db_12 - On the Sizing tab accept the default
value in the Processes field or change it as appropriate for
your installation. Click the Character sets
tab.
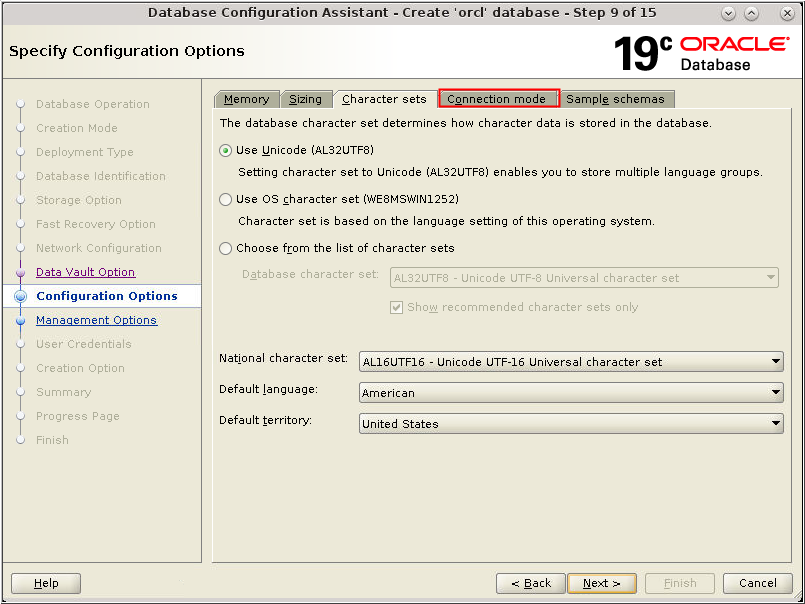
Description of the illustration db_12a - On the Character sets tab select Use
Unicode (AL32UTF8) or change it as appropriate for
your installation. Click the Connection mode
tab.

Description of the illustration db_13 - On the Character sets tab select Use
Unicode (AL32UTF8) or change it as appropriate for
your installation. Click the Connection mode
tab.
Description of the illustration db_13a - On the Connection mode tab accept
the default of Dedicated server mode. Click
the Sample schemas tab.

Description of the illustration db_14 - On the Connection mode tab accept
the default of Dedicated server mode. Click
the Sample schemas tab.

Description of the illustration db_14a - The Sample schemas tab appears.
Select Add sample schemas to the database
and click Next.

Description of the illustration db_15 - The Sample schemas tab appears.
Select Add sample schemas to the database
and click Next.

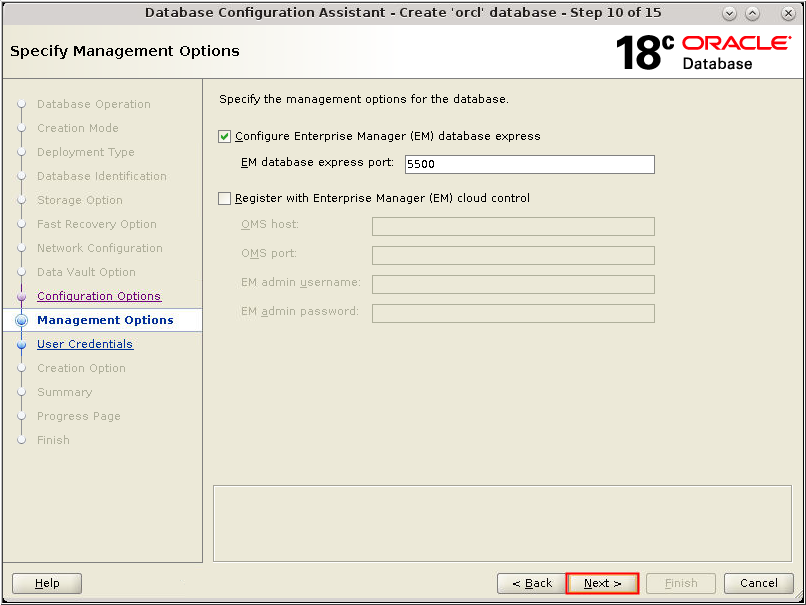
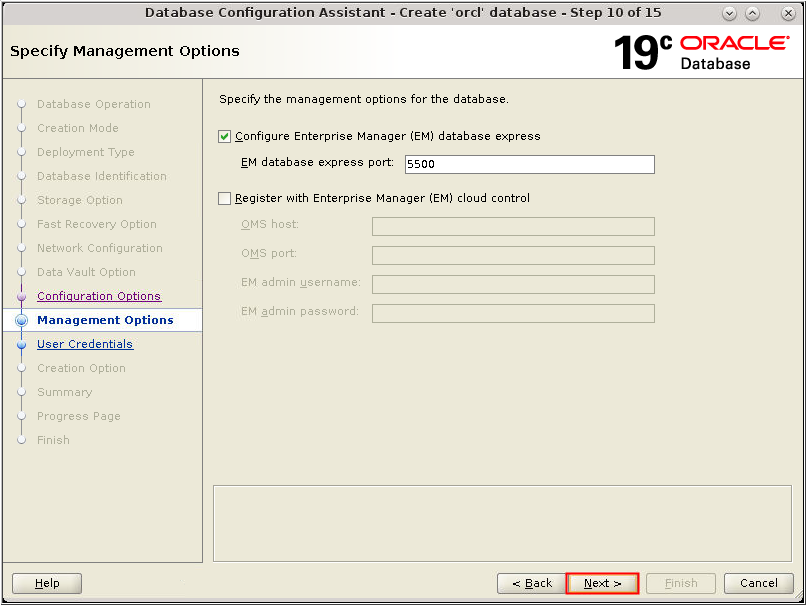
Description of the illustration db_15a - The Management Options window
appears. Accept the defaults and click Next.
Description of the illustration db_16 - The Management Options window
appears. Accept the defaults and click Next.
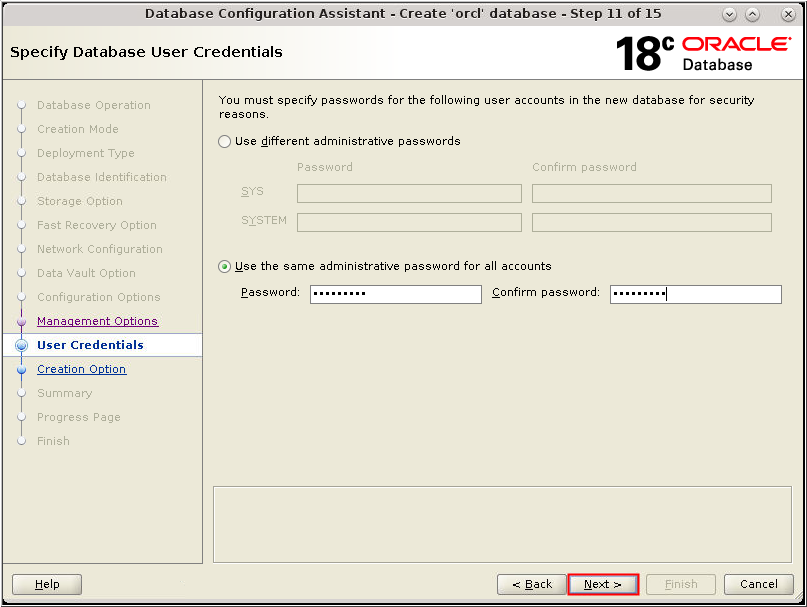
Description of the illustration db_16a - The User Credentials window appears.
Select "Use the same administrative password for all
accounts." Enter your password in the Password and Confirm
password fields. Click Next.
Description of the illustration db_17 - The User Credentials window appears.
Select "Use the same administrative password for all
accounts." Enter your password in the Password and Confirm
password fields. Click Next.

Description of the illustration db_17a - The Creation Option window appears.
Review the details and click Next.

Description of the illustration db_18 - The Creation Option window appears.
Review the details and click Next.

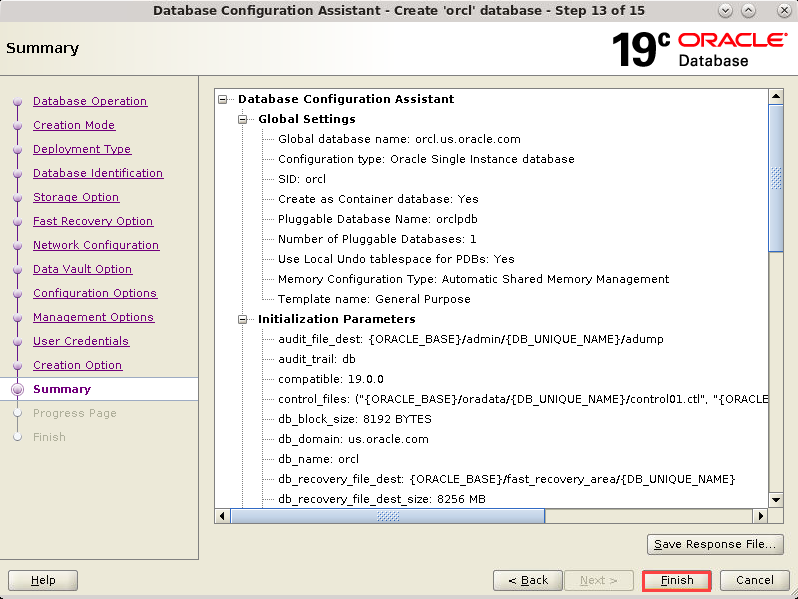
Description of the illustration db_18a - The Summary window appears. Review
the configuration summary information. Click Finish.

Description of the illustration db_19 - The Summary window appears. Review
the configuration summary information. Click Finish.
Description of the illustration db_19a - The Progress Page window appears.
- The Progress Page window appears.
- The Database Configuration Assistant
window appears indicating the database has been created.
Select Password Management to unlock the user accounts or
perform this task at a later time. Click Close.

Description of the illustration db_21 - The Database Configuration Assistant
window appears indicating the database has been created.
Select Password Management to unlock the user accounts or
perform this task at a later time. Click Close.

Description of the illustration db_21a