 Create
and View Resource Plans
Create
and View Resource Plans Before You Begin
This 15-minute tutorial shows you how to use EM Express to create and view resource plans for non-CDBs, CDBs, and PDBs.
Select the Oracle Database release:
Background
A resource plan (plan) is a container for plan directives (directives) that specify how to allocate resources. In addition to the plans that are predefined for each Oracle database, you can create any number of plans.
You can create plans for non-CDBs, CDBs, and PDBs. However, in a particular non-CDB, CDB, or PDB, only one plan is active at a time. When a plan is active, each of its directives controls resource allocation.
What Do You Need?
- Oracle Database 18c19c
 Create
a New Plan using Quick Step
Create
a New Plan using Quick Step
In this tutorial, the system has fewer than 8 services, fewer than 8 users, and fewer than 8 program, hence creating a plan using the Quick Setup would be easier.
- In the Resource Management page, click Show Plans.
- Click Quick Setup.
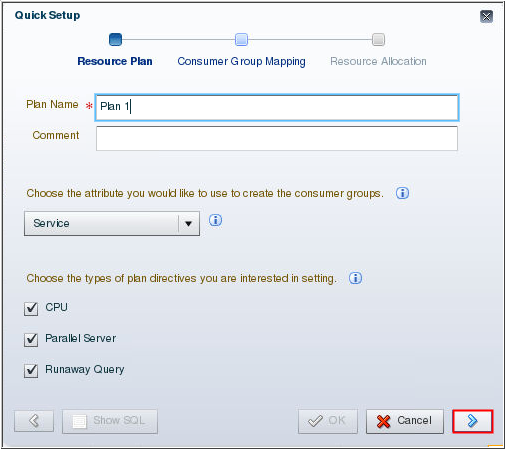
- On the Quick Setup Resource Plan page, enter the values for
Plan Name and select values for Attribute and plan directives.
Click the Next (right arrow)
button.
Description of the illustration a3 - On the Consumer Group
Mapping tab, select the services into the
corresponding consumer group and click OK.
You can also rename the name of the Consumer Group. Click Next.

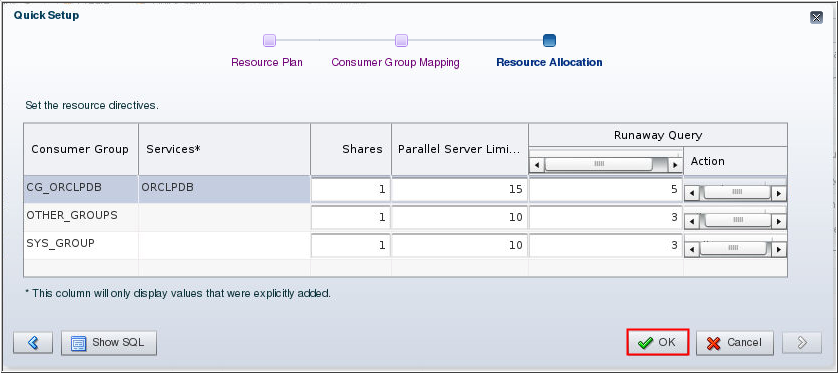
Description of the illustration a4 - On the Resource Allocation
tab, set the resource directives for the plan and click OK.
The content of this tab depends on the directive that you
selected in step 3.
- In the Shares column, enter the appropriate number of shares for each consumer group.
- In the Parallel Server Limit (%) column for each consumer group, specify a value that limits the number of parallel execution servers that can be used by the consumer group.
- In the runaway query metrics list, by default, the Elapsed Time Limit (s) metric is selected, but you can select any of the metrics in the list. You can specify an Action, that is to be taken if any call exceeds the limit set for the metric.
Description of the illustration a5 - A confirmation message appears stating that the plan was successfully created. Click OK.
 View a
Plan
View a
Plan
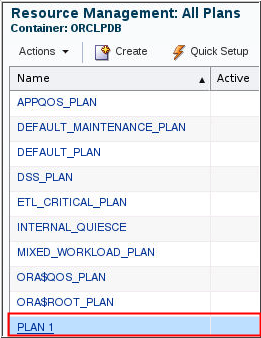
- The Resource Management All Plans page lists all the plans
that are created for the database. To view a particular plan,
click the name of the plan in the Name column.
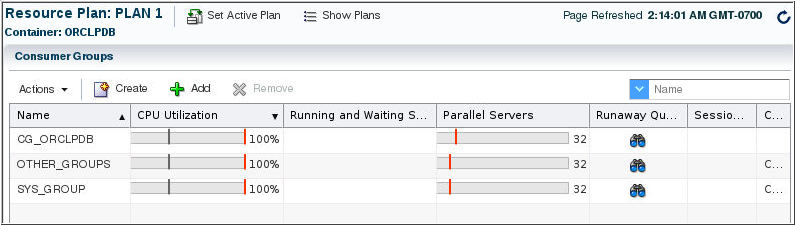
Description of the illustration b1 - The Resource Plan page for the plan appears.
Description of the illustration b2