 Manage
Indexes and Views Using SQL Developer
Manage
Indexes and Views Using SQL Developer Before You Begin
Select the Oracle Database release:
This 15-minute tutorial shows you how to use SQL Developer to manage indexes and views.
Background
A schema is a collection of database objects. A schema is owned by a database user and shares the same name as the user. Schema objects are logical structures created by users. Some objects, such as tables or indexes, hold data. Other objects, such as views or synonyms, consist of a definition only.
What Do You Need?
- Oracle Database 18c19c
- SQL Developer 19.1
- Installed the sample schemas in the pluggable database
 View
Index
View
Index
This is an unnumbered paragraph before a procedure.
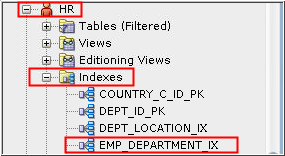
- Expand the HR user in the Other Users node. Expand Indexes.
- Select EMP_DEPARTMENT_IX.
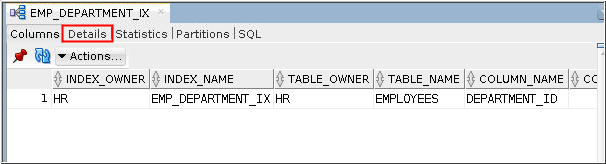
Description of the illustration a2 - Information about the index definition is displayed in the
Columns tab. Click the Details
tab to view additional information.
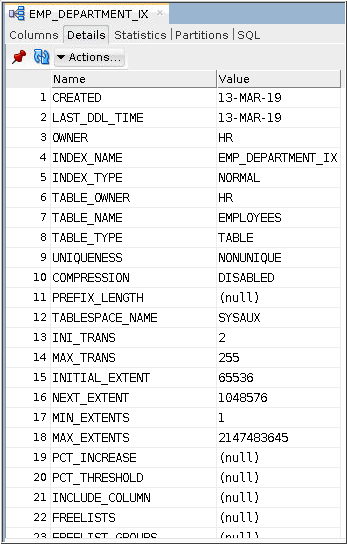
Description of the illustration a3 - The Details tab shows additional information about the index definition.
 Create
Indexes
Create
Indexes
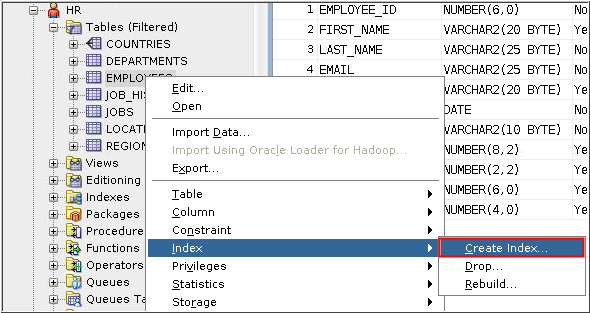
- Select the HR user in the Other Users list and expand the Tables entry.
- Right-click the Employees
table. Select Index
in the menu and then select Create
Index.
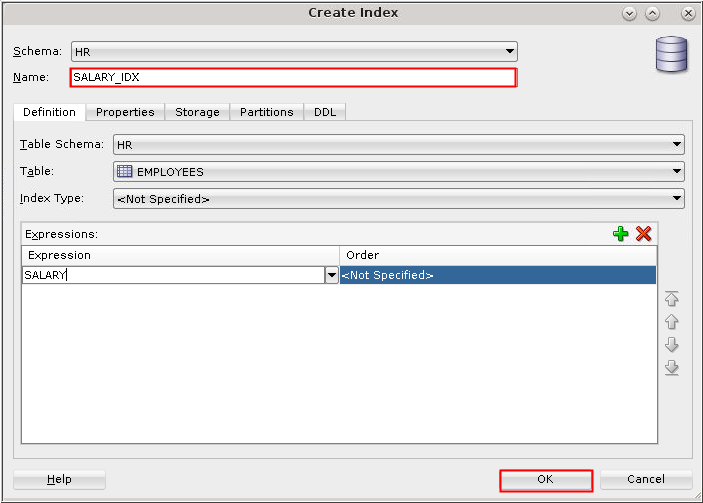
Description of the illustration b2 - Enter SALARY_IDX in
the Name field. Click the "Add
Index Expression" icon and select SALARY
in the "Expression" field. Click OK.
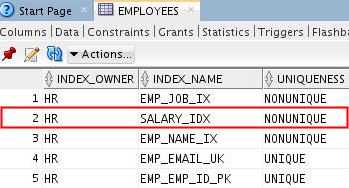
Description of the illustration b3 - Select EMPLOYEES in the Connections pane under Tables.
- Select the Indexes tab on the EMPLOYEES
page. Your new SALARY_IDX
index is listed.
Description of the illustration b5
 Display
Views
Display
Views
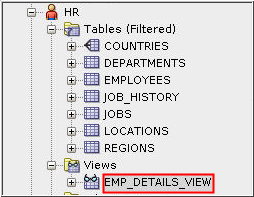
- Expand HR under Other Users in the Connections pane and then expand Views.
- Select the EMP_DETAILS_VIEW
view.
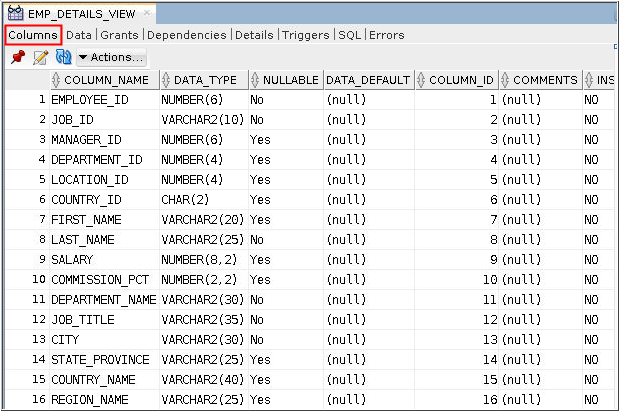
Description of the illustration c2 - The Columns tab in the EMP_DETAILS_VIEW
page displays the columns that are part of this view.
Description of the illustration c3
 Create
a View
Create
a View
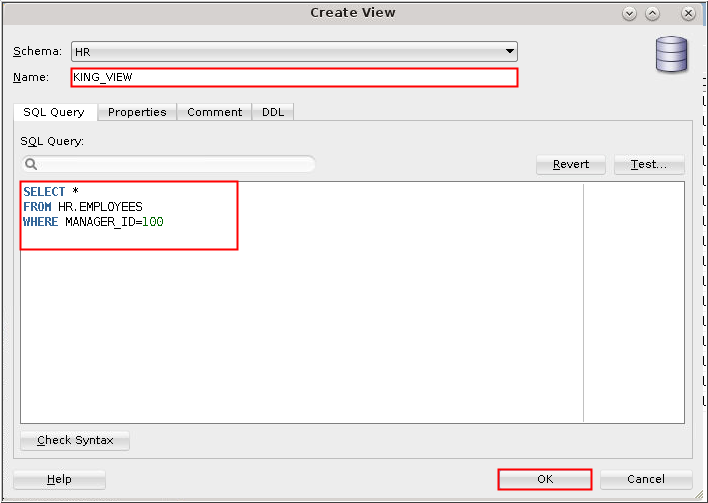
In this example, you create a view named KING_VIEW, which queries the HR.EMPLOYEES table. This view filters the table data so that only employees who report directly to the manager named King, whose employee ID is 100, are returned in queries.
- Expand the HR user
in the Connections pane. Right click Views
and select New View.
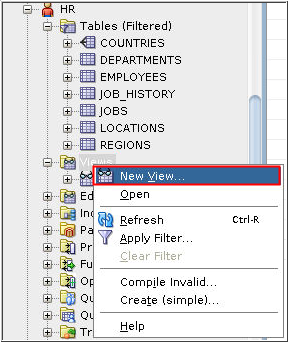
Description of the illustration d1 - Enter KING_VIEW in
the Name field. Enter the following query in the SQL Query box
and click OK.
SELECT *
FROM hr.employees
WHERE manager_id = 100
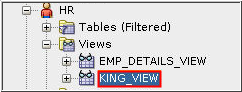
Description of the illustration d2 - The new view is listed under Views in the Connections pane.
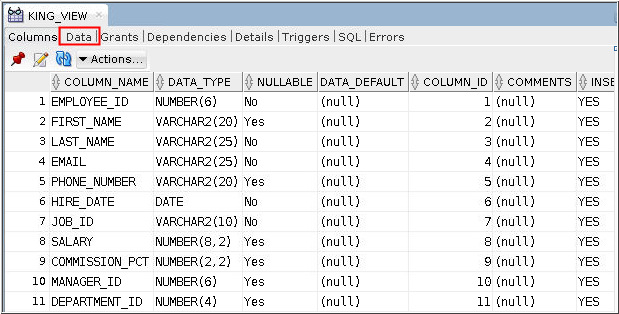
Select the KING_VIEW
view.
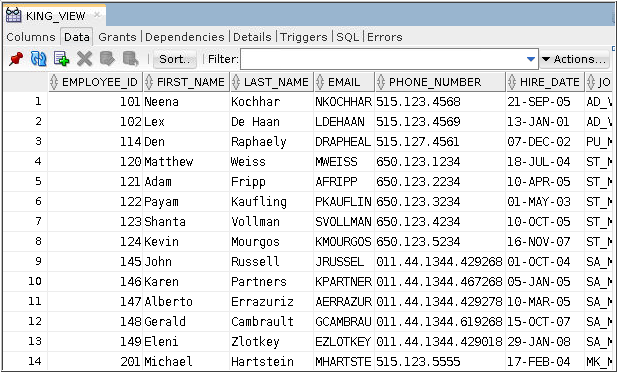
Description of the illustration d3 - The columns that are included in the view are displayed in
the Columns tab. Click the Data
tab.
Description of the illustration d4 - The rows that are retrieved when the view is queried are
displayed in the Data tab.
Description of the illustration d5