 Manage
Tables Using SQL Developer
Manage
Tables Using SQL Developer Before You Begin
Select the Oracle Database release:
This 15-minute tutorial shows you how to view table definitions and table data. You also learn to create a new table and modify it.
Background
A schema is a collection of database objects. A schema is owned by a database user and shares the same name as the user. Schema objects are logical structures created by users. Some objects, such as tables or indexes, hold data. Other objects, such as views or synonyms, consist of a definition only.
What Do You Need?
- Oracle Database 18c19c
- SQL Developer 19.1
- Installed the sample schemas in the pluggable database
- Download the load_po.csv file.
 View
Tables
View
Tables
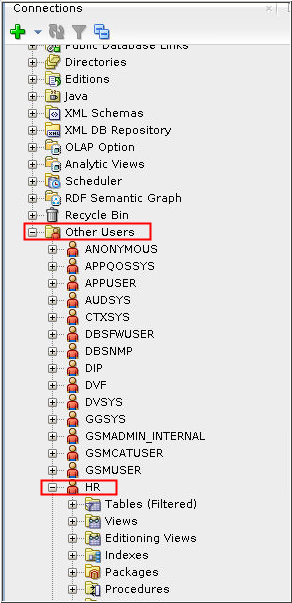
- Expand the system
node in Oracle SQL Developer.

Description of the illustration a1 - Expand the Other Users
node and then expand the HR
node.
Description of the illustration a2 - Expand the Tables (Filtered) node and select the EMPLOYEES
table. Detailed information about the table is displayed in
the object pane. The Columns
tab displays the column names and definitions.
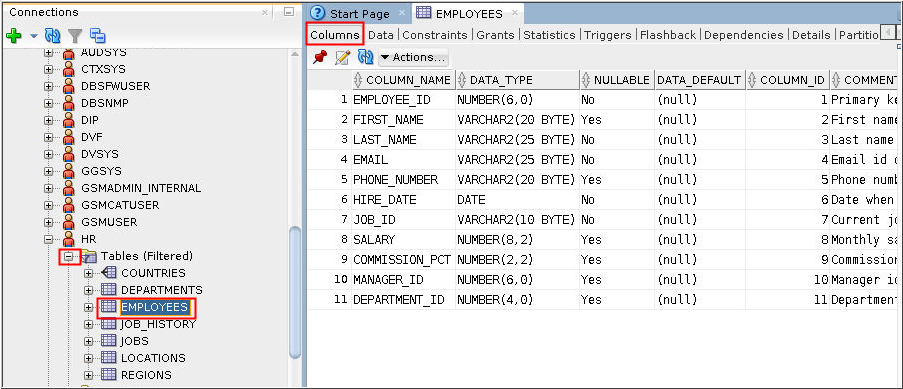
Description of the illustration a3
 View
Table Data
View
Table Data
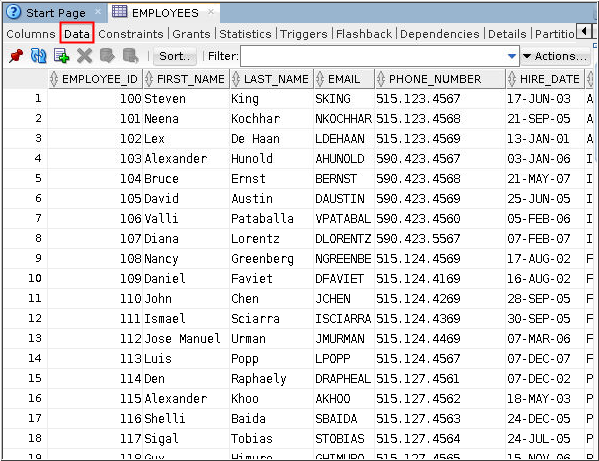
- Ensure that the EMPLOYEES table is selected in the Connections pane. Click the Data tab to view the data stored in the table. The Data tab shows the rows stored in the EMPLOYEES table.
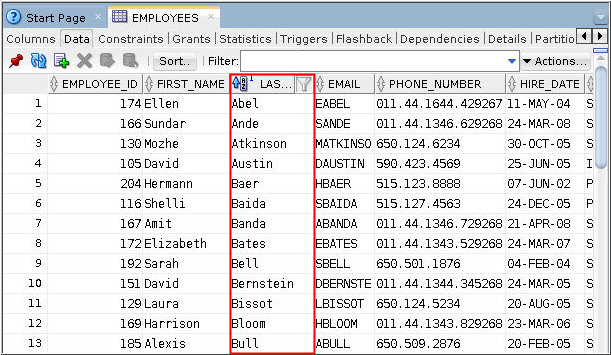
- To sort the rows by last name, right-click the LAST_NAME column name and select Sort in the menu.
- To Select the LAST_NAME
column and click the right-arrow to move it to the Selected
Columns list. Click OK.

Description of the illustration b3 - The data is now displayed in sorted order.
Description of the illustration b4 Dismiss the EMPLOYEES and SYSTEM window.

 Create
a Table
Create
a Table
In this topic you create a new table in the APPUSER schema. You created the APPUSER schema in the Administering User Accounts and Security tutorial.
- Expand the APPUSER node in Oracle SQL Developer. Right-click the Tables node and select New Table.
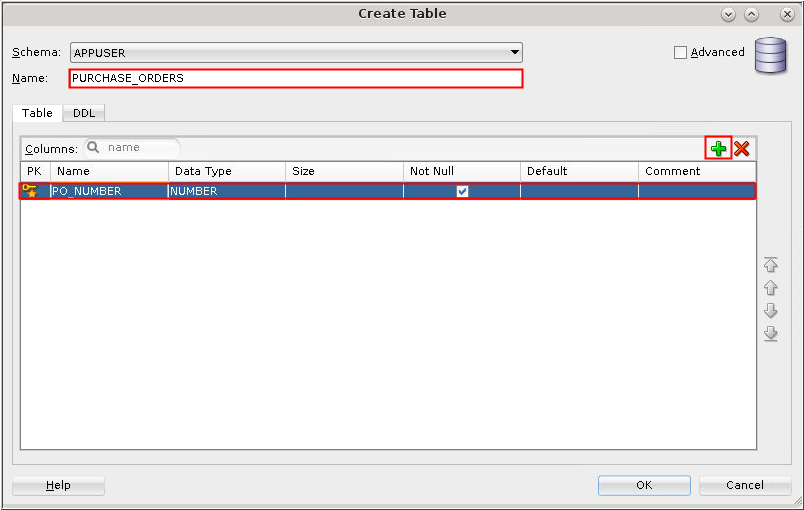
- Enter PURCHASE_ORDERS
in the Name field. Select Primary
Key. Enter PO_NUMBER
in the Column Name field. Select NUMBER
as the Data Type. Select Not
Null. Click Add
Column.
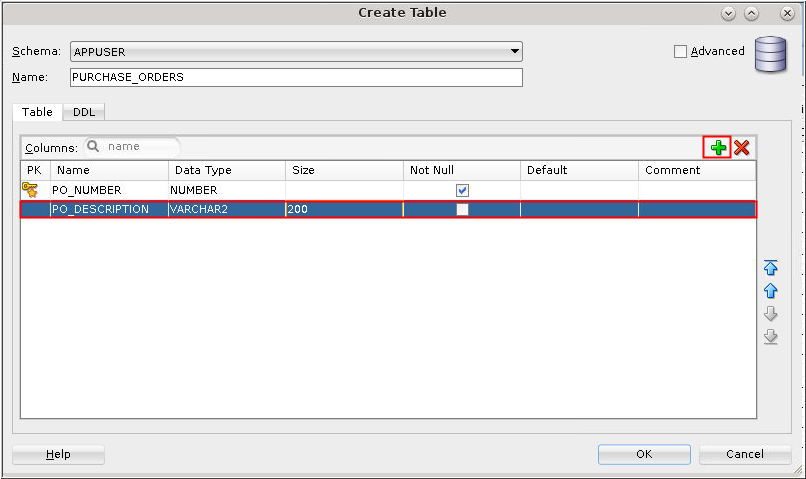
Description of the illustration c2 - Enter PO_DESCRIPTION
in the Column Name field. Select VARCHAR2
as the type. Enter 200
in the Size field. Click Add
Column.
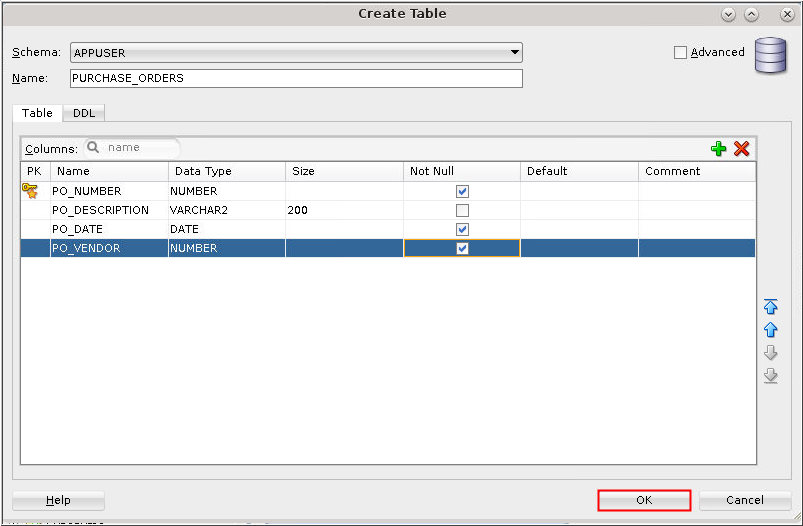
Description of the illustration c3 - Enter PO_DATE in the Column Name field. Select DATE for the type and select the Not Null column. Click Add Column.
- Enter PO_VENDOR in
the Column Name field. Select NUMBER
as the type and select the
Not Null column. Click OK.
Description of the illustration c5 - Expand the Tables node to view the PURCHASE_ORDERS table in the Tables list for the APPUSER user.
- Click the Columns
tab to view the column definitions of the PURCHASE_ORDERS
table.

Description of the illustration c7

 Add a
Column
Add a
Column
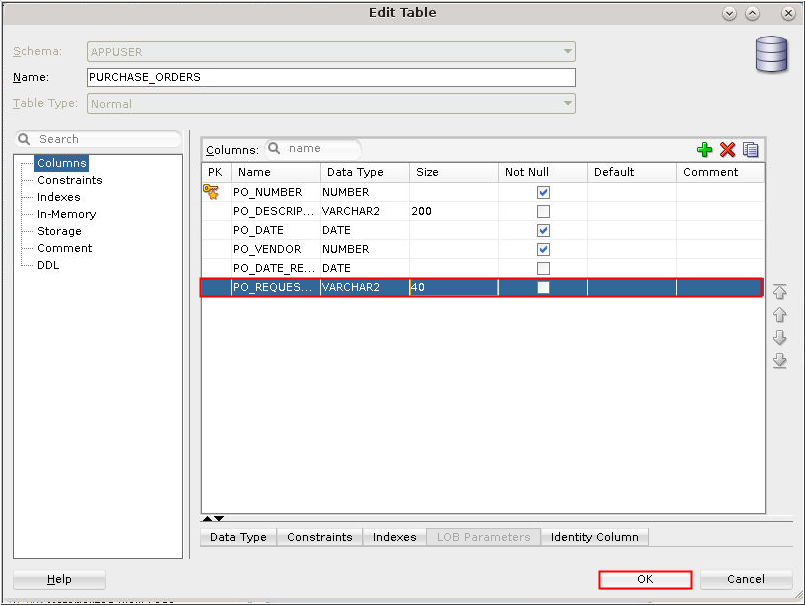
- Right-click the PURCHASE_ORDERS
table and select Edit.

Description of the illustration d1 - The Edit Table dialog box appears. Click the plus sign to add a column or press Alt+1.
- Enter PO_DATE_RECIEVED in the Name field. Select DATE in the Type menu. Click the plus sign again or press ALT+1.
- Enter PO_REQUESTOR_NAME
in the Name field. Select VARCHAR2
in the Type menu. Enter 40
in the Size field. Click OK.
Description of the illustration d4 - The Columns tab shows the new columns.

Description of the illustration d5
 Load
Data into a Table
Load
Data into a Table
- Download the load_po.csv file.
- Right-click the APPUSER
user and select Edit User.

Description of the illustration e2 - On the Edit User window, click Quotas.
Select Unlimited for
the APPTS tablespace
and click Apply. You
will receive a prompt stating that the SQL command processed
successfully, click OK.
The Edit User window closes automatically.

Description of the illustration e3 - Expand Tables. Right-click the PURCHASE_ORDERS
table and select Import Data.
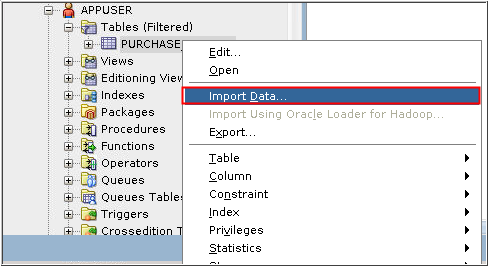
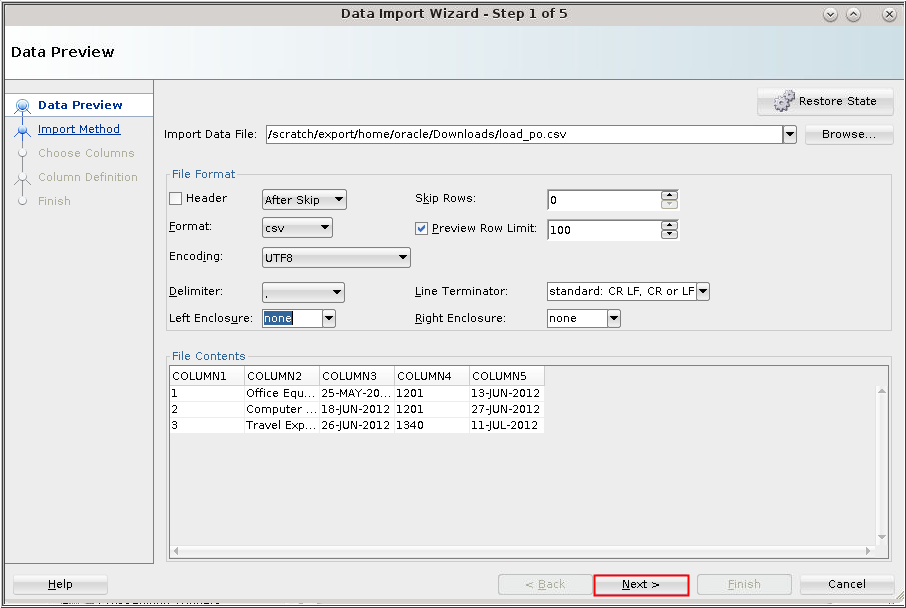
Description of the illustration e4 - Click Browse and select the load_po.csv file. Click Open.
- Deselect Header. Ensure that Format is set to csv and UTF8
is selected for Encoding. Select none for Left Enclosure.
Click Next.
Description of the illustration e6 - Ensure that Import Method is set to Insert. Click Next.
Click Next.

Description of the illustration e7 - Verify each column in the Source Data Columns list and its
value in the Name field BEFORE clicking Next. After verifying
all five columns, click Next. As shown in the screenshot, you
may need to edit the Format of COLUMN5 to DD-MON-YYYY.

Description of the illustration e8 - Click Finish.You get a success message that the data is successfully imported. Click OK.
- Select the PURCHASE_ORDERS table and click the Data tab to
see the new rows.

Description of the illustration e10